Posts in Category: Cooking
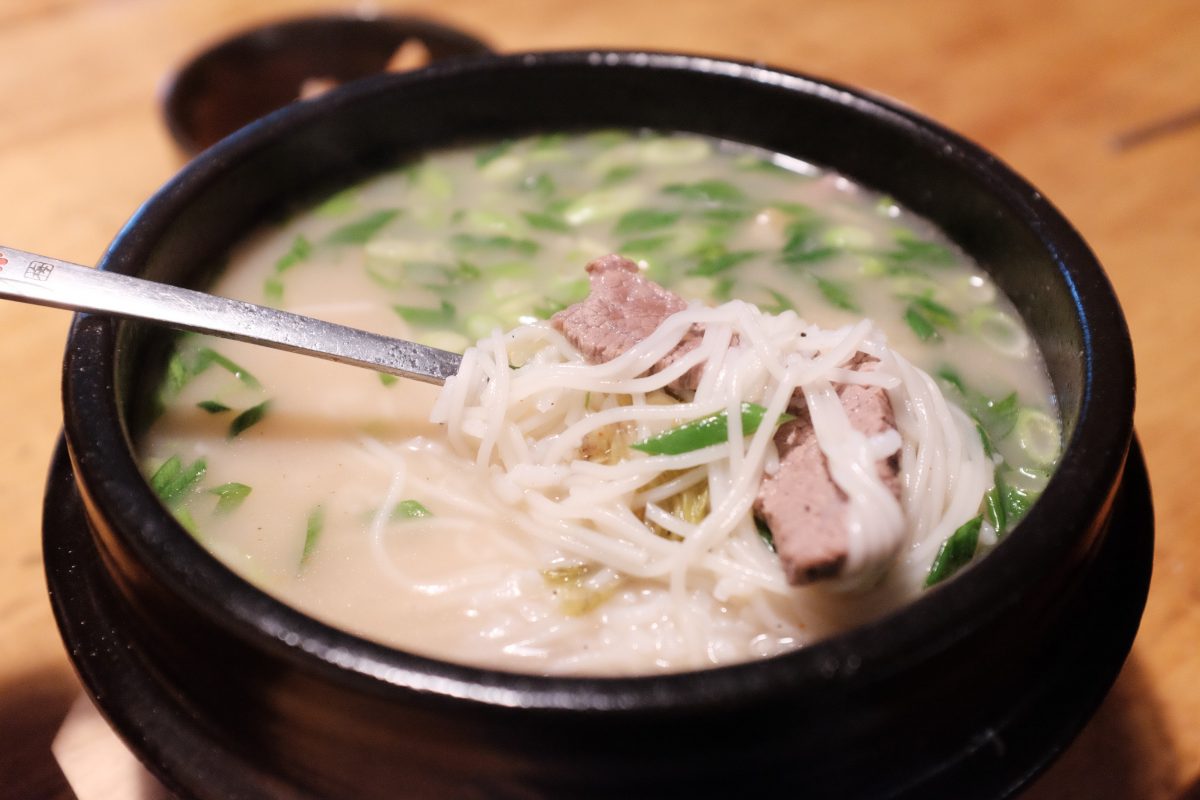
Seolleongtang
Seolleongtang is the first meal I ever ate in Korea. After a 15 hour flight and a long train ride, I finally arrived at my Insa-dong hotel sore, exhausted and hungry. The closest restaurant was directly behind the hotel, attached to the parking lot. This unassuming restaurant turned out to be one of the oldest in Seoul: Imun Seolleongtang. I had a big hot bowl of this plain milky beef soup and within an hour I felt completely refreshed. This simple soup seemed to erase my body’s memory of being crushed in an economy seat for the last 15 hours. It was like magic.
Since then, I have been back to Korea many times and I always start and finish my travels with this simple meal. Imun Seolleongtang has since received Michelin recognition and so it is busier (and more expensive) than ever with lots of tourists coming in to snap photos for instagram and tiktok. The staff seem to take it in stride, brisk and efficient, though maybe somewhat less friendly than I remember nearly 10 years ago. Also gone is the sloppy bucket of juicy and chunky kkadugi in the middle of the table and the big basket of chopped green onion. These now arrive in less bottomless portions after you order. But, even though some things have changed, the food is still as delicious as I remember and I still go to Imun as well as another smaller family run Seollongtang restaurant nearby.
Homemade seolleongtang
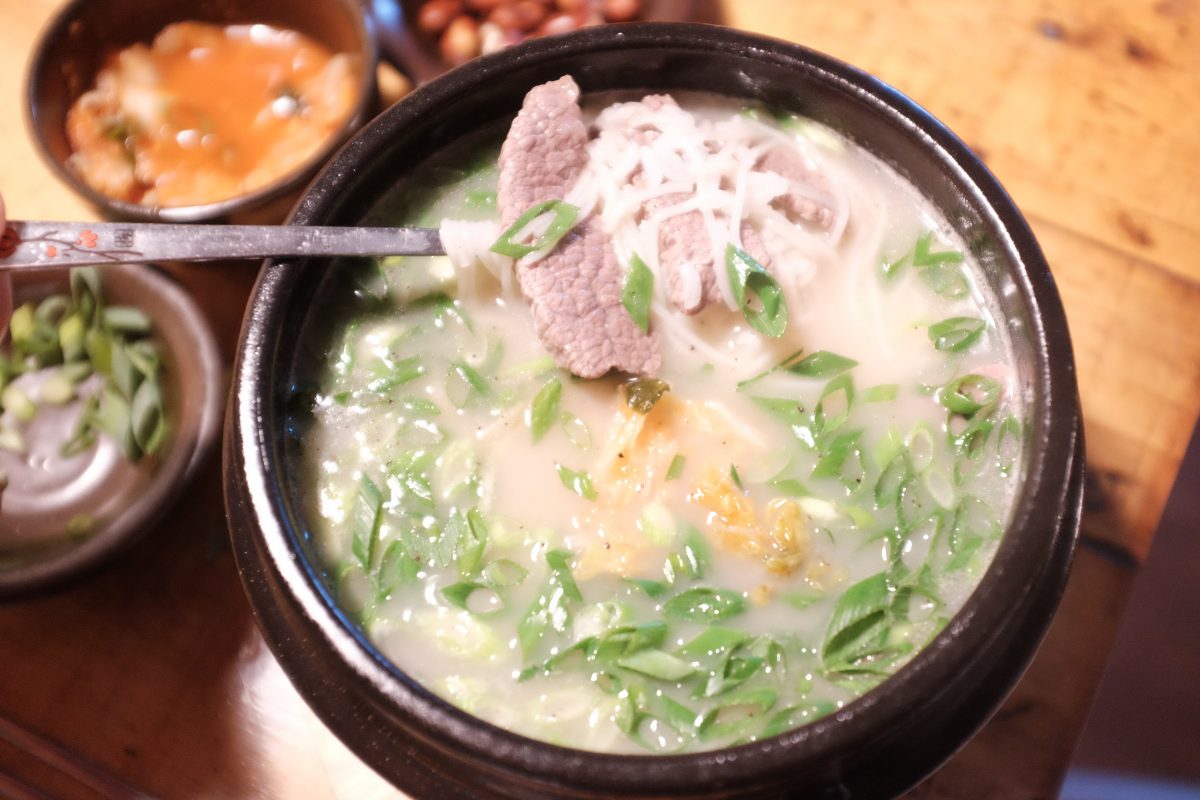
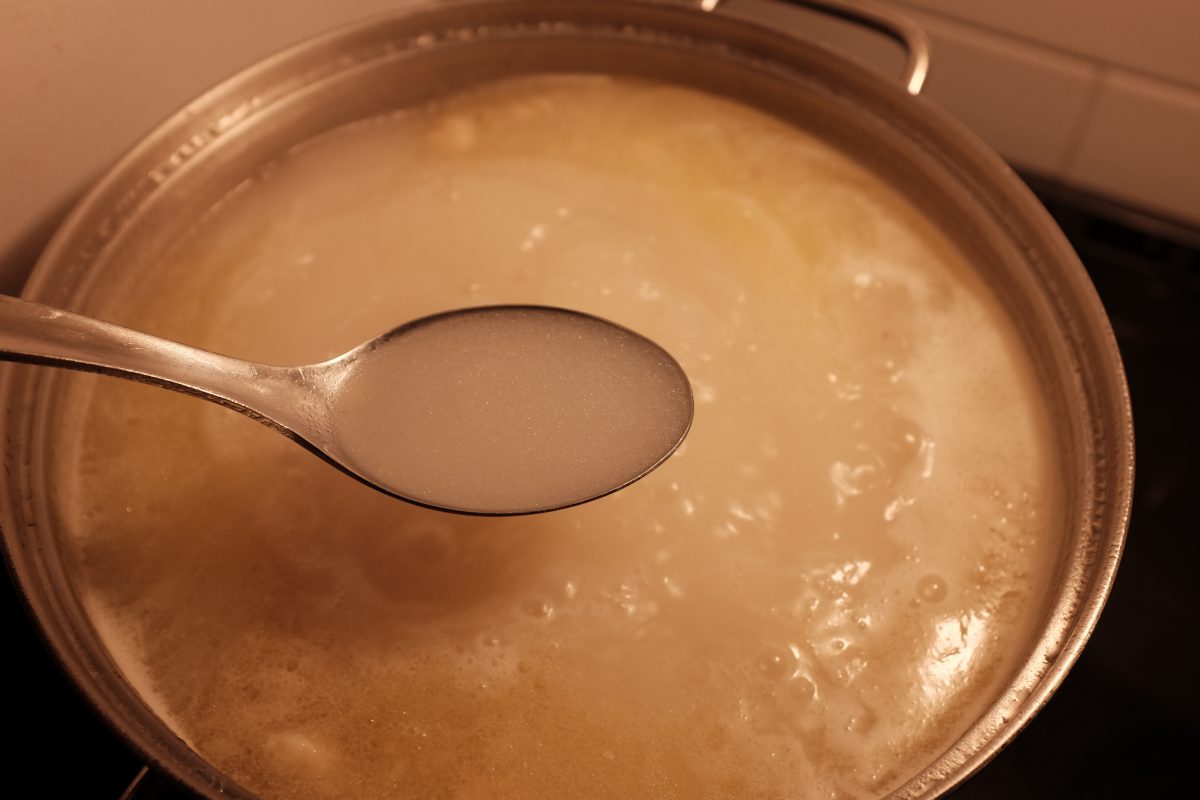
Seolleongtang always seemed kind of mysterious to me. Where did that milky colour come from? How was this simple soup so nutty and delicious? It arrives at the table completely bland and unseasoned but the addition of a little salt and pepper, kimchi juice and green onion turns it into something deep and complex and unforgettable.
Like a good food detective, I decided to launch a full investigation. After much reading and video watching, I discovered that the secret is really in the style of beef stock, in the process rather than the ingredients. The recipe below is a two-part process. First you will need to make the milky bone broth. Once you have this broth on hand, turning it into finished seolleongtang is a very simple and quick process. You can find the complete recipe for the beef bone broth by clicking here.
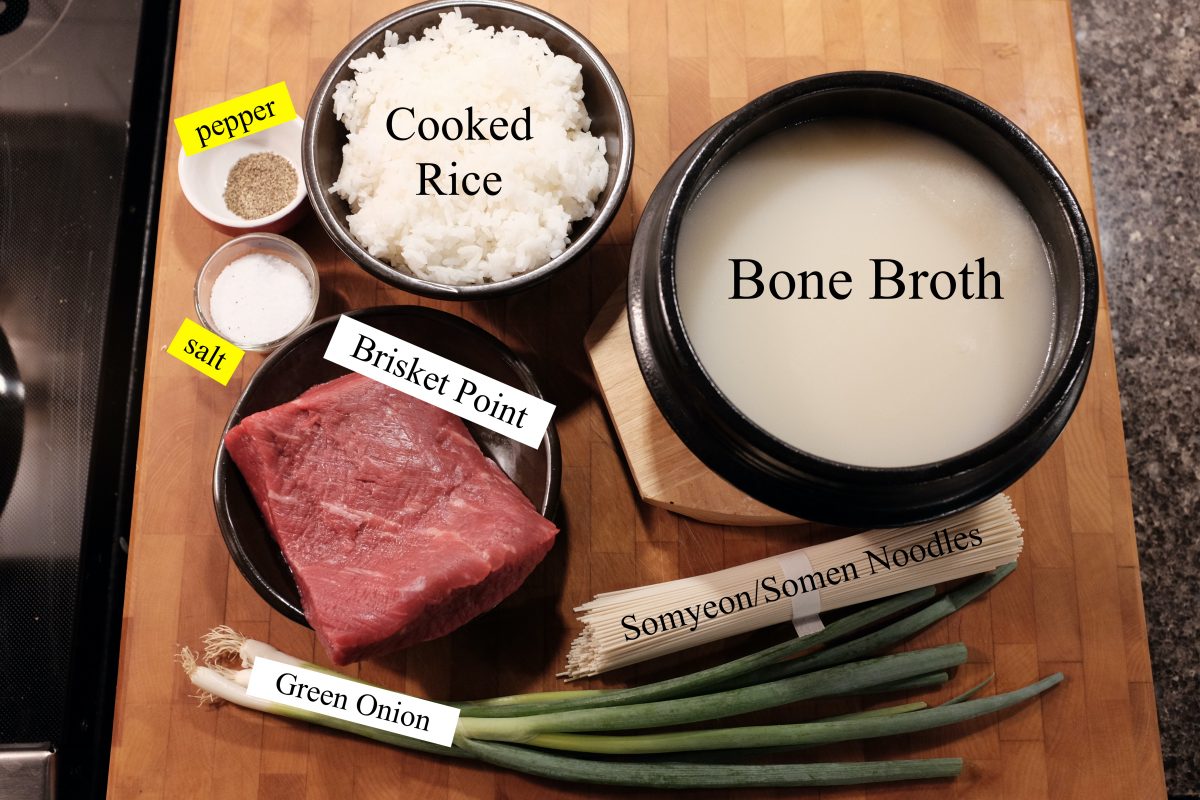
Ingredients
*this is for one big portion or 2 smaller portions
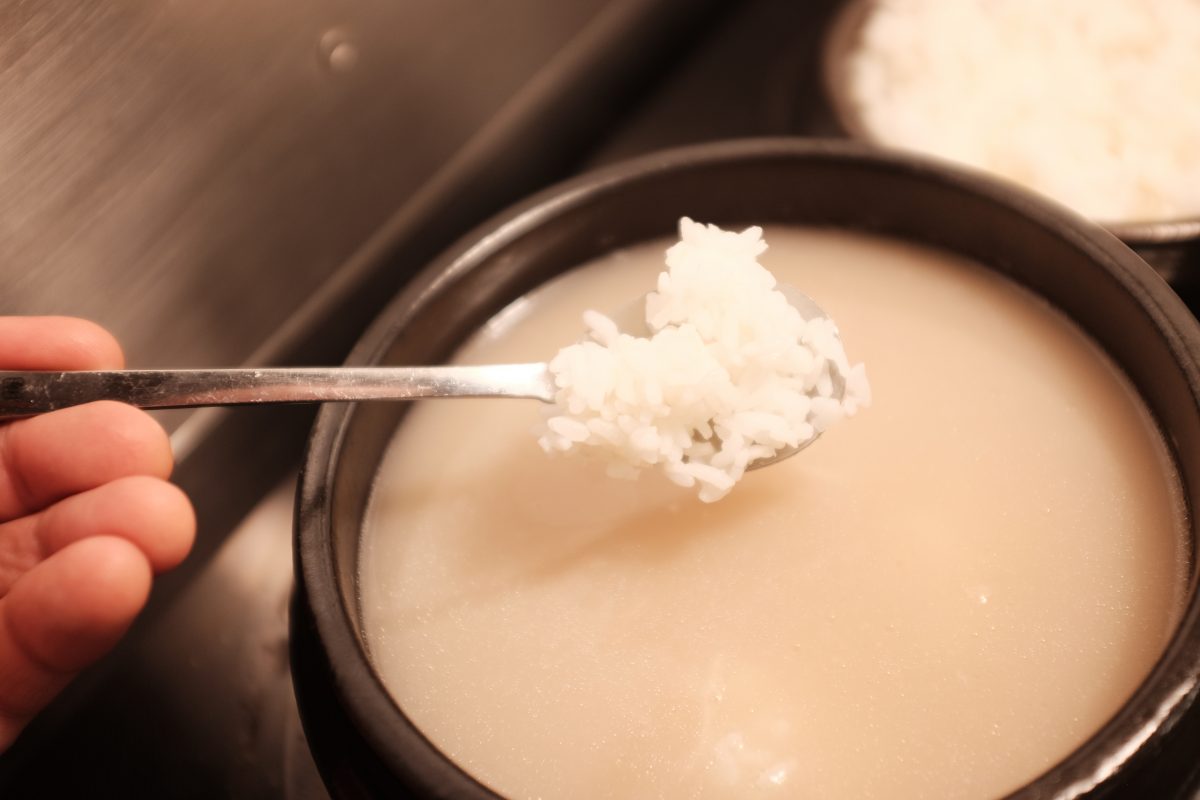
- 1 litre Korean milky beef bone broth
- 250gr beef brisket point
- cooked white rice
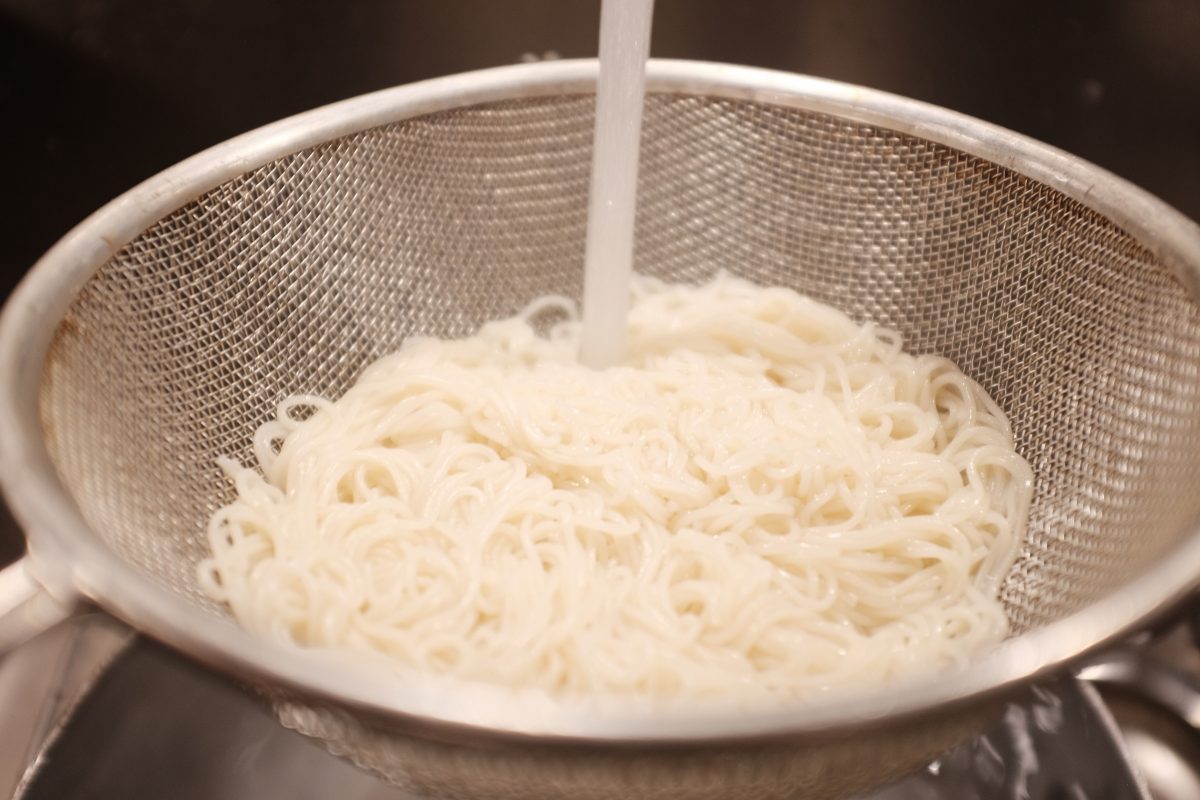
- cooked somyeon/somen noodles
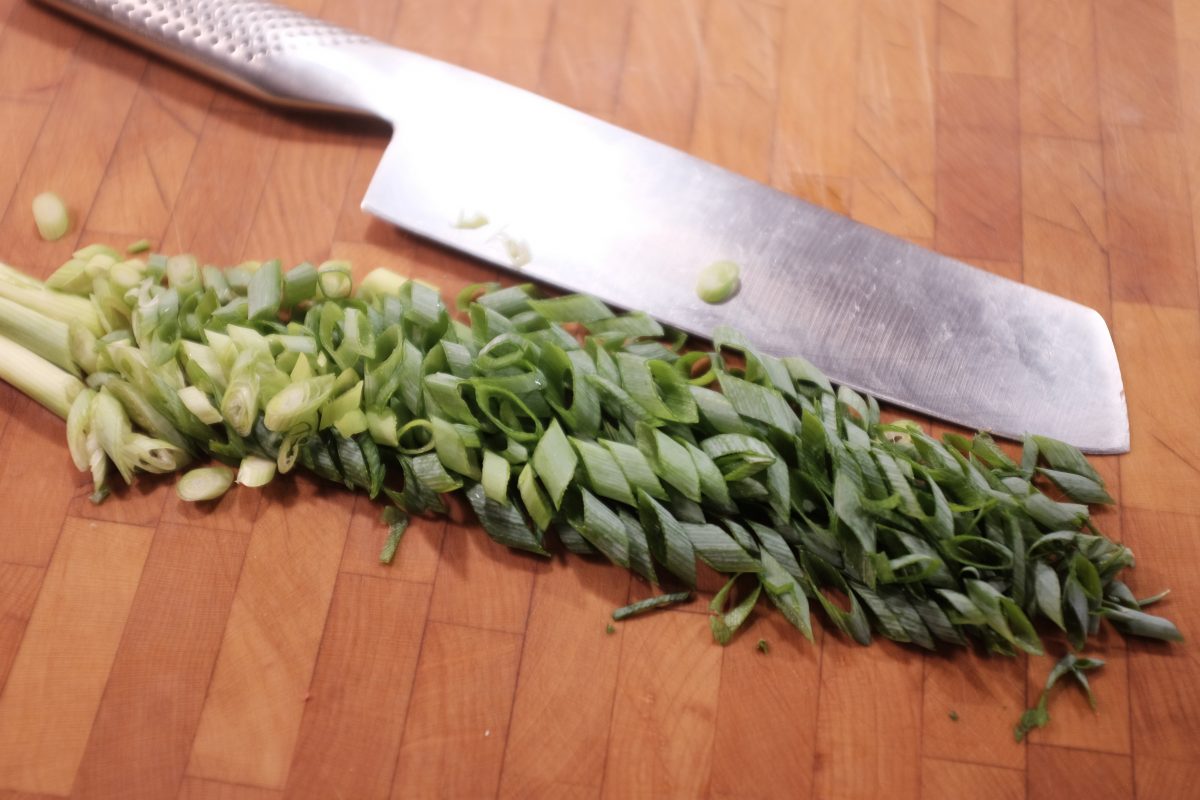
- 2-3 green onions (scallions)
- salt and pepper
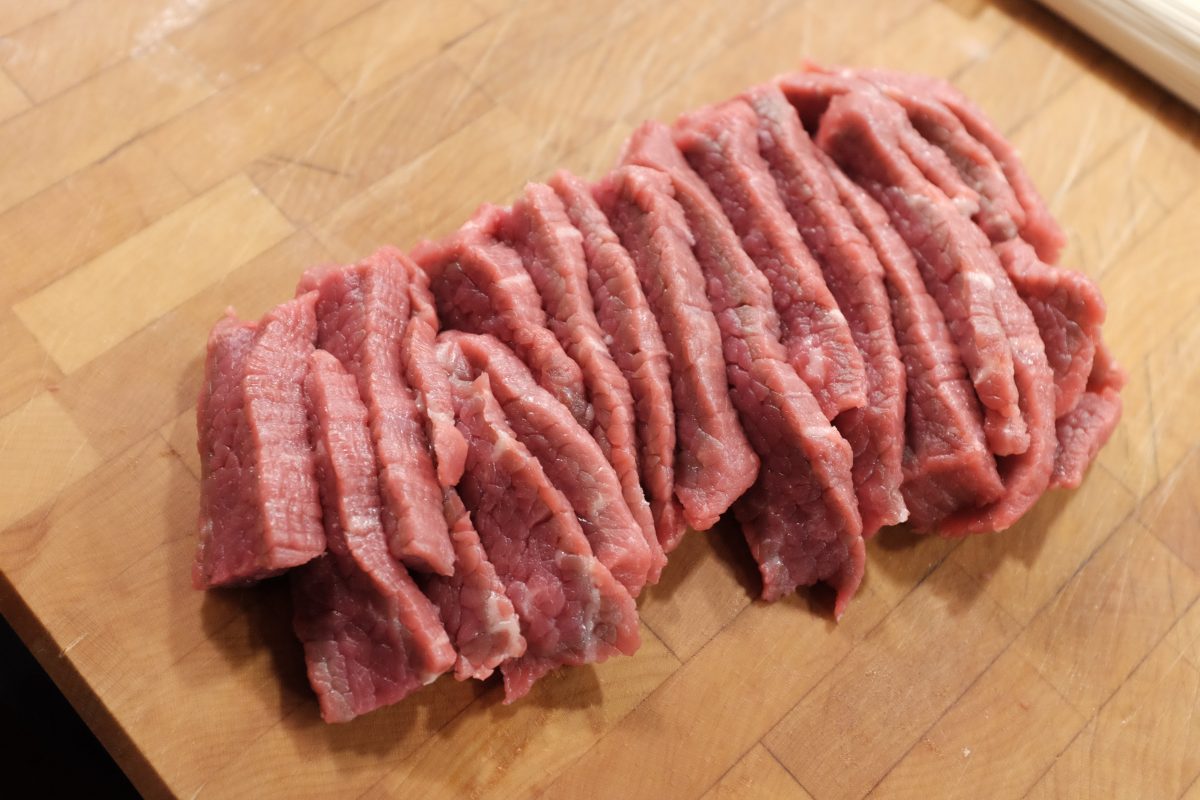
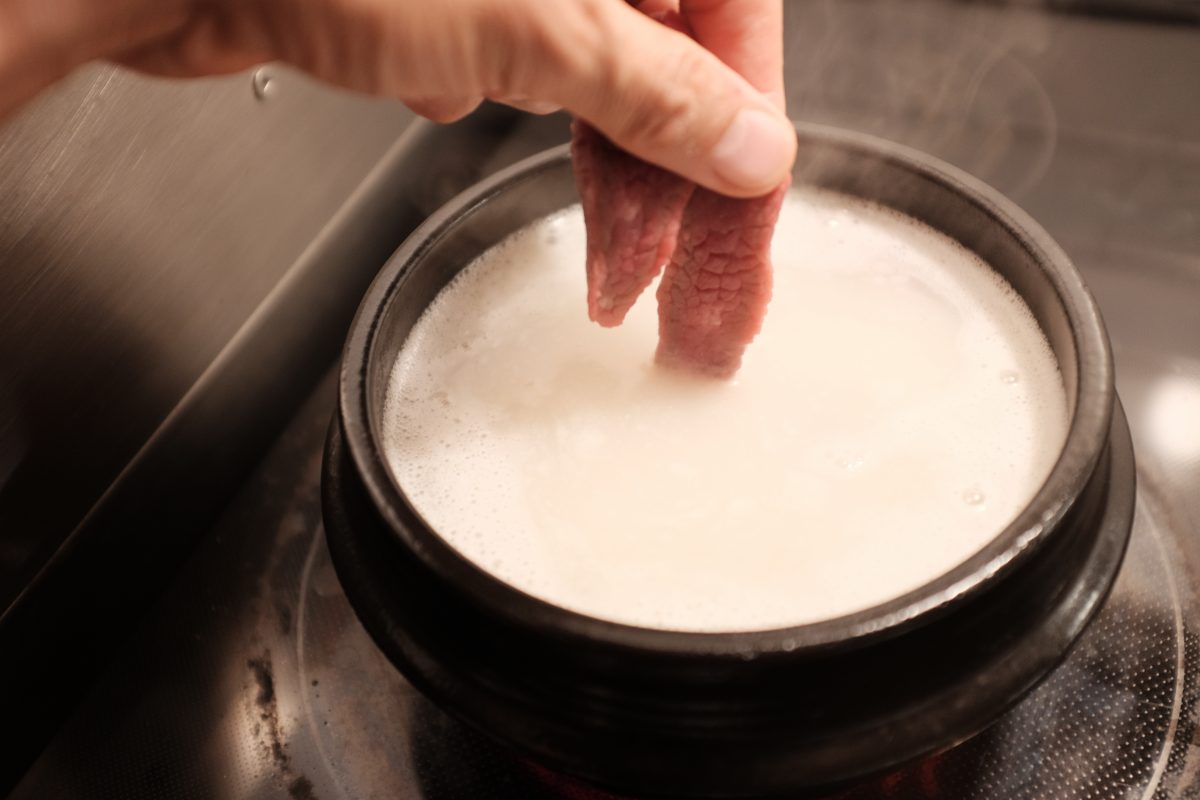
I used brisket point. You can use any beef you like. Tougher cuts will take longer to soften up and more tender cuts will take less time. I like brisket because it is somewhere in between. It has the deep beef flavour of a tougher muscle but is slightly more tender so takes a little less time to cook. If you like, you can soak the meat in water for a few hours to remove some of the blood but, this is optional.
Process


The verdict?
This turned out to be very very good. Maybe 4 out of 5 stars. One star off because, as good as it is, it doesn’t quite measure up to the flavour of Imun Seolleongtang in Seoul. But, honestly, I can say the same thing about all Korean food made outside of Korea. There is always a little something missing when you make these dishes yourself or, eat them in restaurants back home. I think a big part of this is the high quality of ingredients in Korea but, there is also generational knowledge and experience that adds flavour to these dishes and makes the magic hard to replicate. Imun Seolleongtang has been making this same dish for over 100 years and legend has it that the same stock pot has been continuously boiling fresh bones every day for the whole time!
Having said that, I am really happy with the way this turned out and I feel just as refreshed after eating a big hot bowl of this flavourful soup. 시원하다!
If you have any questions or comments please leave them in the space below. Thanks for reading!
If you enjoy the content and would like to contribute towards website maintenance and development, you can make a donation here.
Beef Bone Broth Version 2: Korean Style
Korean Beef Bone Broth vs Western Versions (hard and fast vs low and slow)
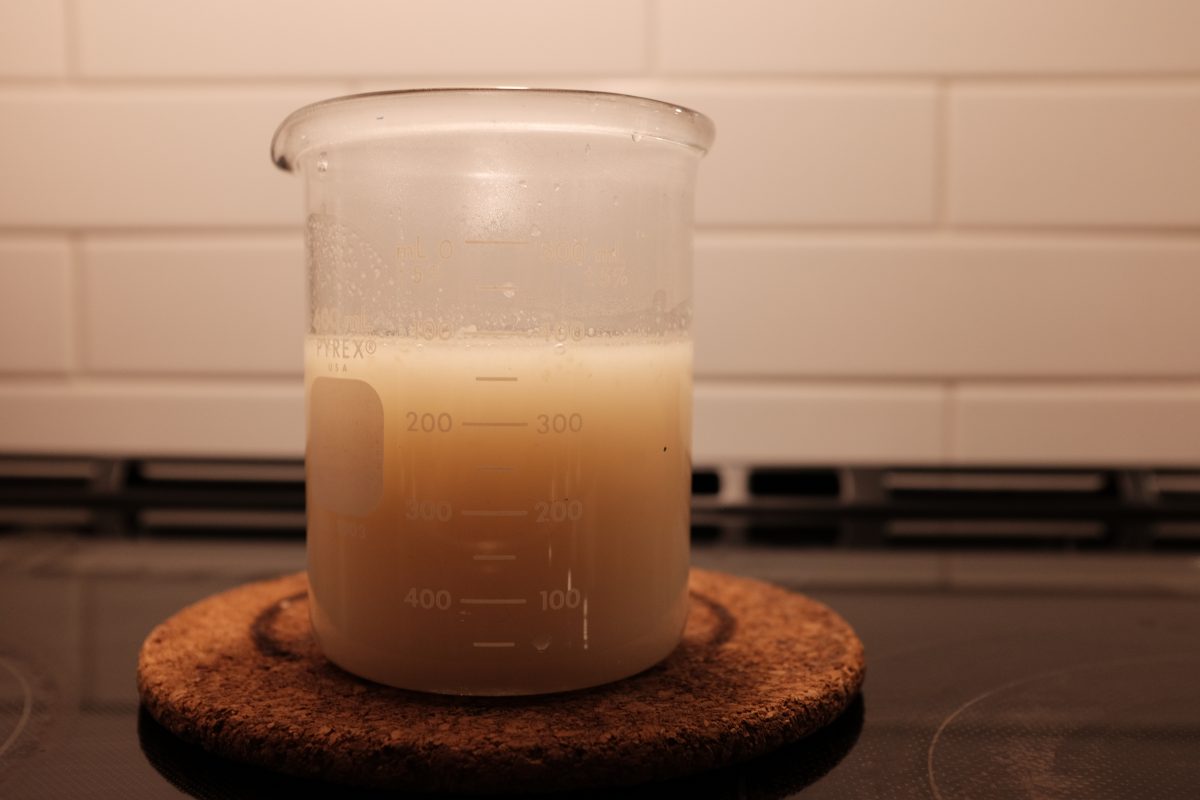
Some time ago, I posted a recipe for beef bone broth (stock) that involves a very long cooking time at a very gentle simmer (click here for this low and slow version). The result is a mostly clear, brownish, meaty and gelatinous stock. This is most often what chefs make in a western kitchen…it will typically be used as a soup or sauce base.
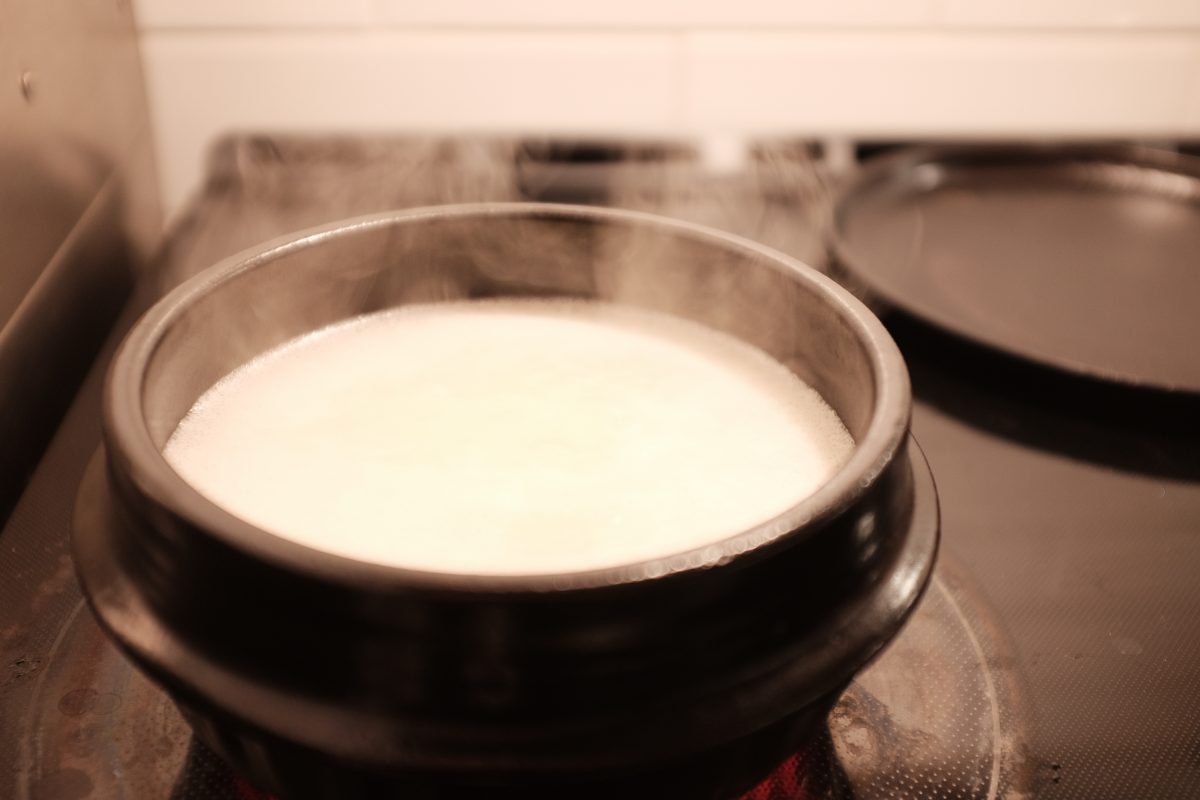
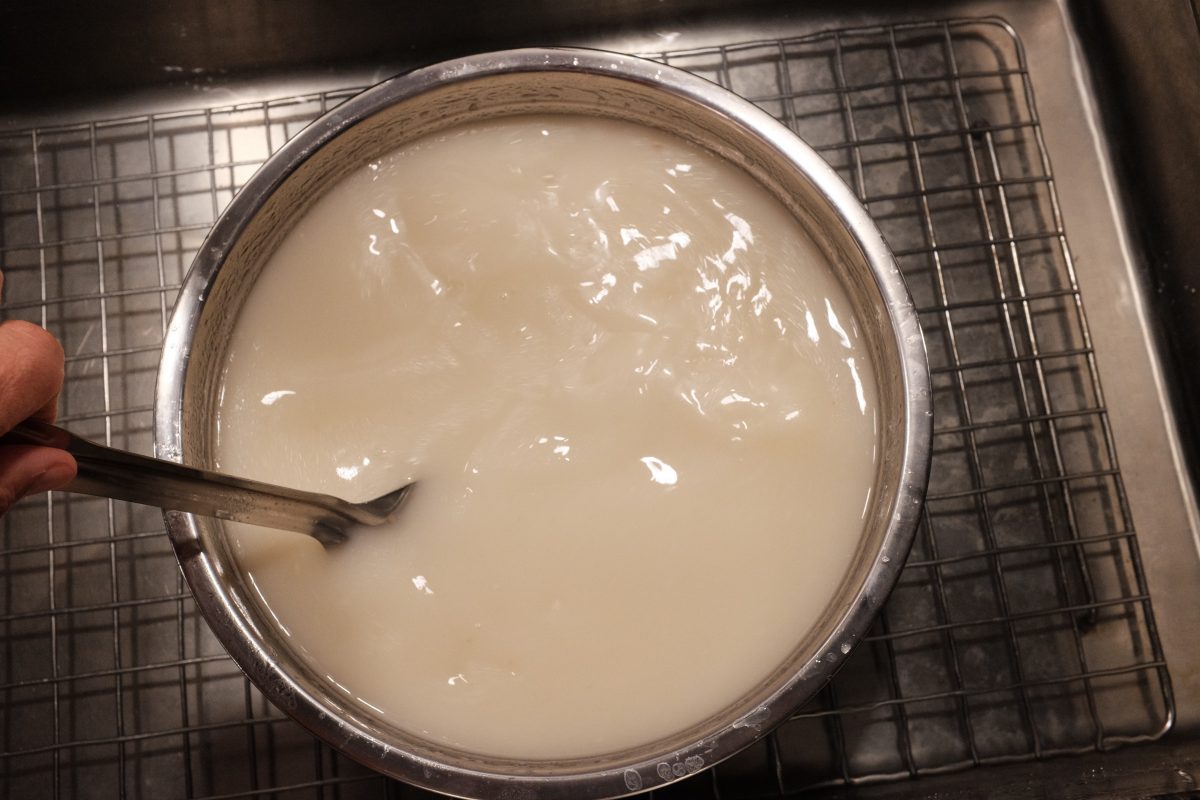
This recipe is almost identical in ingredients and process. The main difference is that this recipe cooks at a harder rolling boil for a shorter time. Even though the steps are almost identical, this small change results in a completely different stock. This one is just as gelatinous but, it is a silky opaque white colour with a nutty and delicate flavour. This stock is a base for dishes like mandu-guk (dumpling soup) or seolleongtang in a Korean kitchen. And, I think this is the version that most people think of when looking for “beef bone broth”.
Ingredients
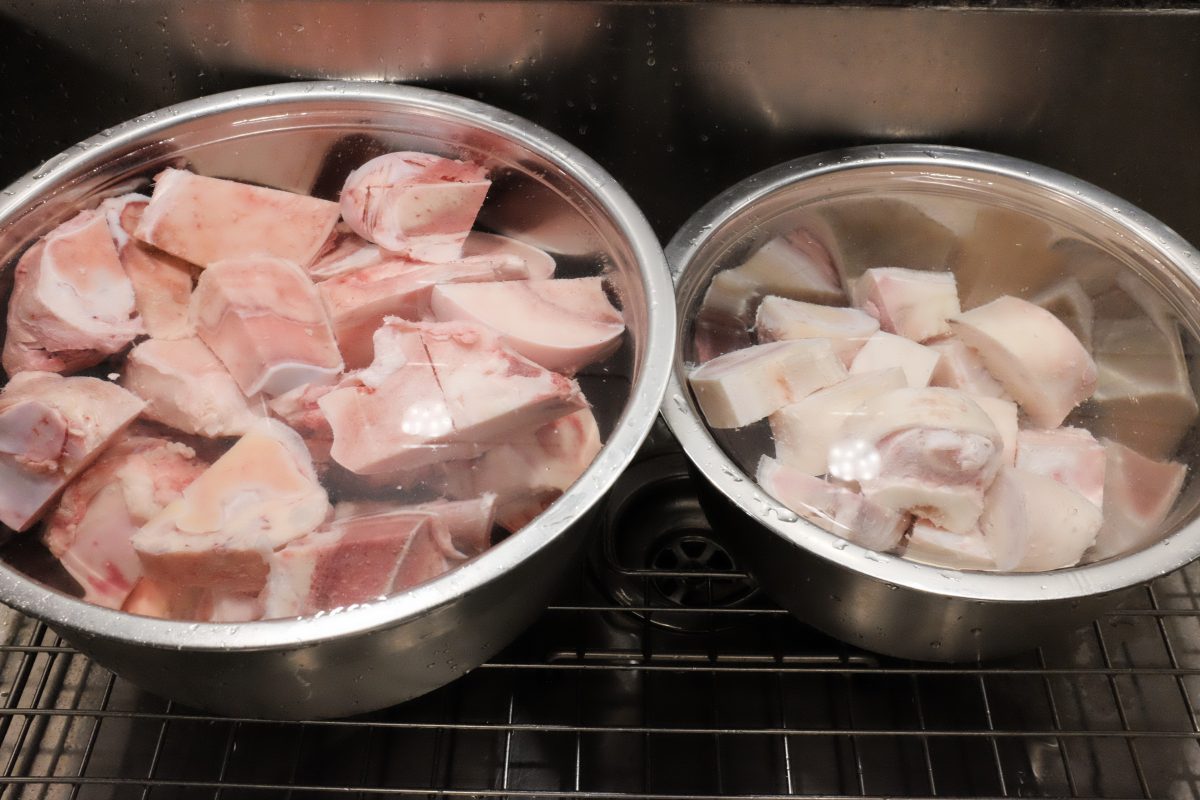
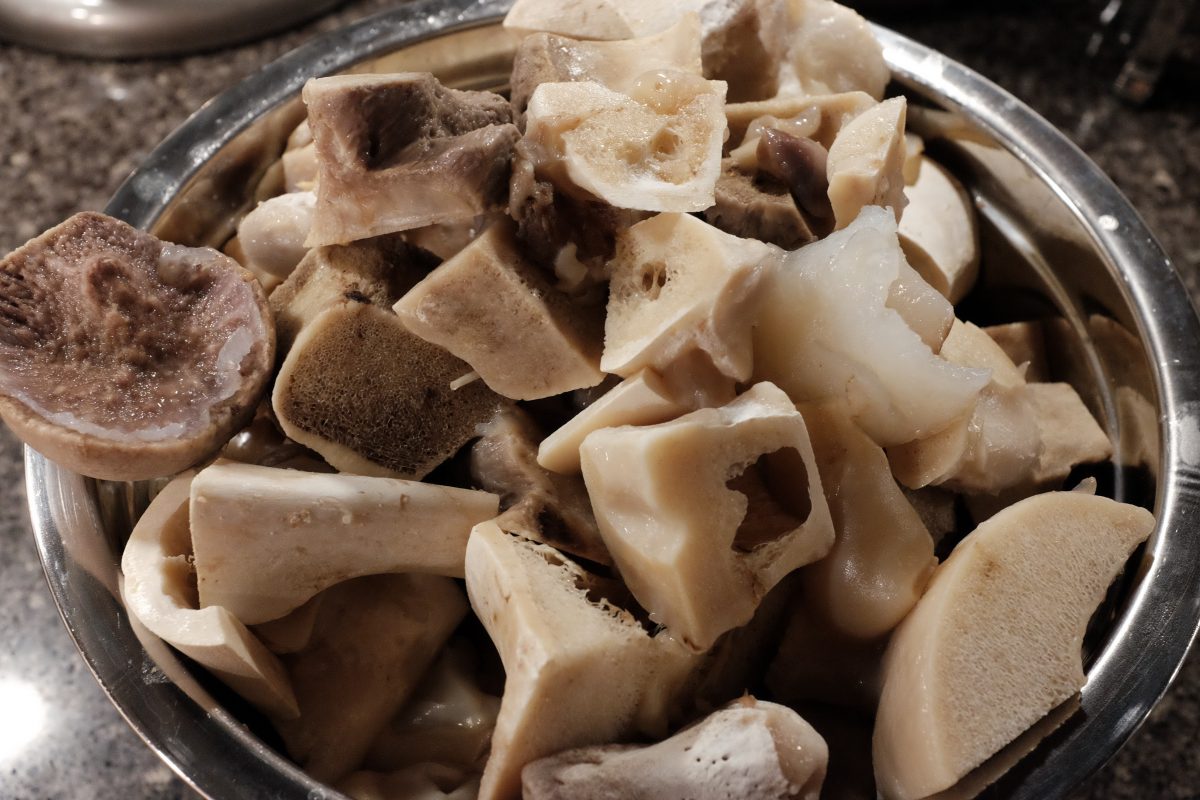
- 4kg (almost 9lb) beef marrow and knuckle bones cut into pieces.
- 1.2kg (around 2.5lb) cow foot cut into pieces
- water
The Korean grocer in my neighbourhood usually has beef bones already cut up and frozen in bags ready to go. If you don’t have access to something like this, any butcher should be able to sell you beef bones for stock. A separate Halal butcher in the neighbourhood stocks frozen cow feet which he chops up for me on his meat saw. Cow foot adds gelatine to your stock which will give it a rich mouthfeel. If you can’t get cow feet, you can leave it out and substitute more bones.
The weights above are a guideline. You can make this as big as the biggest pot you have to hold the bones. I have a 12 litre stockpot and this is a good amount for me. The ratio of bone to cow foot does not have to be exact but I wouldn’t use more than 20-25% foot to bone.
There is no salt in this recipe. Season the stocks as you use it, depending on the dish you are preparing.
Process
This recipe is a slightly abbreviated version of the slow-and-low stock recipe. The process and ingredients are almost exactly the same so I have left out a few of the more obvious photos. If you want more detail on any step, just reference the recipe at this link.
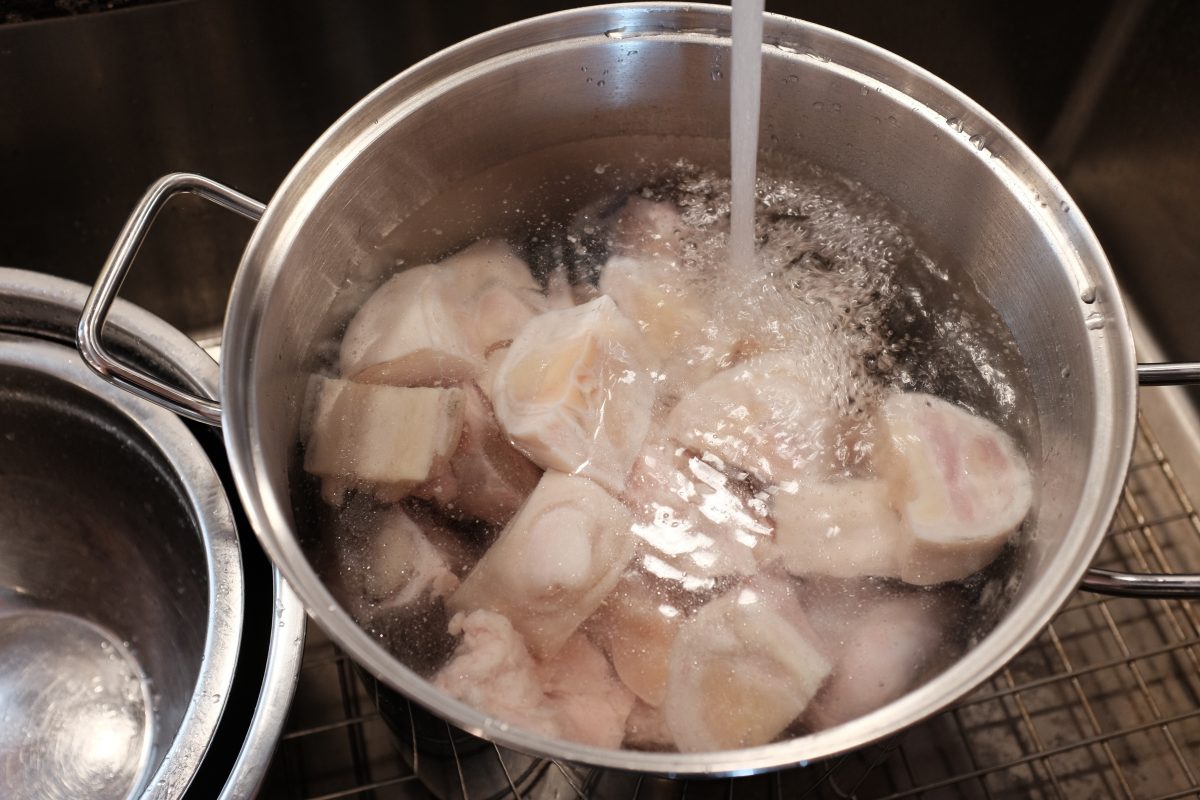
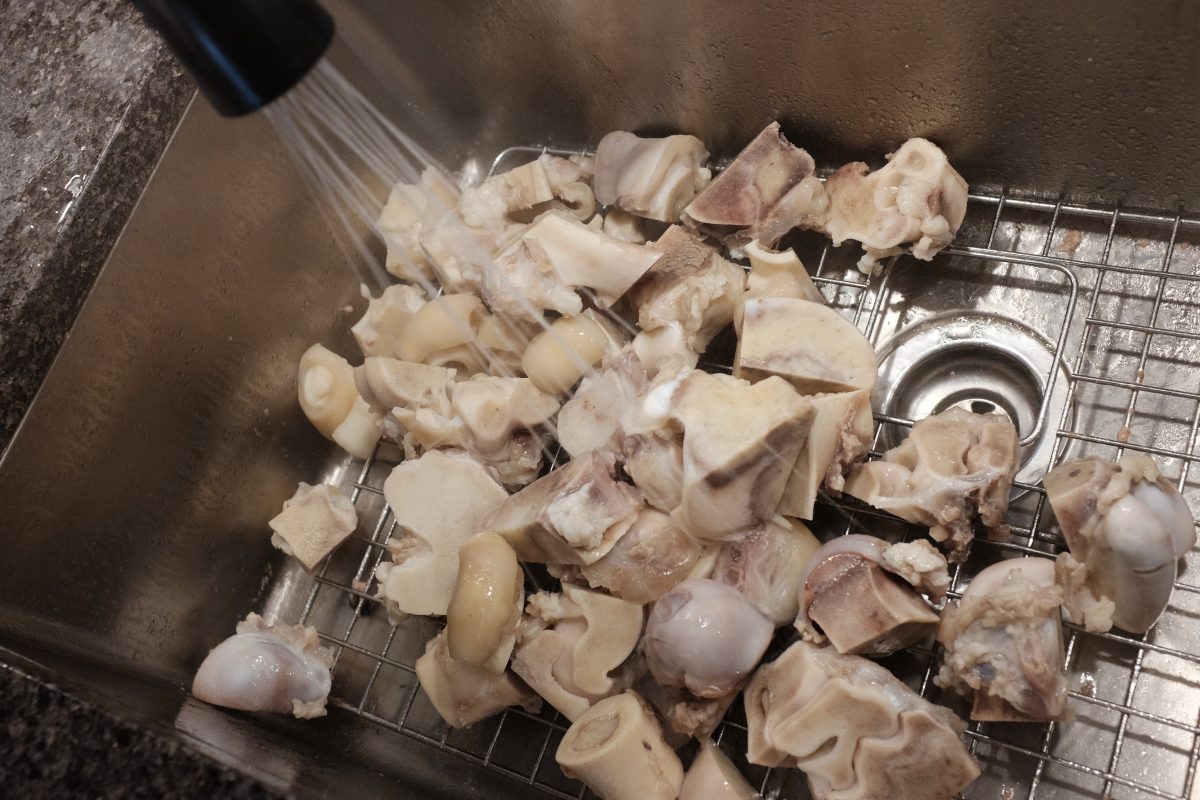
Wash and soak bones
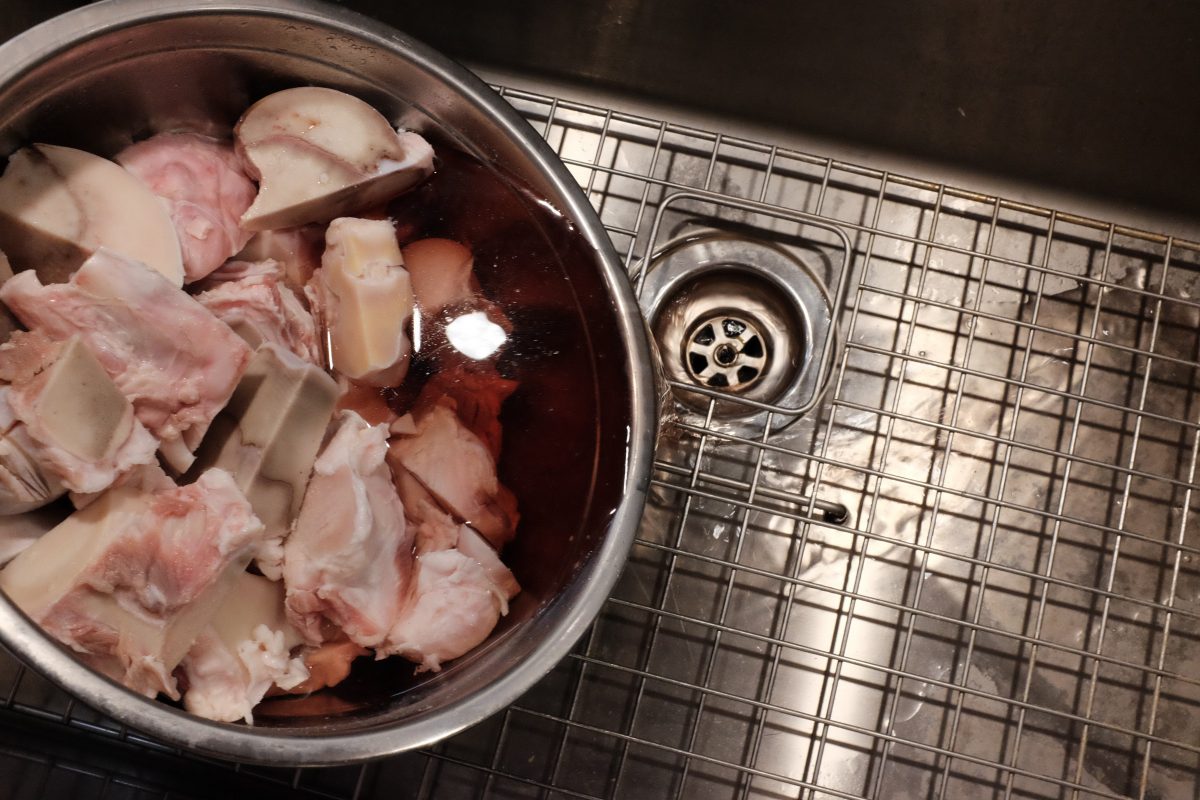
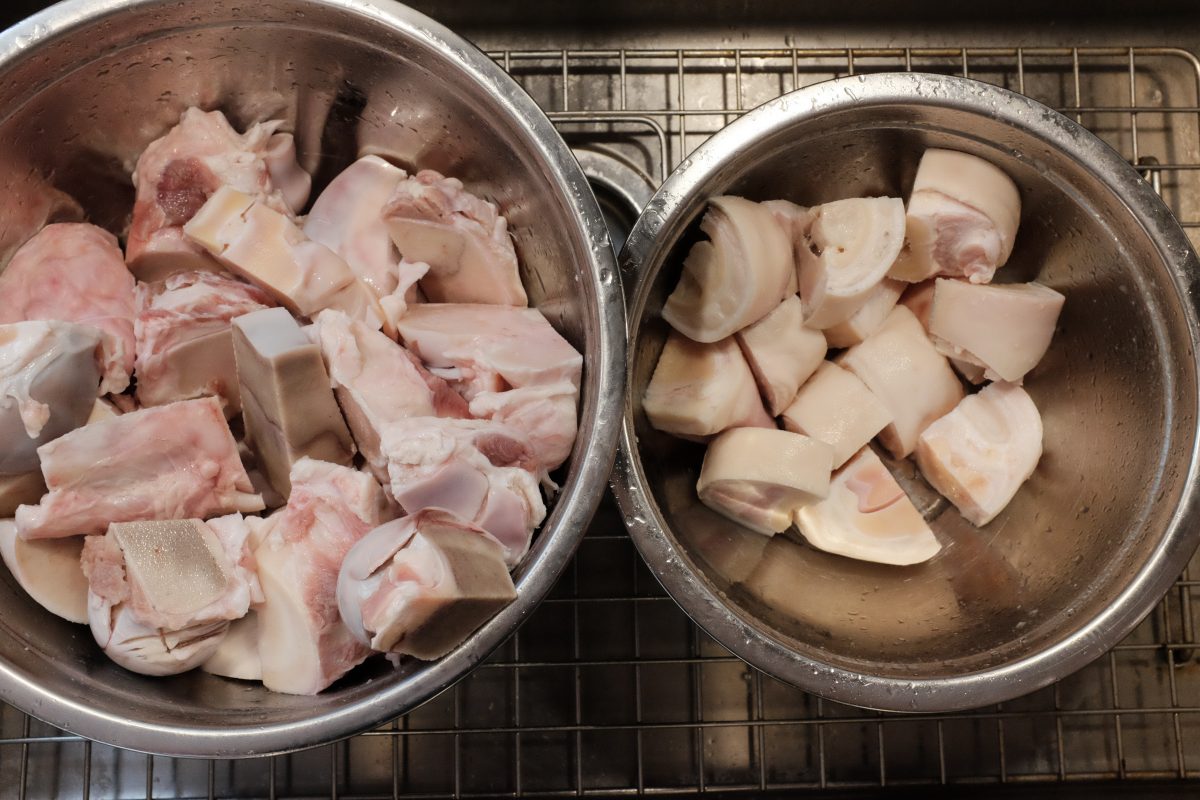
Blanching the bones

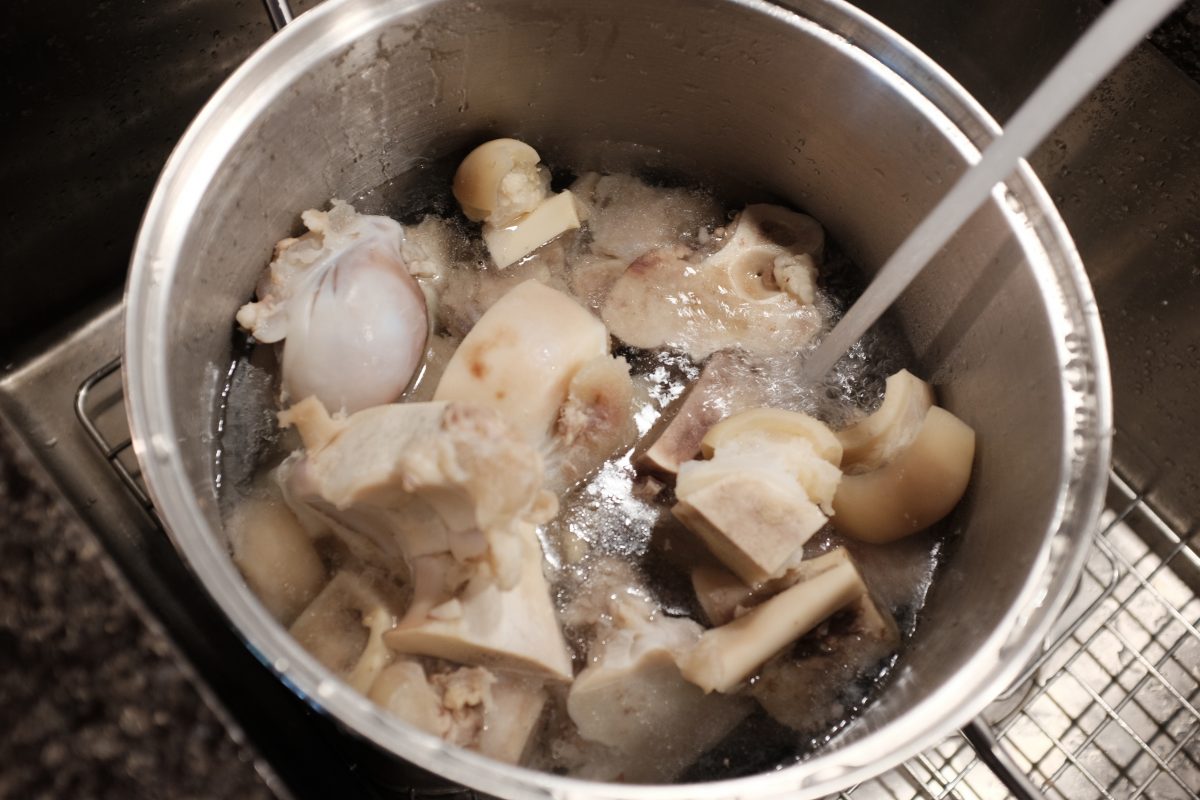
Making the stock

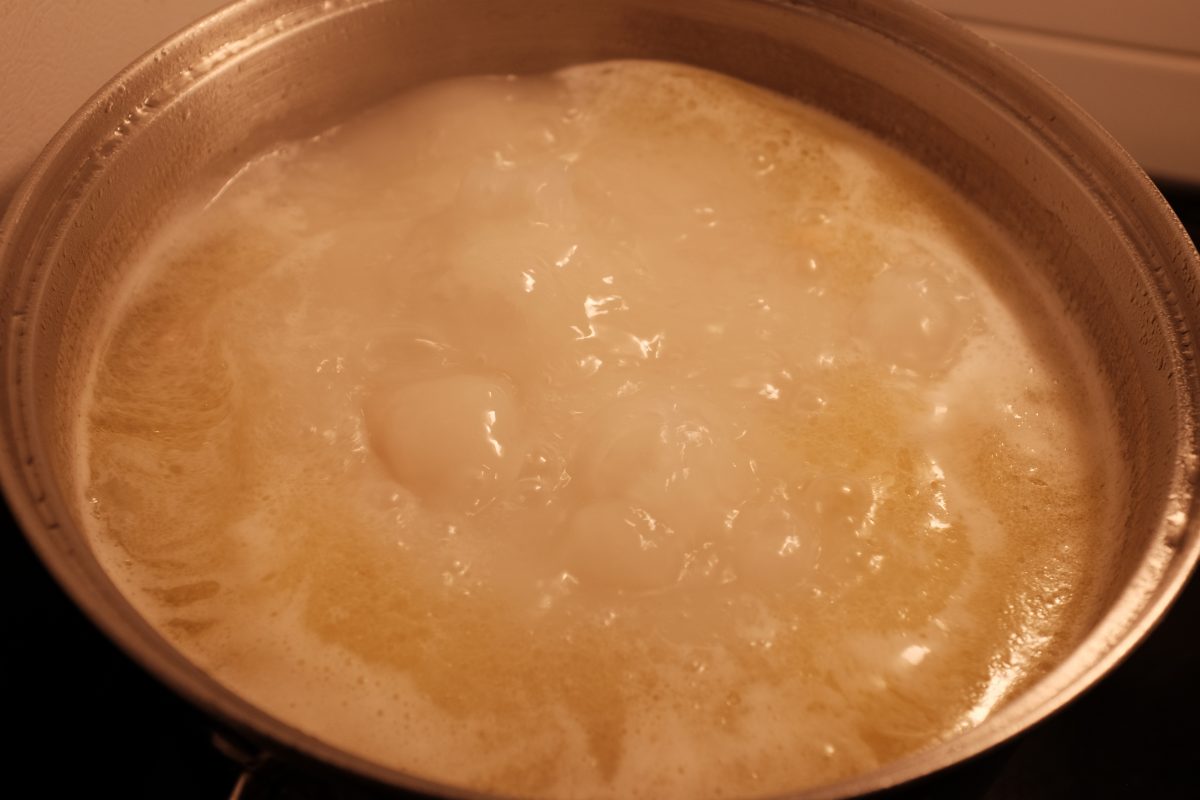
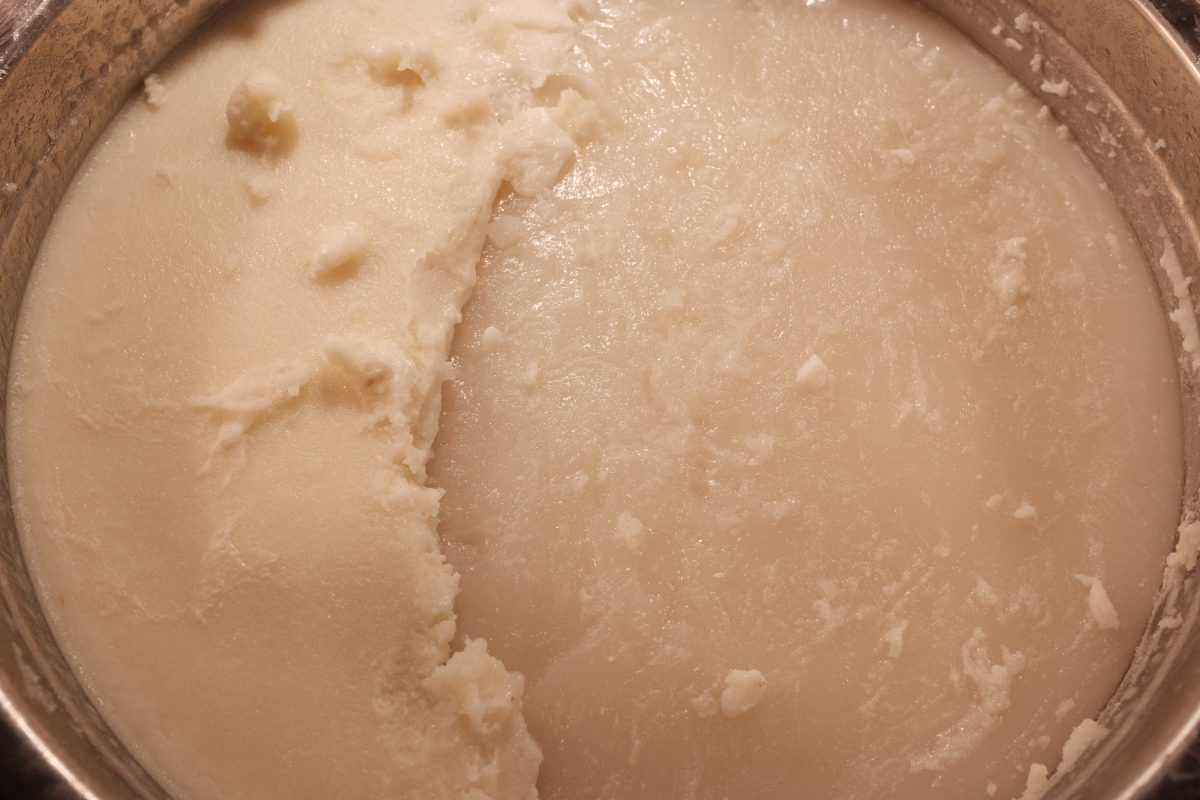
After 8 hours or so…
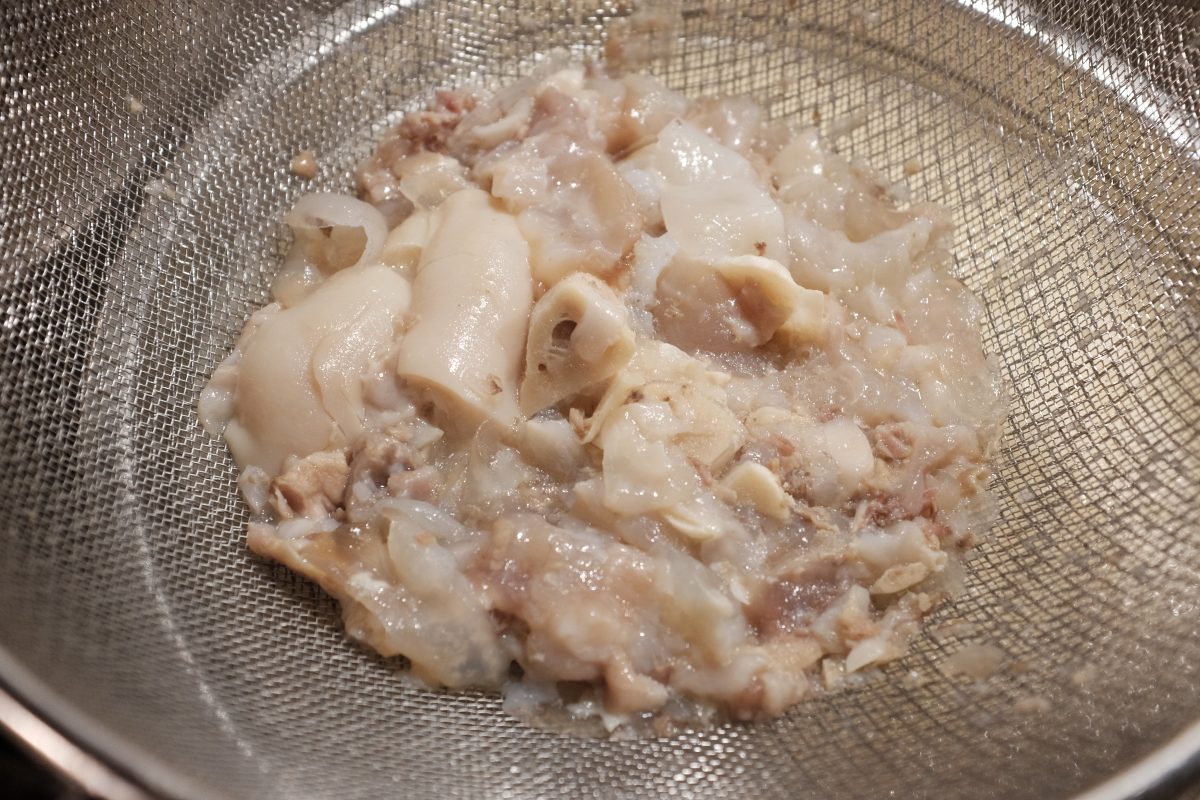
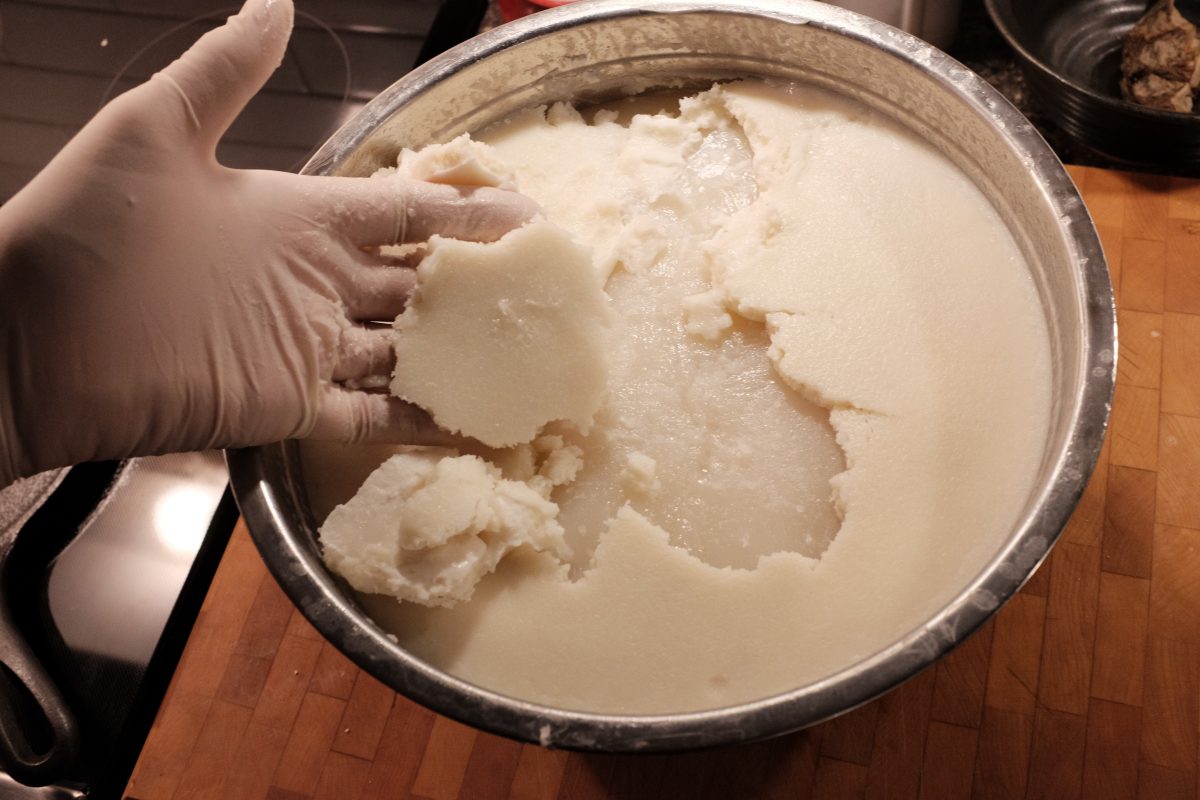
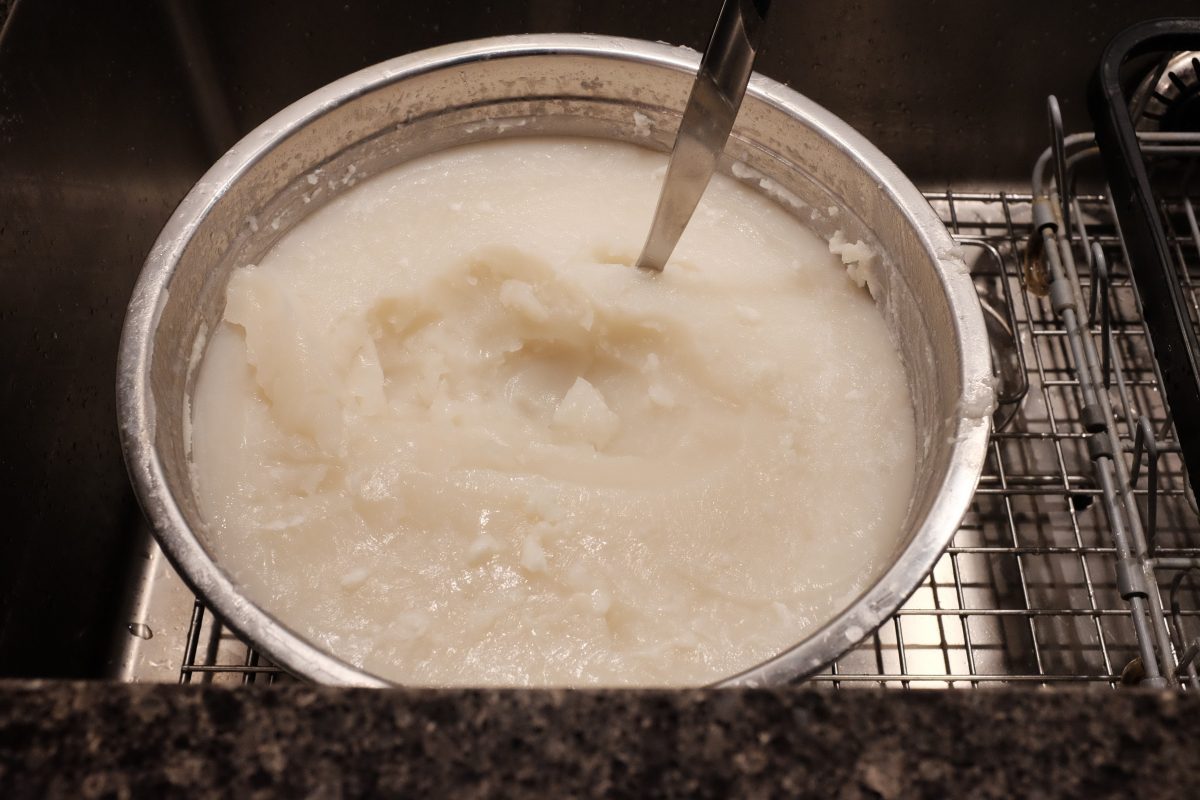
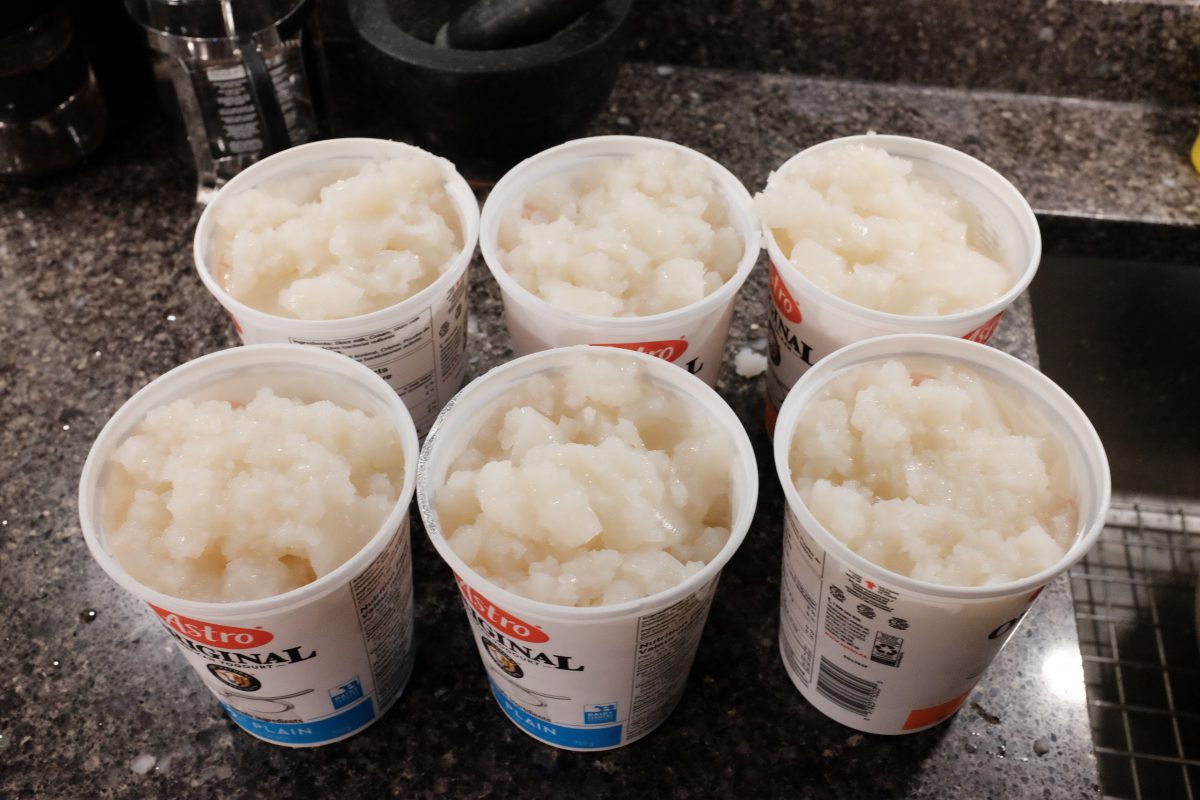
Remove the bones from the stock and strain the liquid.
What to do with your bone broth (stock)
This is the essential milky base for Korean soups like seolleongtang (click here for recipe), doganitang or mandu guk. However, you can also use it as a base for almost any soup where you want good body and deep beef flavour. You can even drink it as is or add just a bit of cooked rice and chopped green onion for the simplest, easiest to digest, healthy and protein rich meal.
If you have any questions or comments or if I spelled Seolleongtang wrong, please let me know in the space below.
If you enjoy the content and would like to contribute towards website maintenance and development, you can make a donation here.
Jeow Bong
What is it?
Jeow bong (or jaew bong) is a Lao chili paste used as a dip or seasoning. It is powerful and complex: full of strong aromatics and potent citrus and fruit flavours, all tied together with fermented fish sauce.
One summer at the restaurant we had a food runner who’s mom was from Laos. We became pretty good friends and her family ended up visiting for a meal a few times. I had fun preparing interesting veggie dishes (off menu) for her vegetarian dad and sister.
Afterwards, on more than one occasion, her mom sent me homemade Lao beef jerky and other little snacks. One time I even got a full dinner-set of larp, sticky rice, sides and, of course, jeow bong! This was my first experience with Lao food and I was hooked.
Sometime before our food runner left to go to university, she brought me my own bamboo sticky rice steamer and pot set with a couple of little rice baskets. This was such a thoughtful gift and I use them often. Thanks Tounie, Émilie and famille Desrosiers!
Jeow bong recipe:
This is a very good recipe. I am always surprised at how incredibly delicious it is every time I eat it.
First let me say that although I am a professional chef, I am no expert at Lao cooking. I have learned to make a few dishes because I like them so much but I am still learning. When I looked around the internet for recipes, I found many different recipes for jeow bong. I pulled from a few of them, combining ingredients that I can easily get in my neighbourhood. Many recipes include pig skin as an ingredient but I left it out of this recipe only because I didn’t have time to pick it up. This recipe turned out very well without it but next time I may try with pork included.
Ingredients
- 10 cloves garlic
- 4 medium shallots
- around 25 grams fresh galangal (one thumb-size chunk)
- 20 grams dried chilis
- 60ml (1/4 cup) of water
- olive oil for frying (1-2 tablespoons)
- 30ml (2 tablespoons) fish sauce
- 6 kaffir lime leaves
- 25 grams tamarind paste (a little less than 2 tablespoons)
- 1 teaspoon MSG or Aji-no-moto (same thing, different name)
- 1 tablespoon palm sugar (or use regular white sugar)
Process


Now what?
Store the paste in an air-tight container in the refrigerator.
You can use your jeow bong as a dip for meats or veggies or mix it into stir fried dishes. Or, try swiping a little onto a ball of warm sticky rice and popping it into your mouth. This is my favourite way to eat it.
Go easy with this stuff. It is surprisingly powerful!
If you have any comments or questions, please feel free to leave them below.
Thanks for reading : )
If you enjoy the content and would like to contribute towards website maintenance and development, you can make a donation here.