Makgeolli is a Korean alcohol (or sool 술) made by fermenting rice with a natural starter called nuruk (누룩, sounds like noo-rook). I have heard it called “rice wine”, “rice beer” and “Korean sake” but it has very little in common with any of those. Makgeolli is its own thing. A few good ingredients and a complex, multi-layered, simultaneous fermentation by a large variety of bacteria and yeasts make this a uniquely Korean sool. It has its own distinct flavours, textures and history. It is unlike any other rice ferment.
The recipe below is not the most simple but the preparation and process are fairly straightforward. My goal was to make the recipe easy to follow so I have included lots of pictures and even some sounds.
Important considerations before you start
There are 2 stages to this recipe and, from start to finish, this brew can take anywhere from 3 weeks to a month. In Stage 1, during the first three days or so you will need to stir it up a few times. In Stage 2, you will need to stir it again for a few days after which it is mostly just waiting and tasting occasionally.
Each stage of this recipe takes several hours to prepare. In Stage 2, you will spend 5 hours just washing, soaking and steaming rice. It’s best to plan ahead so you have enough time to get through the process in one shot.
Temperature is important. You will need to find a spot that is room temperature or a bit cooler for fermenting this brew (20-25C). Higher temperatures can cause your brew to ferment too quickly and may cause some off-flavours. Cooler is always better.
Equipment
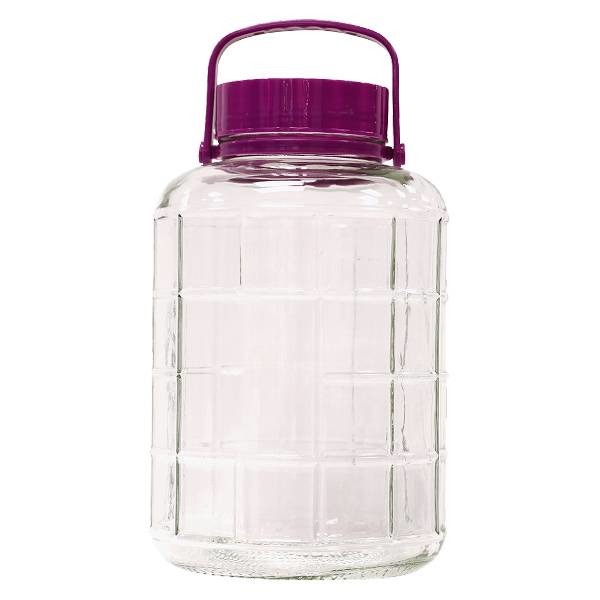
You will need a glass or pottery container to hold your brew. 8-10 litres is a good size.
You can find these glass jars at many Asian grocery stores or supermarkets.
These ceramic onggi jars are sometimes for sale in Korean grocery stores or markets.
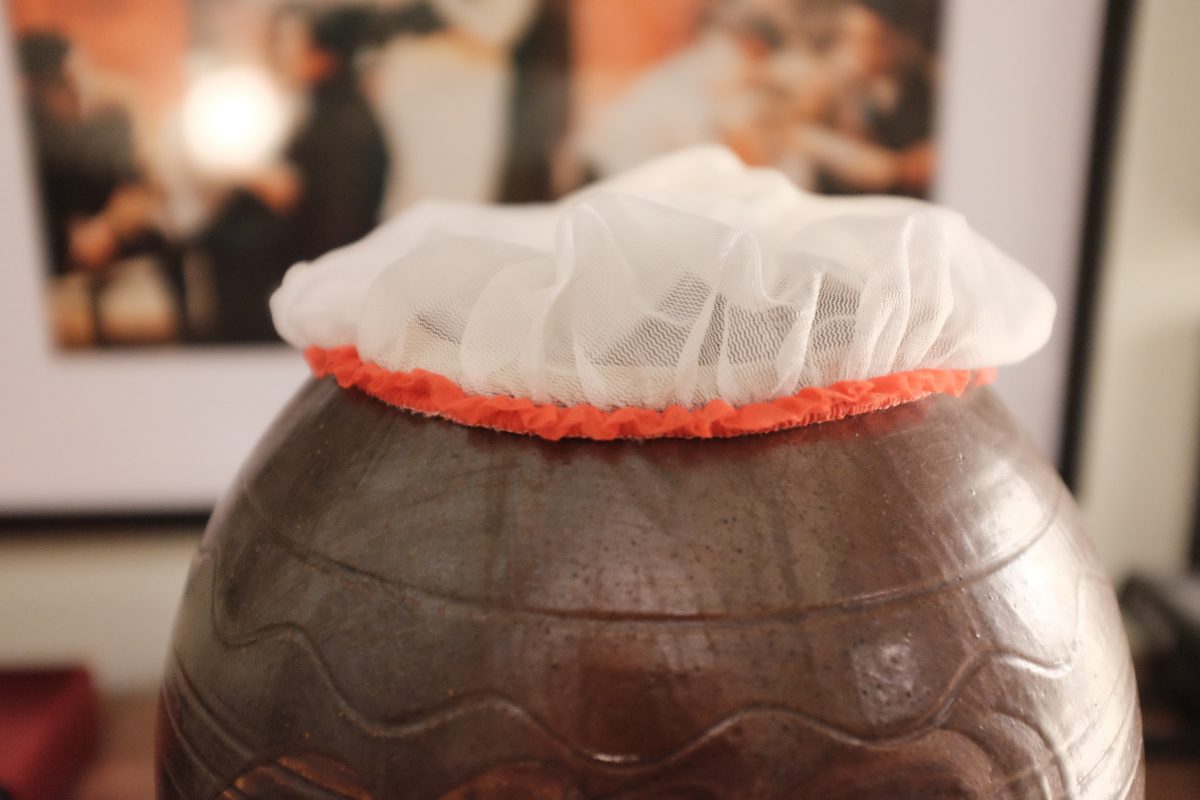
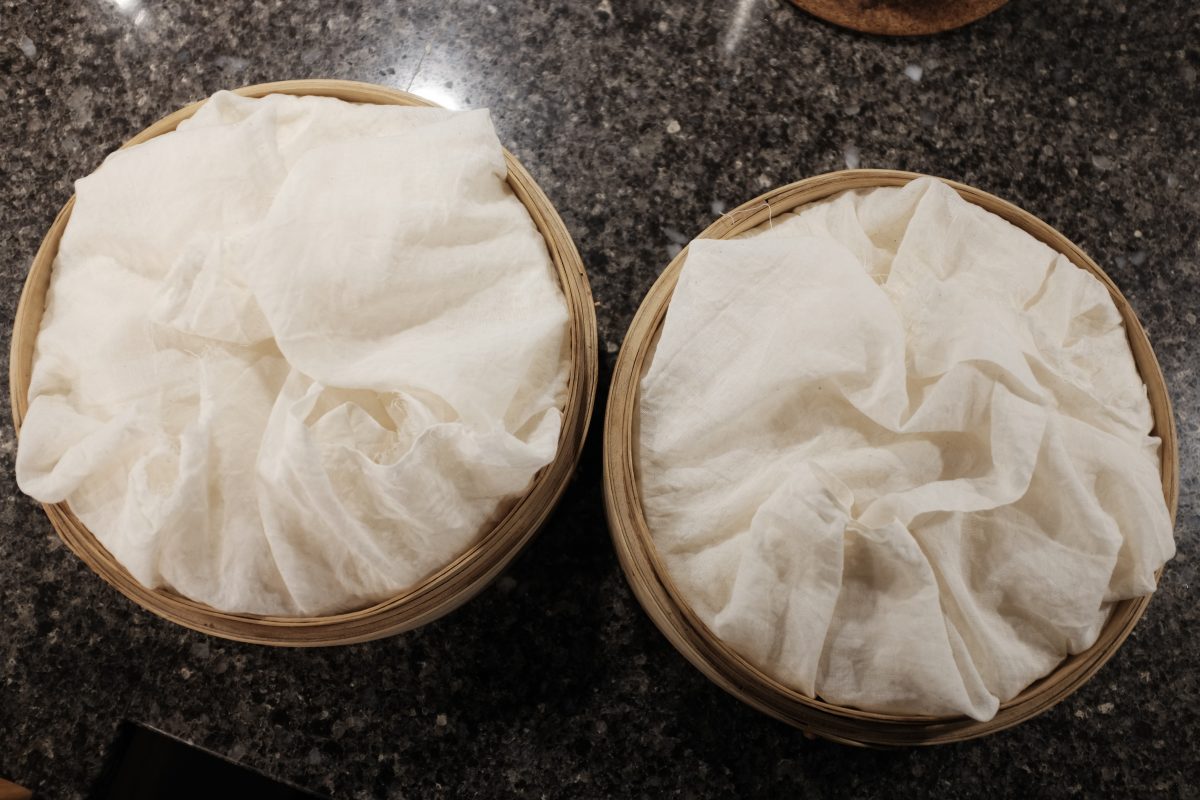
I think most people use glass. I have ceramic onggi jars around the house so that is what you will see in the pictures but either will get the job done. You will also need a piece of fabric or cheesecloth and an elastic band to cover the top of your jar. This ferment needs to breathe and will release a lot of gas. A fabric cover will let it vent and keep insects and dust out.
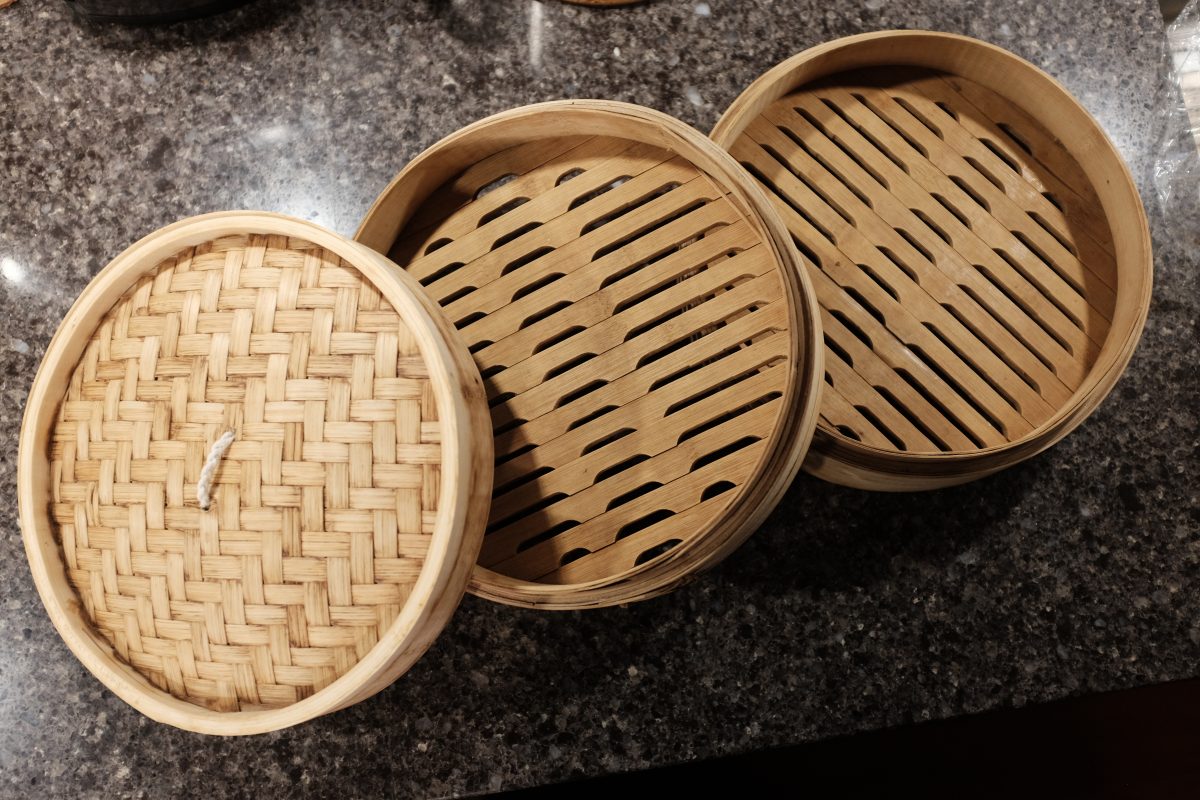
You will need a steamer of some kind. Bamboo steamers are cheap and very useful. I have a medium size one with two decks that I will use to steam rice for this recipe. If you have a pot with a stainless steel steamer insert, that will also work. Lastly, you will need a piece of cheesecloth or other fabric big enough to wrap the rice in the steamer.
Ingredients:
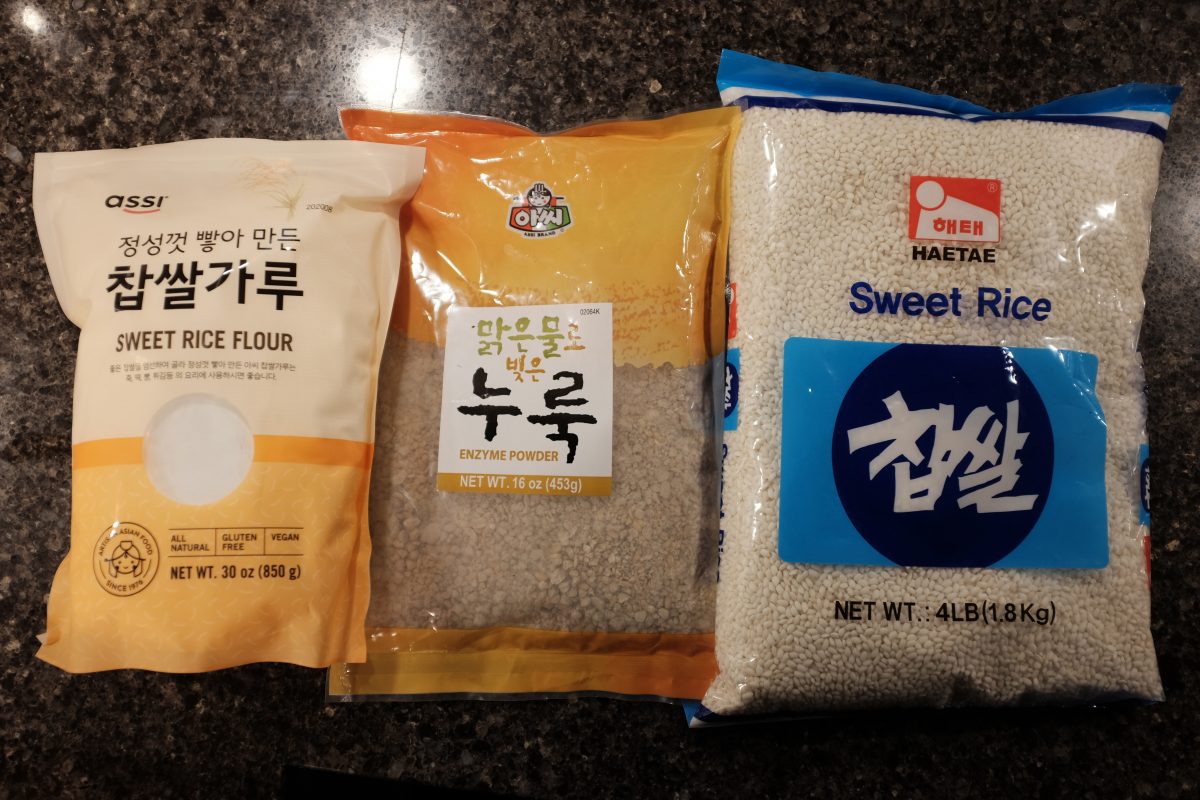
There are only 3 ingredients here: rice, water and nuruk.
Nuruk is made by forming moist cakes of grain (usually some combination of wheat and barley and rice) and hanging them in open air to attract wild yeasts, bacteria and mold as they dry. These are then pounded into rough granules to use as a fermenting starter. Bags of this powder can be found at Korean grocers under the english name “Enzyme powder” or just look for the Korean name “누룩” on the bag. There is a picture of a bag of nuruk in the ingredients below.
You can make makgeolli with many different kinds of rice. For this recipe I am using a short grain sweet rice called chapssal (찹쌀). I think that this rice is most likely to make a successful and easy drinking first brew.
Here is what we need:
500 grams sweet rice flour (this is just rice milled into a fine powder)
2 kg sweet rice (chappsal)
2.5 litres filtered or spring water
250 grams nuruk plus another 250ml filtered or spring water to hydrate it
Sweet rice flour, nuruk and sweet rice.
Process:
The recipe is broken into 2 parts. In Stage 1, we will ferment the rice flour for a number of days (around 3). In Stage 2, we will add steamed sweet rice and finish the ferment over the next few weeks. A two stage recipe like this is called “Iyangju”.
Stage 1
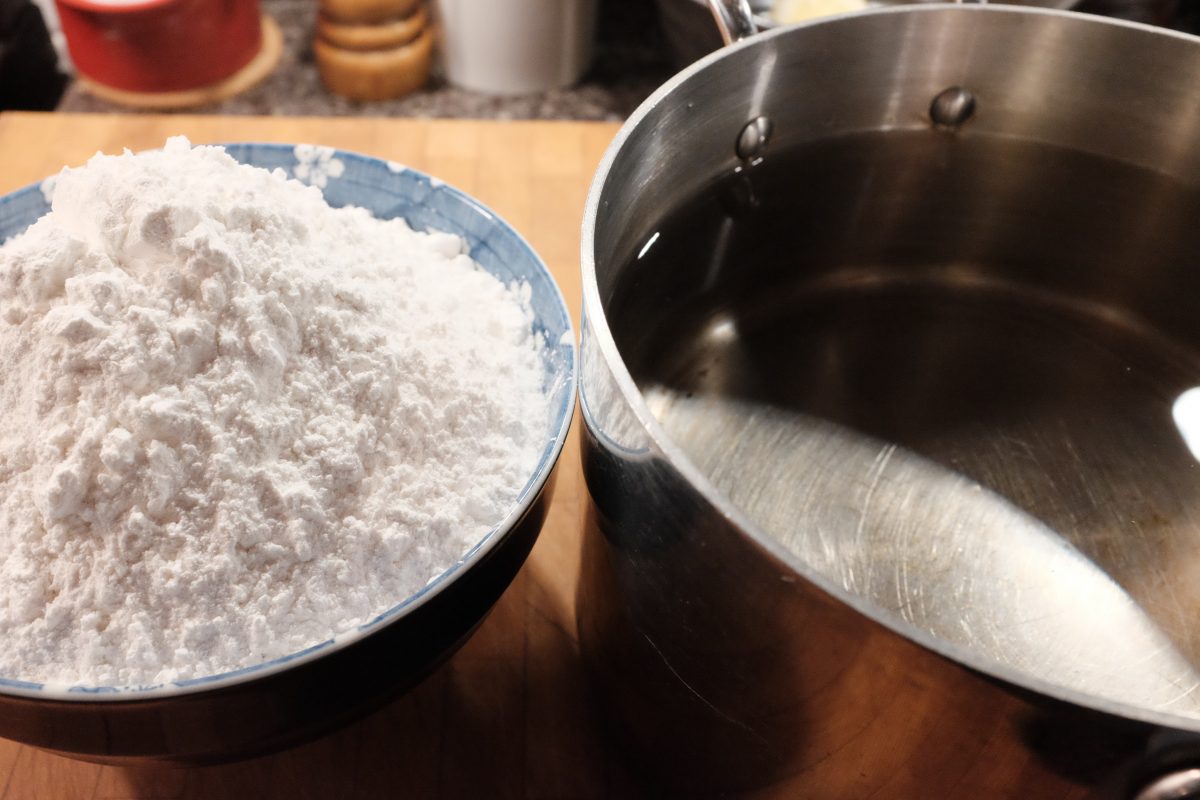
Measure out 250 grams rice flour and 2.5 litres of spring water.Combine rice flour with water in a heavy bottom pot and heat on medium-high while stirring constantly. This takes some time to come up to temperature but it is important to keep it moving so that it doesn’t burn. We want this to come up to boiling temperature. It will be thick and steamy when done.
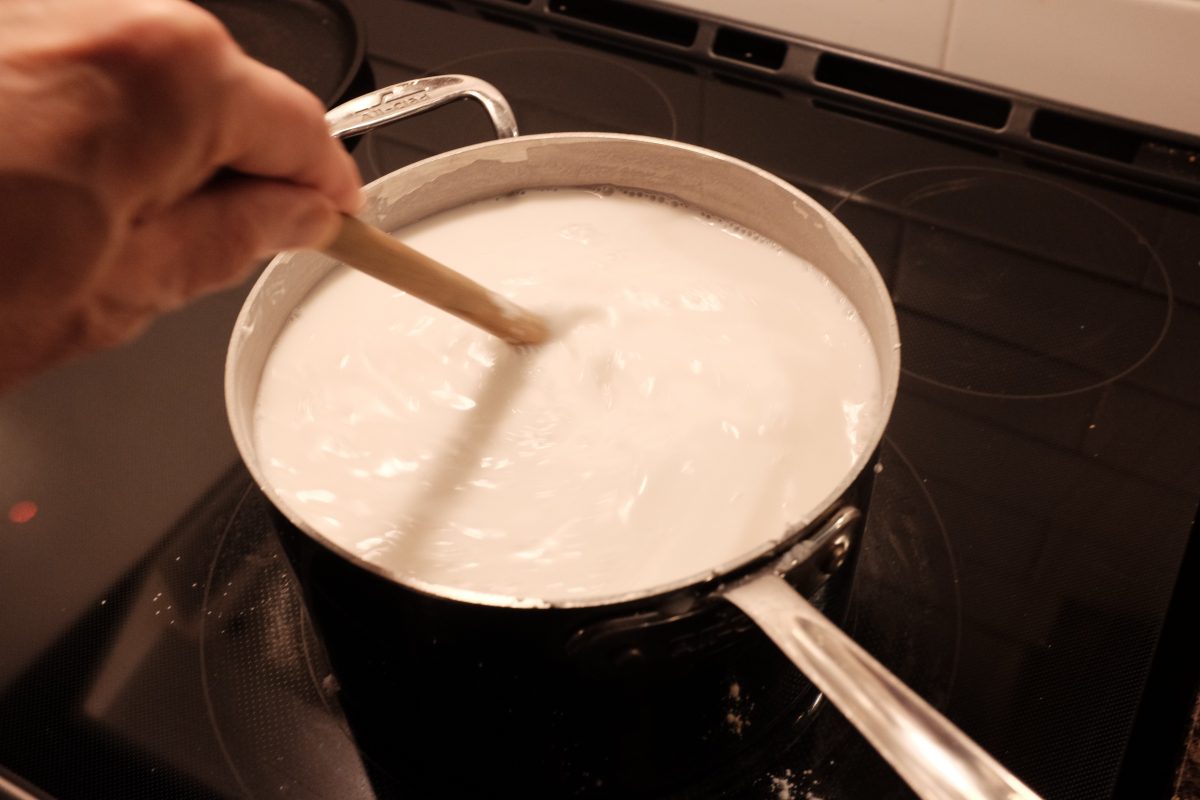
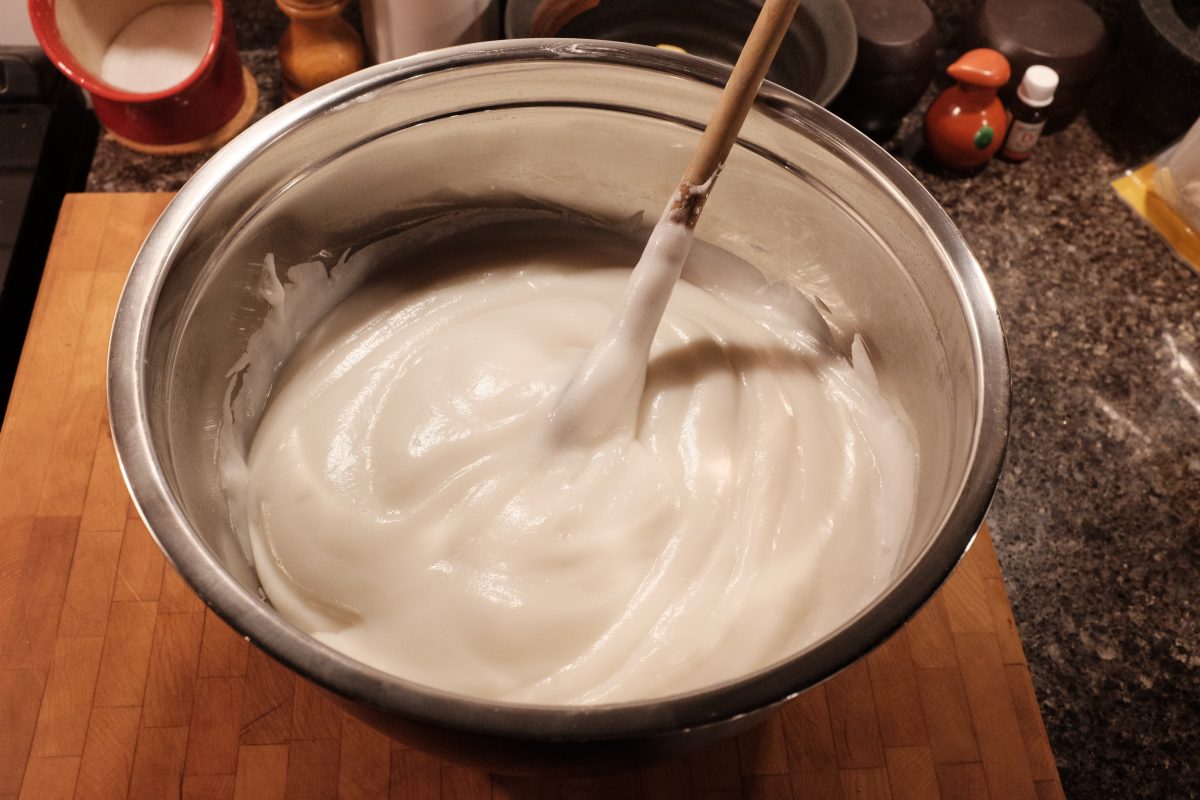
Eventually, as the mixture nears the boiling point, it will get very thick. Once it is very thick, take it off the heat. The video here shows just how thick it should get. This thick rice slurry is called juk (죽), sounds like “jook”.
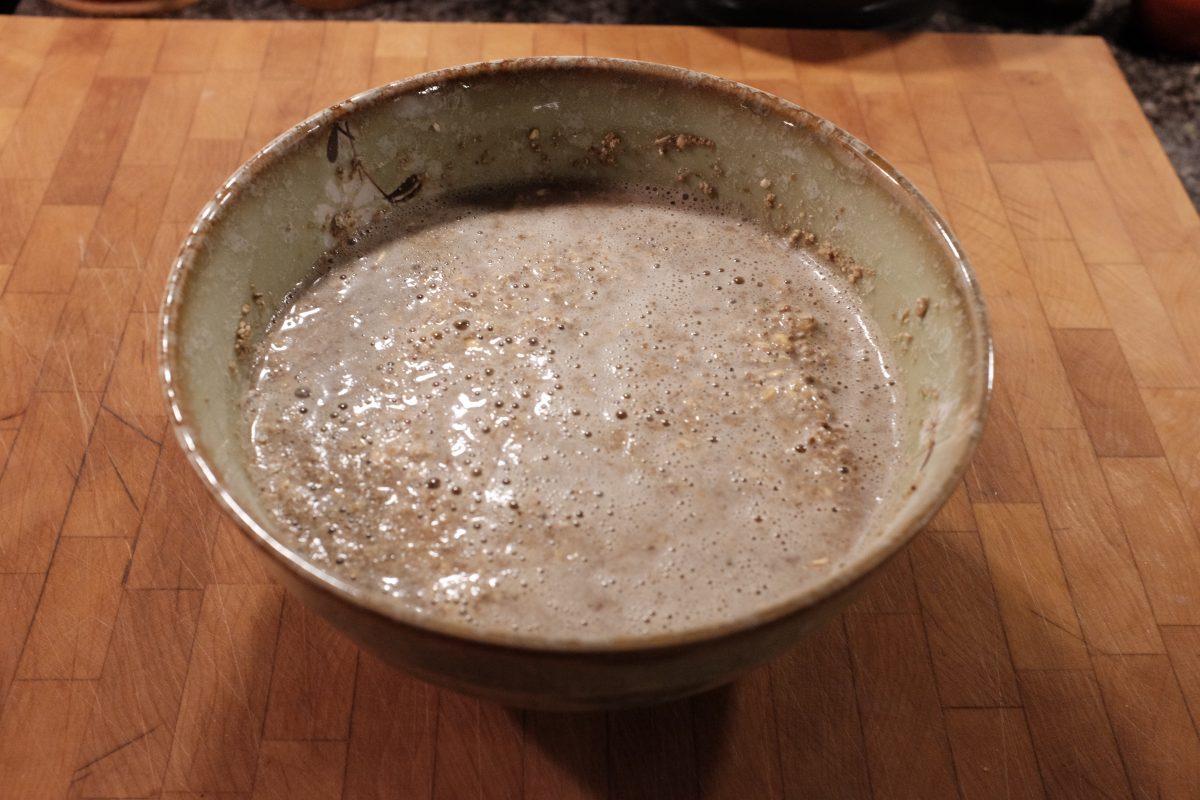
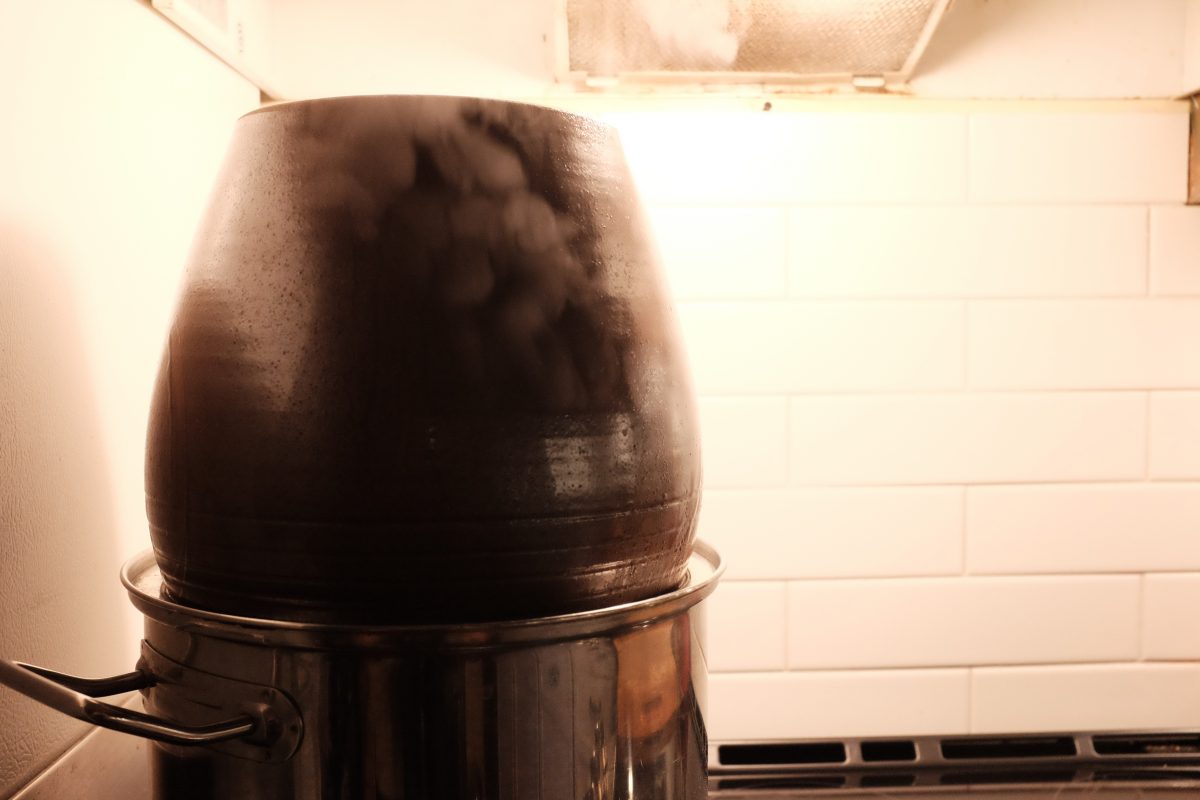
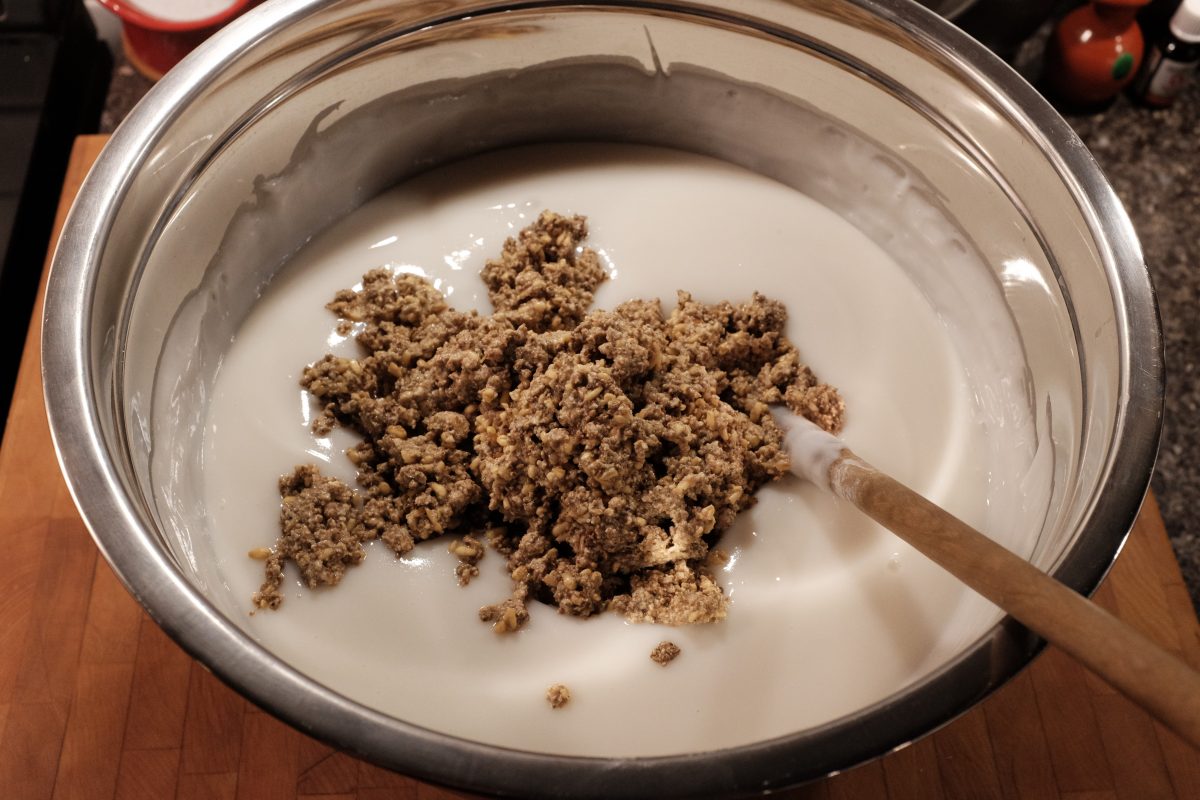
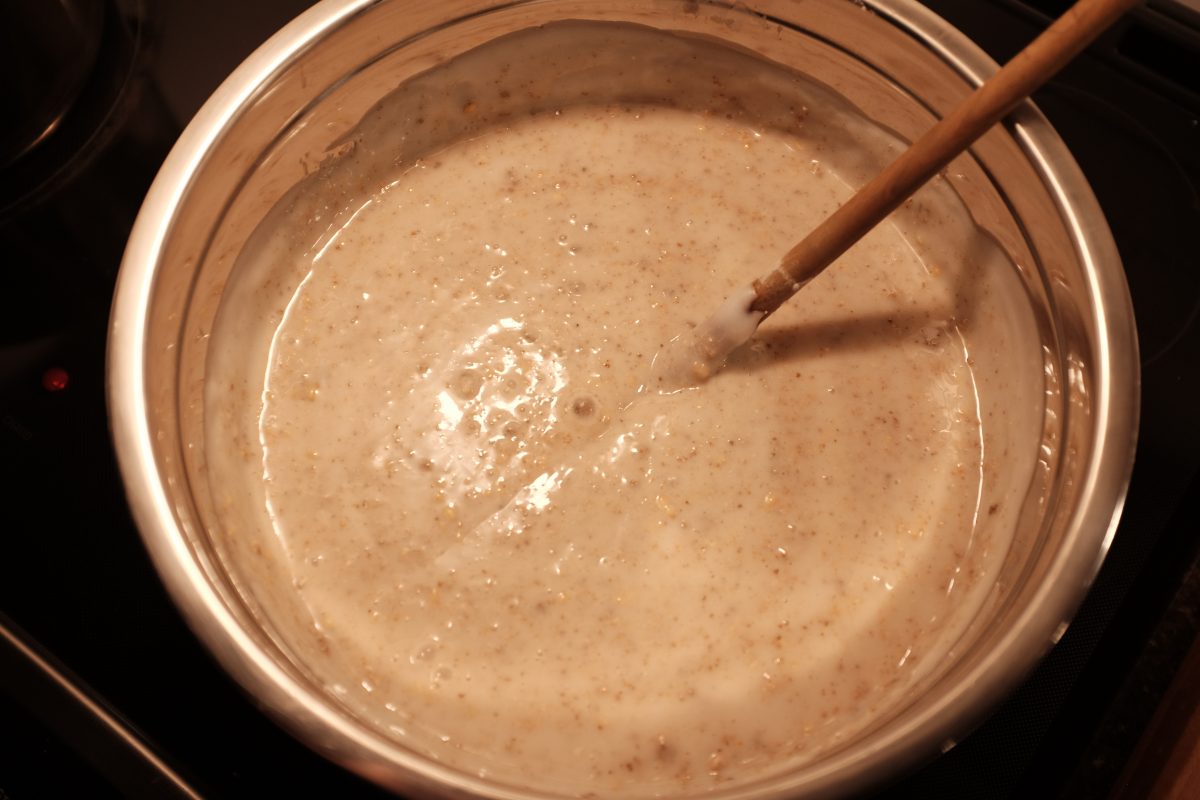
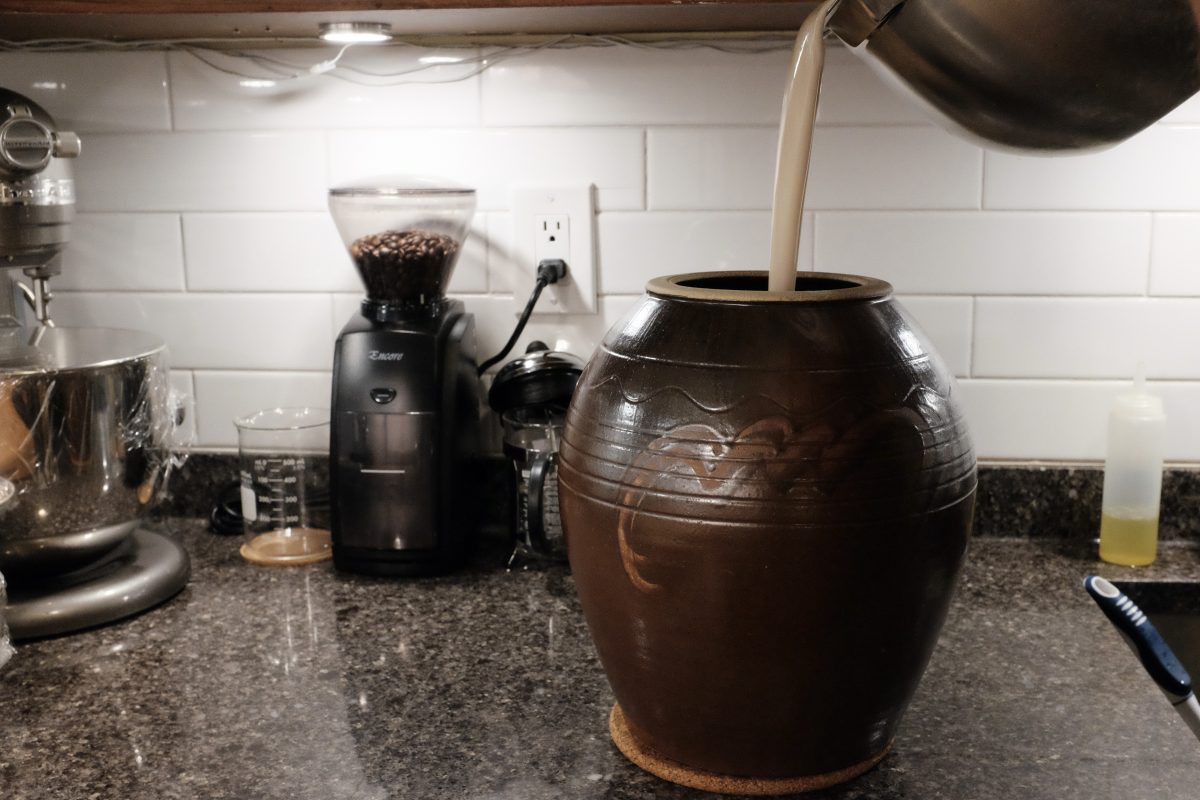
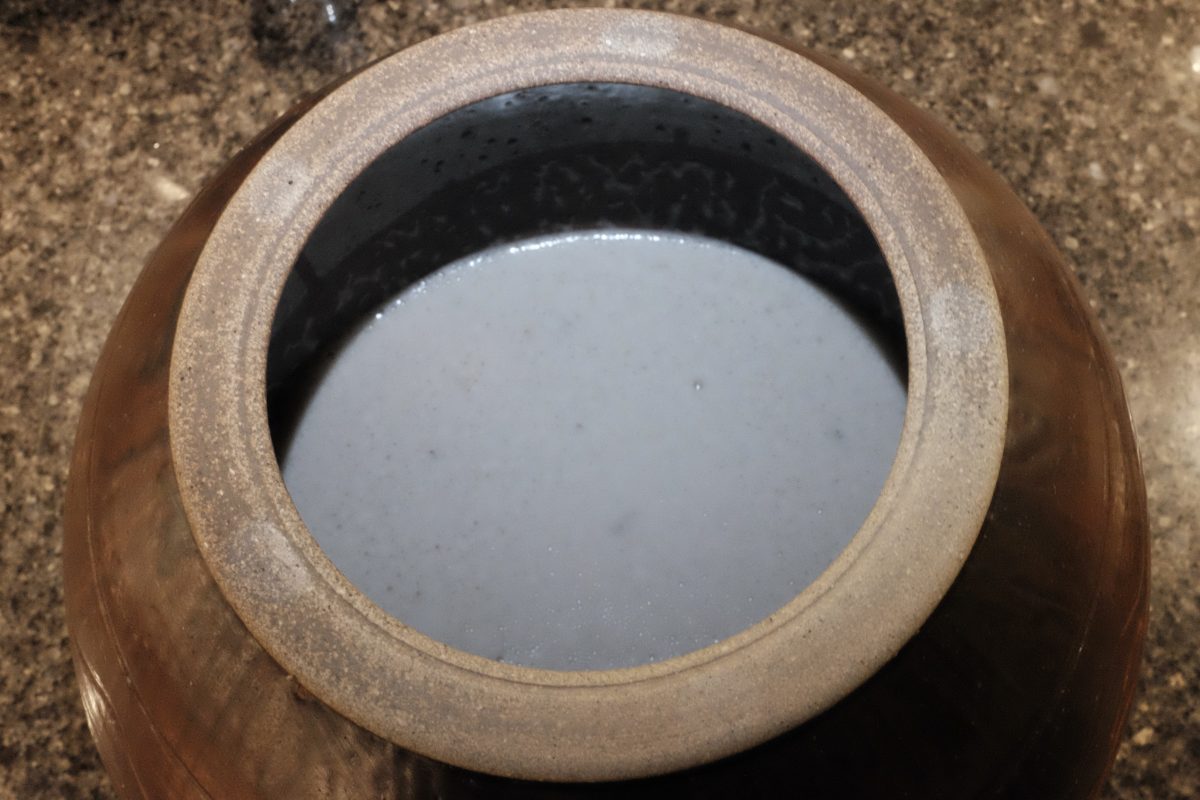
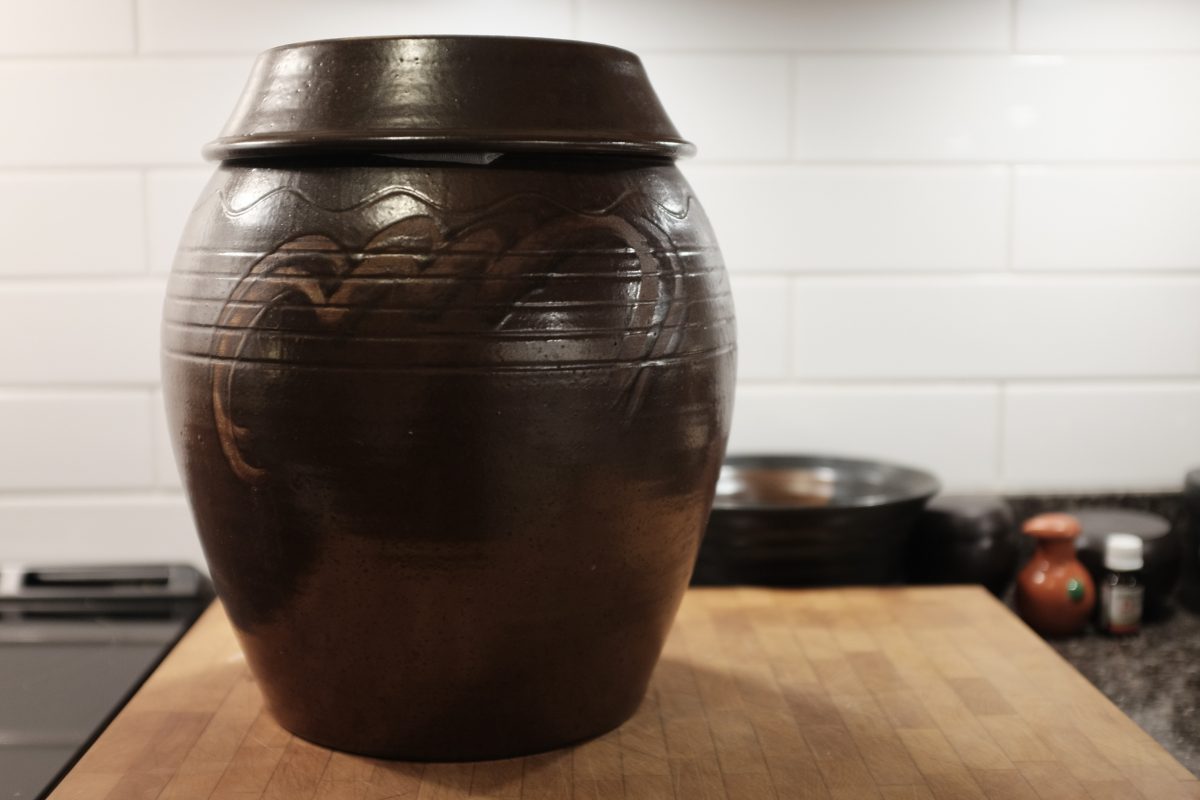
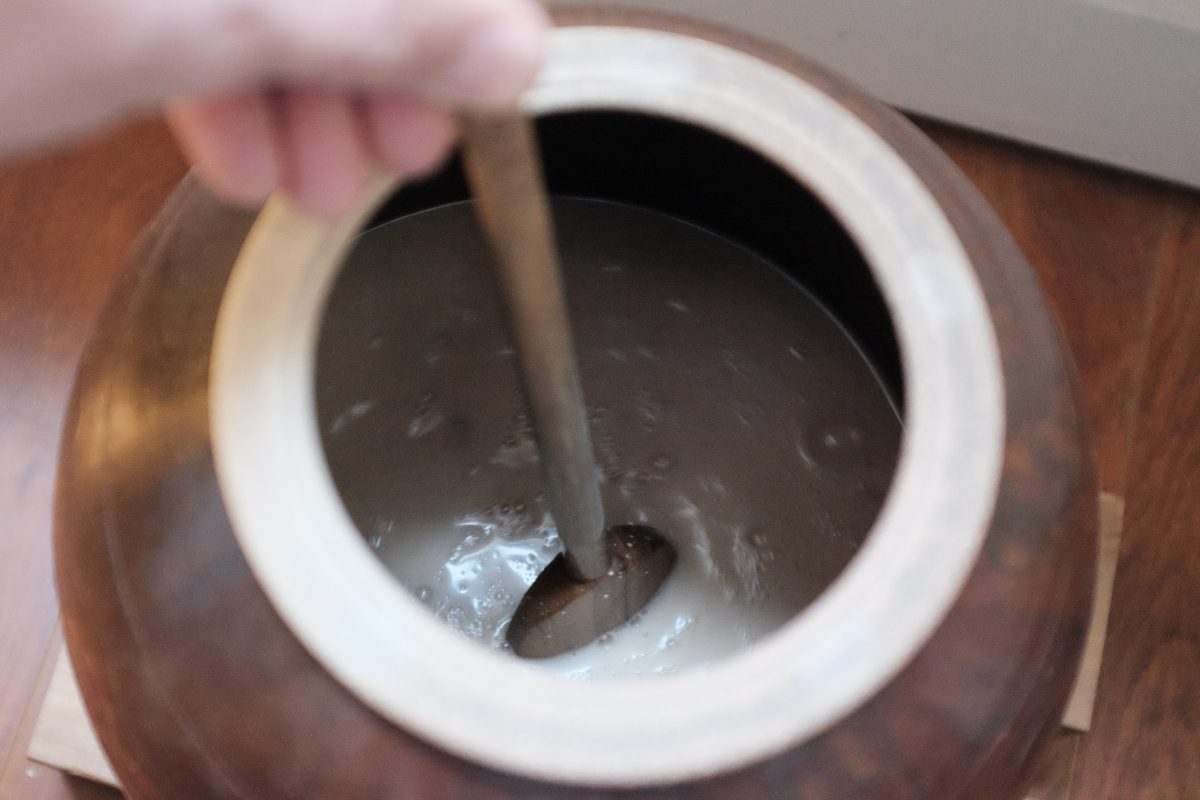
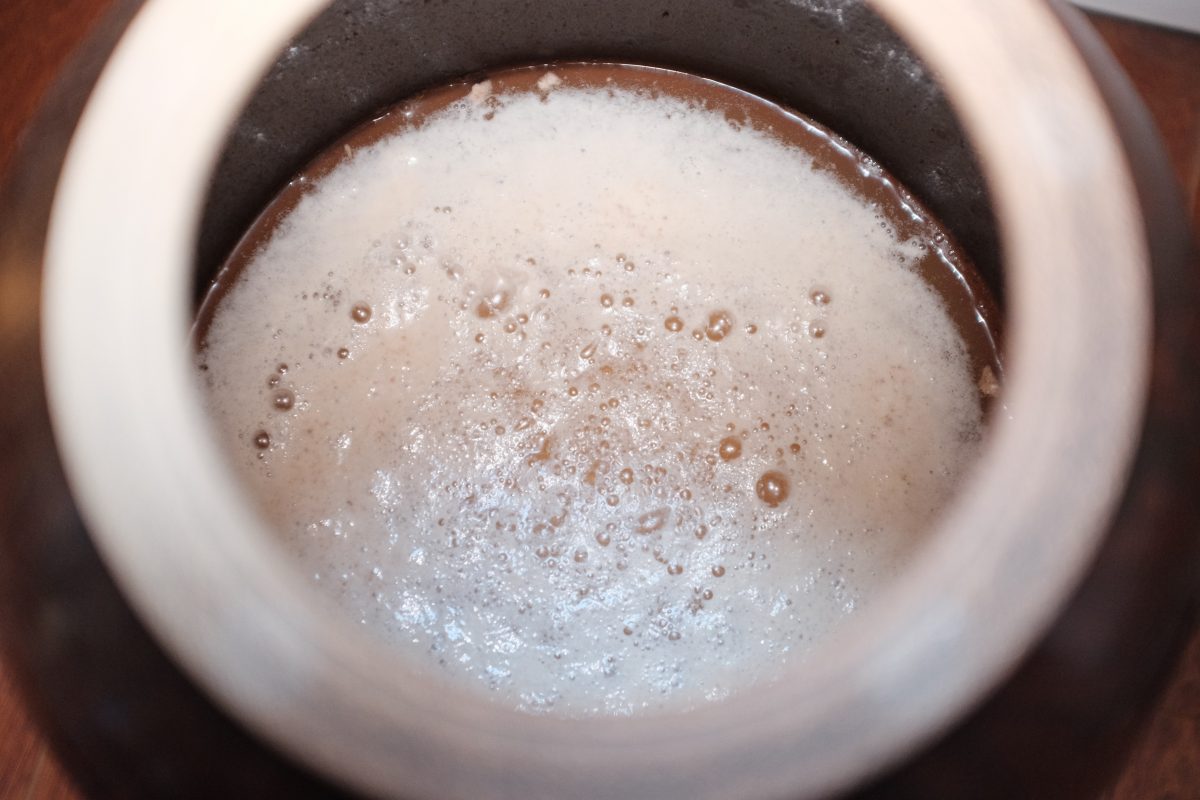
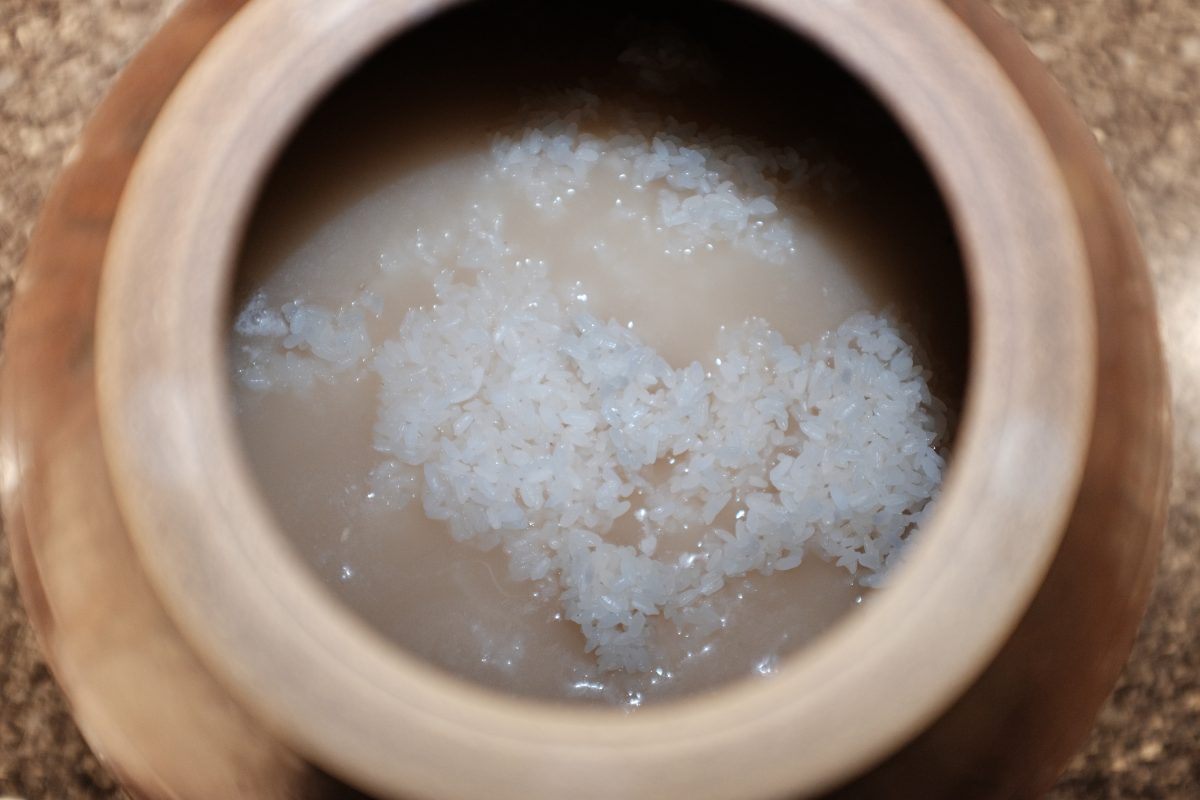
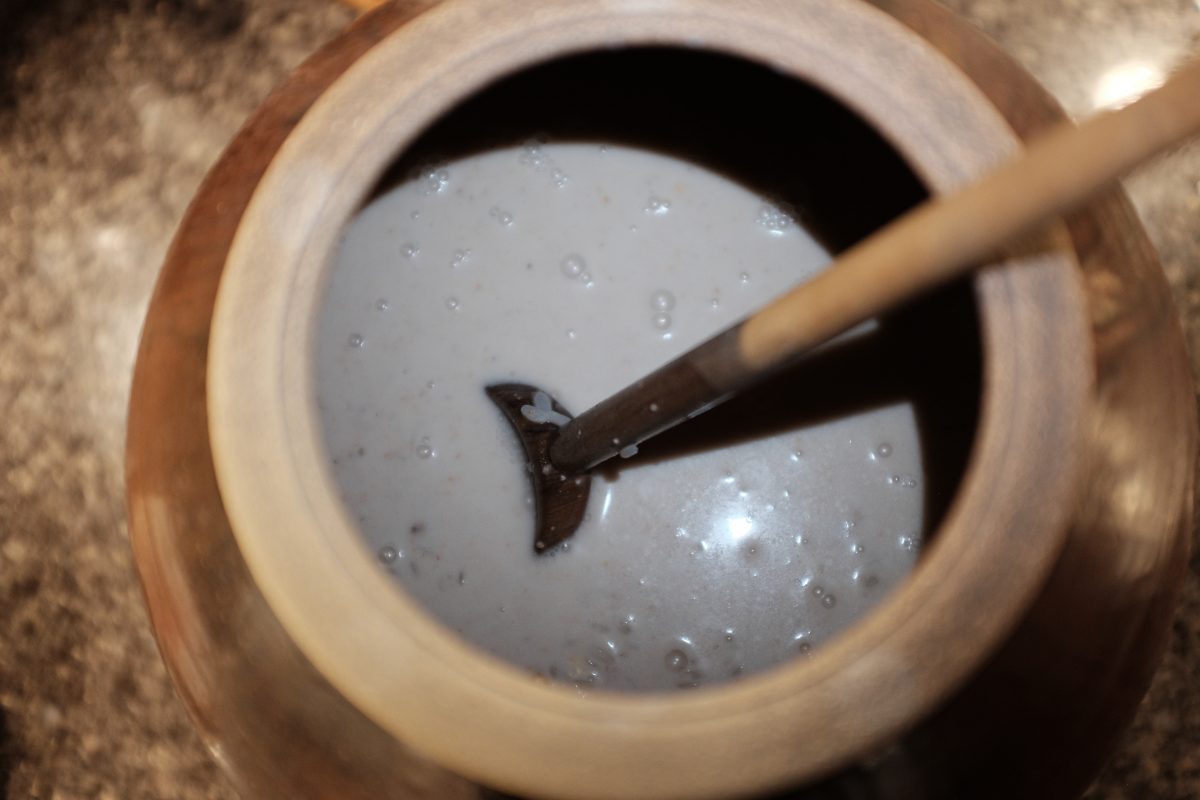
Transfer the juk to a clean bowl and let it cool down to room temperature (no hotter than 25 celsius). Stir it from time to time to release some heat from the centre. This takes a long time, maybe a few hours. You can speed this up by putting the bowl into an ice bath and stirring until it cools.While the juk is cooling, weigh out 250 grams of nuruk.Add 250 ml of spring water and allow it to hydrate. At this point, give the nuruk a good sniff. I think it smells like a dusty antique book that was abandoned in a damp basement for years. If you get any other interesting impressions, please leave them in the comments.In this picture I am sanitizing a clay onggi jar with steam. I have these jars around so that’s what I use. Most people will use a glass jar instead (8-10 litre/2 gallon capacity). Whichever container you use, make sure to wash and sanitize it by steaming, boiling or using a food safe brewers sanitizer like Star-san. We are looking to sanitize not sterilize so filling your container with boiling water and letting it sit for 10-15 minutes is fine.Once the juk cools to room temp (25C or below), combine it with the hydrated nuruk in a clean bowl.Mix very well. If you stir long enough, the thick juk will eventually become more liquid making it easier to pour into your container. This can take 5-10 minutes of stirring.Pour all of the mixture into your sanitized container.It will rest in here for the next few days as the first stage of fermentation gets under way.I like these clay jars because they don’t allow any light inside. I can keep them anywhere. If you are using a glass jar, try to keep it somewhere dark or cover it with a towel. The yeast and bacteria are happier away from light. IMPORTANT: place your container somewhere where the temperature is between 20 and 25 celsius. Higher temperatures can result in very fast fermentation and unwanted flavours. Room temperature or a little cooler is ideal. This ferment also needs air so, cover the top of your container with some cloth and seal it with an elastic band to keep out insects and dust. Do not put on a tight lid.I found this cover at a Korean supermarket. It looks like a mesh shower cap made specifically to fit these jars. Any piece of fabric or towel sealed with an elastic band works just as well.Twice a day, open up the container and give it a good stir, making sure to get all the sludge in the bottom mixed in.There will probably be a little raft of bubbles starting a day or so into the ferment. These are the first signs of life.This is after around 2.5 days. My brew is very active with lots of bubbles and a strong sweet scent. I dropped a microphone over the edge and put the cover back on and made a recording. The field recorder and mics are sensitive so they pick up every pop and fizz.This is the sound of a very active ferment. It sounds almost like running water or something frying in a pan. This level of activity means this needs a little more time. Once it settles down, you can plan to start Stage 2.This is a day later, about 3.5 days in to Stage 1. You can hear that the activity has slowed down quite a bit compared to the first sound file with just a little fizzing and popping. It is now ready for Stage 2.
Stage 2:
In this stage we will wash, soak, drain, steam and cool our 2kg of sweet rice. And, afterwards, we will add it to our fermenting container.
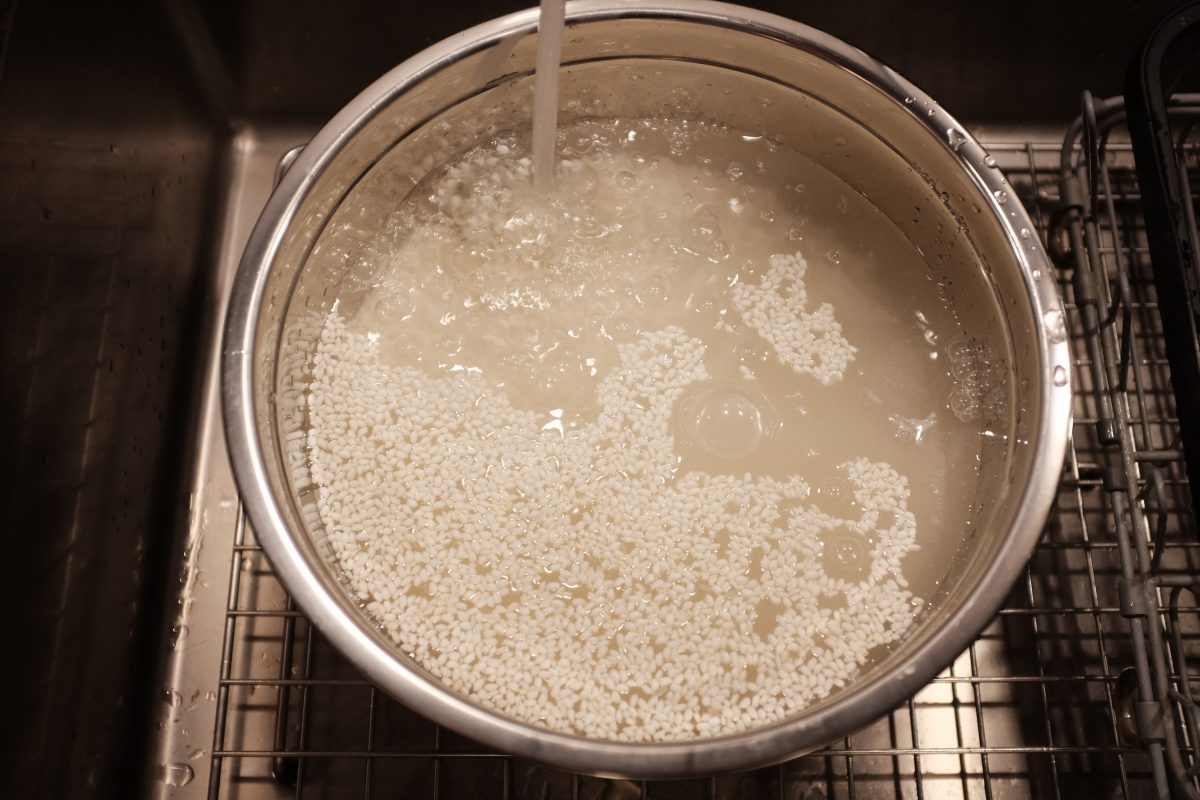
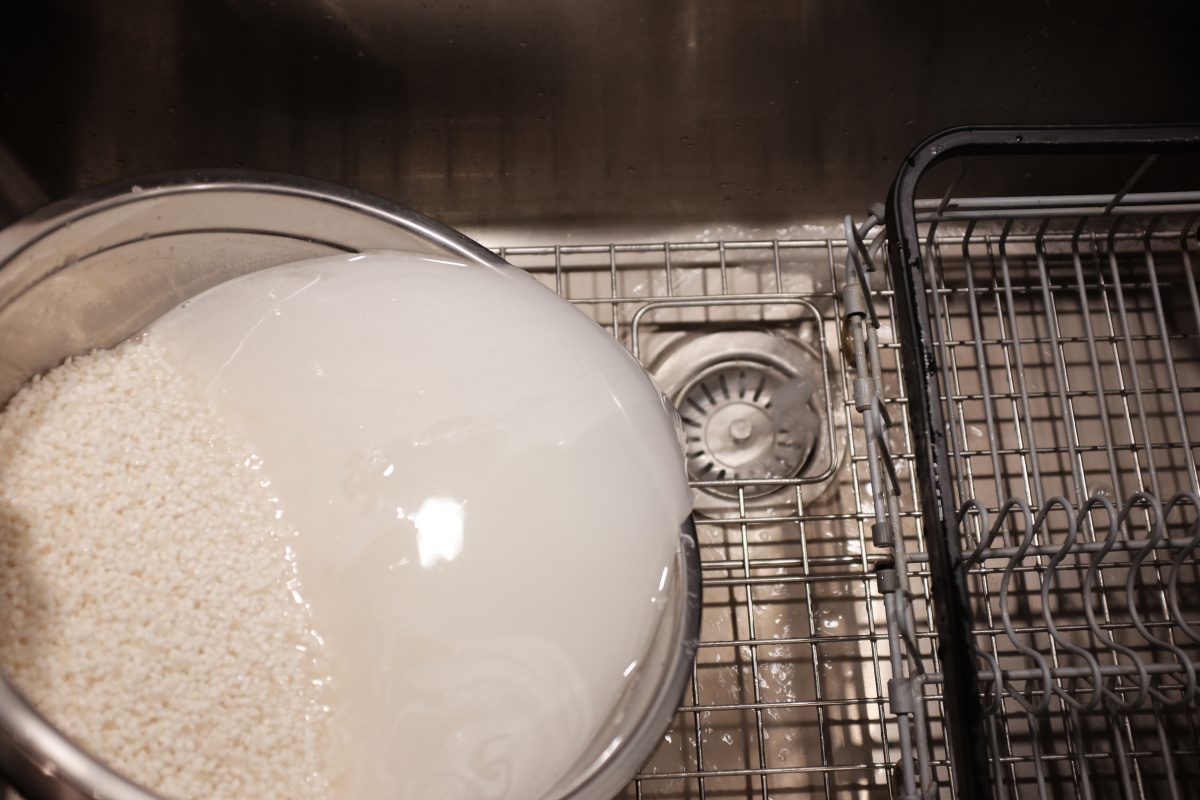
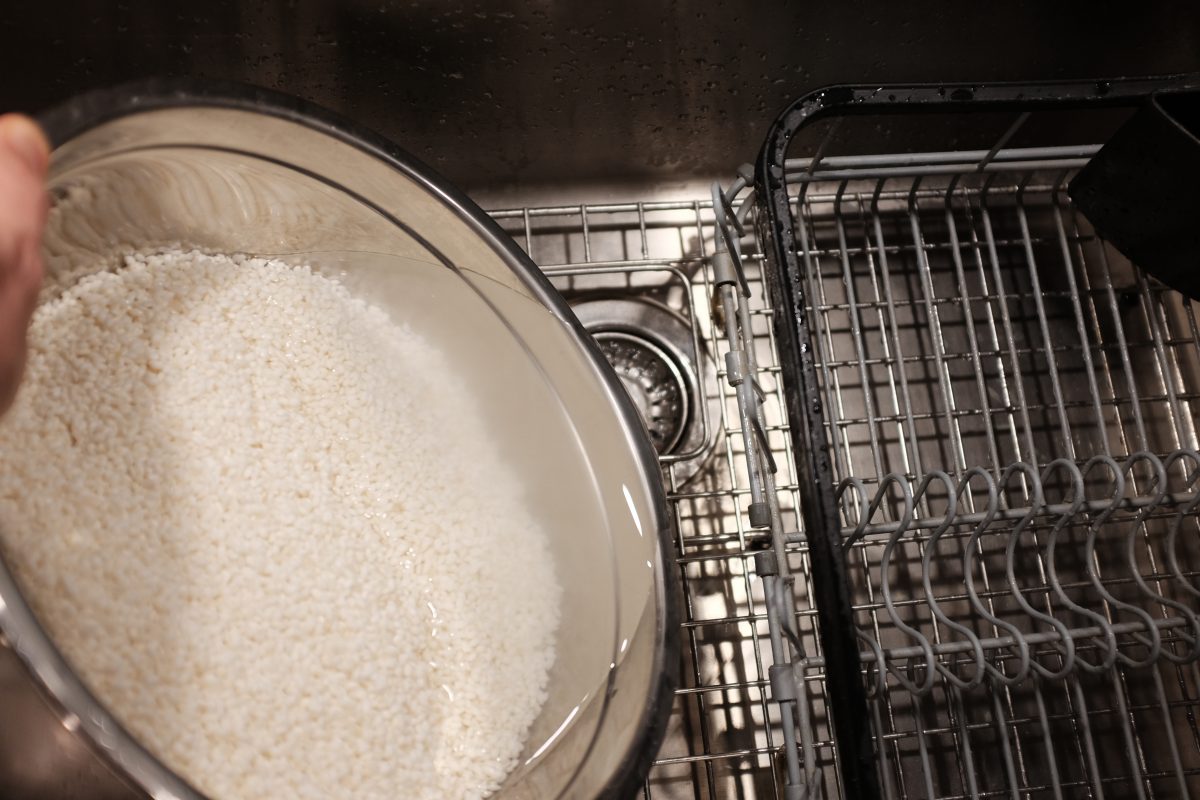
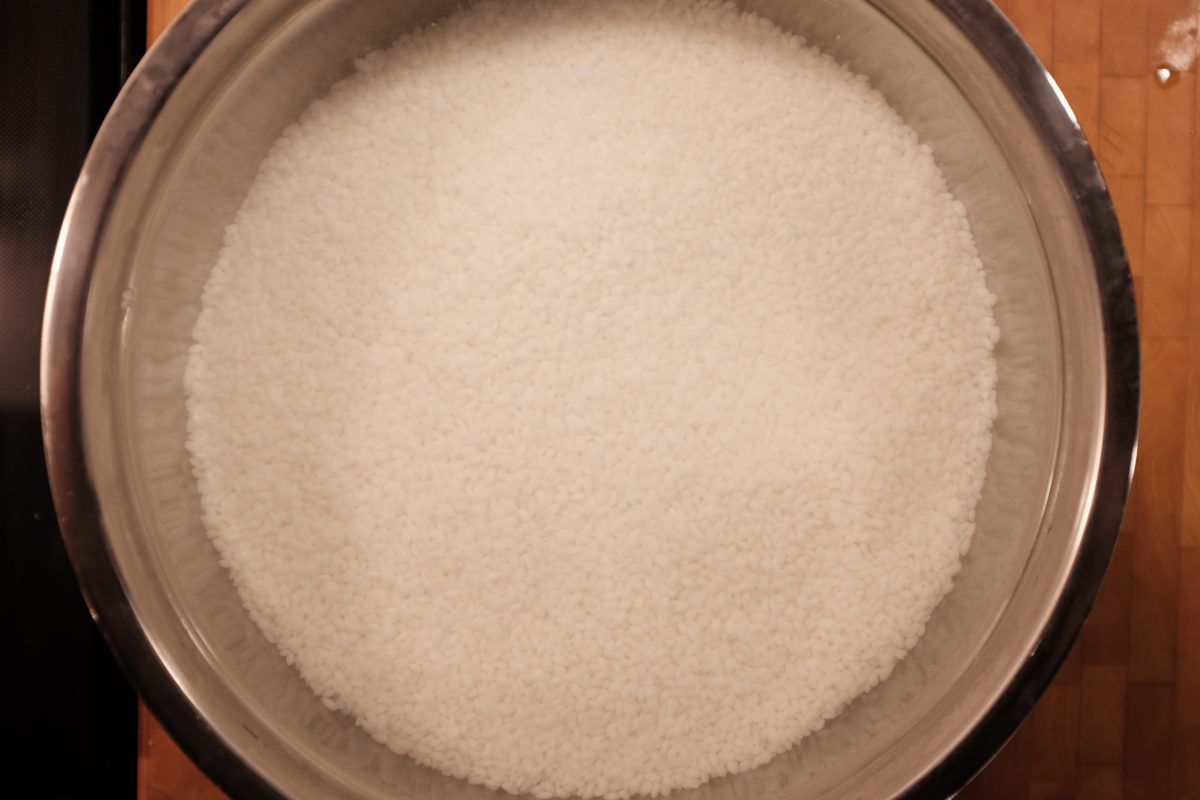
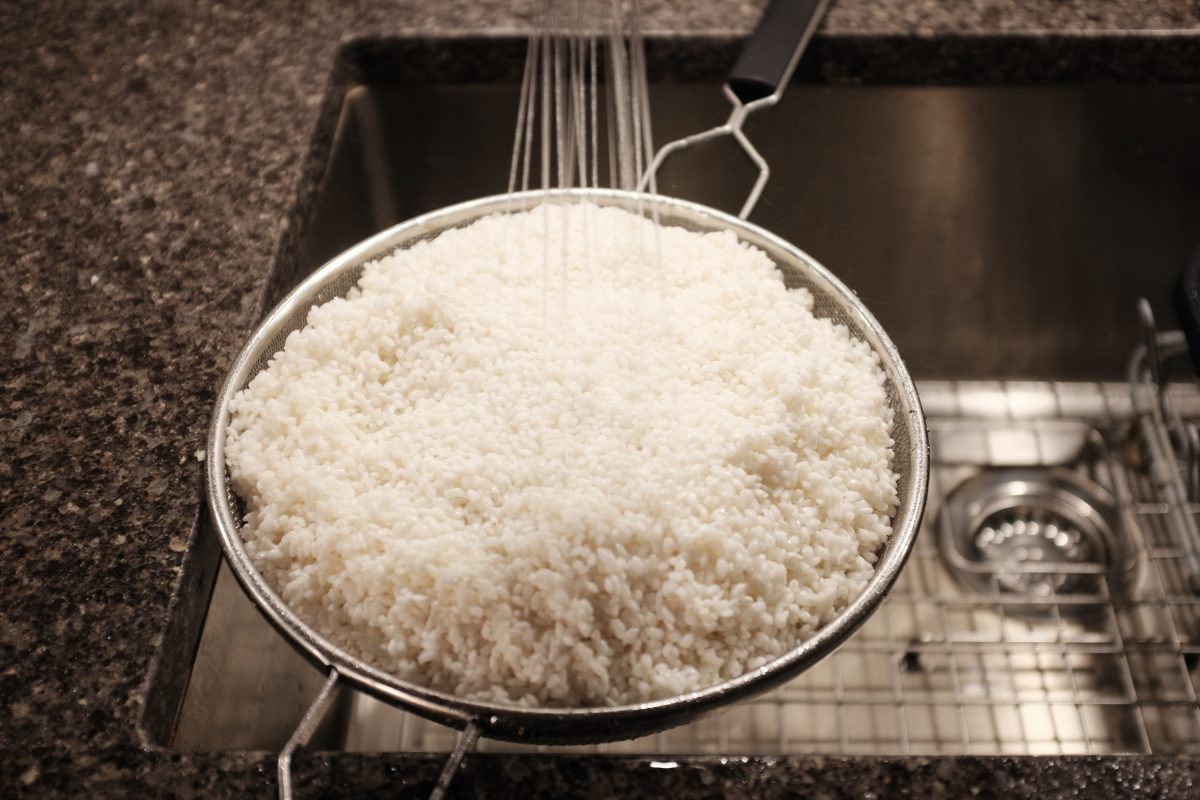
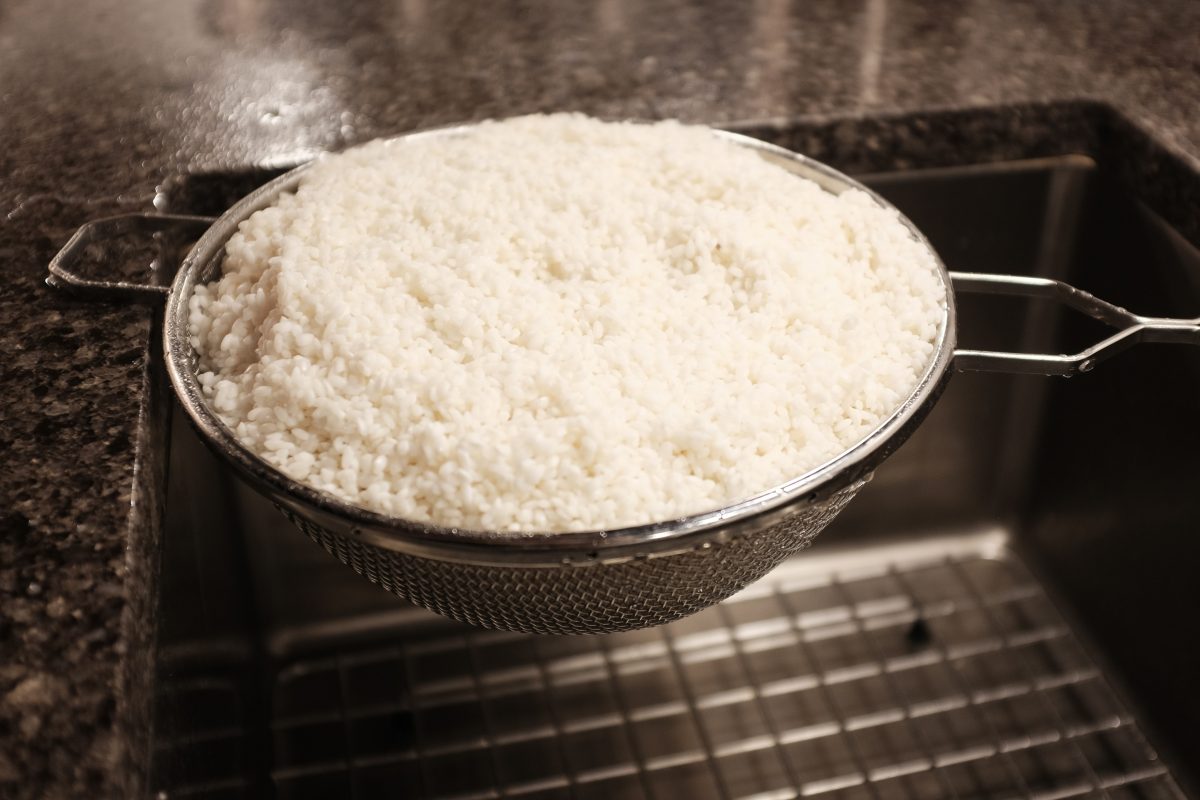
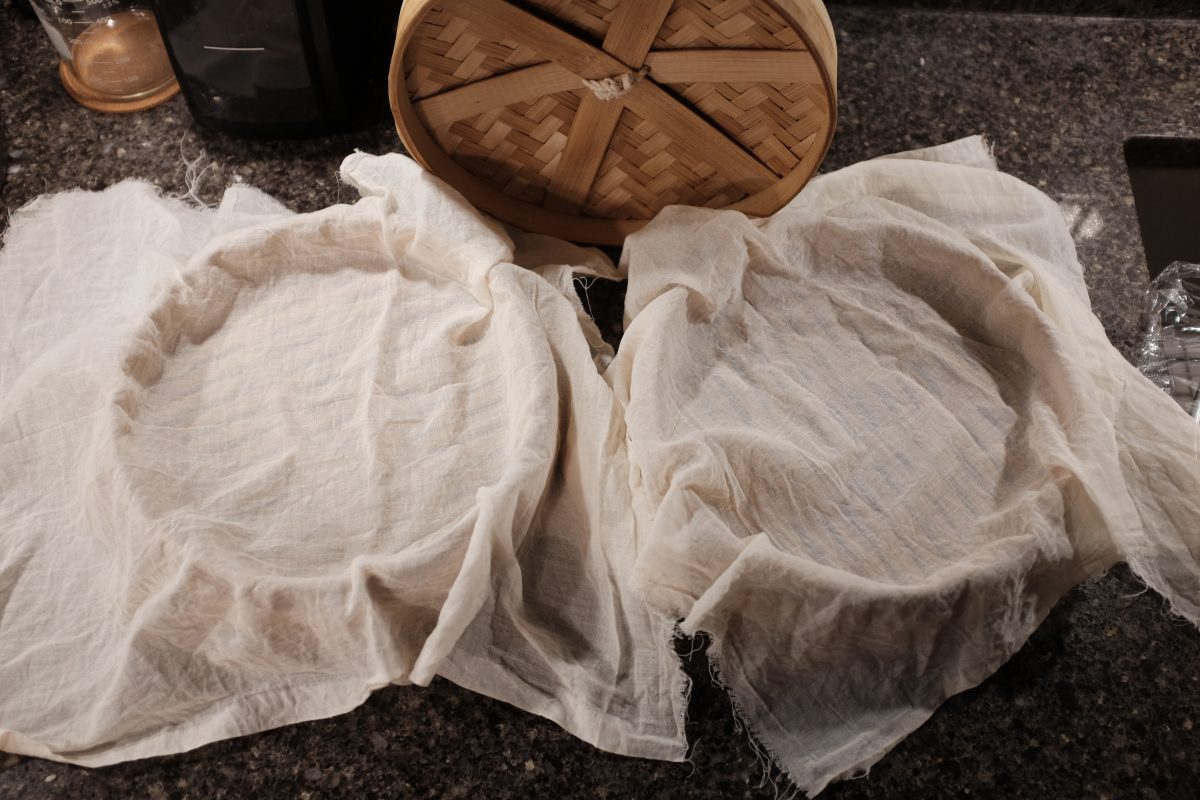
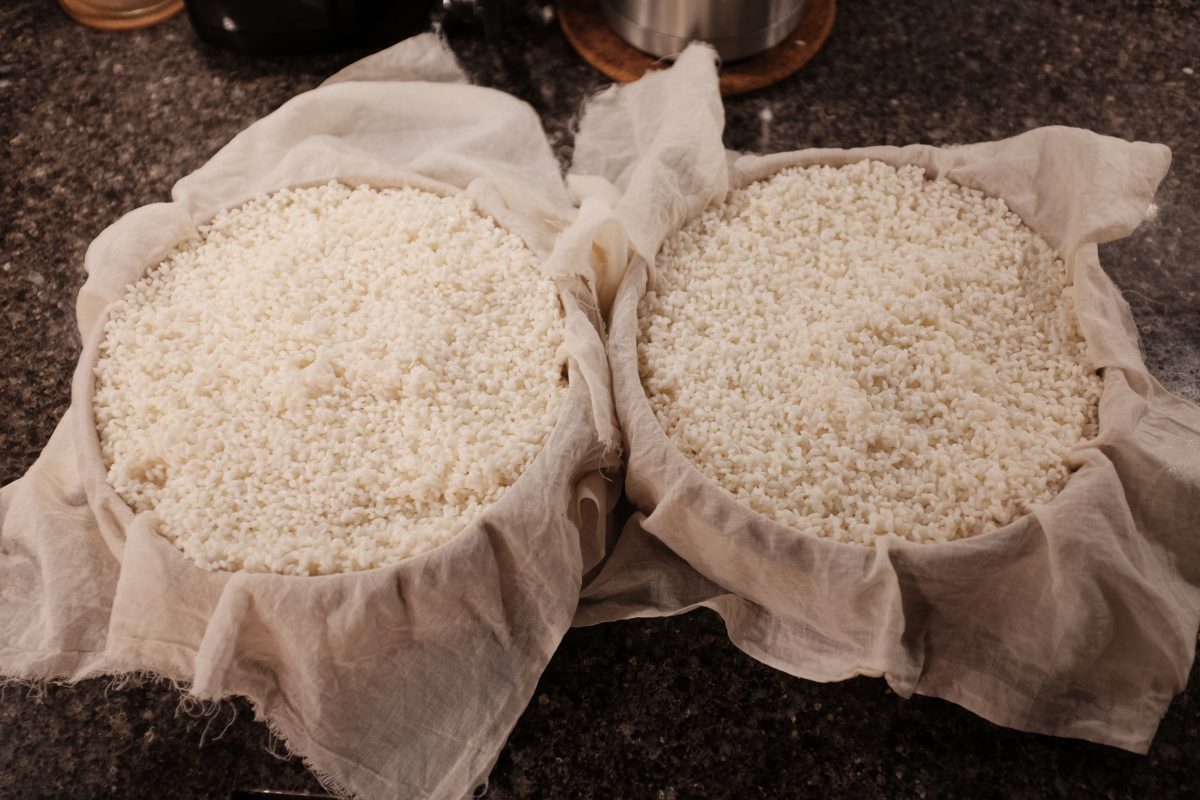
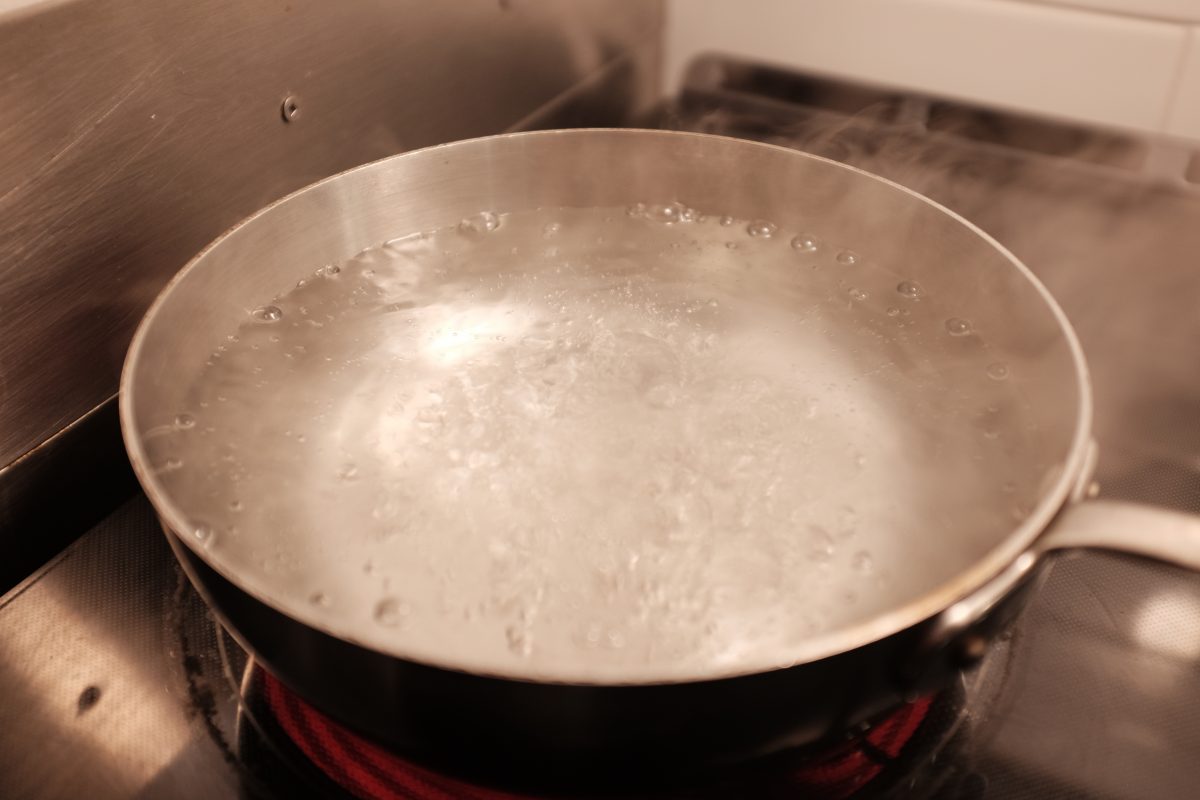
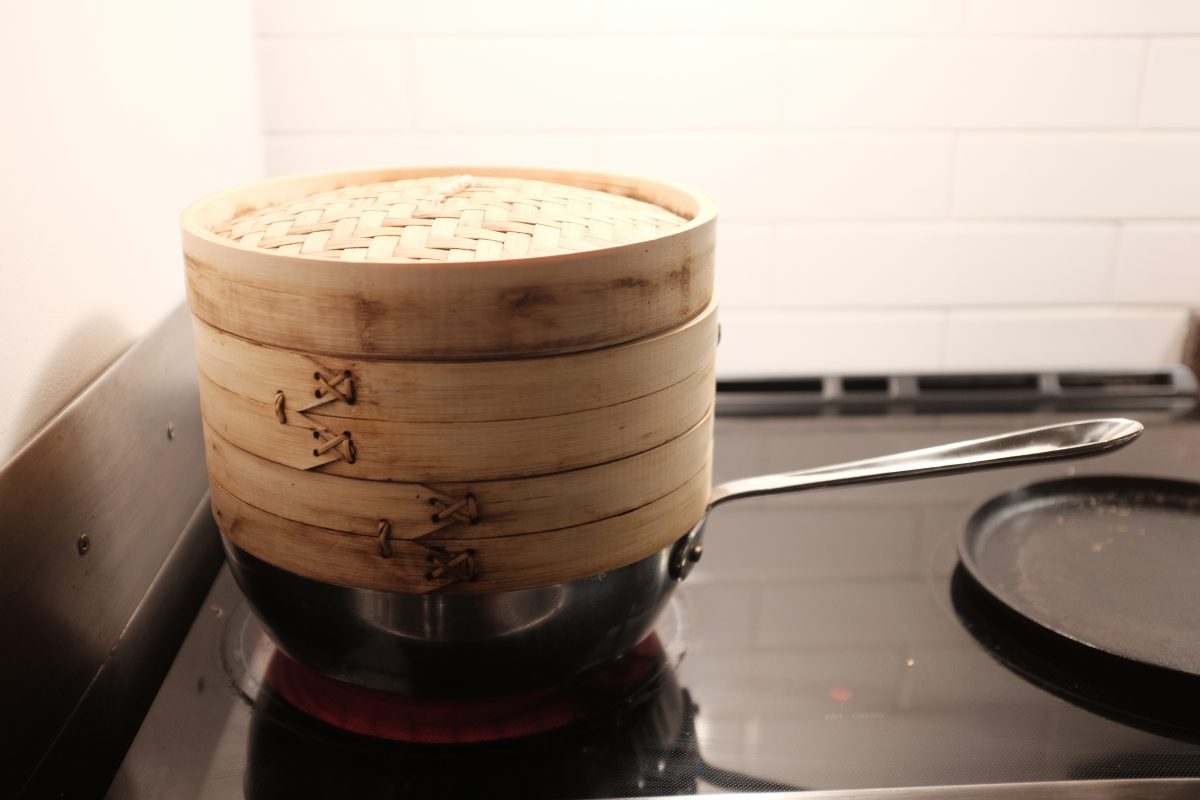
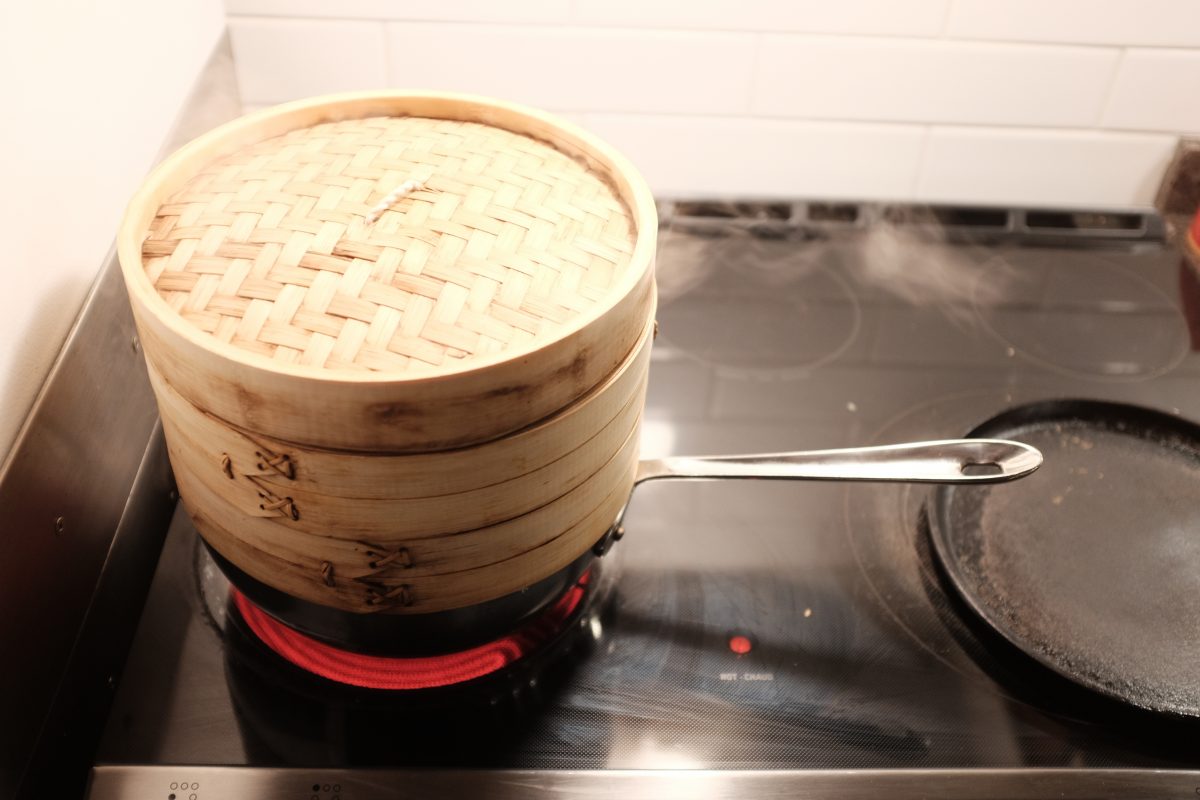
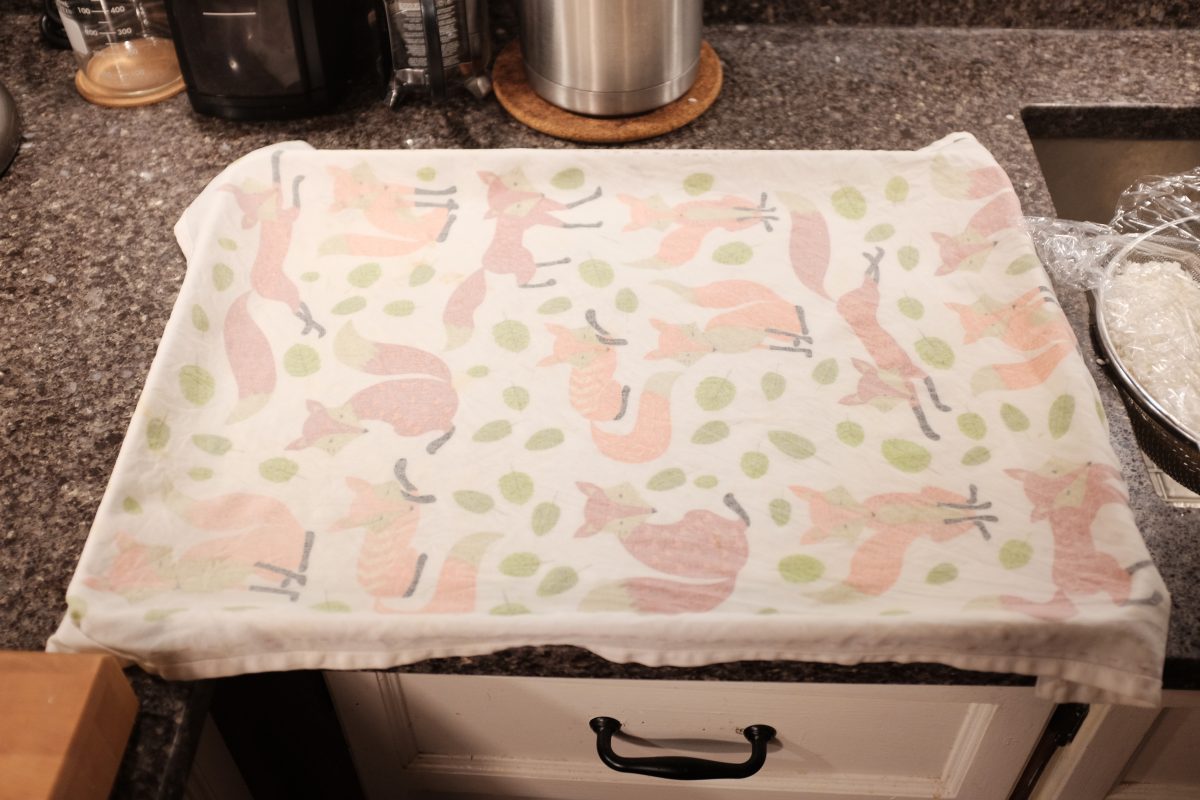
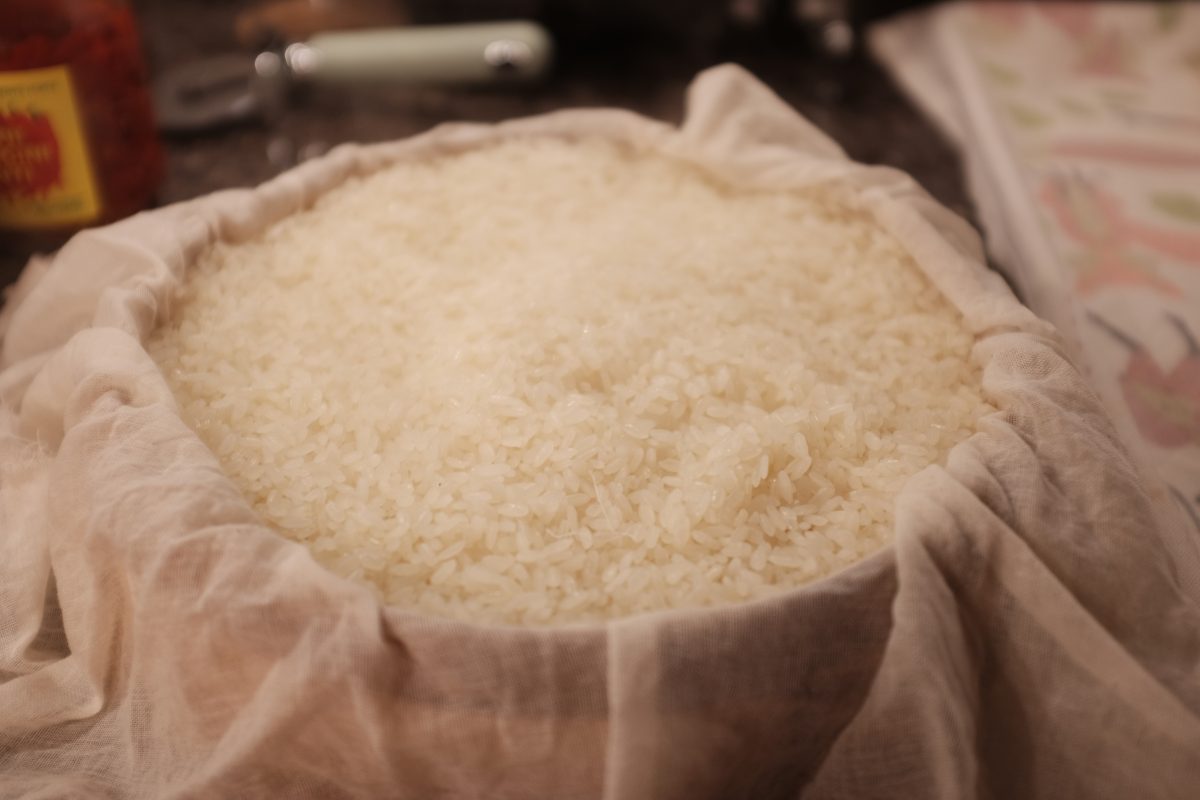
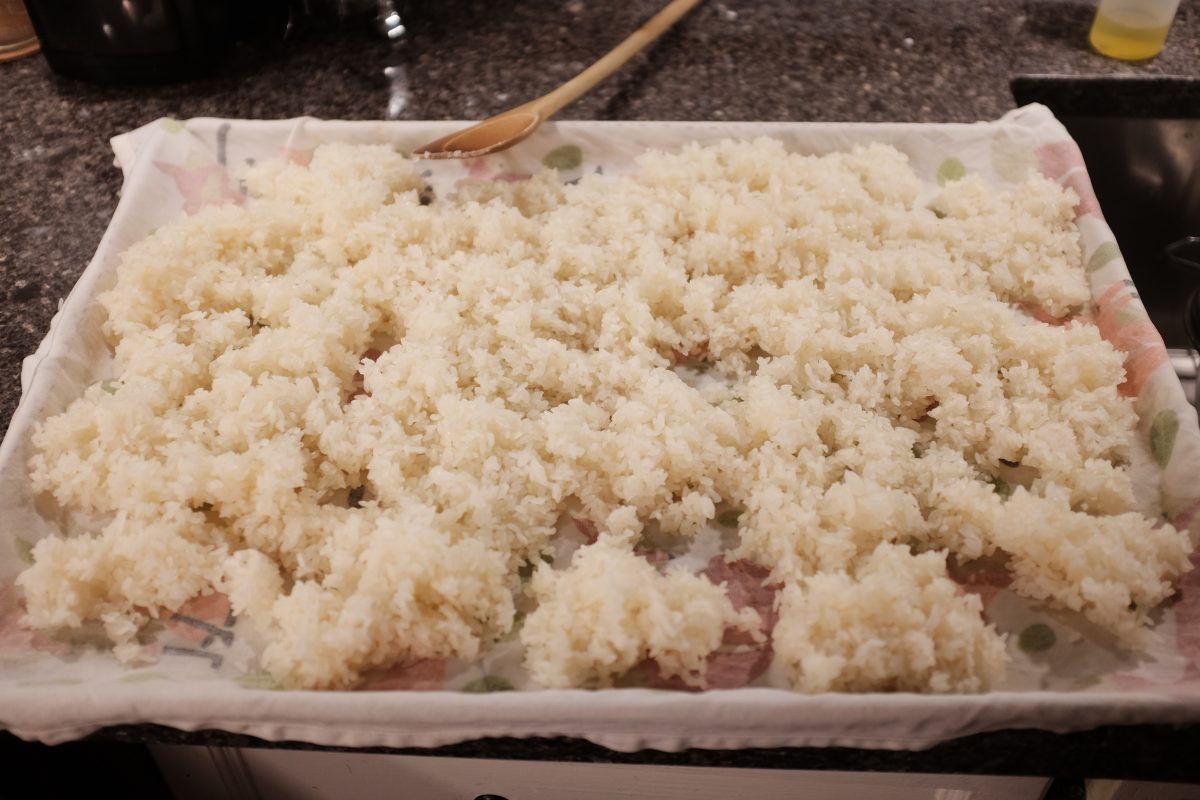
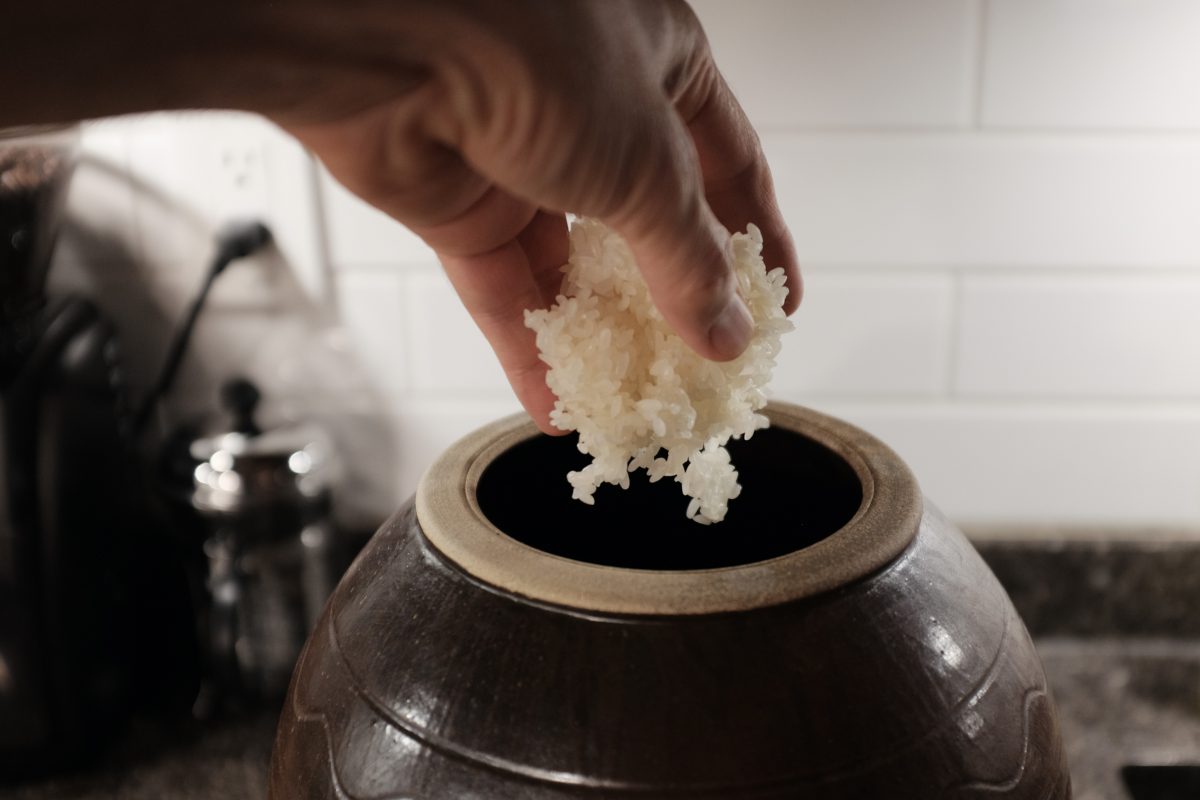
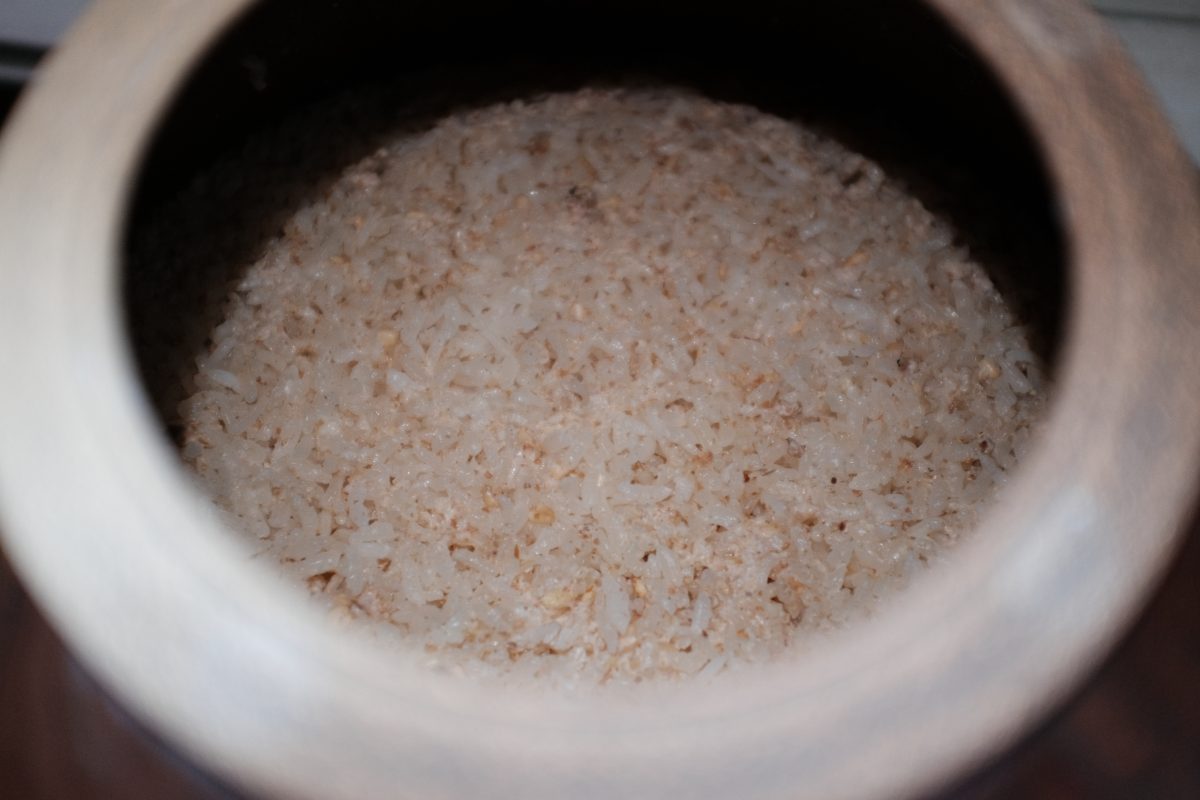
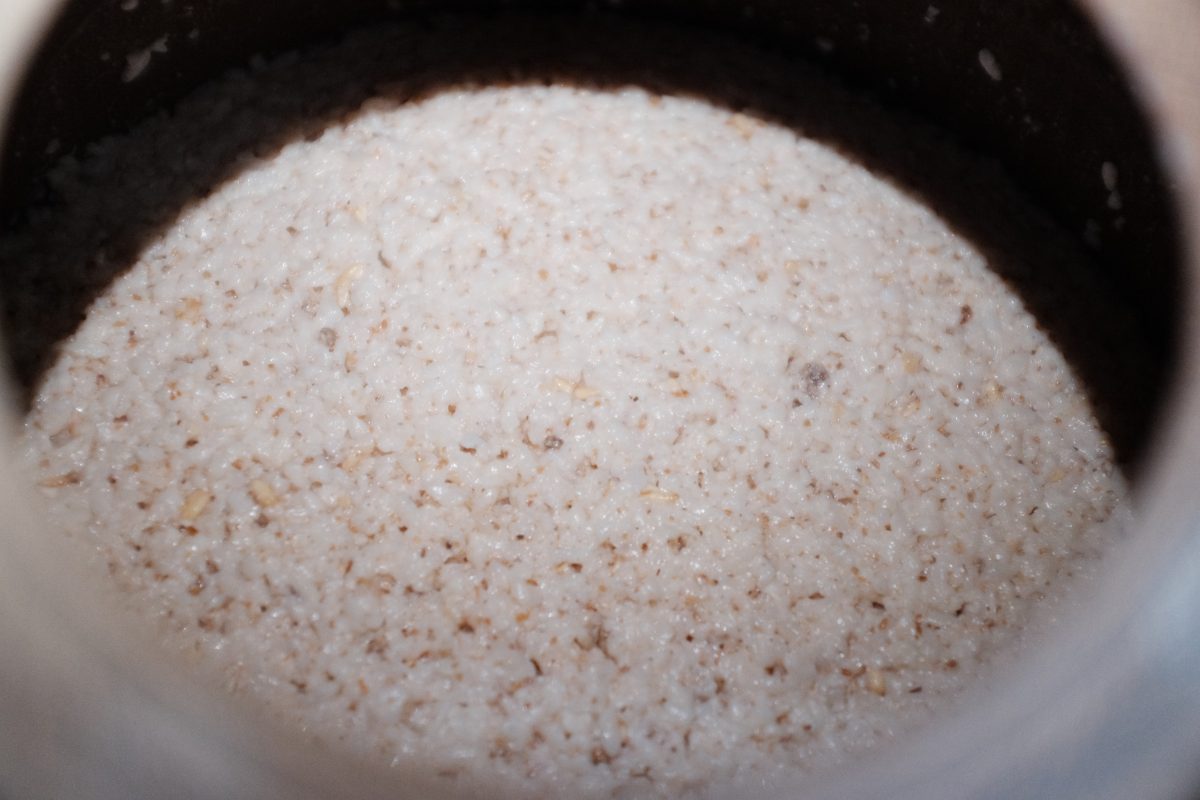
Place all the rice in a large bowl and fill it with fresh cold water.Wash the rice by hand. Be gentle here. Try not to crush the rice or grind the grains too much. Just gently swish it around with an open hand from bottom to top.You will likely need to wash the rice at least 10 times. Mix it with lots of fresh water, dump out most of water, refill with fresh water and repeat…The goal is to wash it until the water is mostly (like 80%) clear. The first few washes will be very cloudy like this one and then gradually it will clear up with each wash.I washed my rice 12 times and this is the last drain. You can see that it is much clearer than the above picture but there is still a little sediment. This is fine.Cover the washed rice with fresh water and let it soak for at least 3 hours at room temperature.After soaking for 3 hours, drain the rice into a big strainer or colander. Rinse it with fresh cold water.Let it drain for around an hour. It will still be damp but not dripping wet.Prepare your steamer. I will use this double deck bamboo steamer.Whichever steamer you use, line the baskets with a large square of clean fabric or cheesecloth.Fill with rice. For best steaming, don’t pack them tight right to the top. The rice and steam need a little space to cook properly. Fold over the cloth to cover the rice.Bring water to a full hard boil before putting the steamer over it.Once the water is rolling, cover with the steamer. If all the rice fits in a single steam basket (bigger than mine), set a timer for 40 minutes and let it steam hard. Make sure to start with enough water so that it doesn’t boil dry or check half way through and top it up. If your steamer has 2 decks like mine, set a timer for 20 minutes. After 20 minutes, switch the top and bottom trays and set a timer for the remaining 20 minutes. Switching the trays will make sure the top and bottom rice steams evenly.While the rice is steaming, prepare a cooling tray by lining it with a fuzz-free towel or cloth. Wet the cloth in water and squeeze it out as hard as you can so that it is just damp not wet. This will keep the cooling rice from sticking to it. I am using a baking sheet covered with a linen tea towel.After 40 minutes, remove the basket(s) from the steamer. The rice should be cooked but dry. It will be translucent and have a bouncy texture when you chew it. Korean brewers call this steamed rice “godubap”. It will fuel the fermentation for Stage 2.Empty the the steaming baskets onto the tray and spread the rice out to cool to room temperature. This will happen pretty quickly, 10-15 minutes. Rice will stick to the rice basket cloths..do your best to pick it off by hand but don’t worry if you can’t get it every grain. The rice should not stick to your damp towel cooling tray.When the rice has cooled to room temperature, add it to the fermenting container.It will seem very full and dry but over the next few days the rice will break down and start to liquefy as it ferments.Stir it very well, seal the top with cloth and elastic and return it to your cool and dark fermenting spot.
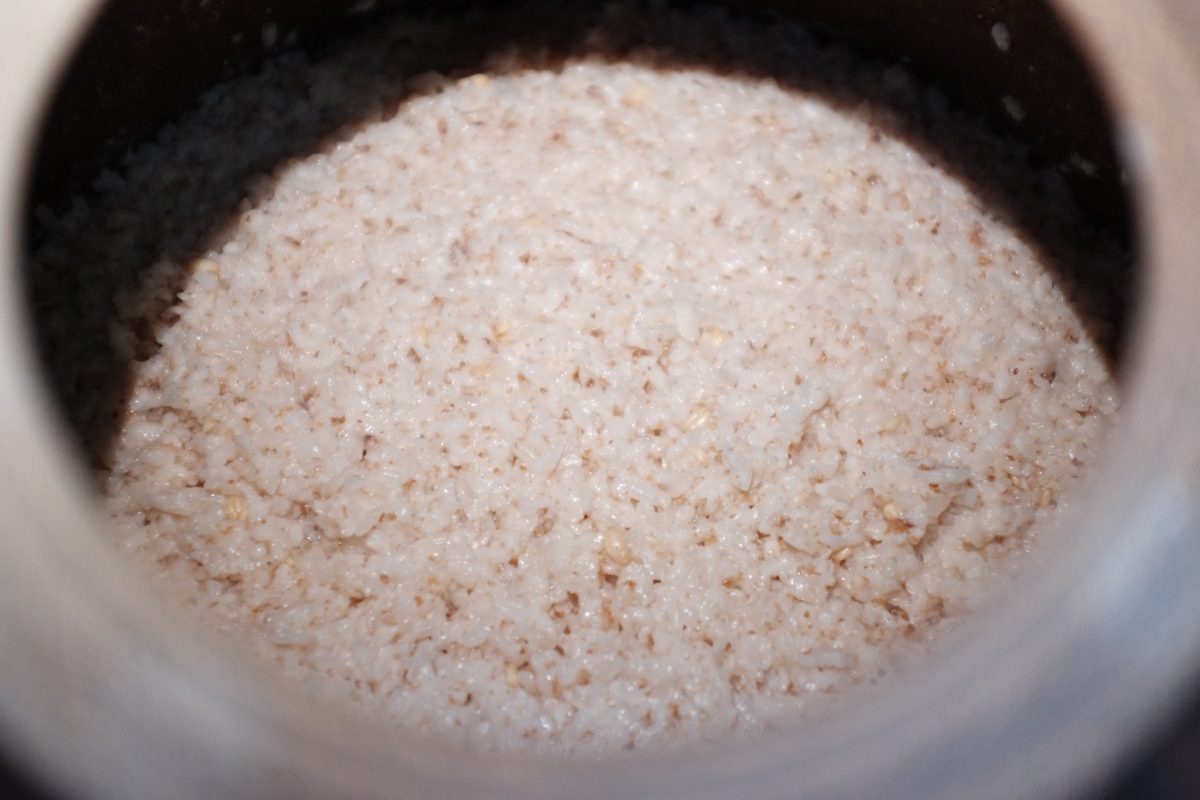
Stage 2, Day 1
The rice has absorbed almost all of the liquid. It looks just like a pile of cooked rice. Over the next few days, this will change as the rice gets broken down. Listen to this:It is bubbling and fizzing. Not as much as in the first stage but still sounds pretty active.It feels just like very wet cooked rice. Continue to stir twice a day…
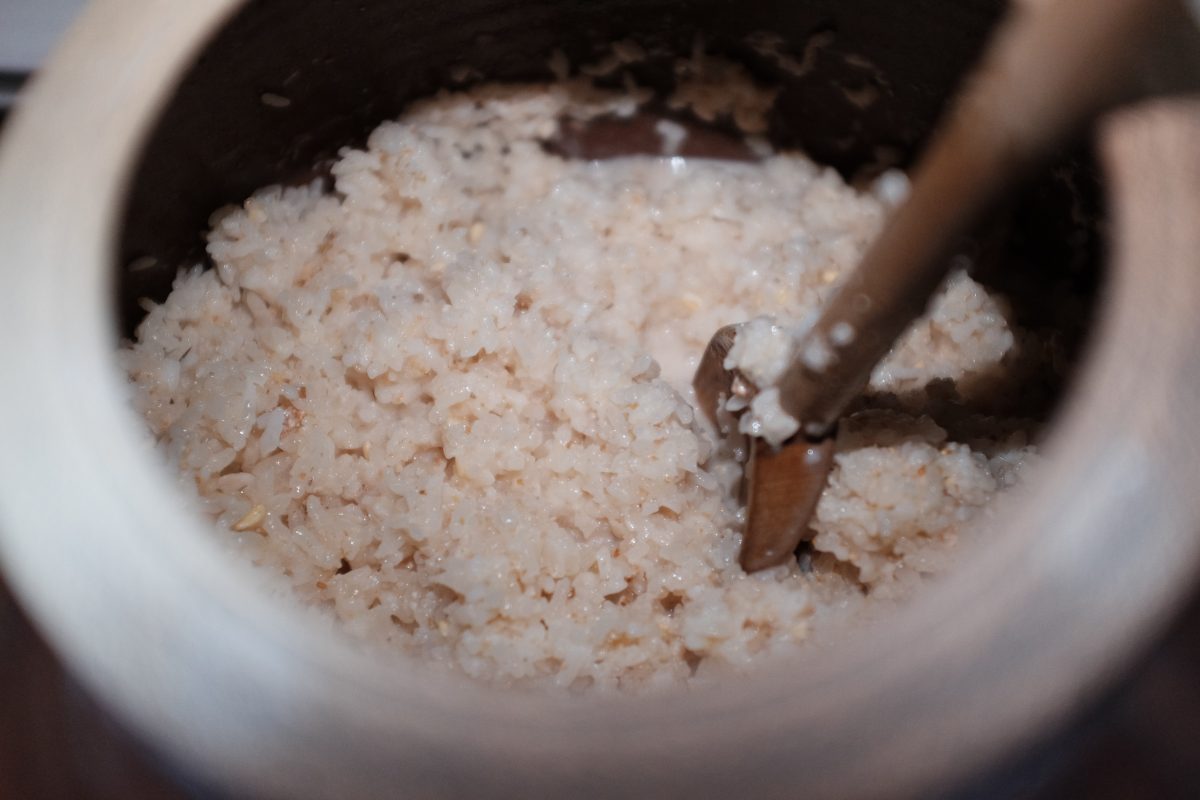
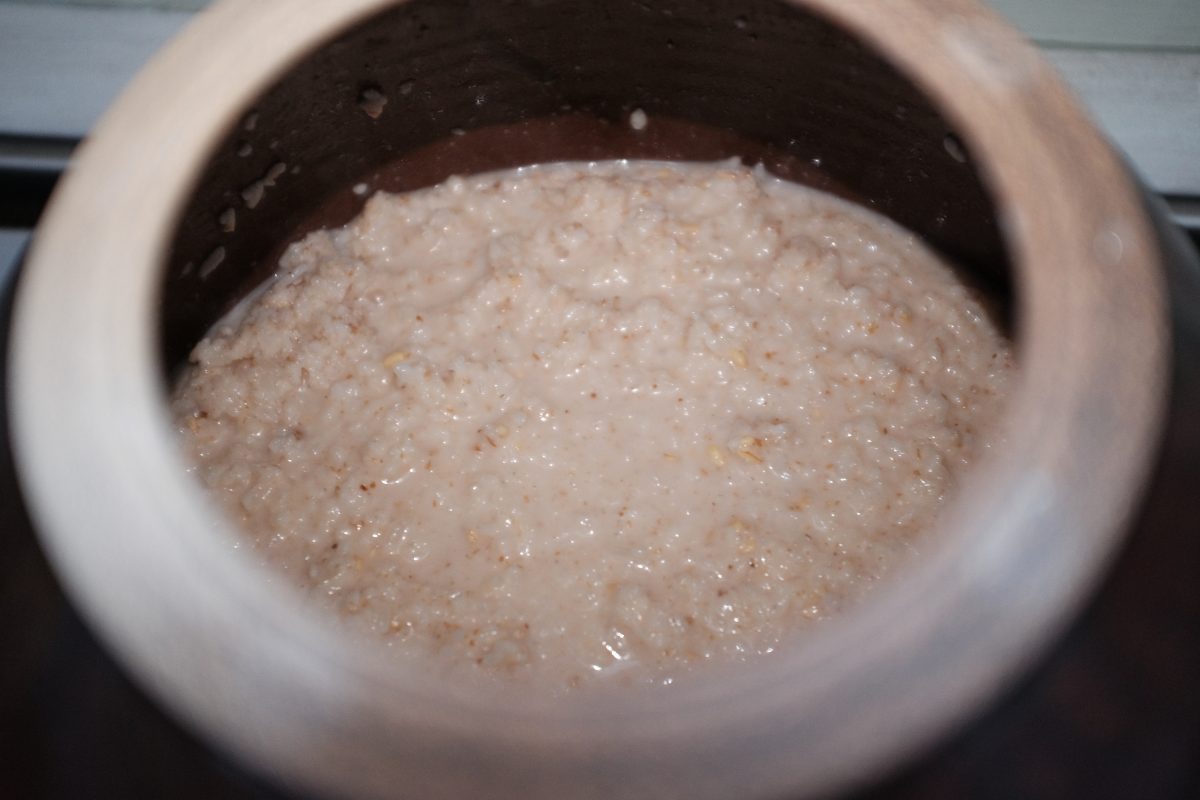
Stage 2, Day 2
The rice looks softer and wetter than the first day.After stirring, you can see how the rice is starting to breakdown and liquify. It looks like hot oatmeal.Moderate amount of bubbling…it has a thicker sound to it.
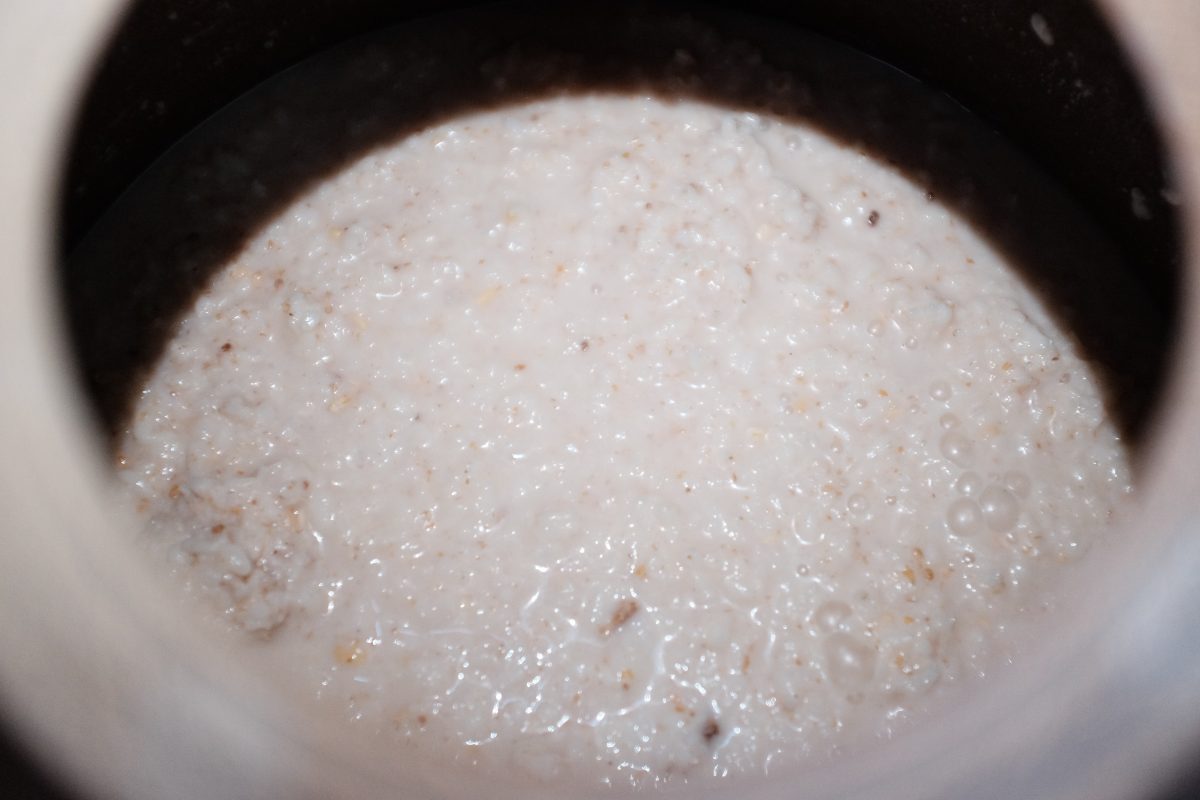
Stage 2, Day 3
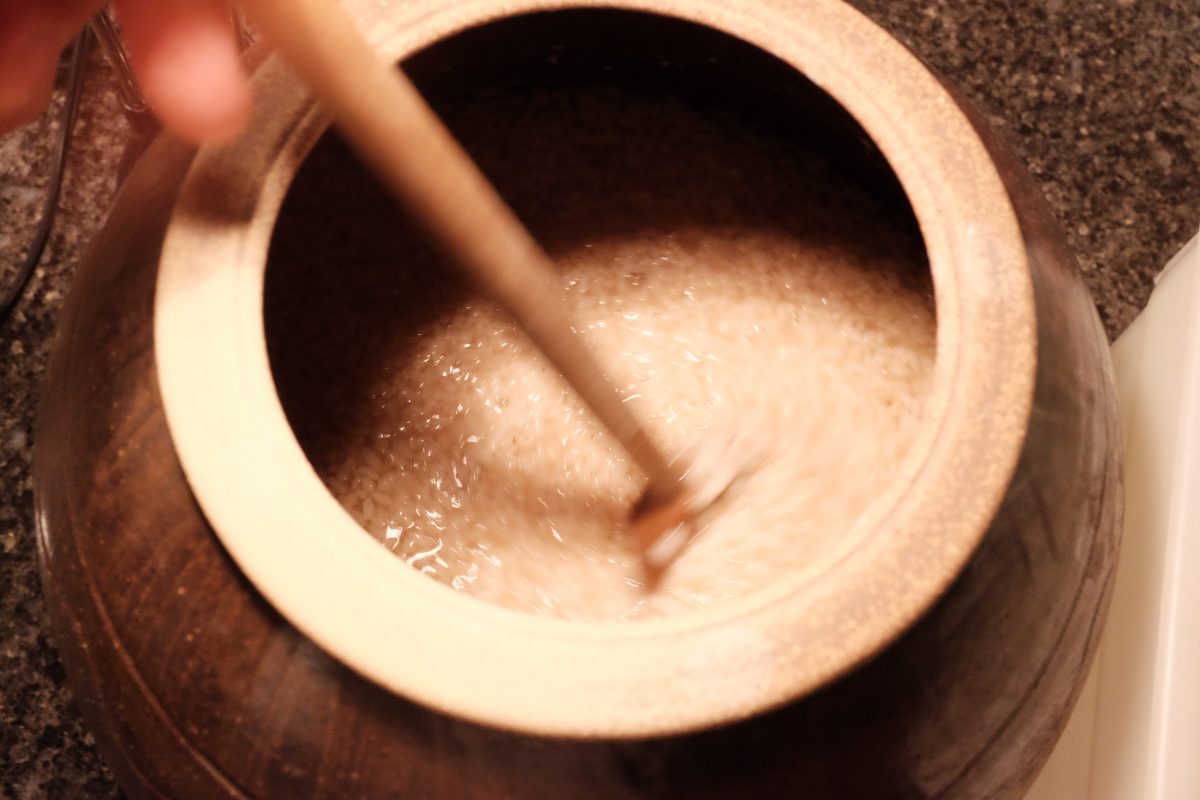
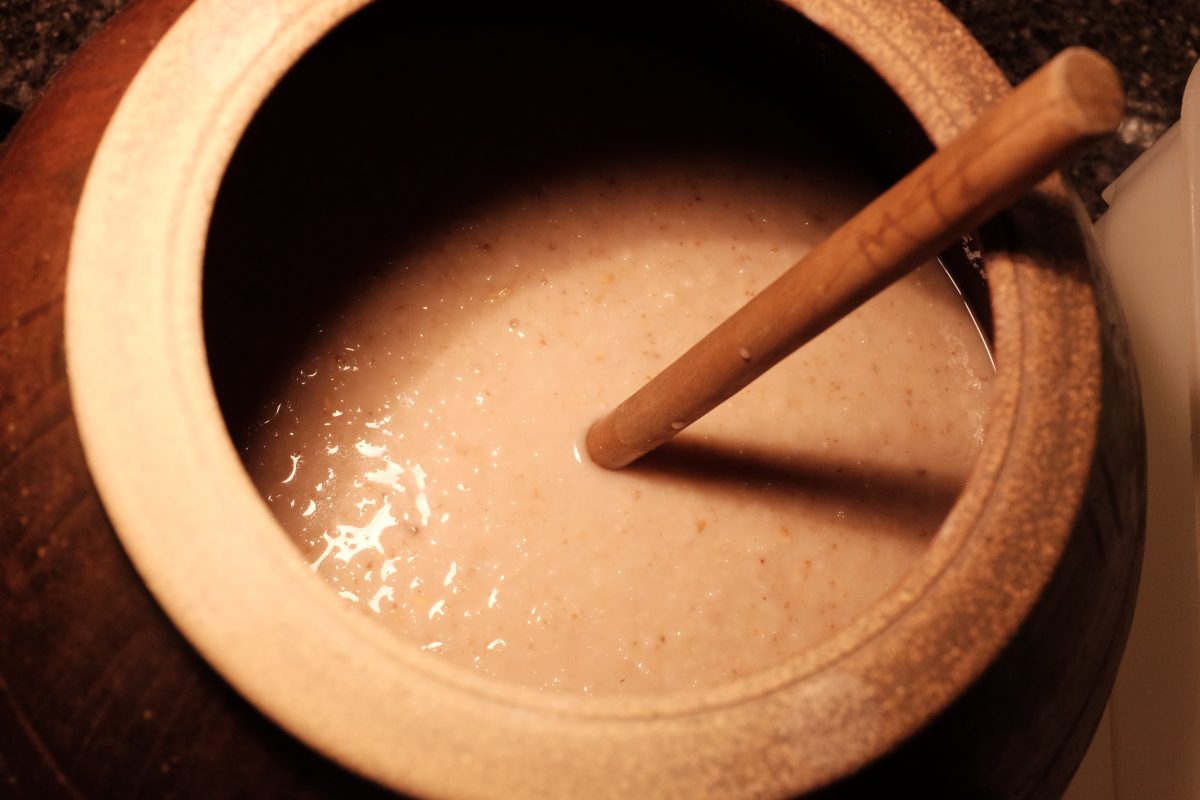
The rice is even more plump and wet. There is a somewhat thinner raft of rice on top and more liquid underneath.After stirring, it is obvious that the rice has broken down and there is more liquid than solid in the mix. This is the last time we will stir this brew. Clean up the sides up your container as much as possible above the brew. Use a rubber spatula or a damp cloth to give it a wipe. There is an alcohol smell now. I can also taste alcohol on the spoon after stirring.A steady moderate amount of bubbling.
Now we wait
For the next 2 to 3 weeks or so, open up the jar every few days and listen for activity and monitor any changes on the surface. Smell it and taste it for alcohol strength by sticking a spoon or chopstick into the mix.
The Match Test
By lowering a lit match into your container, you can get a visual cue for how much fermentation is going on. An actively fermenting brew will give off carbon dioxide. This will snuff a match quickly. The brew below is around 10 days into Stage 2. The match test shows that it is still actively producing CO2. The match goes out as soon as it gets past the rim of the jar. Eventually, as fermentation slows, you should be able to lower a match right to the surface without it going out.
This is just a fun measure of how active the fermentation is.
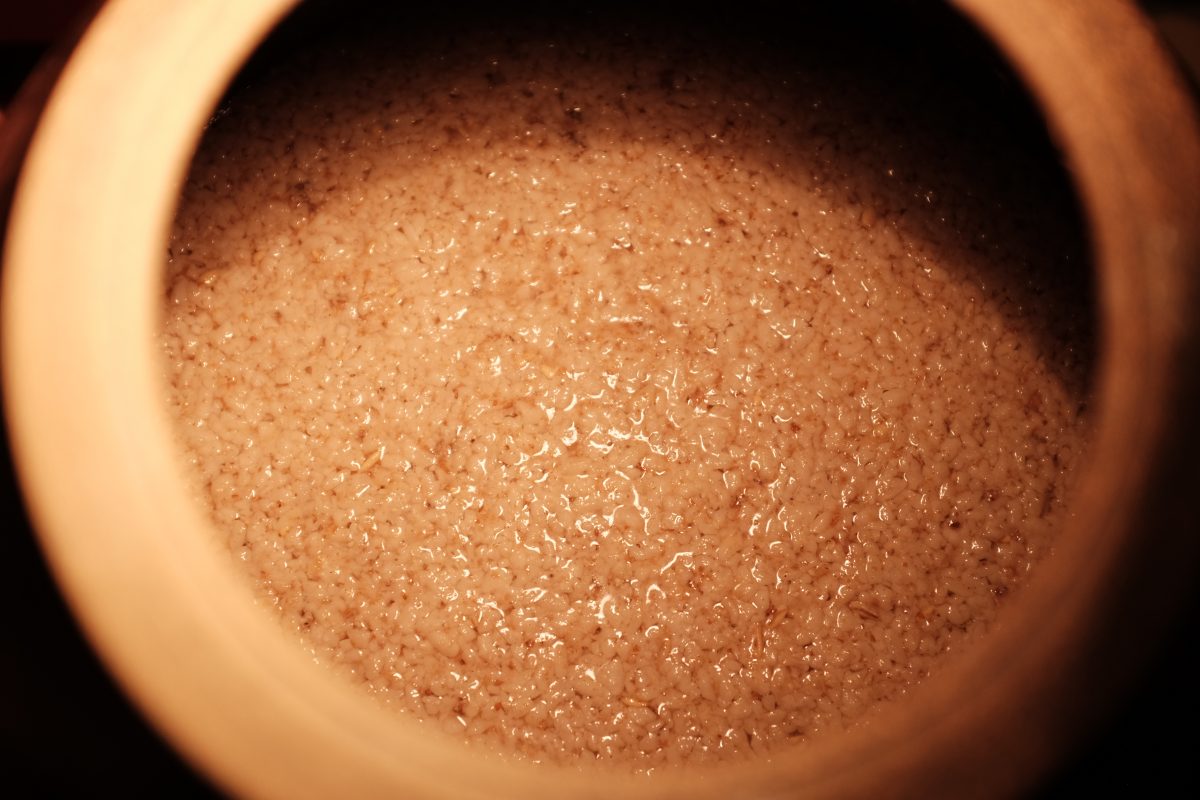
Stage 2: 2 weeks after adding rice
The brew is starting to have a nice boozy sweet smell. There is a thin shiny layer of liquid forming on top of the rice mash.
Stage 2: 14 days after adding steamed rice.Over the last 2 weeks, the bubbling has become much slower but the brew is still active.
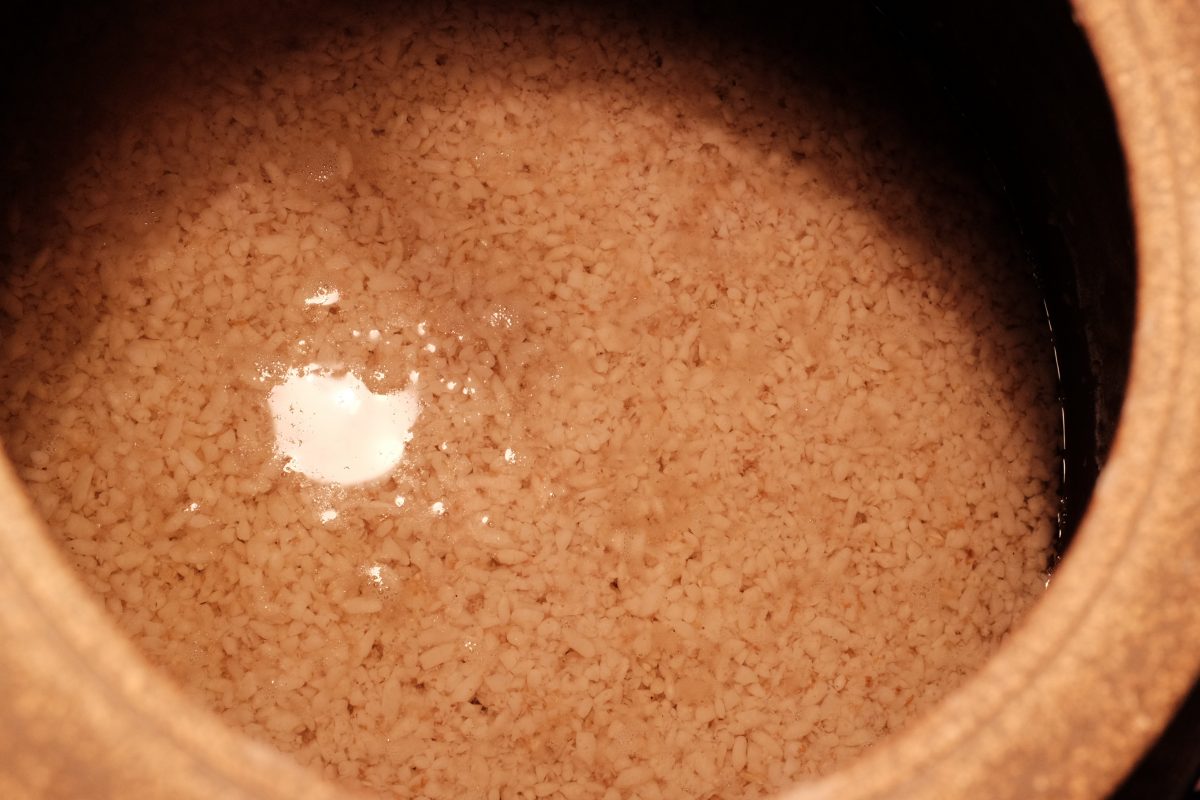
Brew is showing signs of being done
We are now 18 days into Stage 2 (3 weeks total fermentation time measured from the start of Stage 1). The bubbling has practically stopped with very little activity (not enough to even get one bubble during a 10 second sound recording). The brew smells and tastes of alcohol. Compared to a few days ago, there is now a very clear layer of liquid on top.
In this picture there is a clear glassy layer of liquid above the surface of the rice.
The Match Test Take 2
Unlike the first time we did this, the match stays lit even if I hold it right against the surface of the brew. This is good indication that little to no fermentation is happening and the brew is ready for filtering.
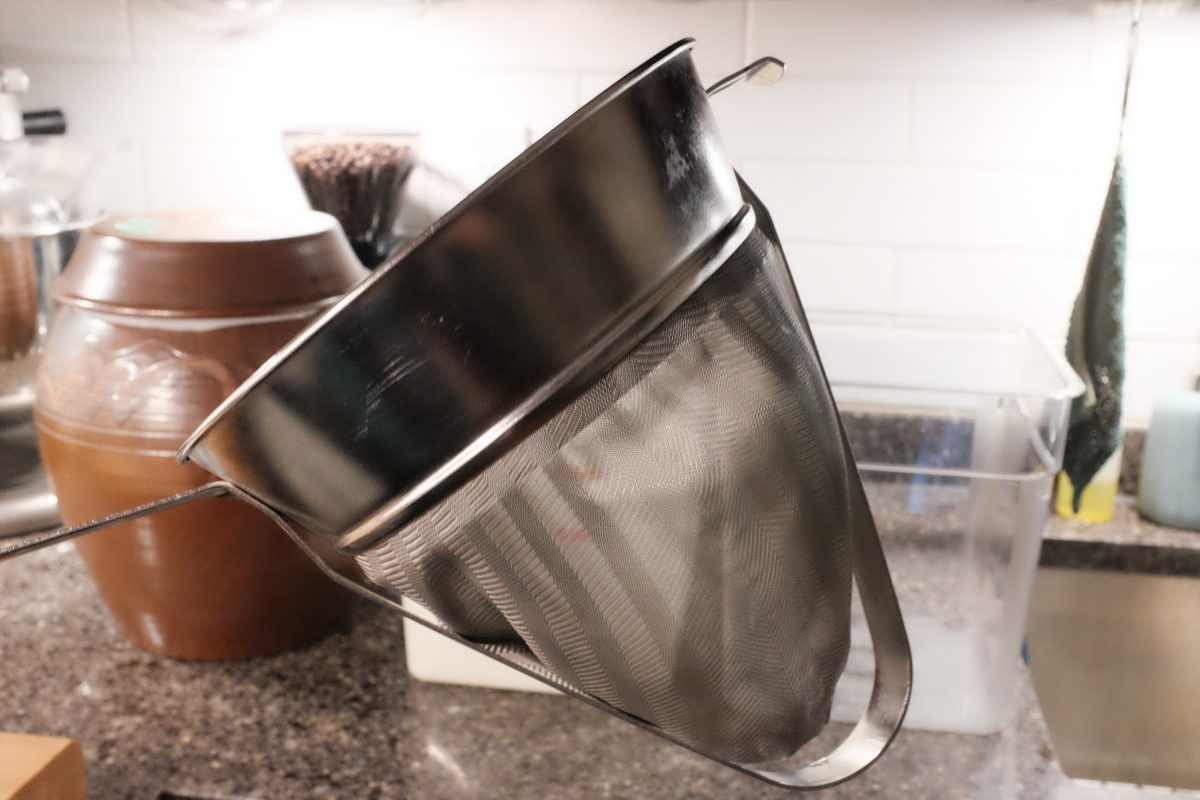
Filtering the brew
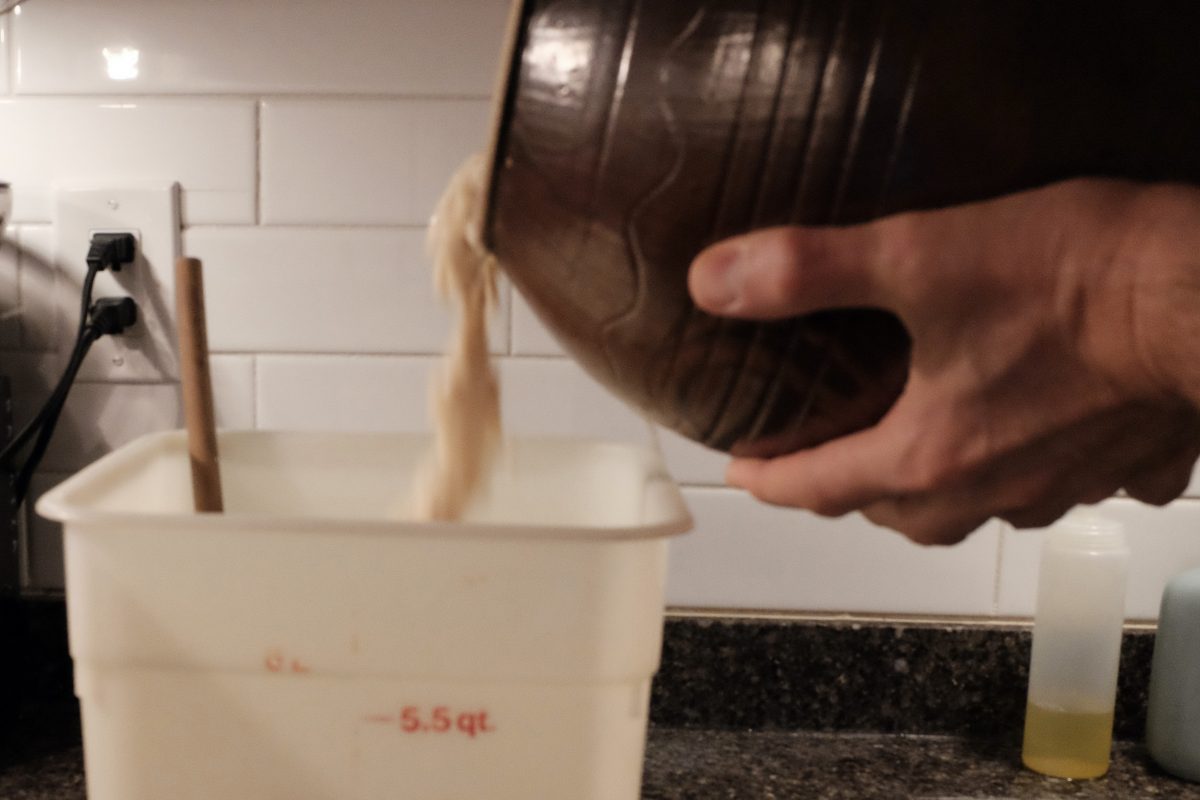
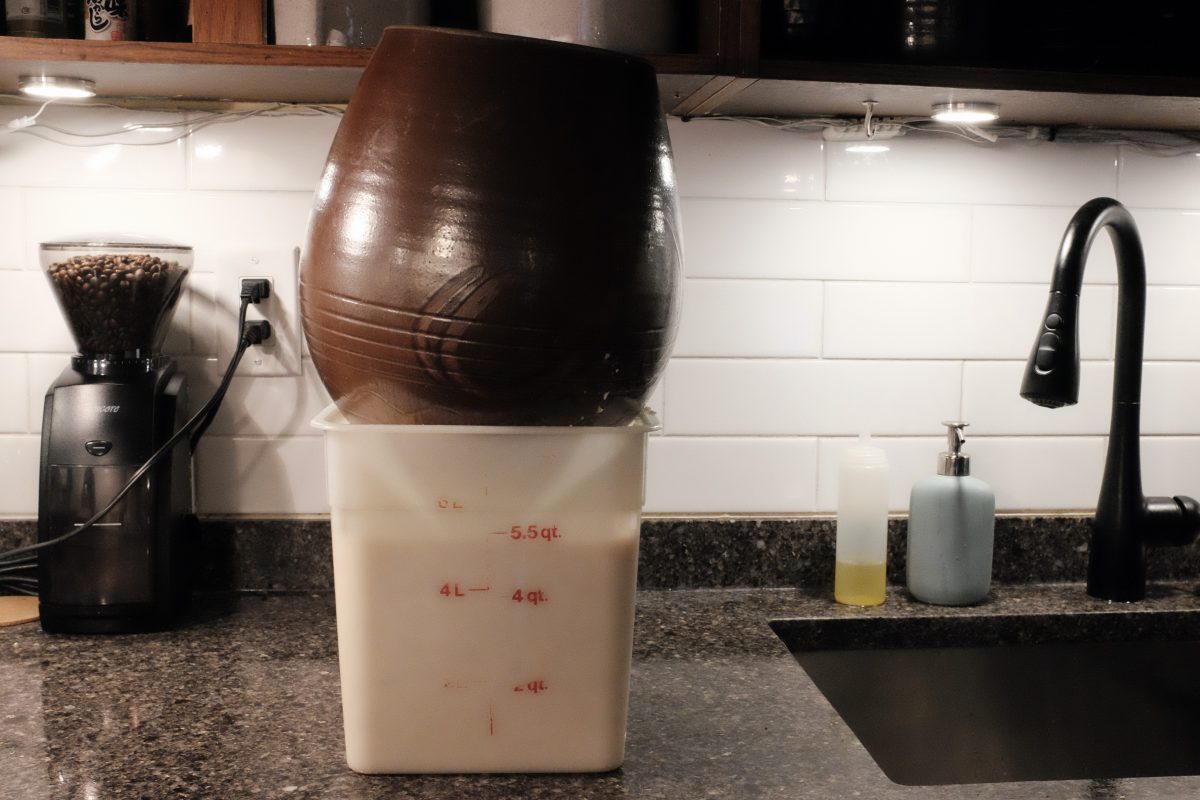
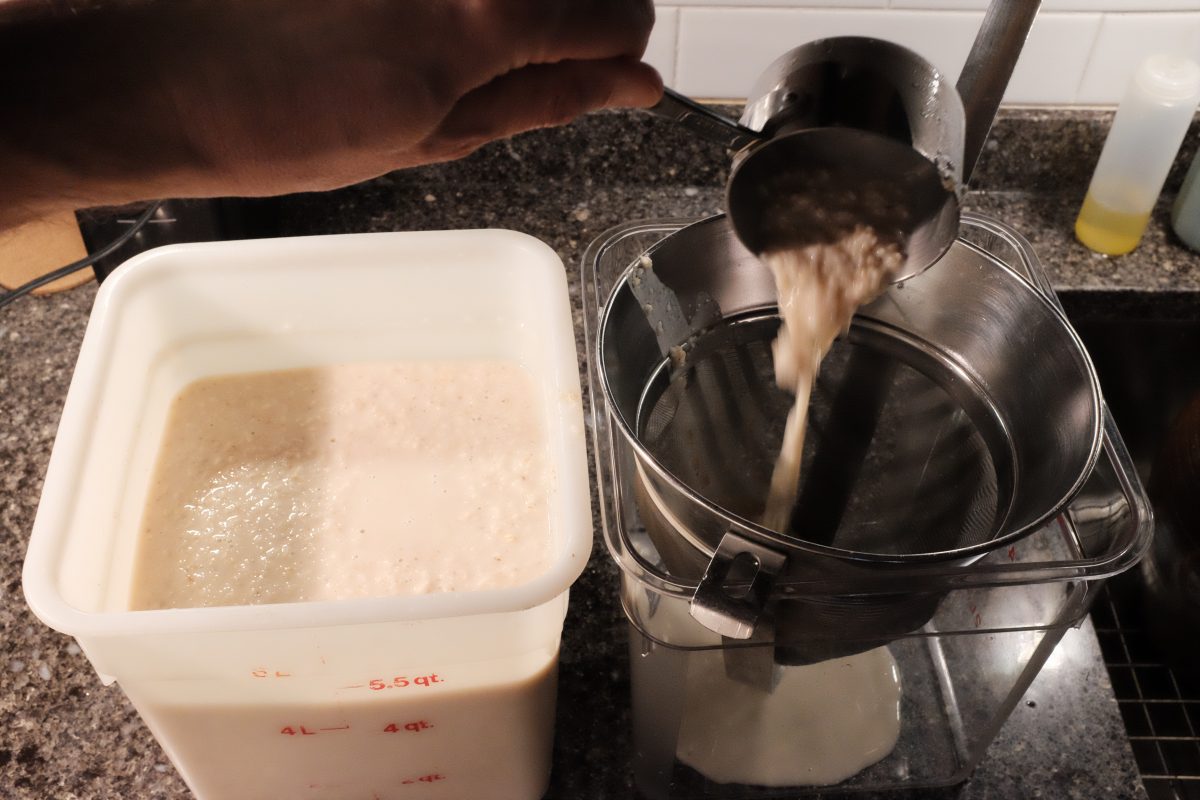
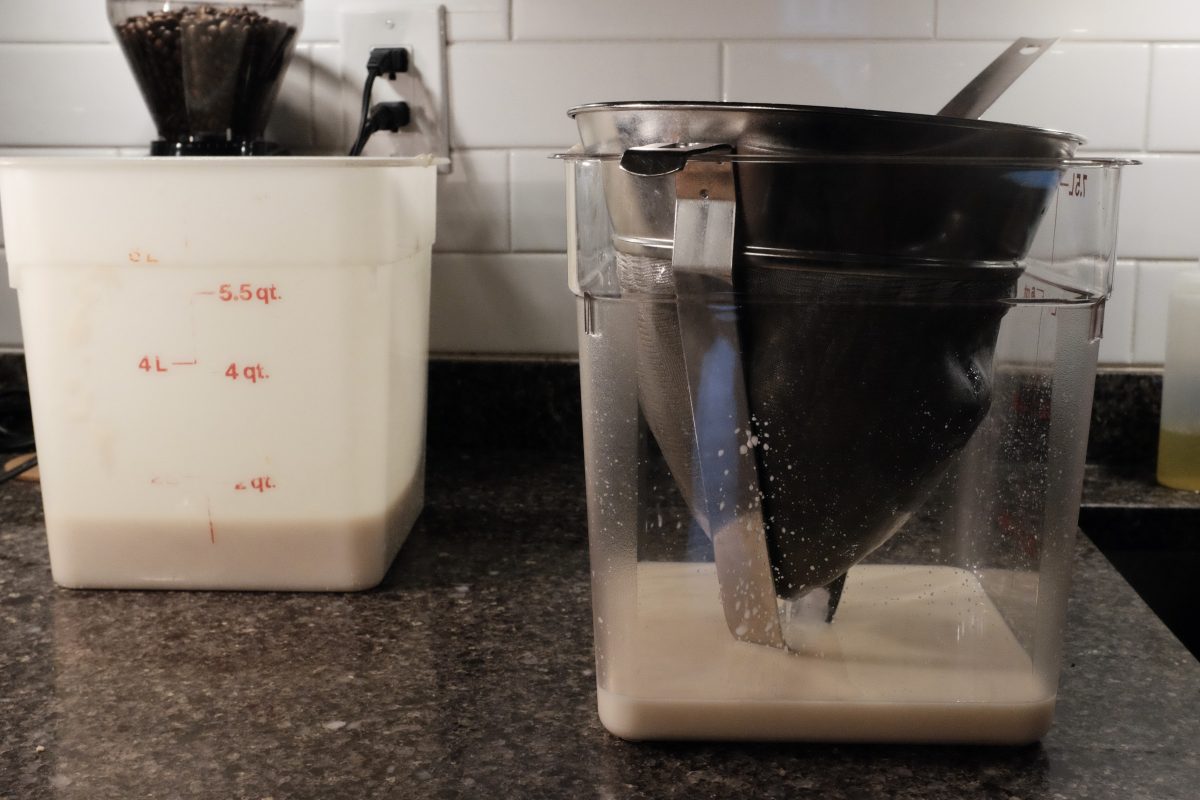
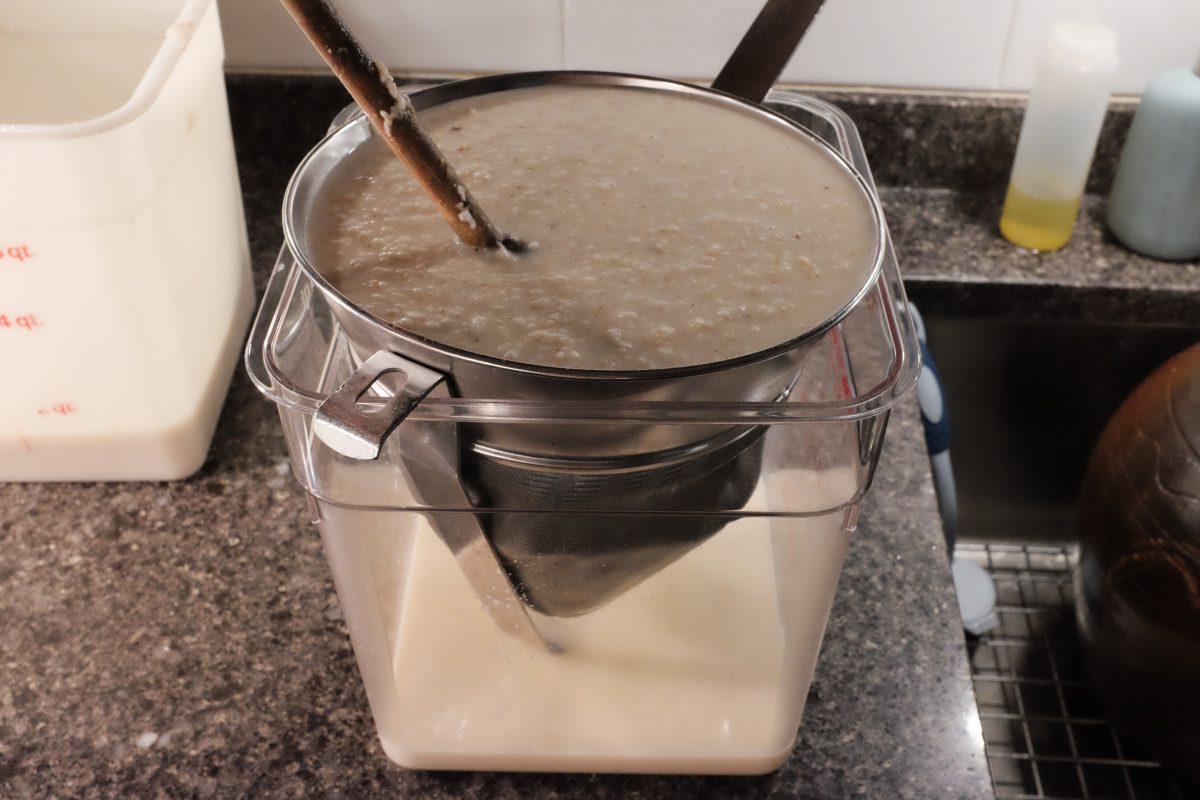
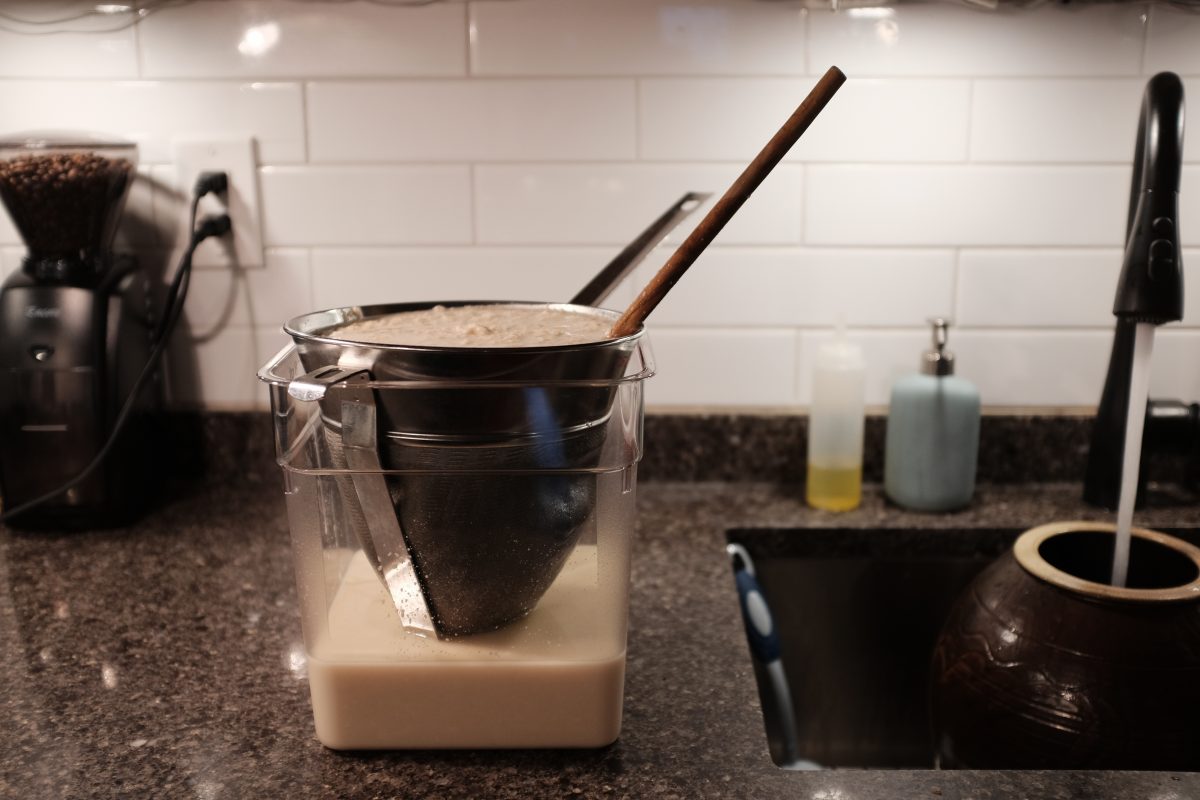
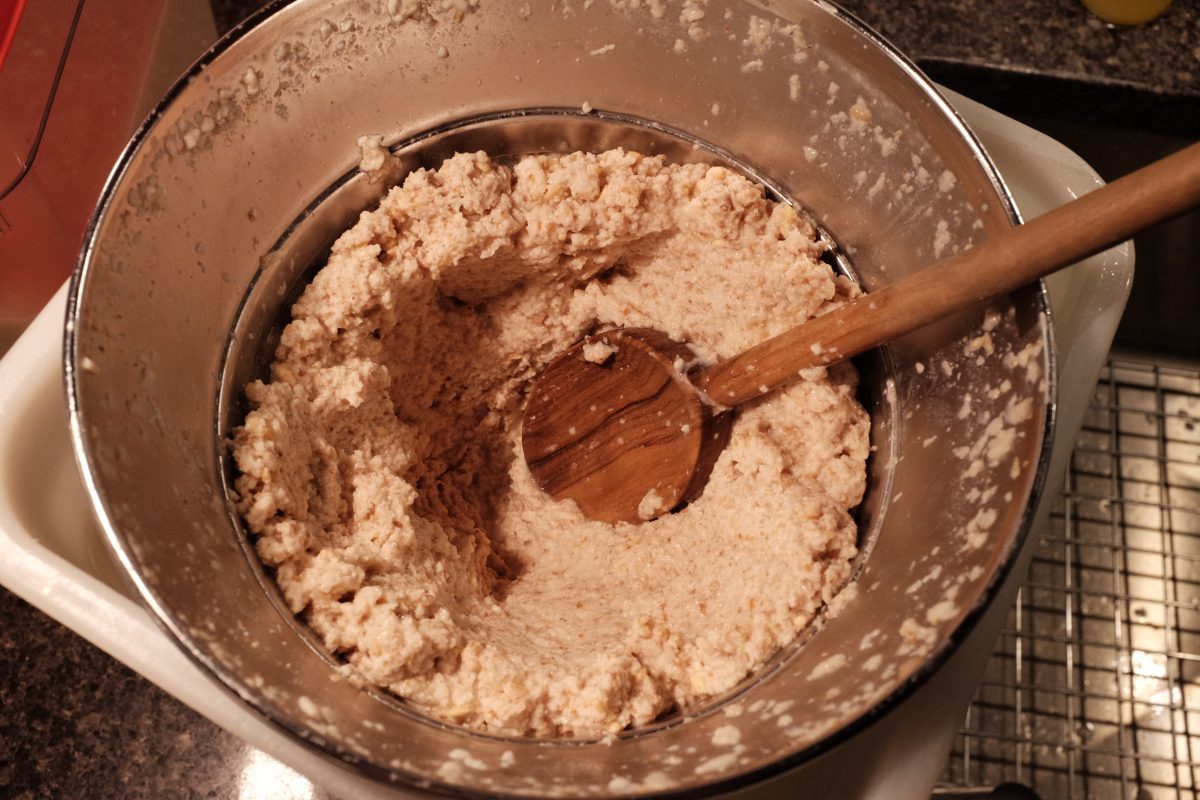
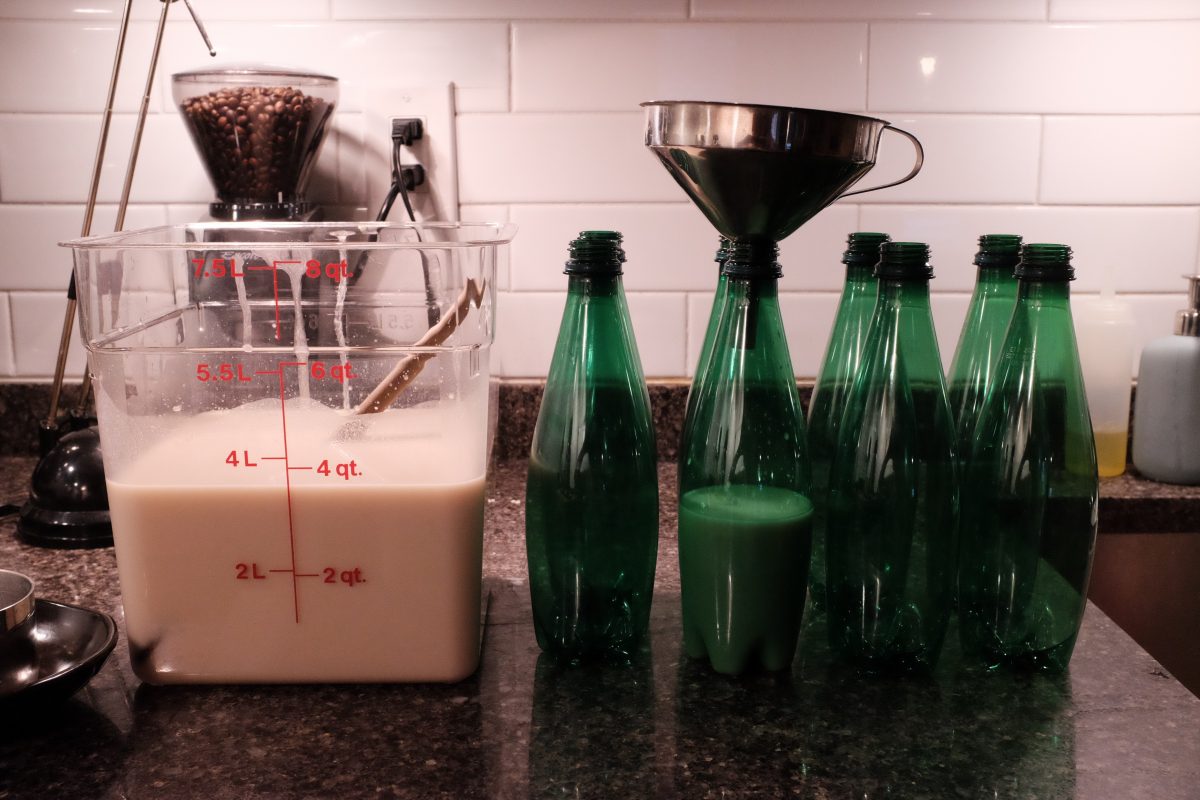
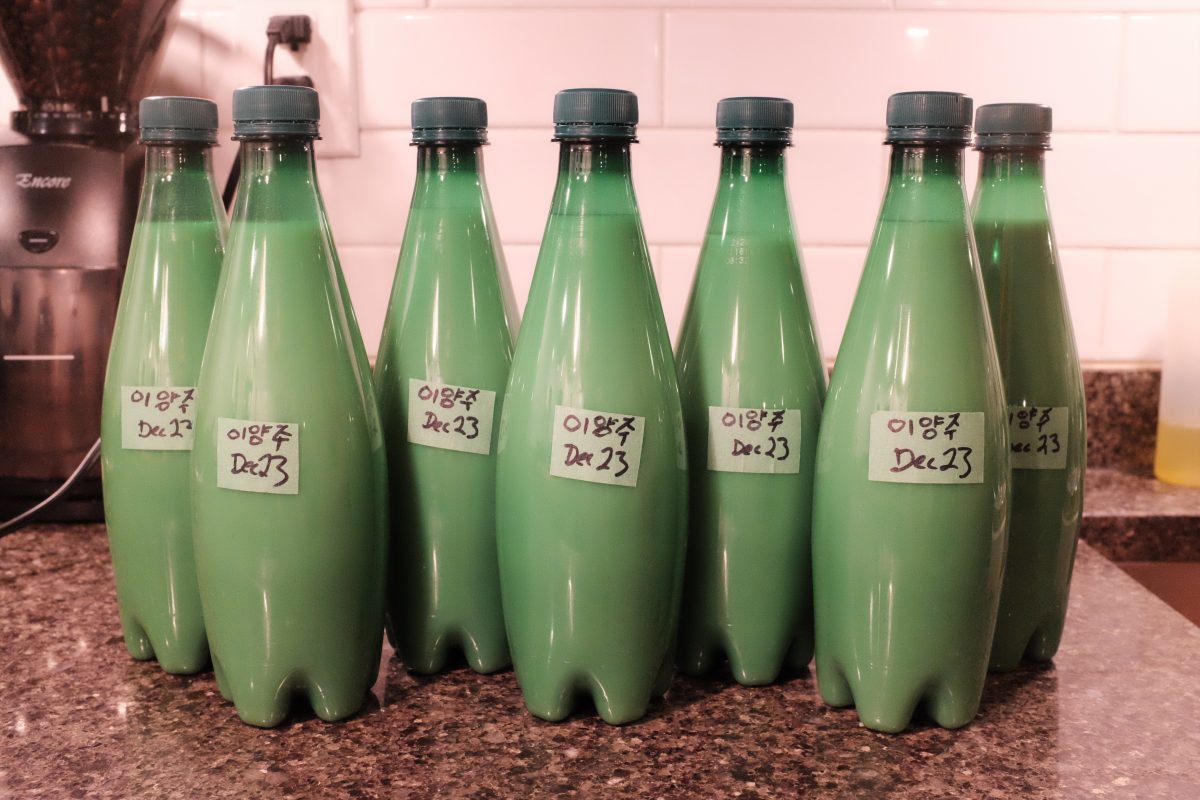
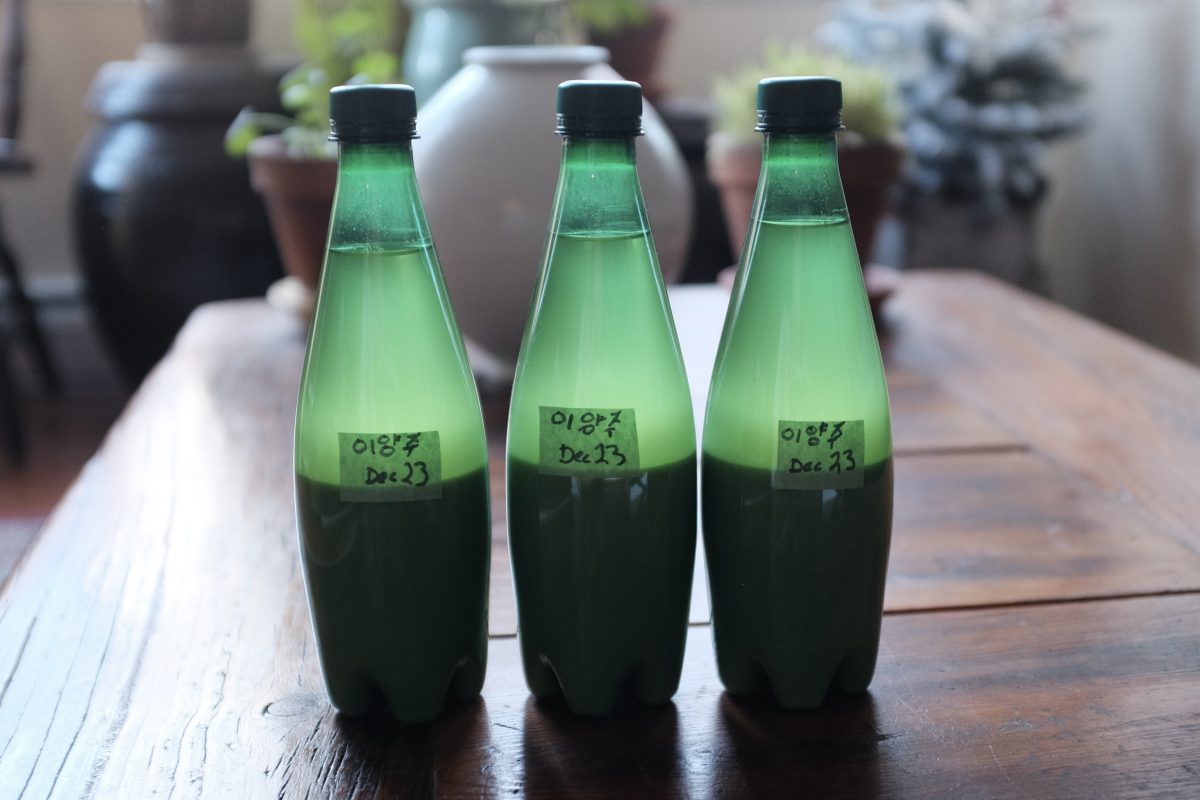
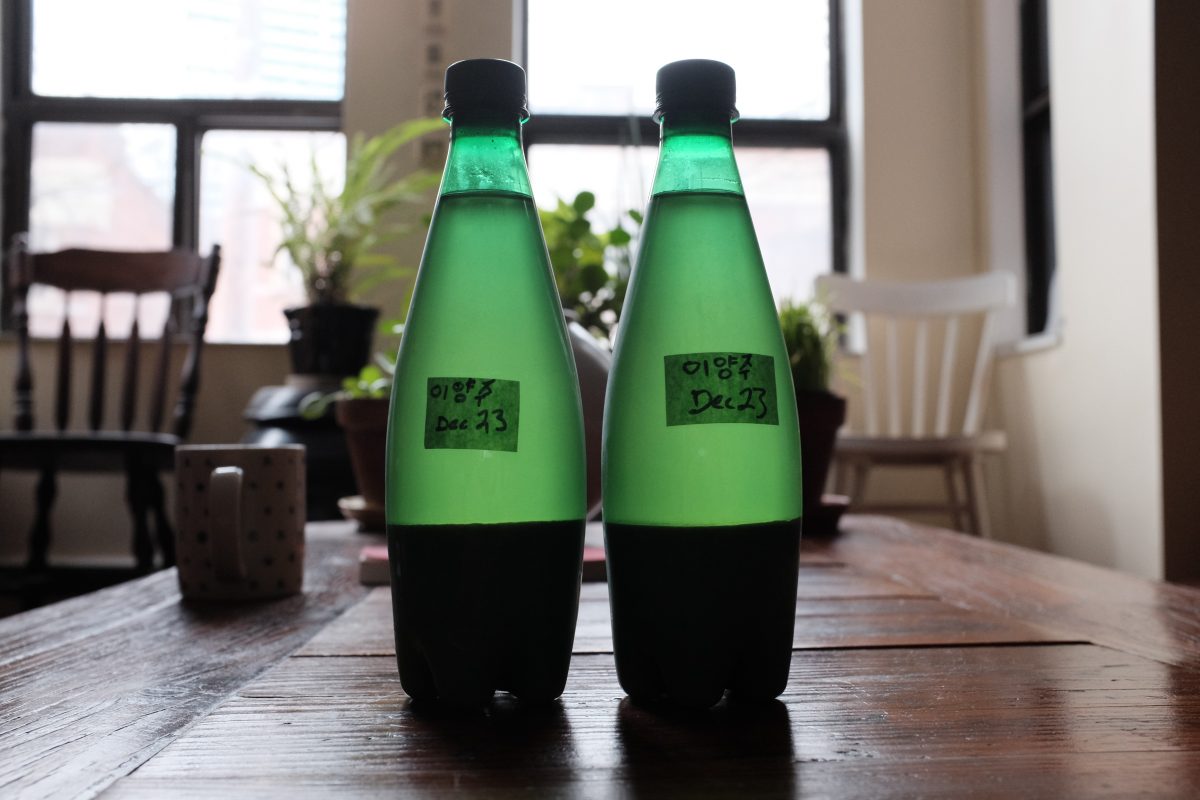
This is a very useful tool in the kitchen. Premium kitchen stores sell them but they will probably be cheaper at a restaurant supply shop. This particular strainer is called a “fine mesh chinois”. The mesh is fine enough to strain makgeolli without filtering through a cloth or bag. Cloth filtering works great and is more common. I prefer this just because I have the chinois around and I find it a little less messy. Before filtering give your brew a good stir to get the sediment off the bottom.It should have a very creamy texture with little chunks of rice and nuruk suspended inside.The onggi jar is awkward to work with here so I will dump everything into an open top container first.Getting every last drop.With my fine strainer over a second clean container, I can begin transferring the brew and slowly filtering it.Milky liquid and fine sediment will pass through but the heavier, thicker remains will not.The mesh will eventually clog up so you will need to stir it constantly and gently scrape up the inside walls of the strainer to keep the liquid moving through.This will take a little time…When it gets really thick, you can gently press the contents of the strainer against the sides to squeeze out the last drops. What you are left with is a very damp rice mash called “jigemi”. Most people will toss this out but, if you have a look online you may find uses for this boozy mash. I recently learned that you can make another drink out of this called “moju”. I will probably try this in the future and post up a recipe.Once the straining is done, transfer your brew to bottles for storage. I recommend plastic soda bottles. They are safer. If your brew is still fermenting it will continue to produce gases which can break a glass bottle if the pressure gets too high. I like to use these plastic Perrier bottles. Before filling each bottle give your brew a good stir. This will keep the sediment even from bottle to bottle.Mission accomplished. You can drink this right away if you like. Mine will go in the fridge for a few days.After a couple of days, the brew is starting to separate into a clear layer on top and a milky layer of sediment on the bottom. It will continue to settle over the next week or so.This is around 2 weeks after this brew was bottled. There is now a layer of clear liquid above and thick sediment below.
Terminology around nuruk-fermented rice alcohol and how to enjoy your brew:
Depending on a few different factors, there a few different categories of rice alcohol. Without going into a lot of detail, here is a basic list:
Makgeolli: sedimented brew with less than 10% alcohol
Takju: sedimented brew with more than 10% alcohol
Yakju: clarified rice brew (the clear top layer in the above picture)
Our two-stage brew, long-fermented in a cool environment will almost certainly have more than 10% alcohol by volume. This means that it is a “Takju” and I think it is best to drink it as is. Gently turn the bottle over a few times to distribute the sediment and enjoy.
If you leave the bottles to rest, after a week or so, all of the sediment will settle to the bottom and there will be a very clear sediment-free layer on top. This is “Yakju”. You can pour it off slowly so as not to disturb the sediment and enjoy just the clear alcohol on it’s own. You can also pour it off, rebottle only the clear layer and age it indefinitely. It will change and develop new flavours over time.
If you pour off the Yakju, and dilute the sediment with fresh water, you will end up with a weaker drink in the under 10% alcohol range: this is Makgeolli. OR..you can also dilute your Takju with water to lighten it up and bring the alcohol concentration down…this would also be Makgeolli.
If I want something really refreshing and thirst quenching to drink with spicy food, I will often dilute my Takju with sparkling water. The brew is lighter and slightly fizzy and the flavours open up in a little different way…similar to the way an ice cube or a little water affects Scotch whiskey.
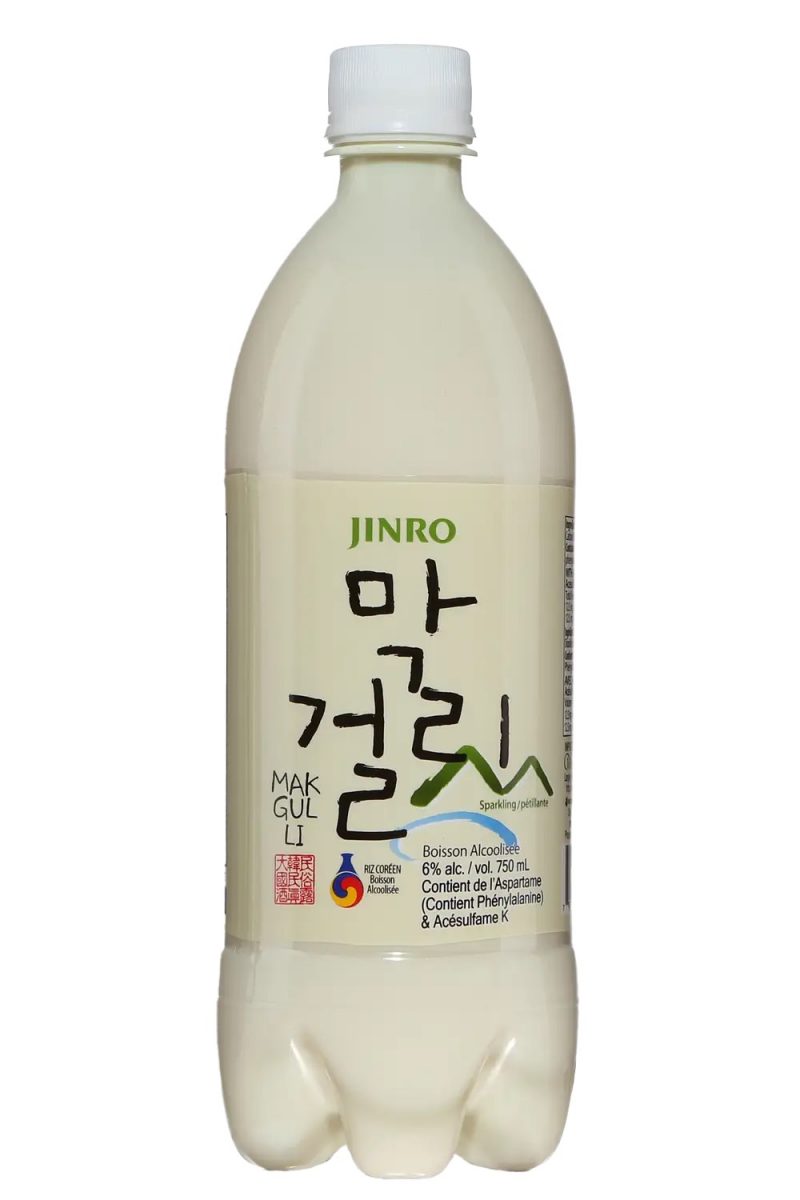
Commercial Makgeolli:
This looks familiar…
You have probably seen plastic bottles of commercial makgeolli at your local liquor store or in convenience stores in Korea. This cheap and tasty drink has it’s own charm but it does not have that much in common with a traditionally fermented brew like we have made. This commercial Makgeolli is usually fizzy, watery, has very low alcohol content and it surprisingly sweet, almost like a soda. It is sweetened with aspartame to make it more palatable and to prevent further fermentation in the bottle (and pressure related accidents while it is transported).
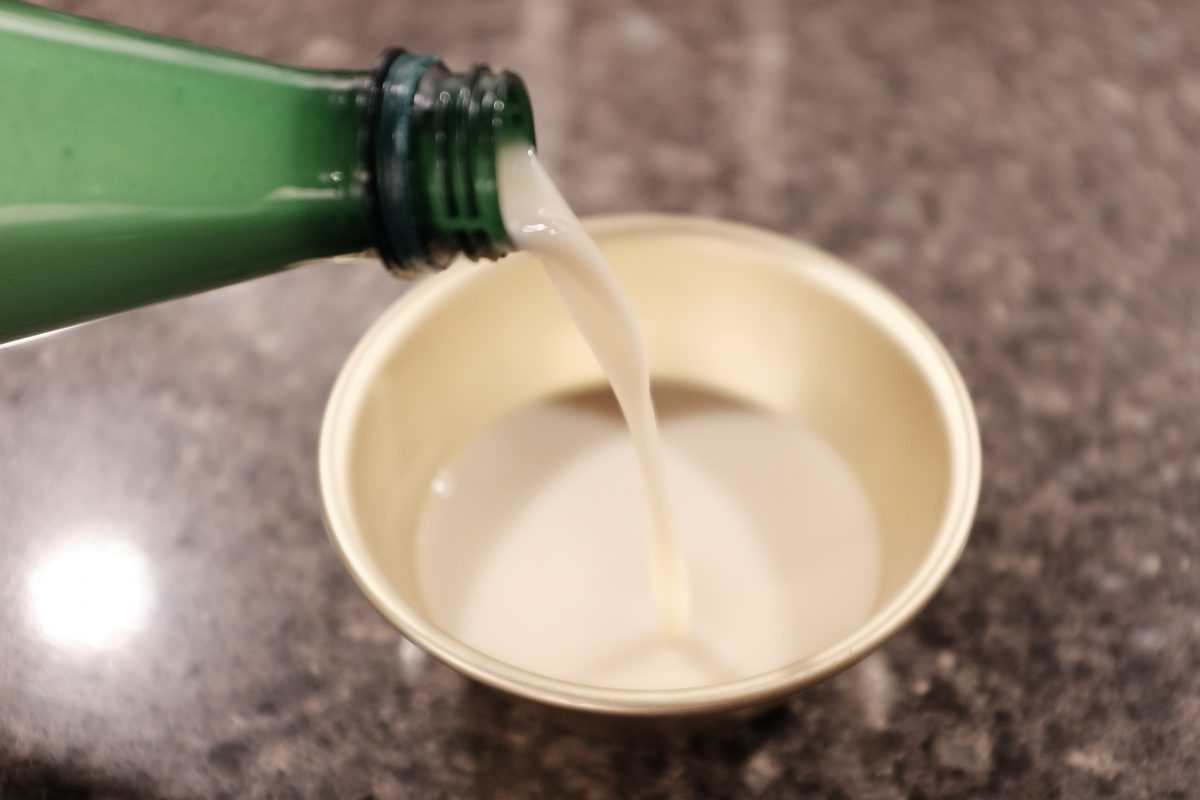
In contrast, our home brew has little to no fizz, a much higher alcohol content and is not especially sweet. In fact, it will lean closer to the dry and tart side with complex rice-y, boozy flavours and a thick creamy mouthfeel. You will taste and feel the alcohol very quickly. It is delicious! And, it is unlike anything else. Korean rice alcohol is entirely it’s own thing and it is next to impossible to compare it to any other brew.
The home made brew is thick, creamy, tart and strong.
Commercial brewers making traditional Korean sool
Over the last 5 years or so, some commercial brewers of traditional Korean sool have emerged. The first in the US was Hana Makgeolli, founded by Alice Jun. Alice and her team have produced a range of small-batch rice brews ranging from traditional Takju to, most recently, a potent full-strength Soju 60. I have linked a video below of Alice explaining the range of traditional Korean sools as well as Hana Makgeolli’s current offerings.
It was probably close to 10 years ago that I had the pleasure of meeting Alice in New York City when she was still developing recipes in her Brooklyn apartment. I got to sample an early brew “under the table” over Poke-bowls at a Manhattan SunriseMart. To this day, it is still one of my best New York experiences! Alice is one of the loveliest and most generous people I have met and she has a deep understanding of Korean rice alcohol, learning first-hand as a child helping her dad with traditional home brews. I highly recommend having a look at the above video for a comprehensive Sool School and if you are lucky enough to be able to try Alice’s brews in person, don’t hesitate to visit her shop and brewery.
As always, if you have any questions, comments or suggestions, please leave them below. If you try this recipe and like the results, please let me know. I hope you enjoy making your own rice brew as much as I do. Cheers! : )
If you enjoy the content and would like to contribute towards website maintenance and development, you can make a donation here.
This was a fantastic write up. I made my first single fermentation and want to try the two stage, and yours is the best I’ve seen online. Loved the sound you were able to capture as well! Thanks!


Wow. Outstanding capture of entire process. Thanks for sharing this.
Thank you : ) Let me know if you try it out.
This was a fantastic write up. I made my first single fermentation and want to try the two stage, and yours is the best I’ve seen online. Loved the sound you were able to capture as well! Thanks!
Thank you for your comment! Happy you enjoyed the post and I hope your makgeolli is delicious : )
When adding the nuruk, did you strain it first?
No straining now. Everything goes in together. Nuruk will get strained out at the very end after the brew is finished.