Posts Tagged: cooking
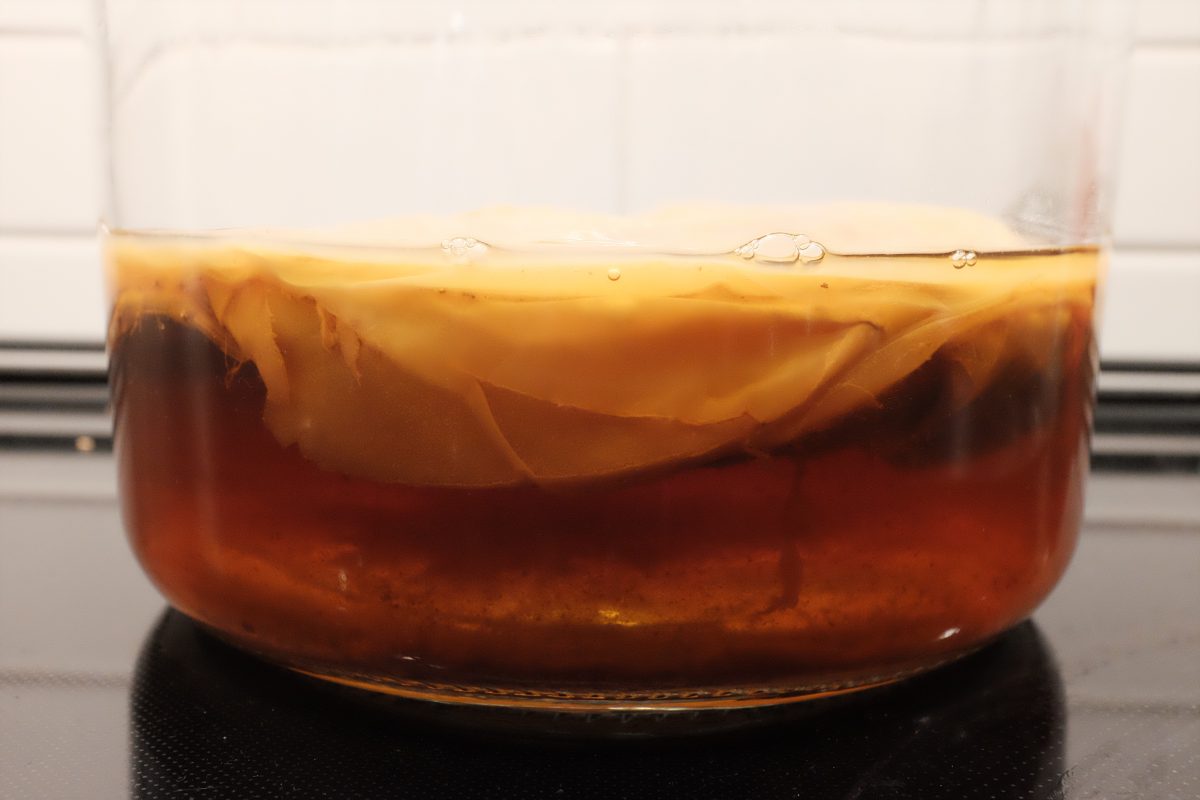
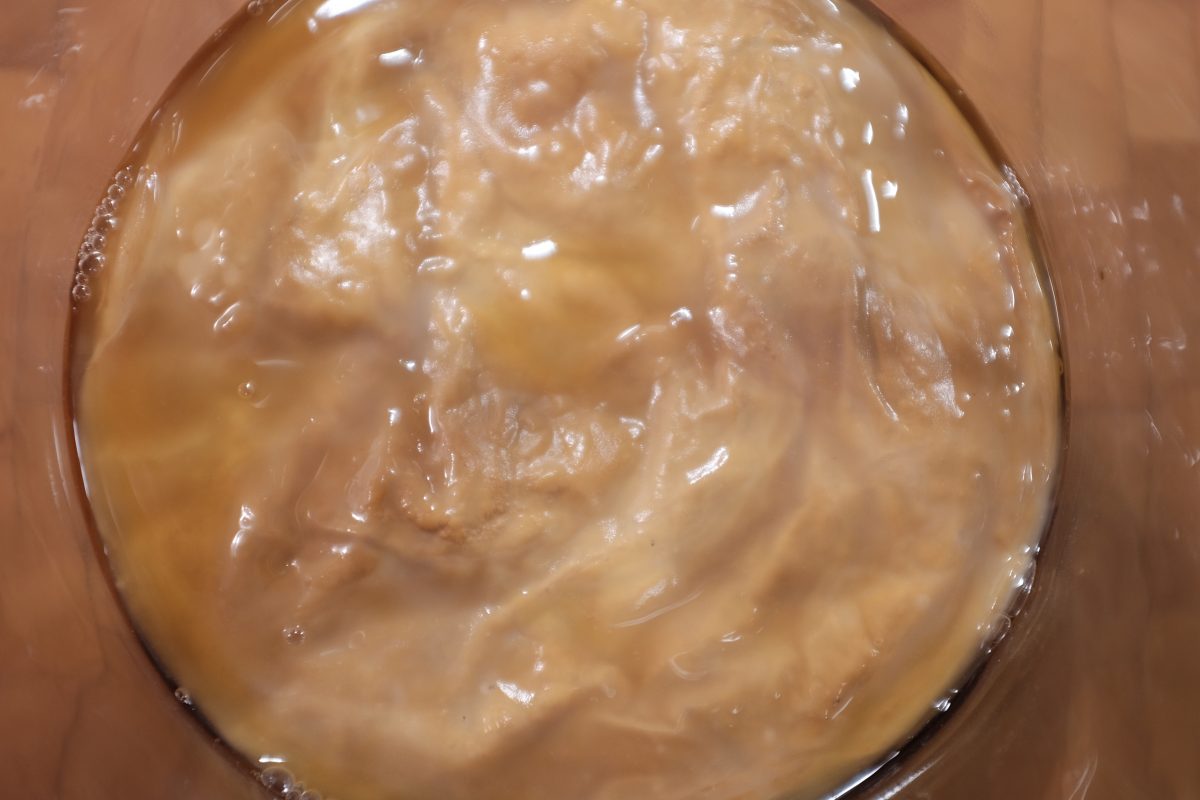
Simple Kombucha Recipe
What is kombucha?
In it’s simplest form kombucha is black tea fermented by a symbiotic culture of bacteria and yeast (SCOBY) in the presence of sugar. There are probably thousands of good articles out there that explain this process in great detail…so I won’t add to the pile. In this article, I only want to provide a simple recipe with a clear process for myself and anyone else who might want to try making kombucha.
Why kombucha?
In addition to having a long and mythical history, kombucha is purported to have many health benefits (the final ferment contains live probiotic bacteria). I make it because it is fun, it makes my kitchen smell interesting and funky and it is delicious and refreshing. It is a terrific substitute for soda when you are eating anything heavy or greasy. It’s great with pizza and burgers but even works with more delicate flavours like sushi and sashimi.
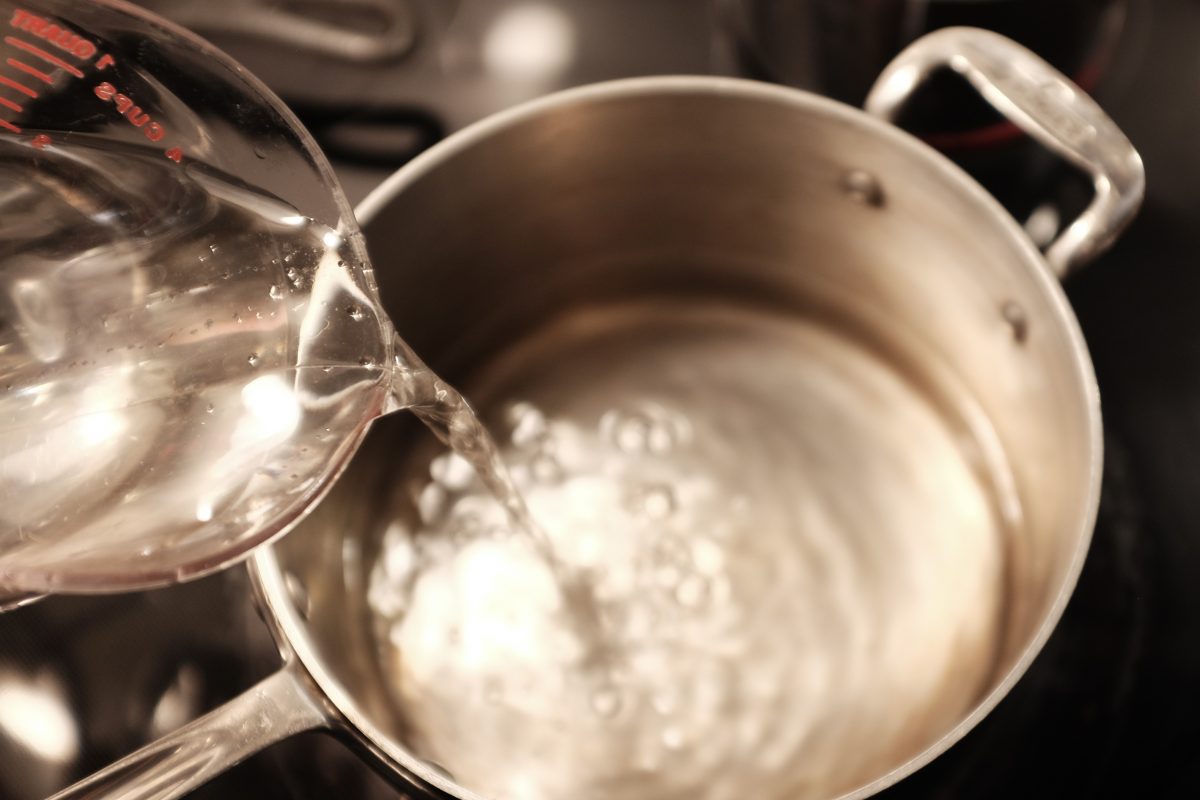
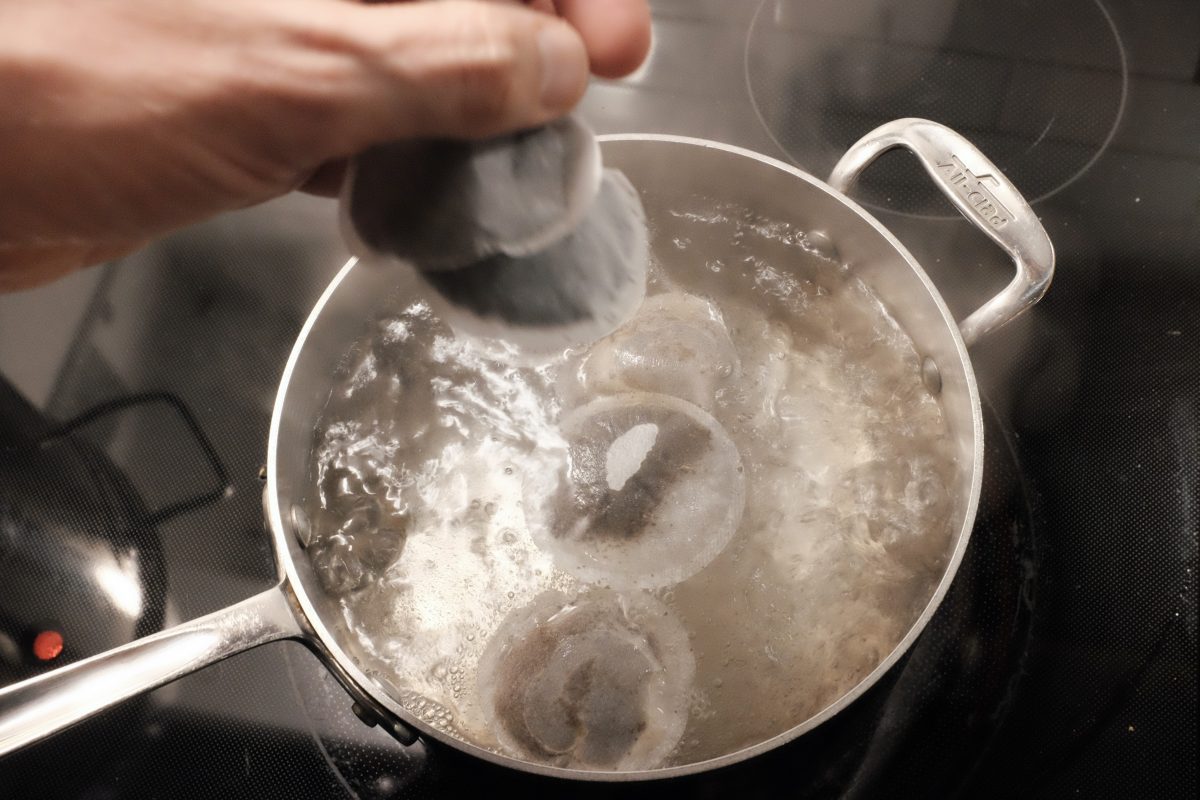
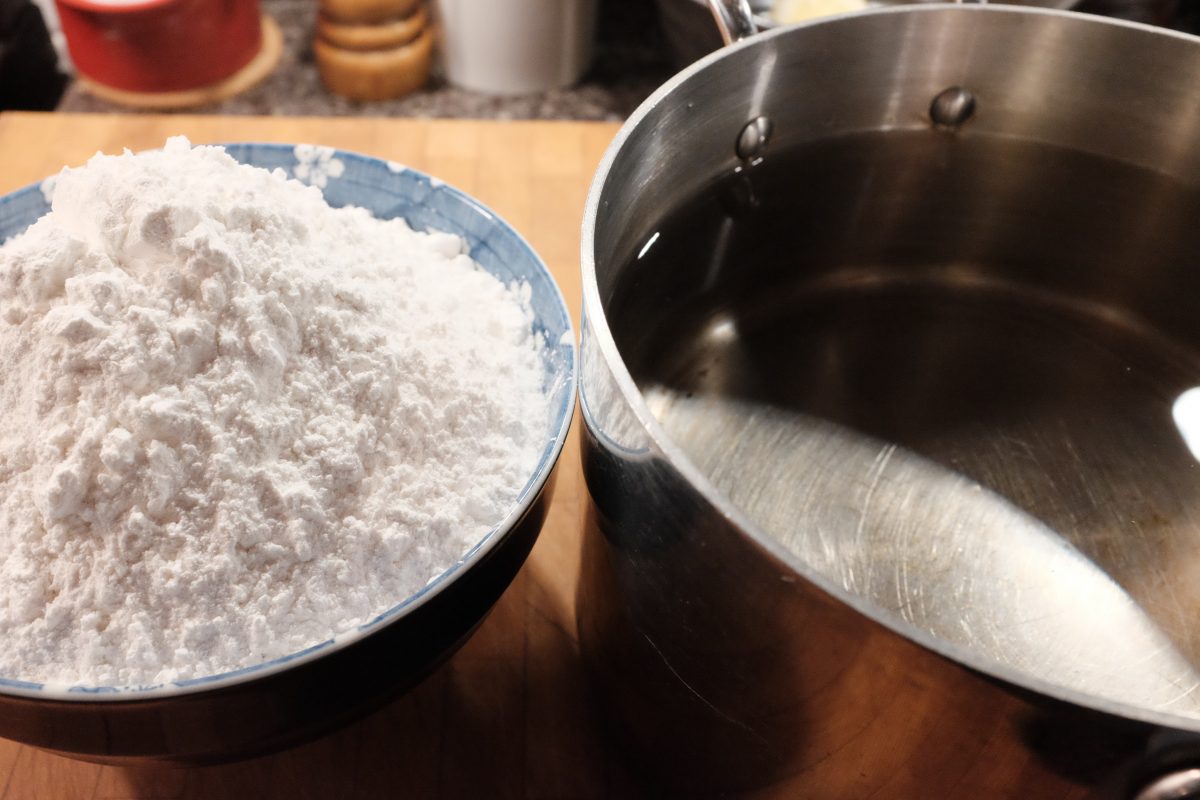
Ingredients:
- 1 SCOBY
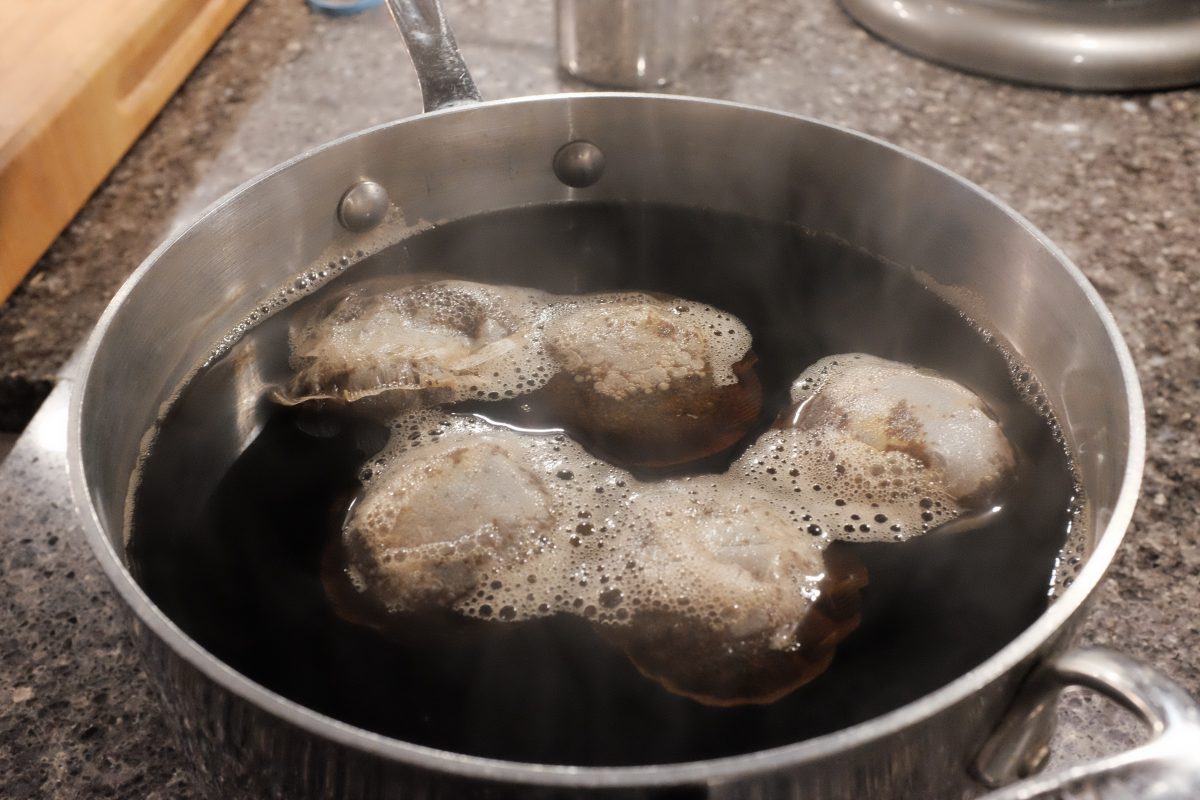
- 6 black tea bags (I am using orange pekoe)
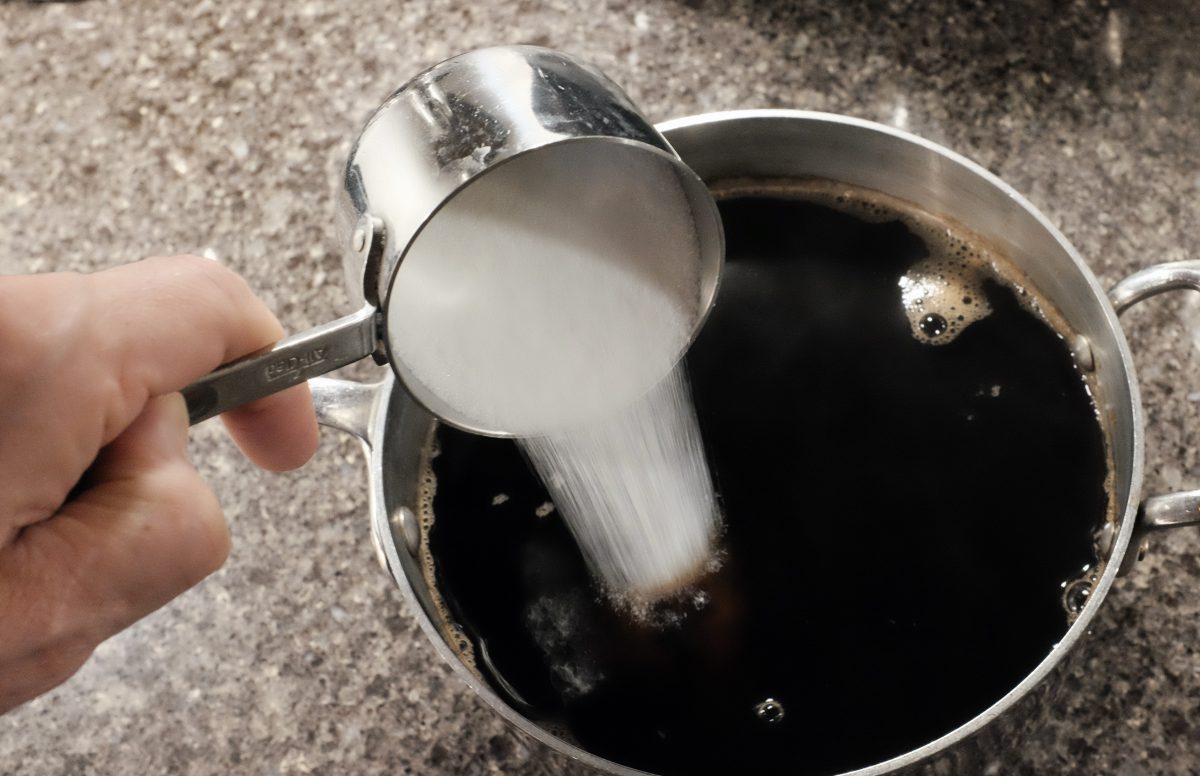
- 1 cup regular white sugar
- 12 cups of water
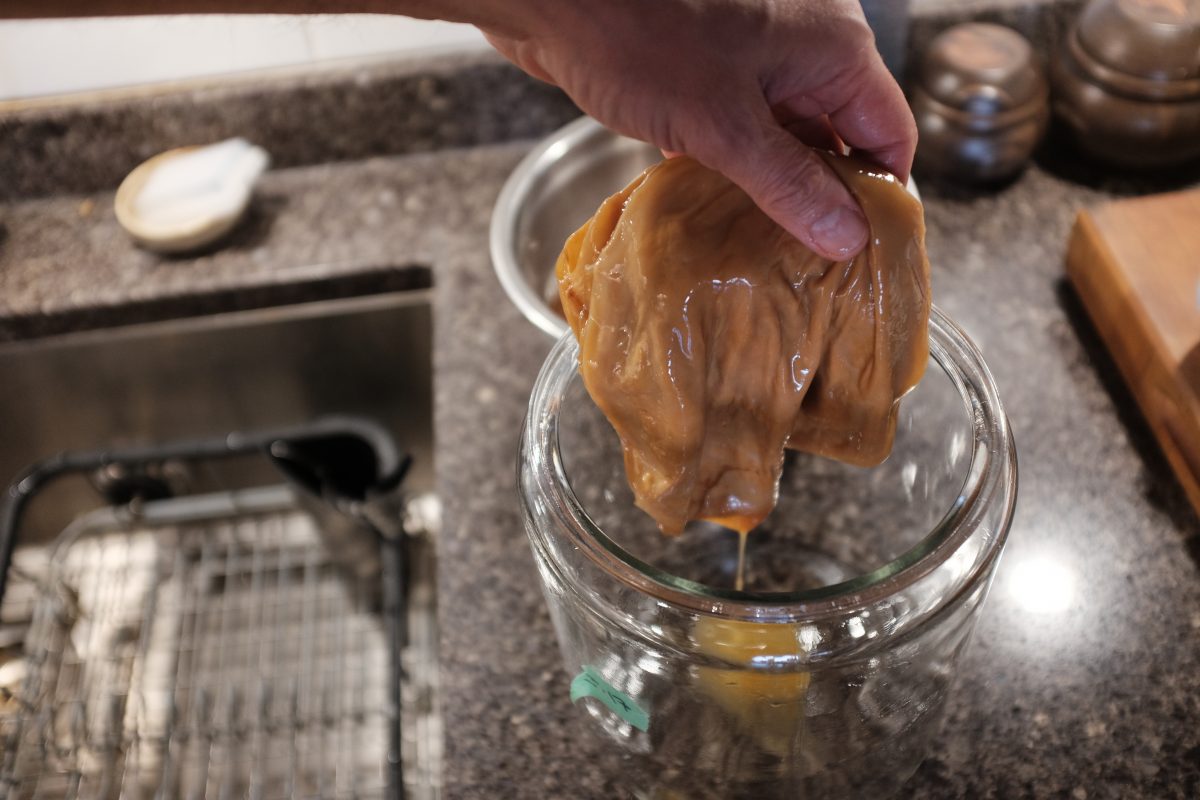
You can’t really “make” a SCOBY. You will have to buy one online or get one from someone who is brewing. Once you have one, it will grow with every batch and you can peel off layers to share with fellow brewers. I got mine from my lovely downstairs neighbour.
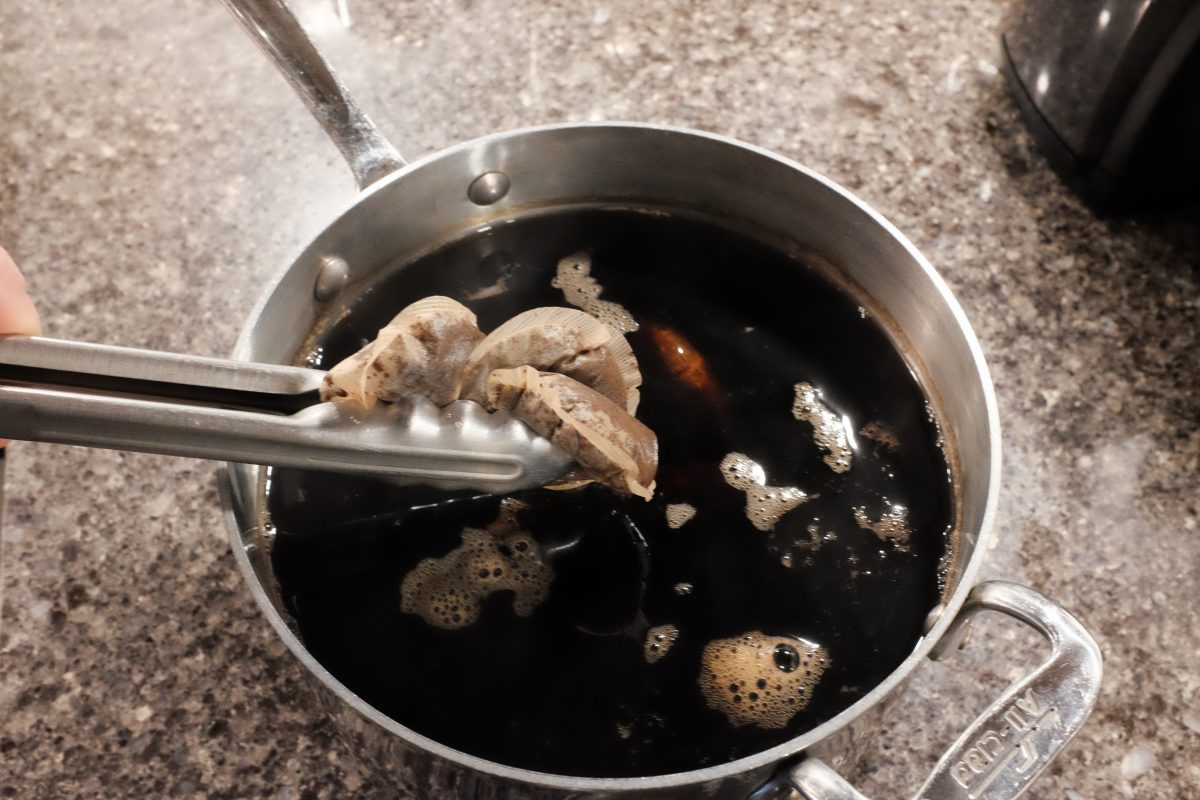
You can just use cheap everyday tea bags. I am using orange pekoe bags from the grocery store. Use black tea and avoid anything flavoured (for now). I like these round Tetley brand ones…they are very strong and brew up to a nice colour and aroma.

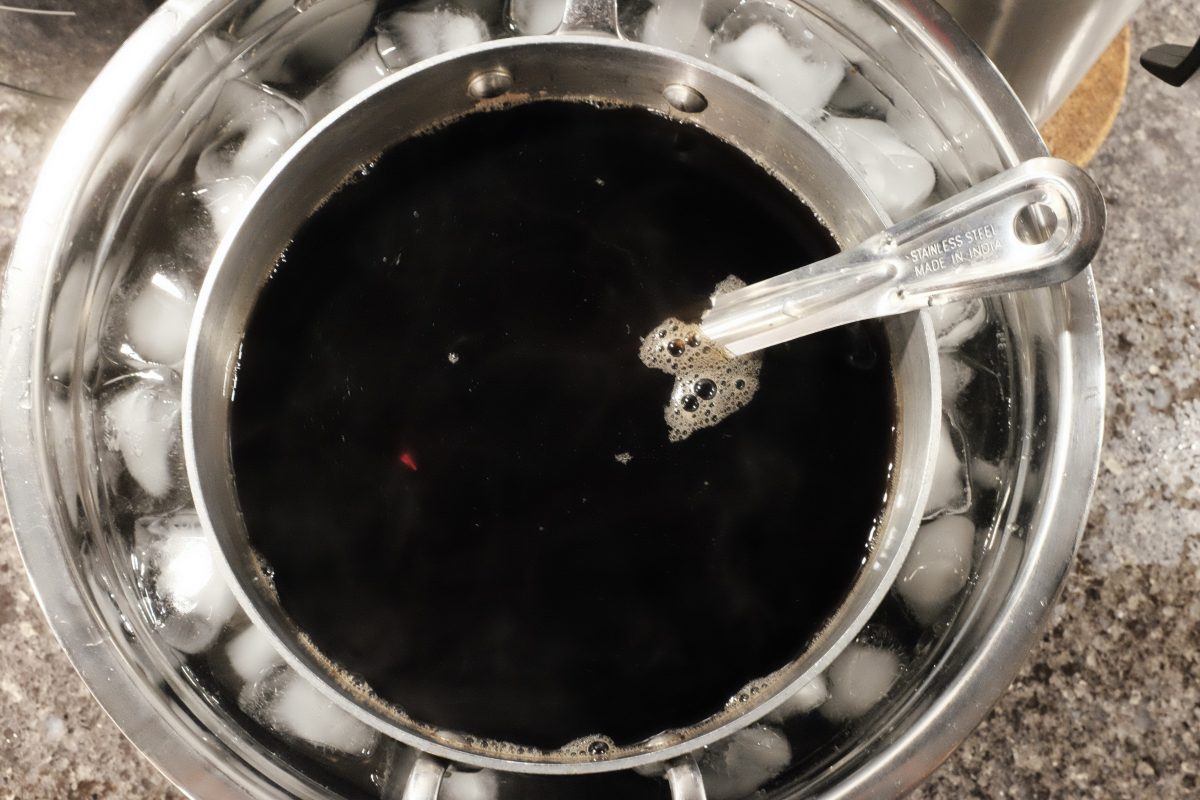
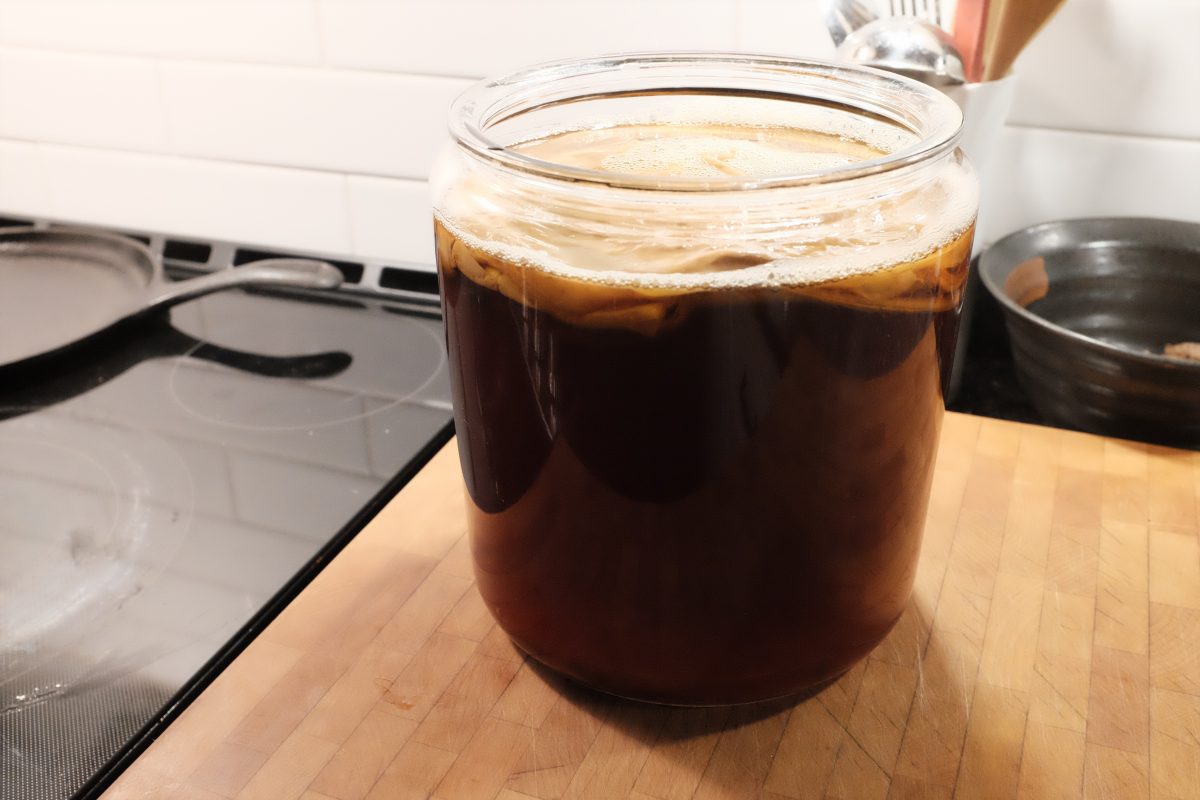
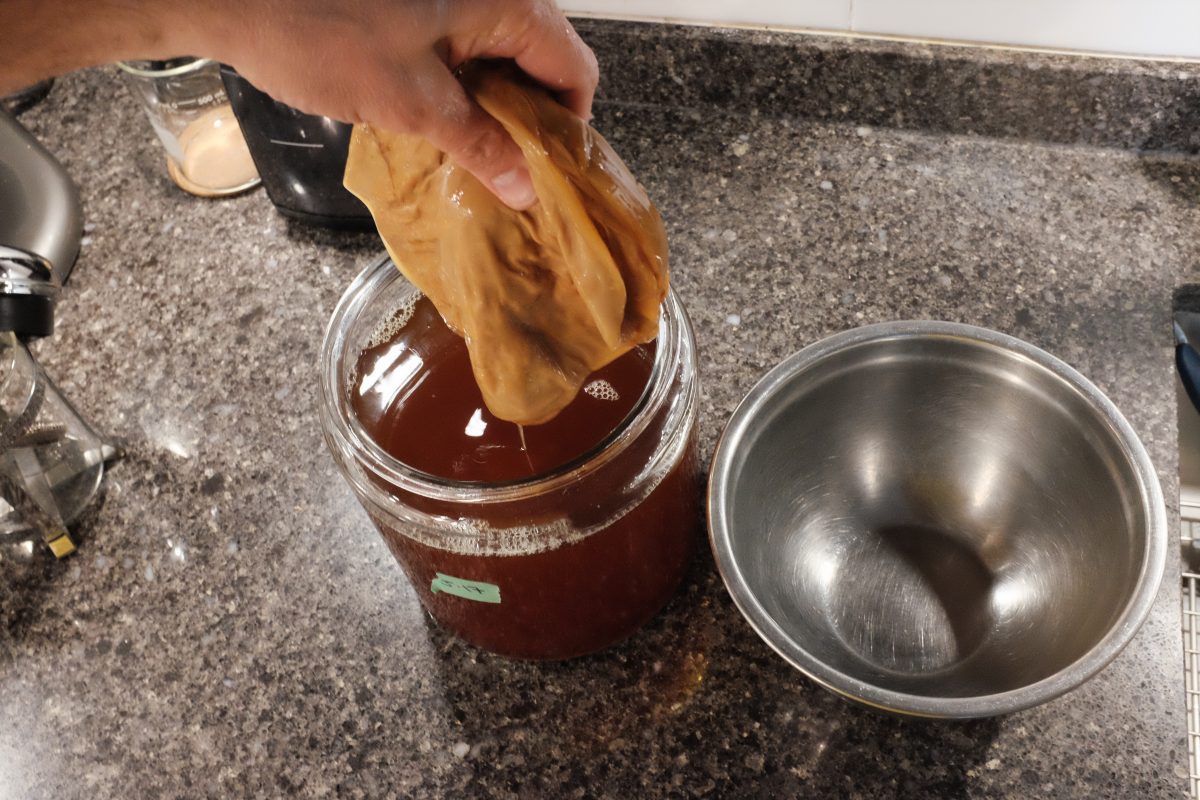
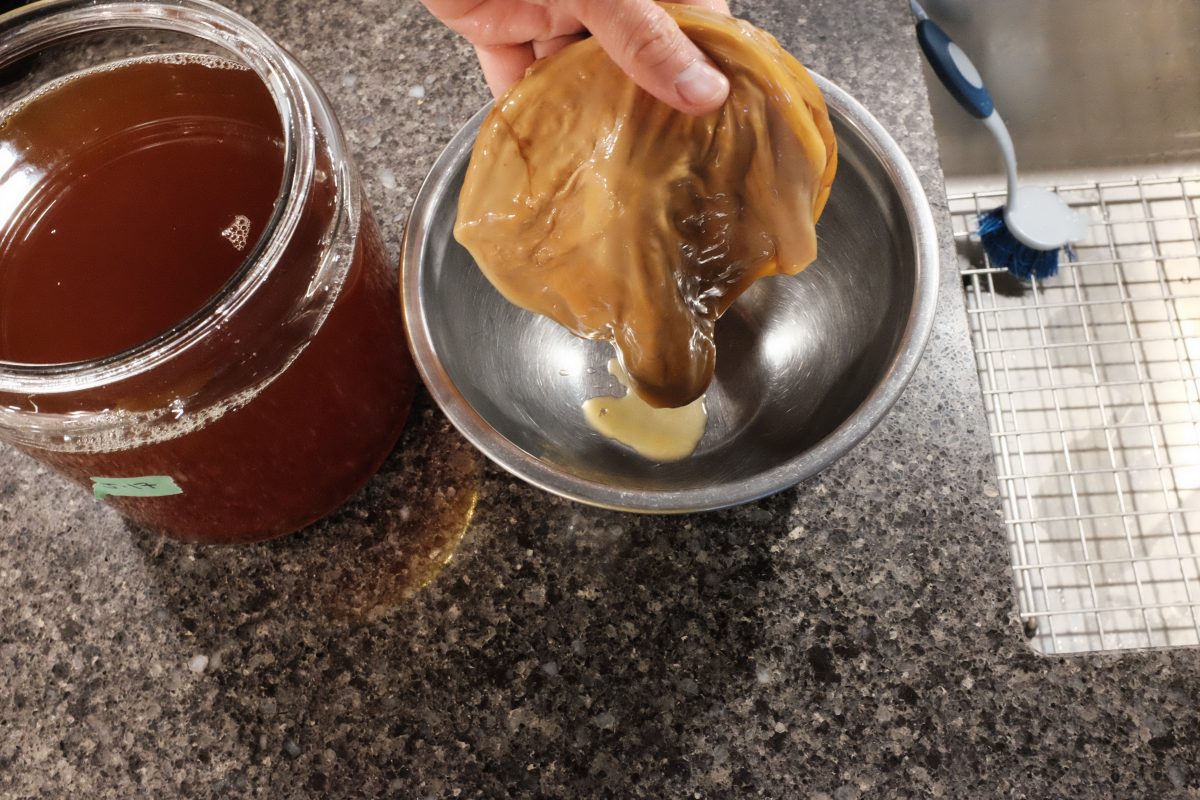
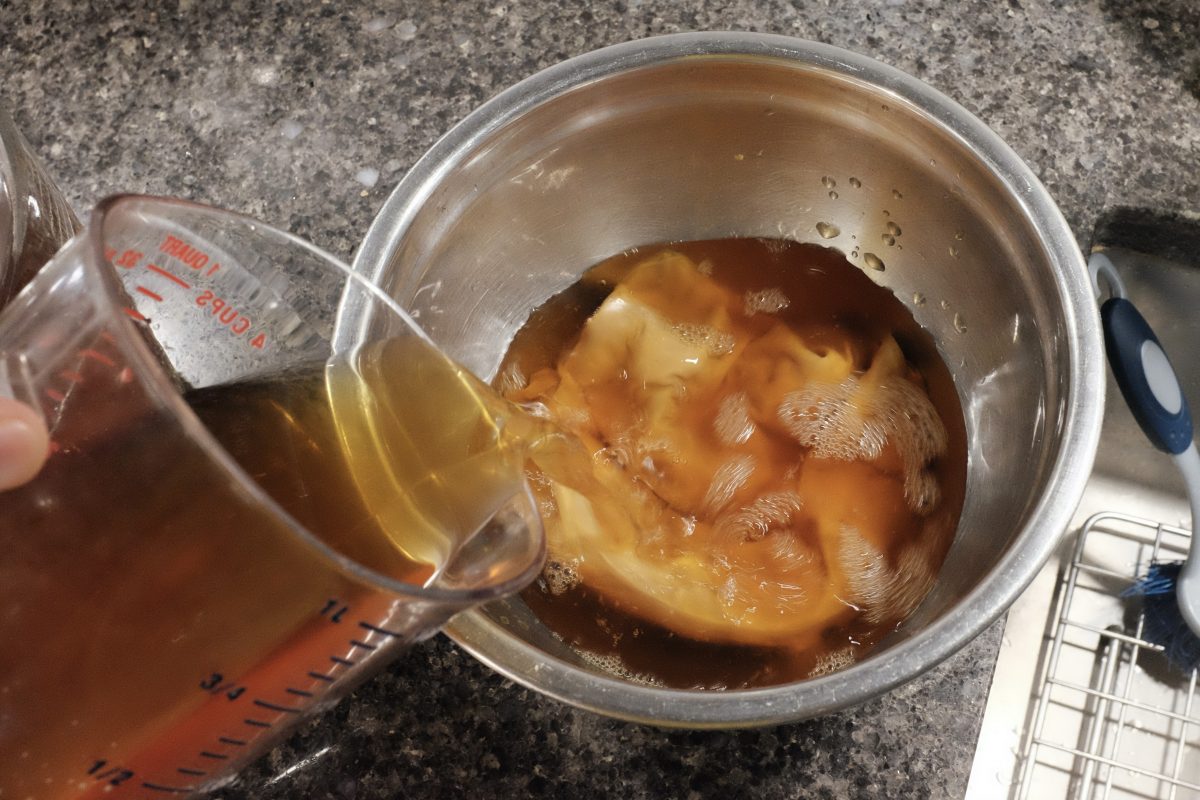
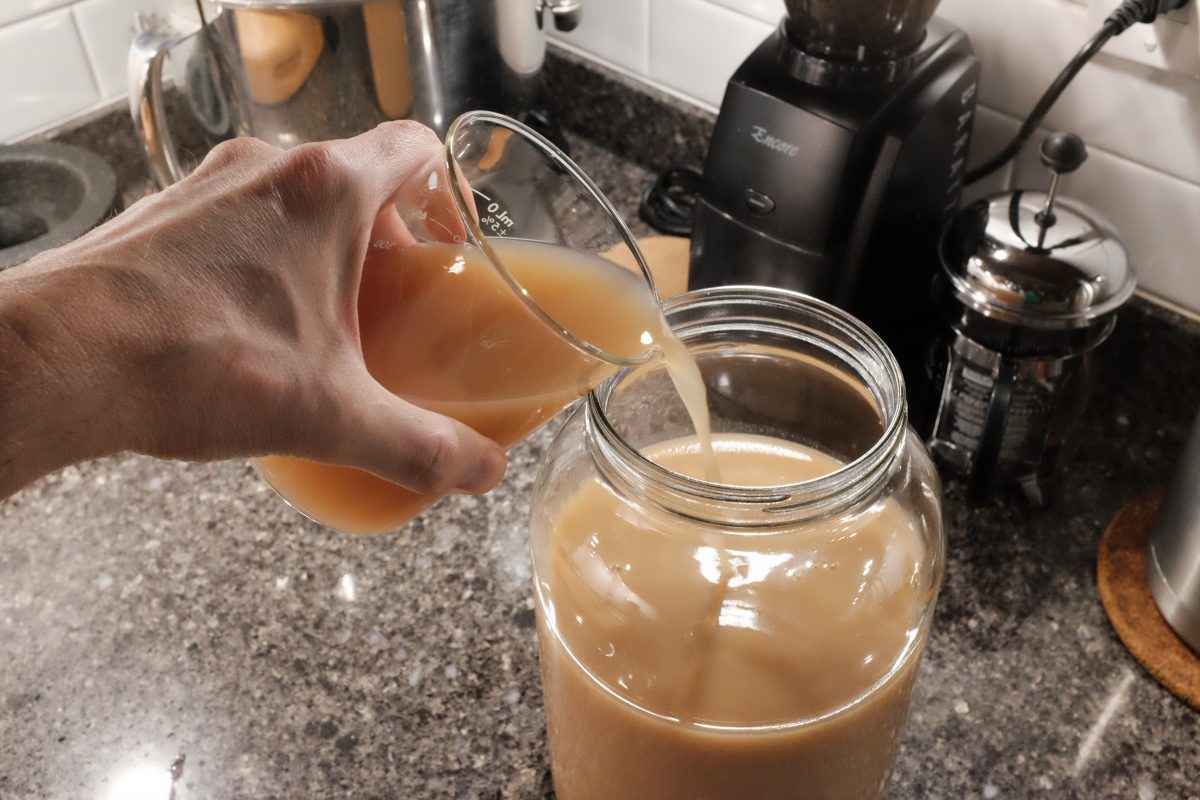
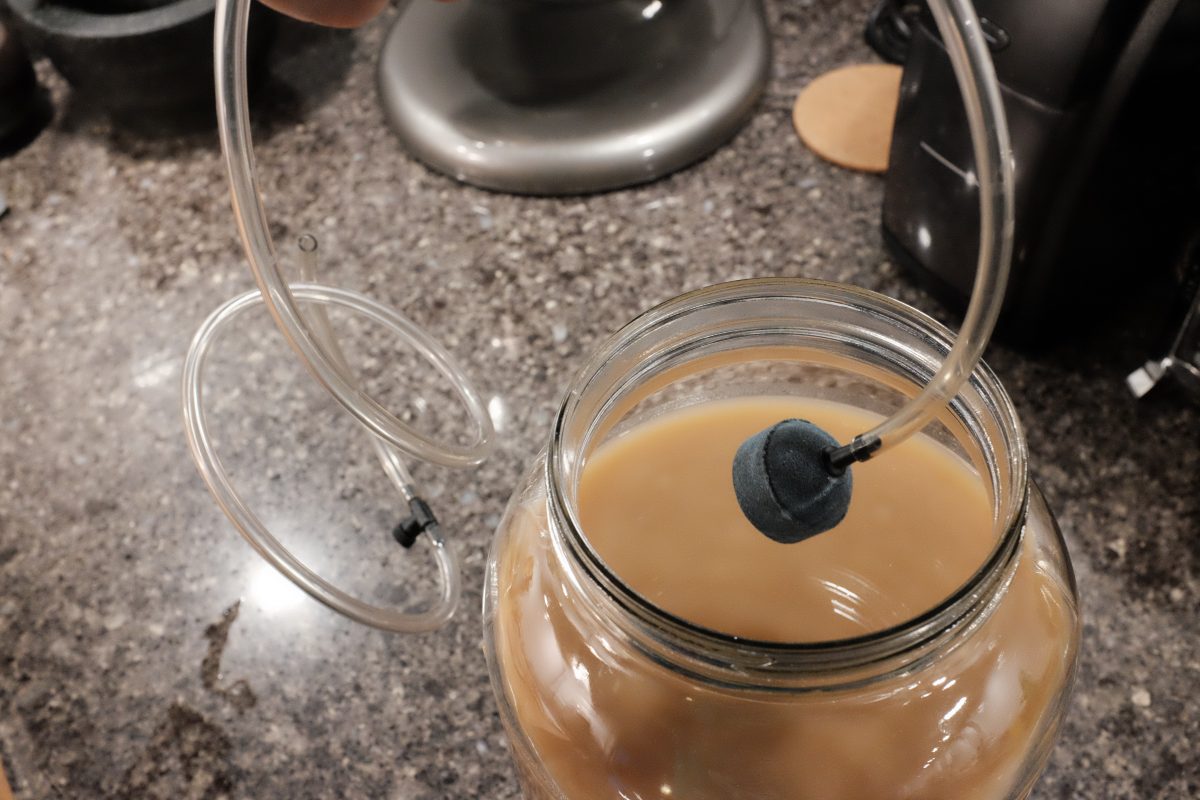
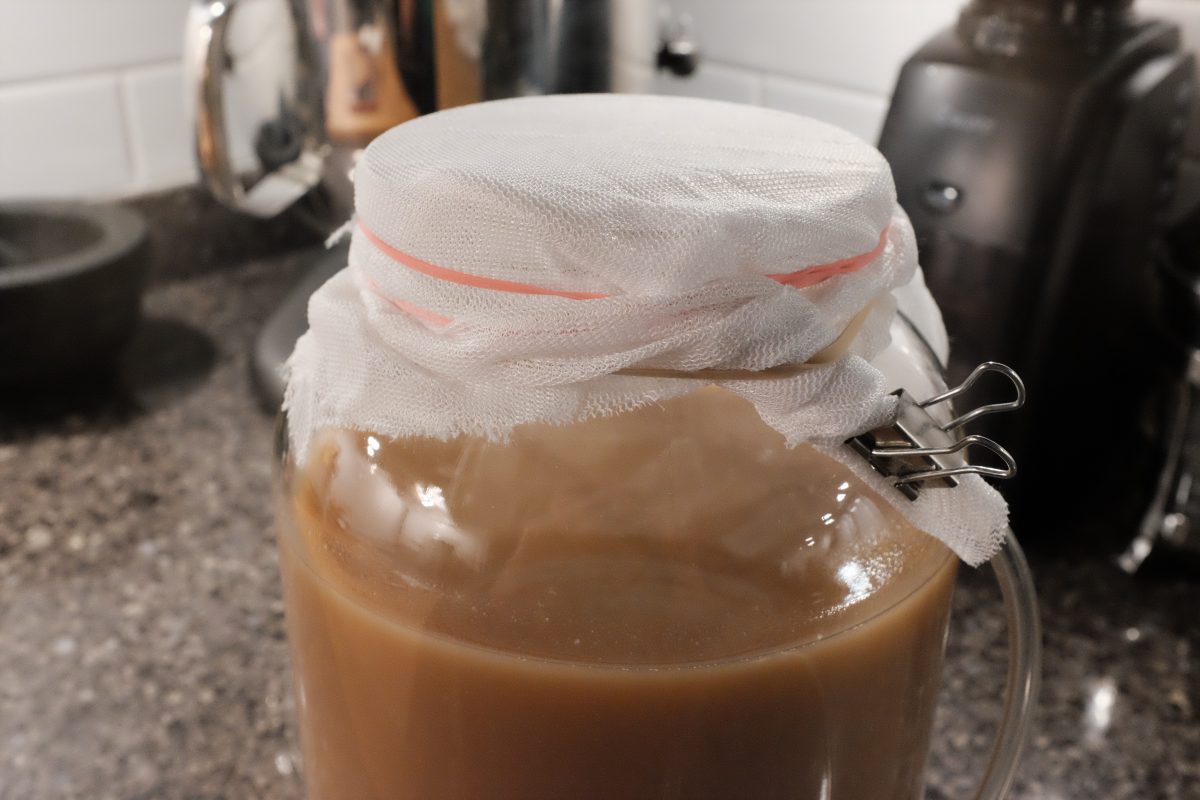
Process
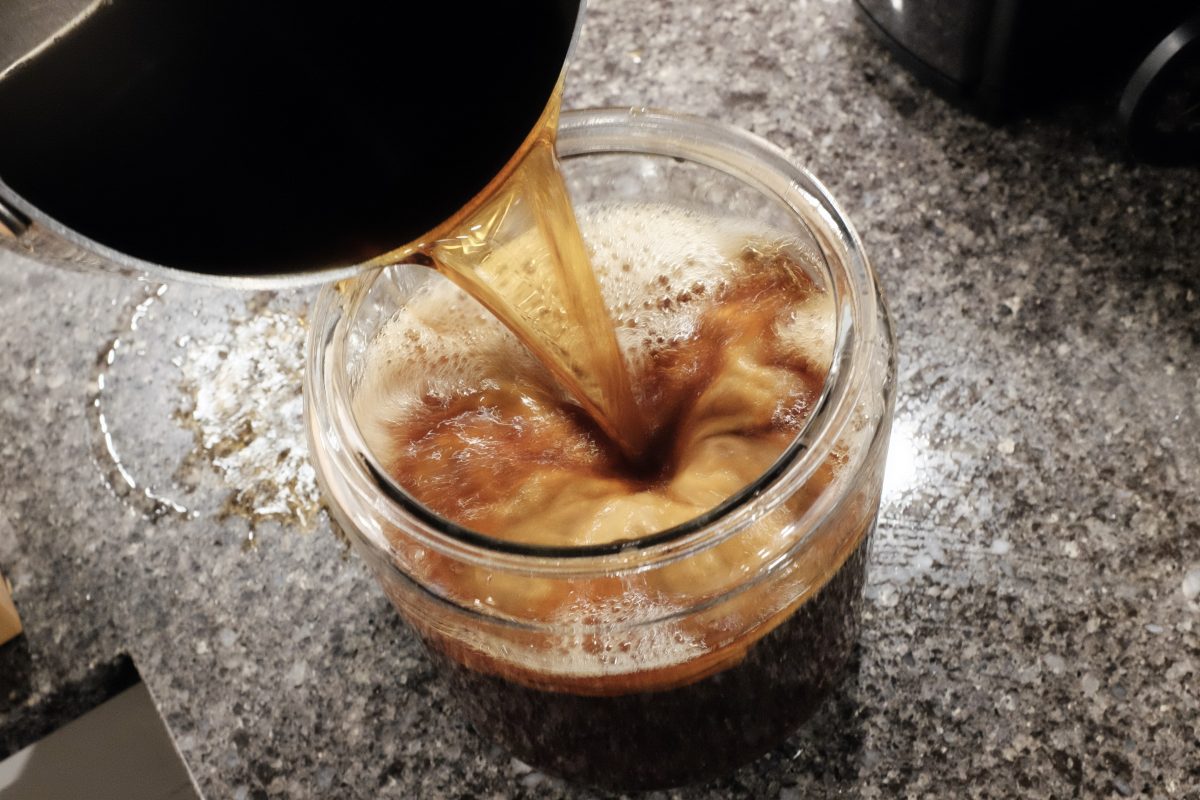
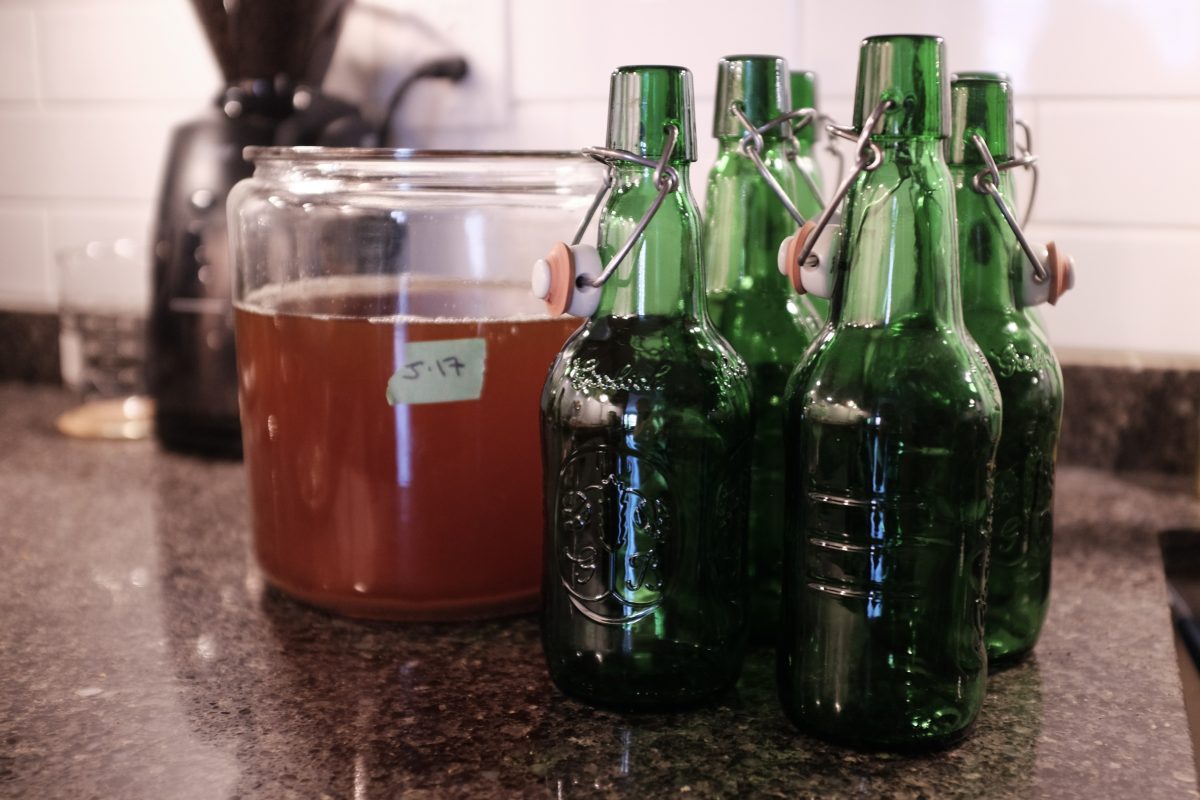
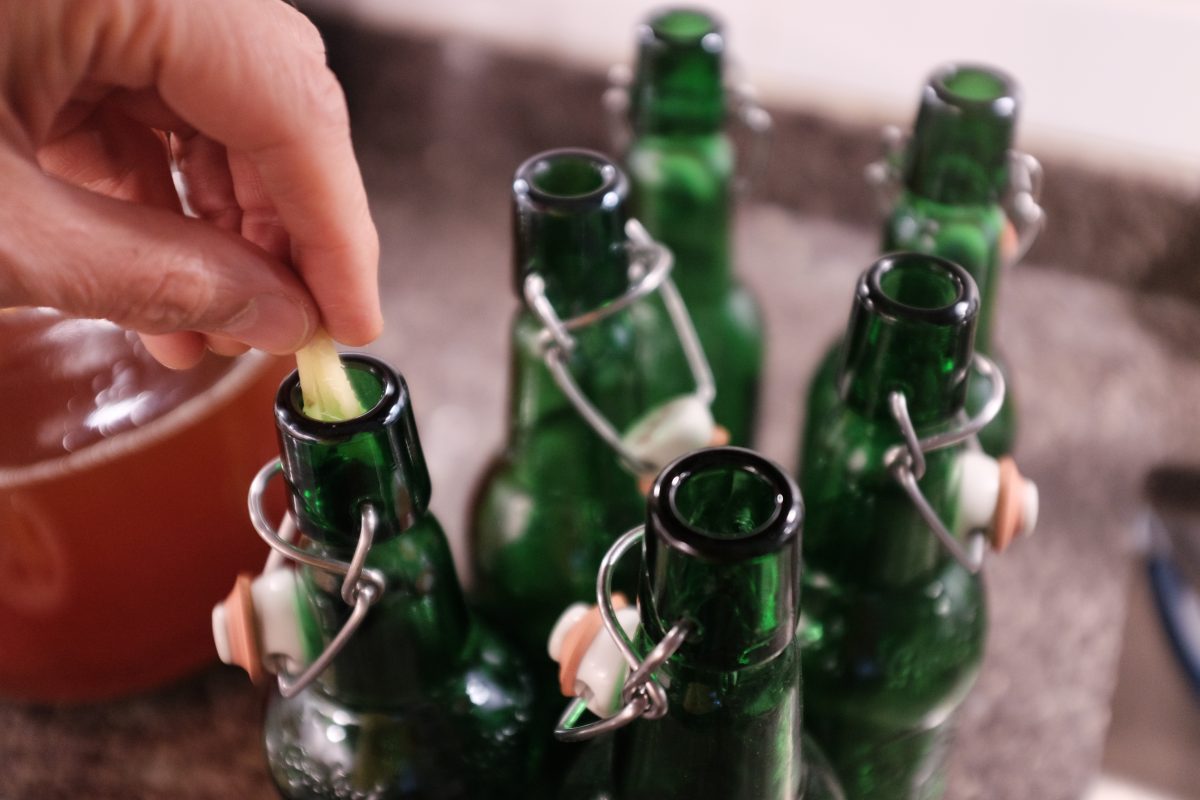
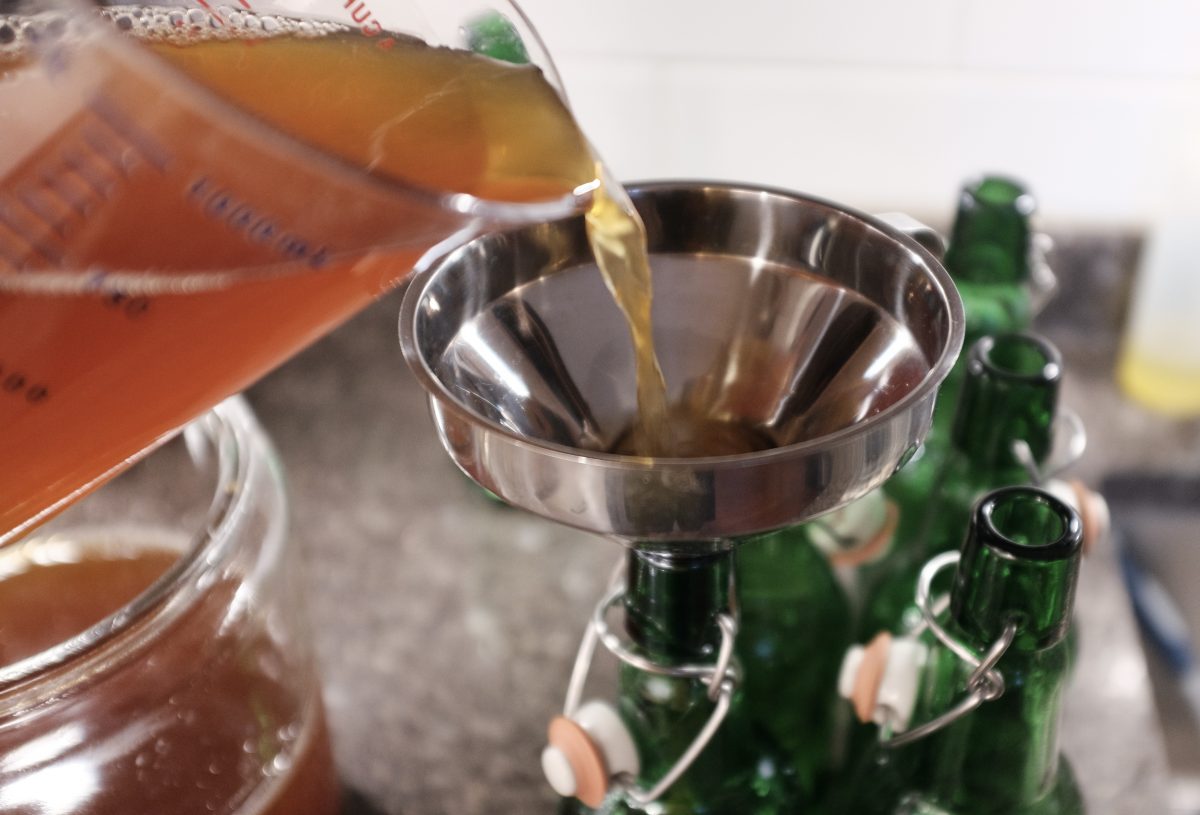
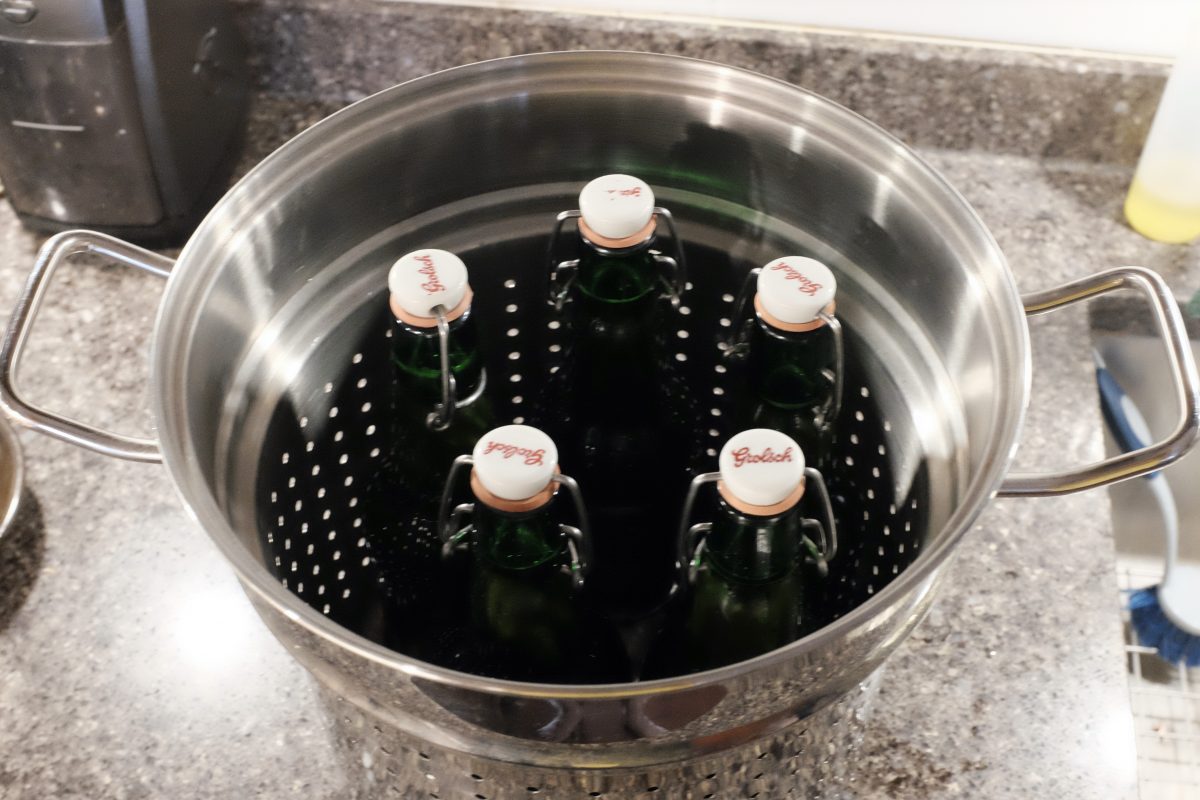
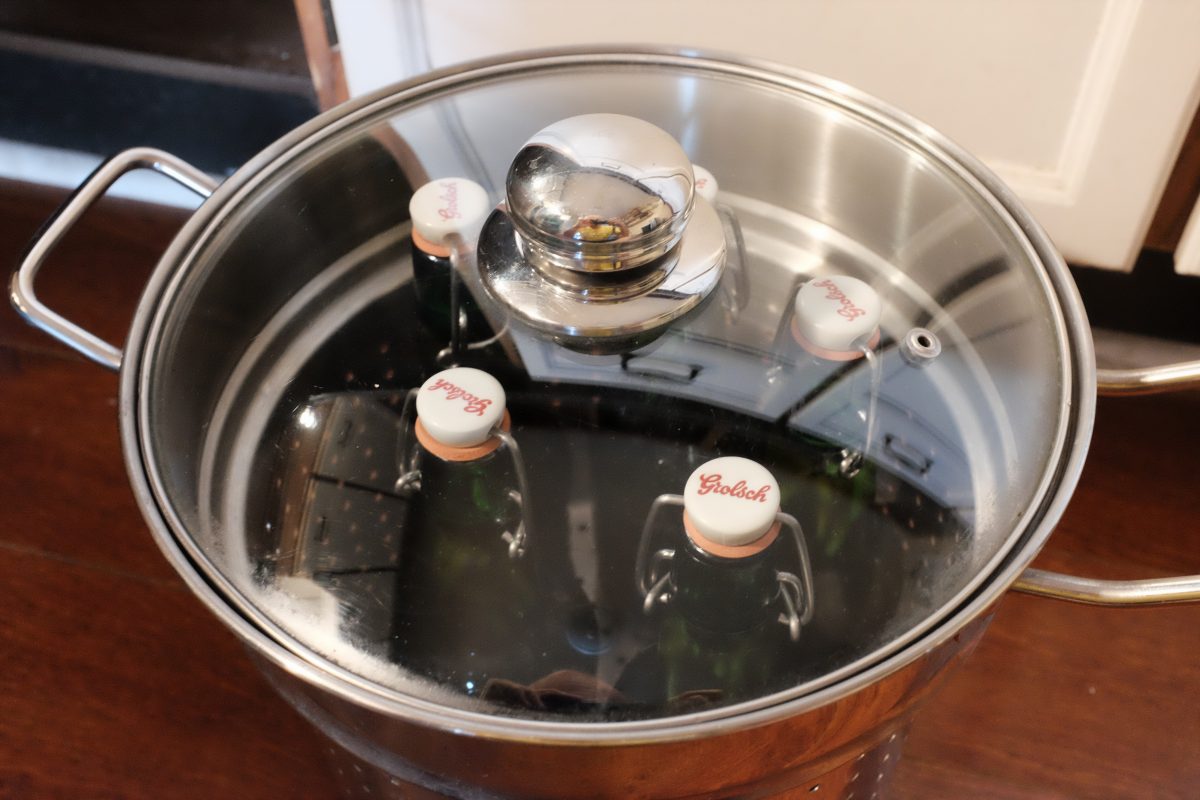
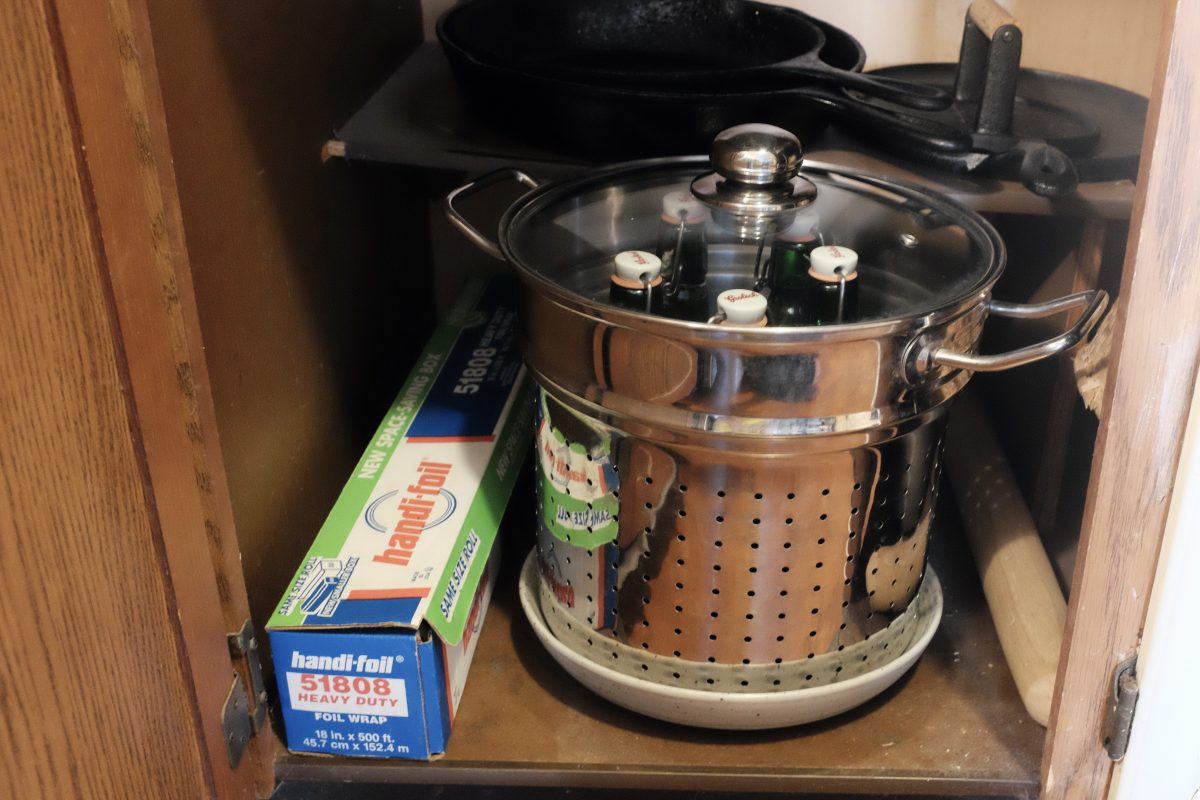
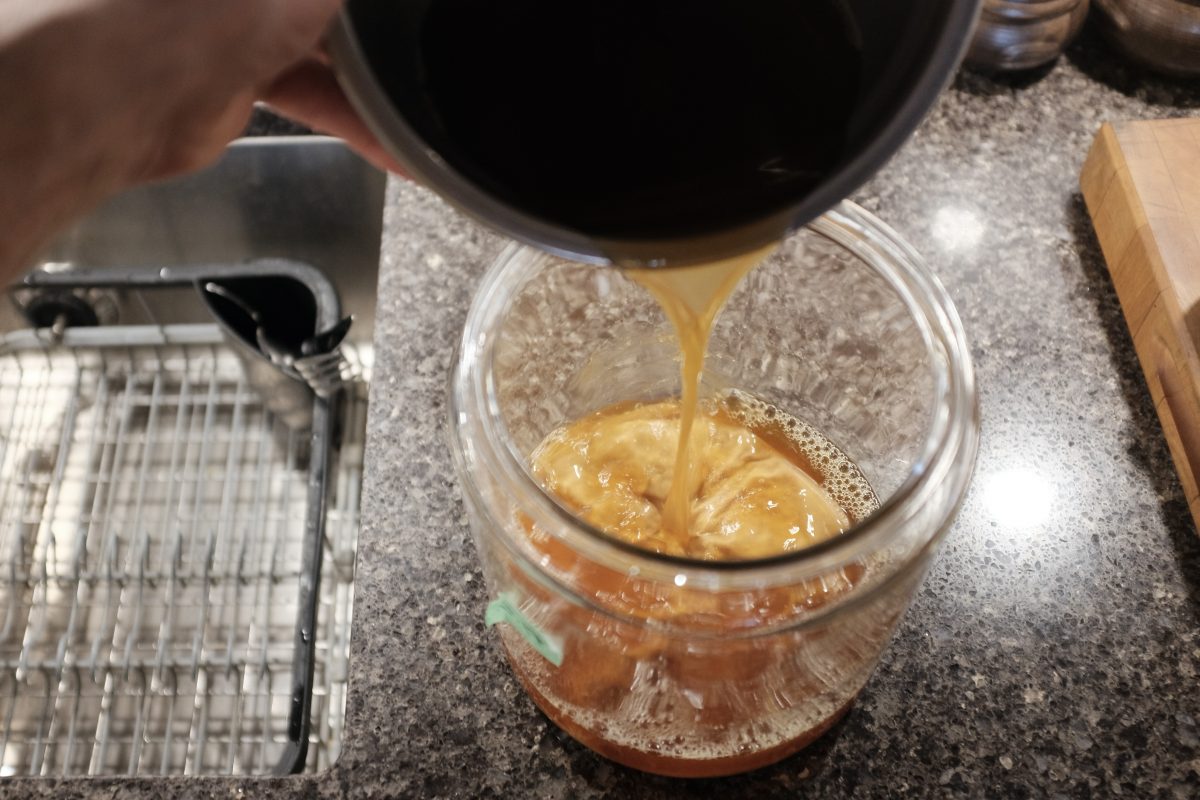
Time to bottle


Additional Ingredients / Second Ferment
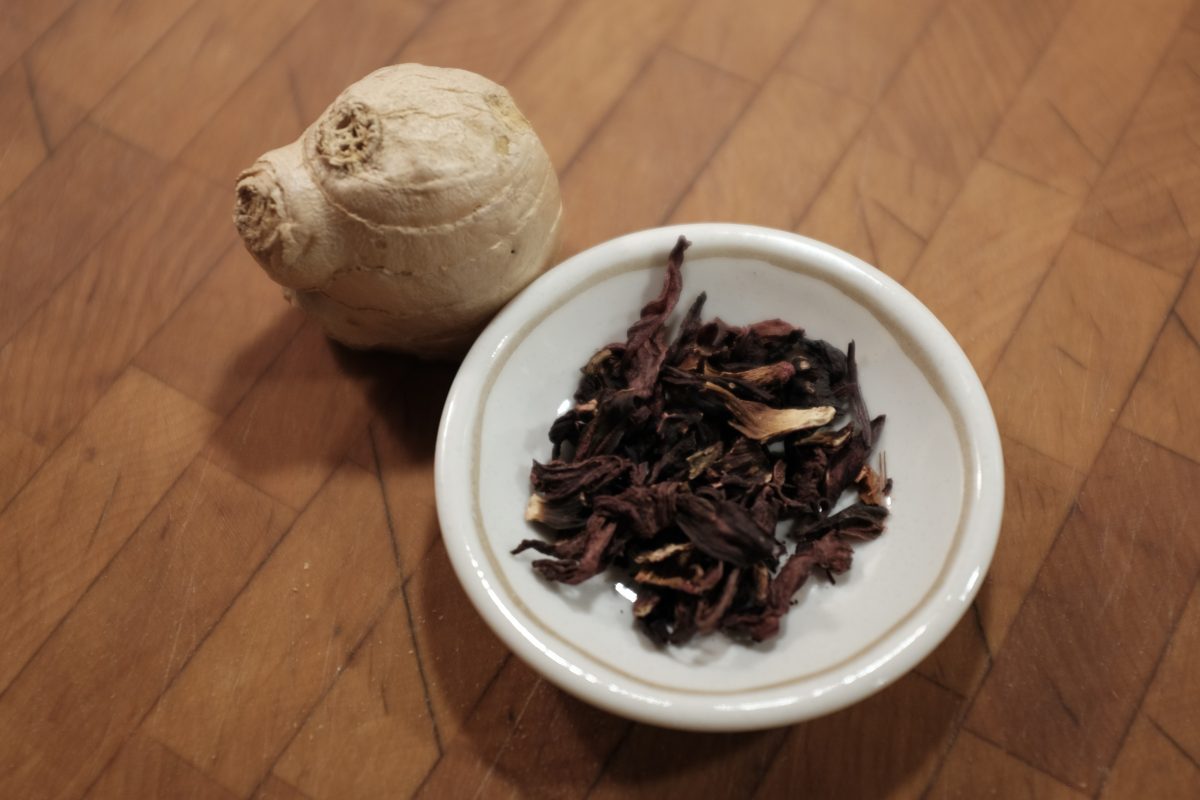
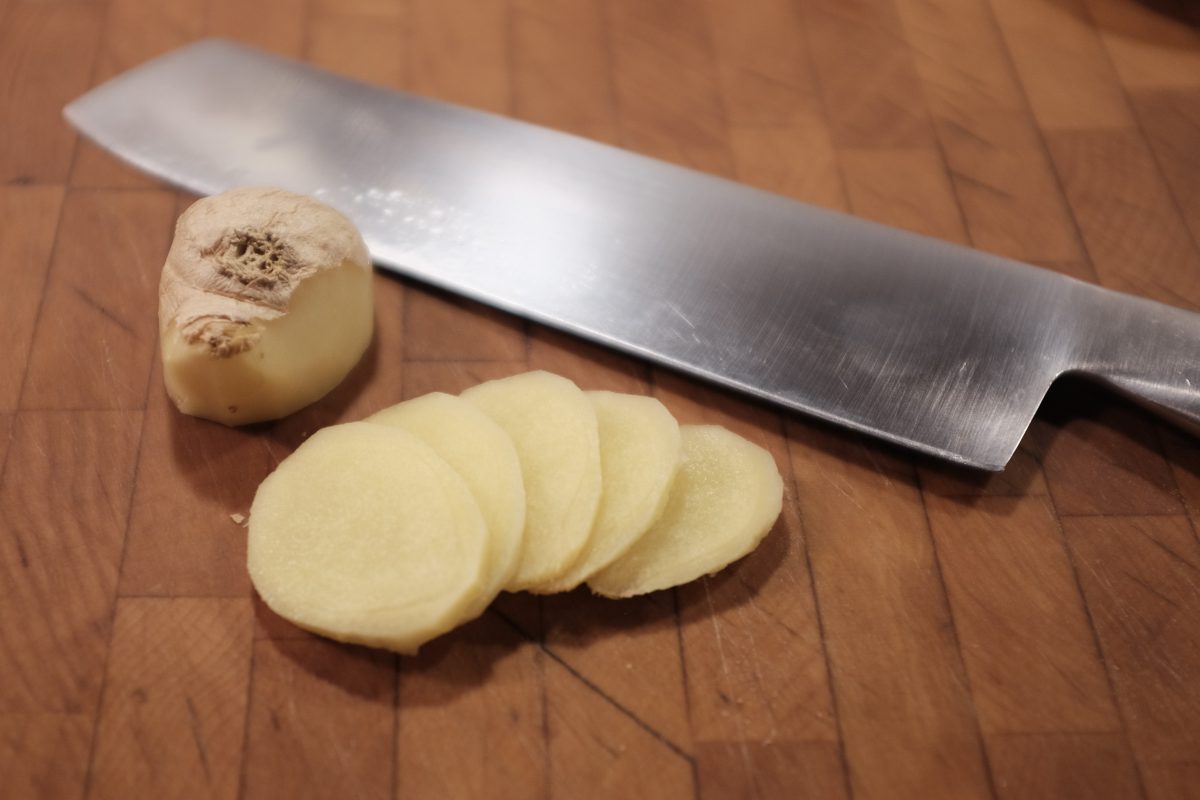
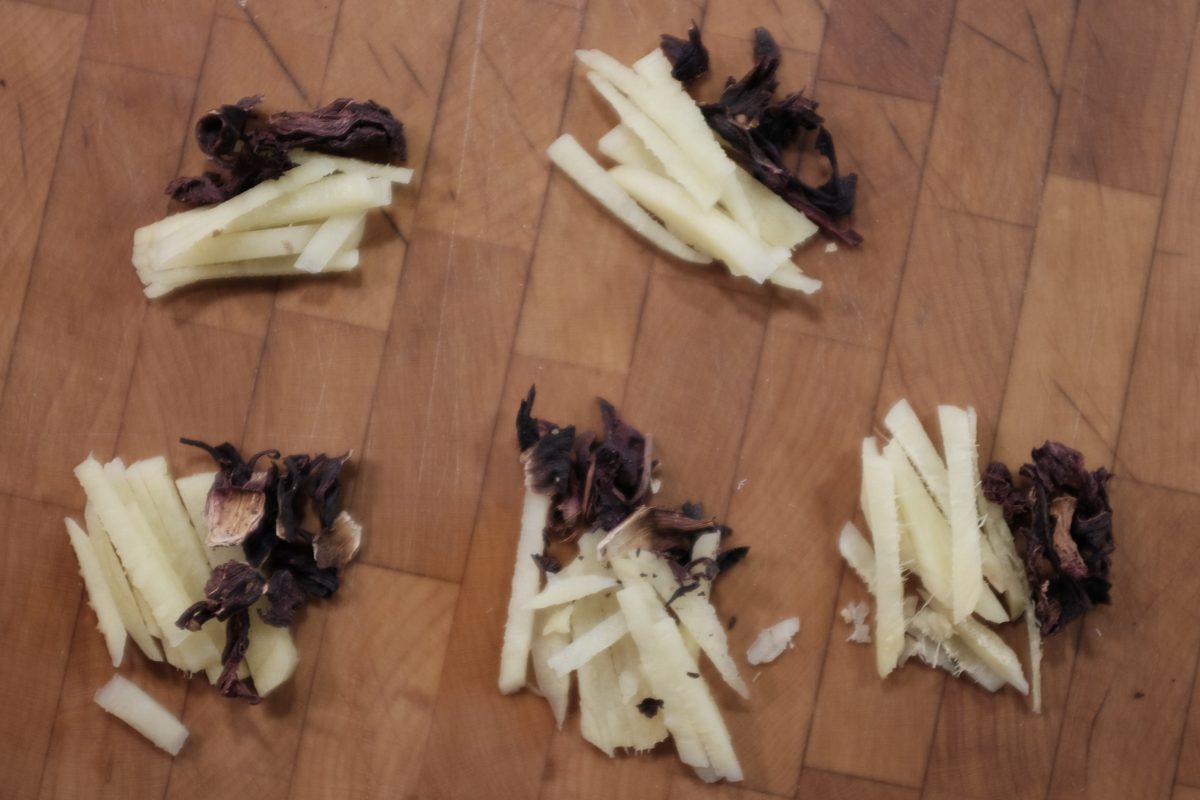
You can bottle your fermented tea just as it is. It will be delicious. Or, if you like, you can also add some aromatics as you bottle. I almost always add fresh ginger and dry hibiscus flowers to mine. The ginger adds a little sweet snap to the brew and the hibiscus add a little tang and a beautiful rosey colour.
Over the years I have tried citrus peels, cinnamon sticks, all kinds of herbs and spices and I always come back to ginger and hibiscus. It is a winning combination with the fermented tea. You can usually find whole dried hibiscus flowers in any spice shop, asian grocery store or Mexican grocery (where it is called Jamaica). It may also be under the name Rose of Sharon. It is all the same thing and definitely worth seeking out.
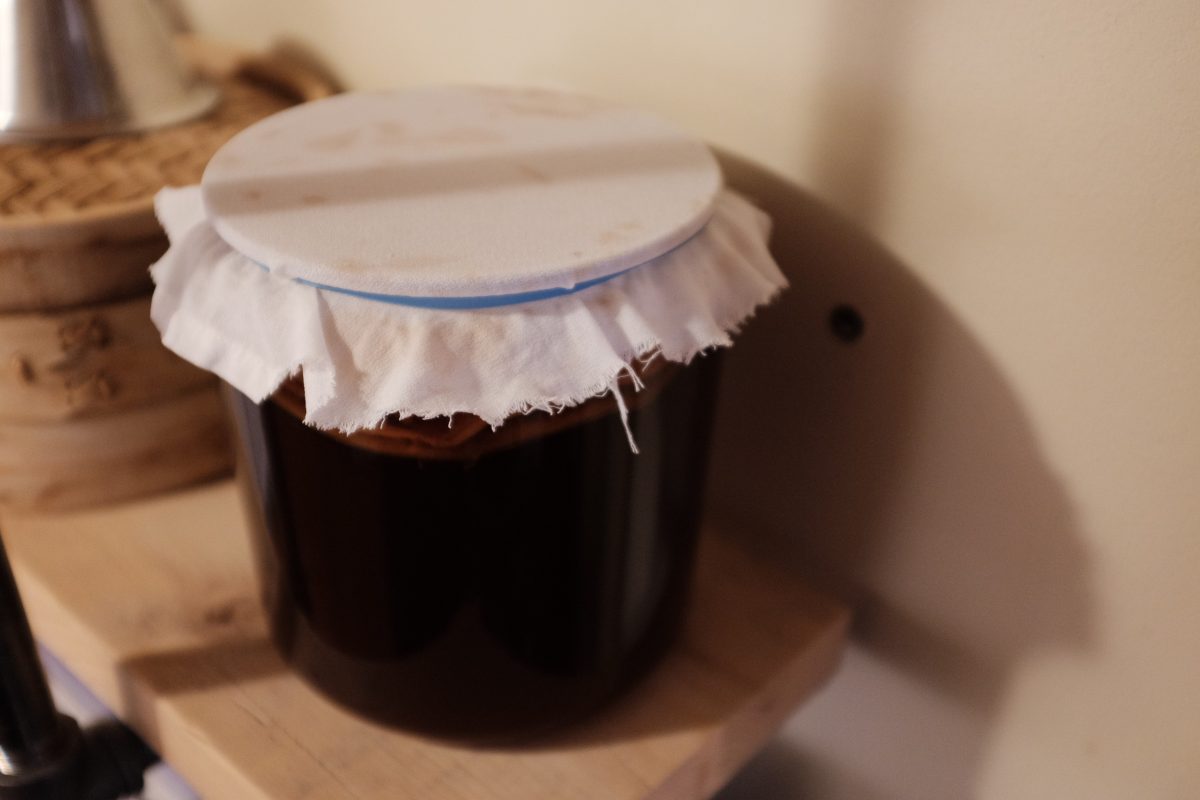
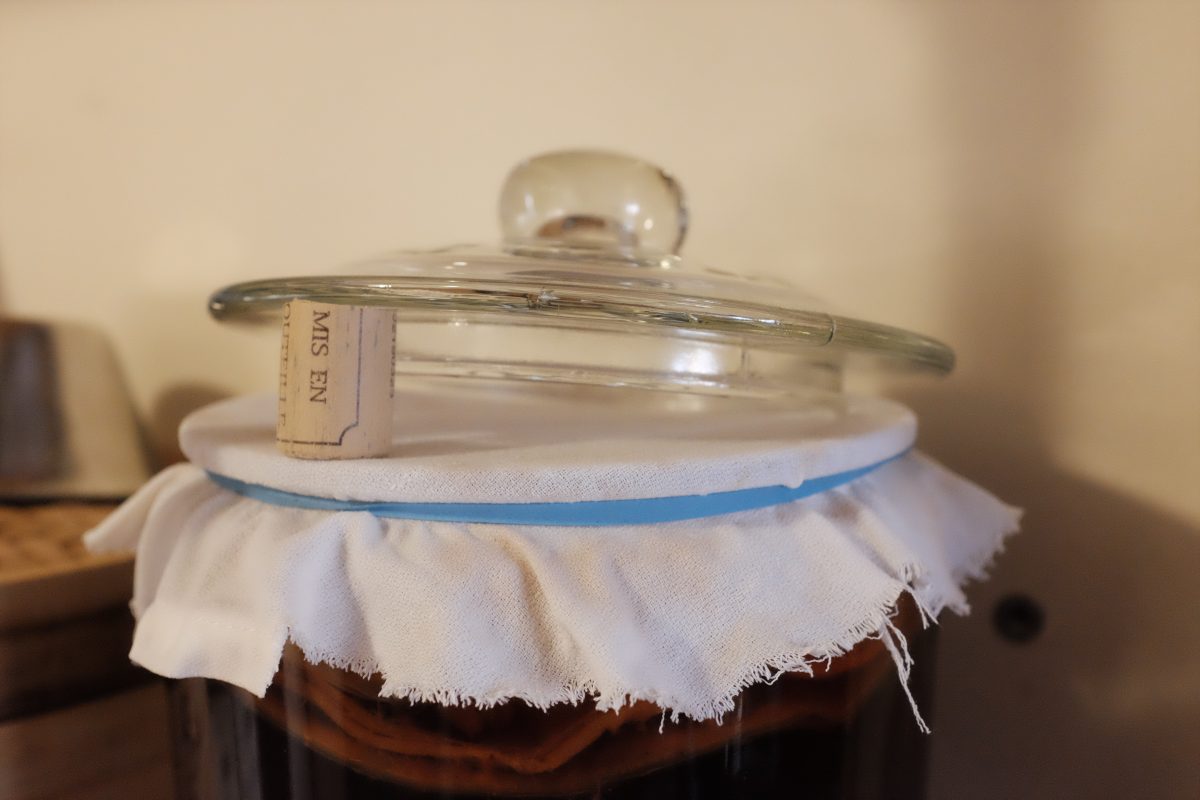
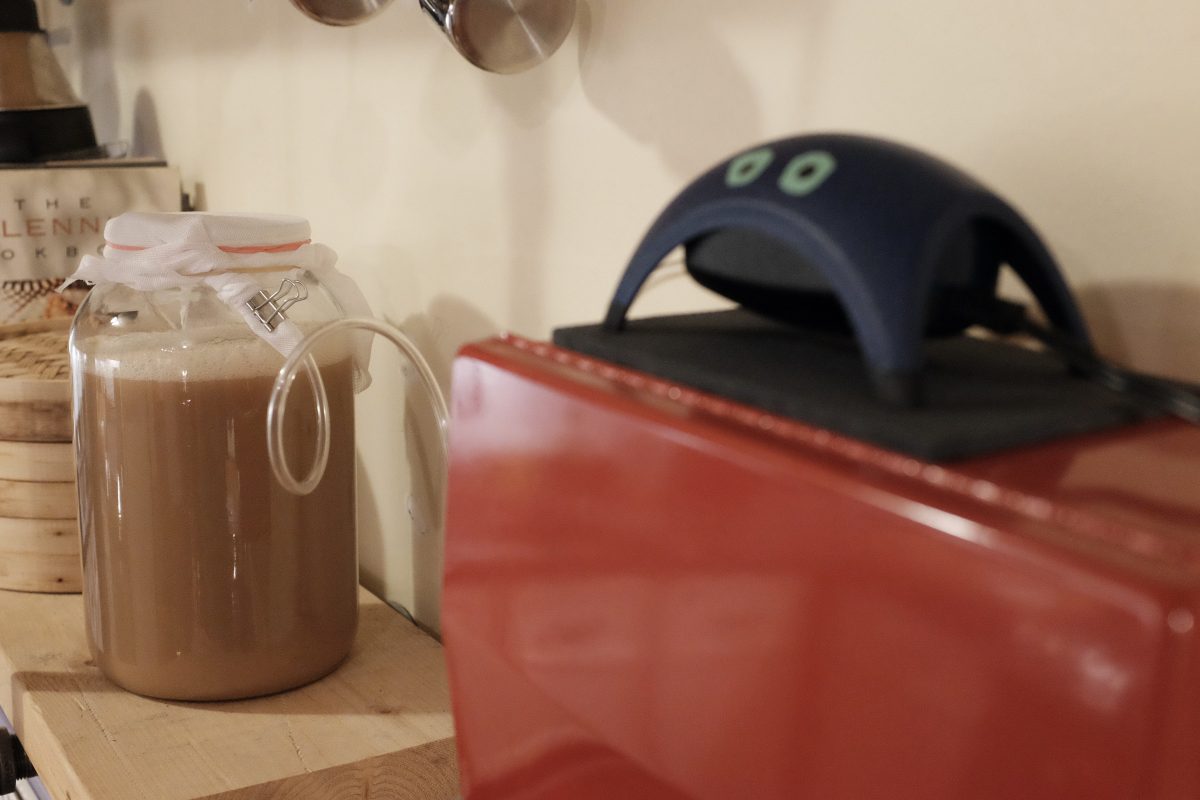
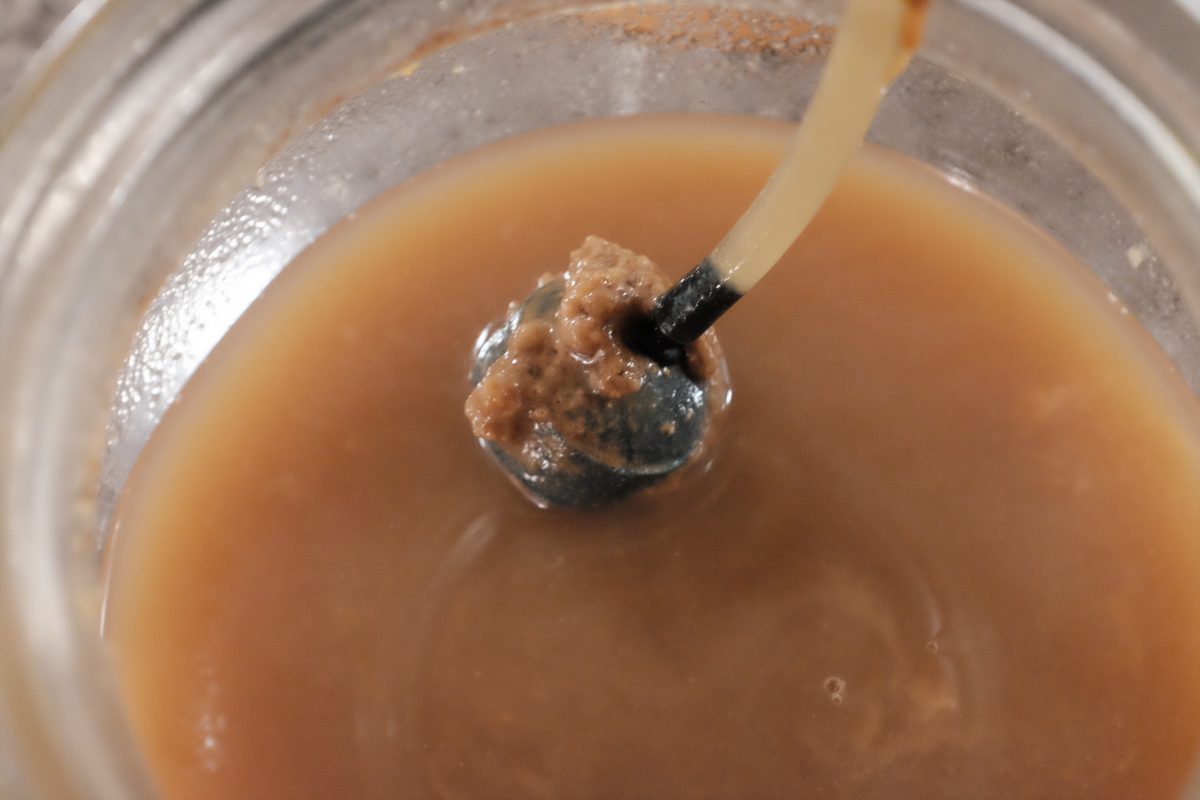
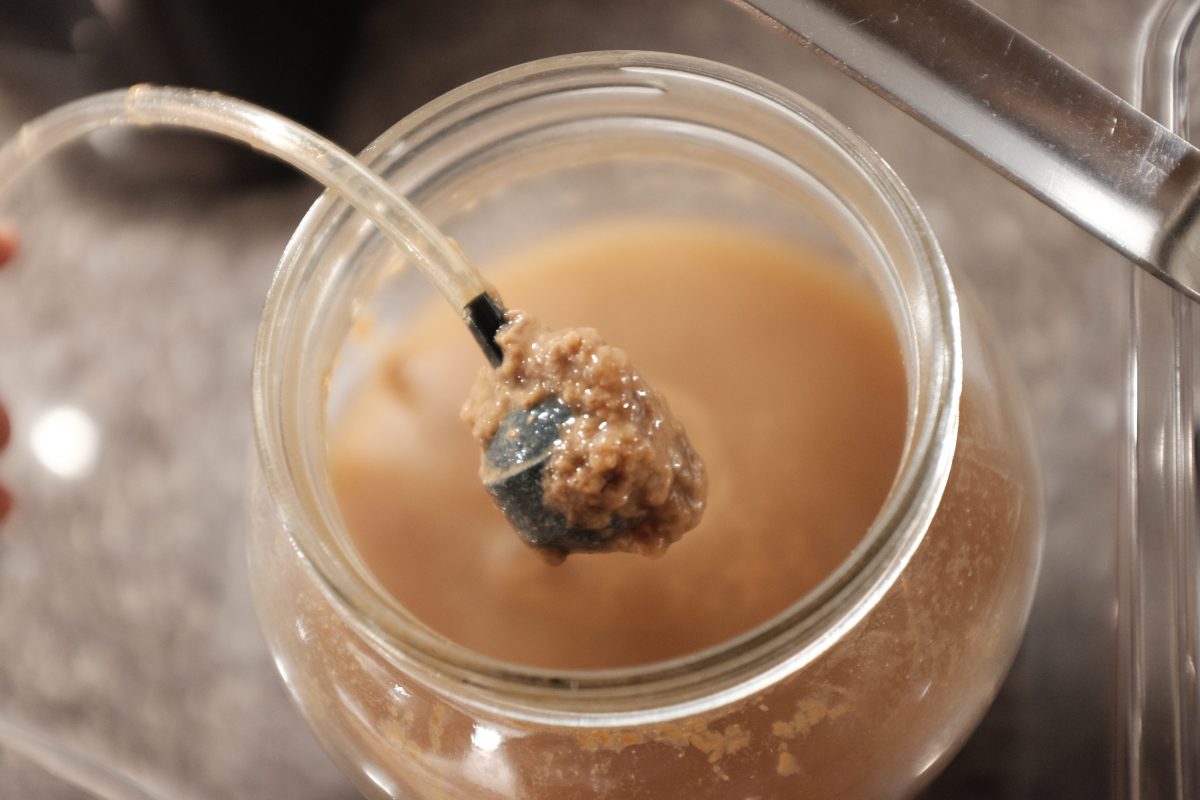
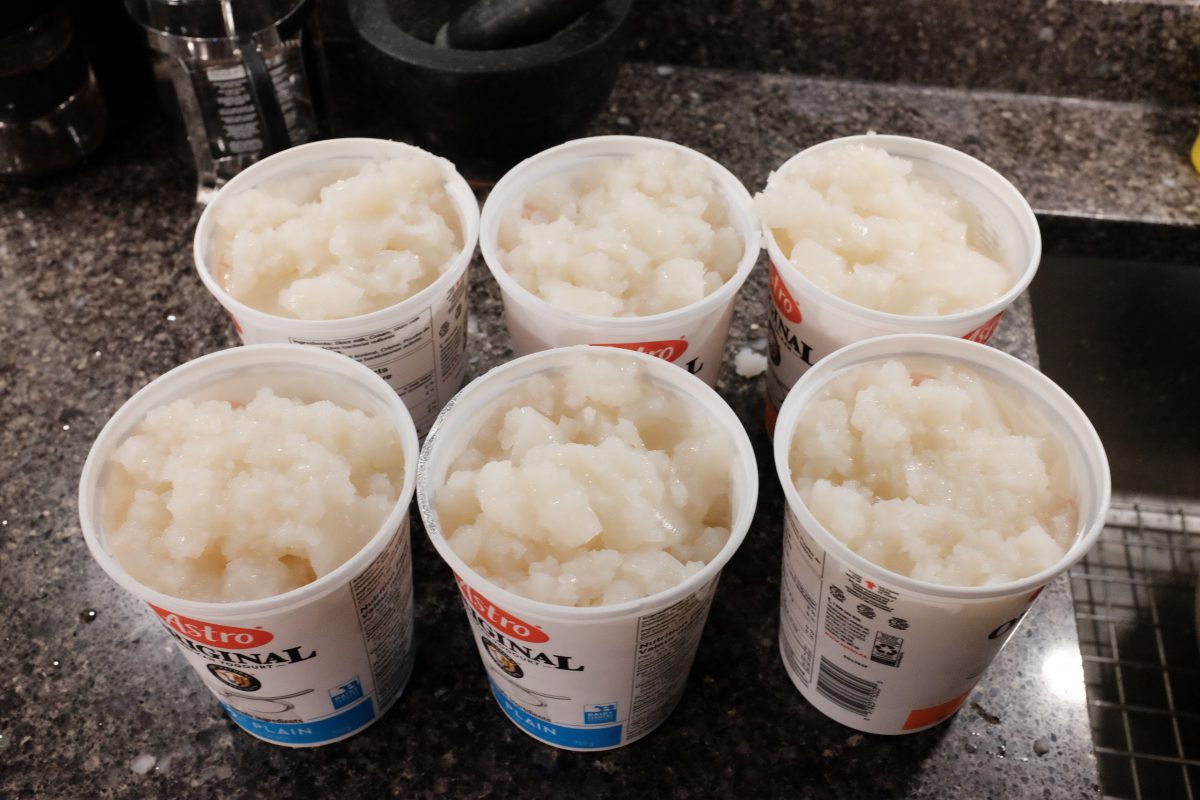
Scoby Storage
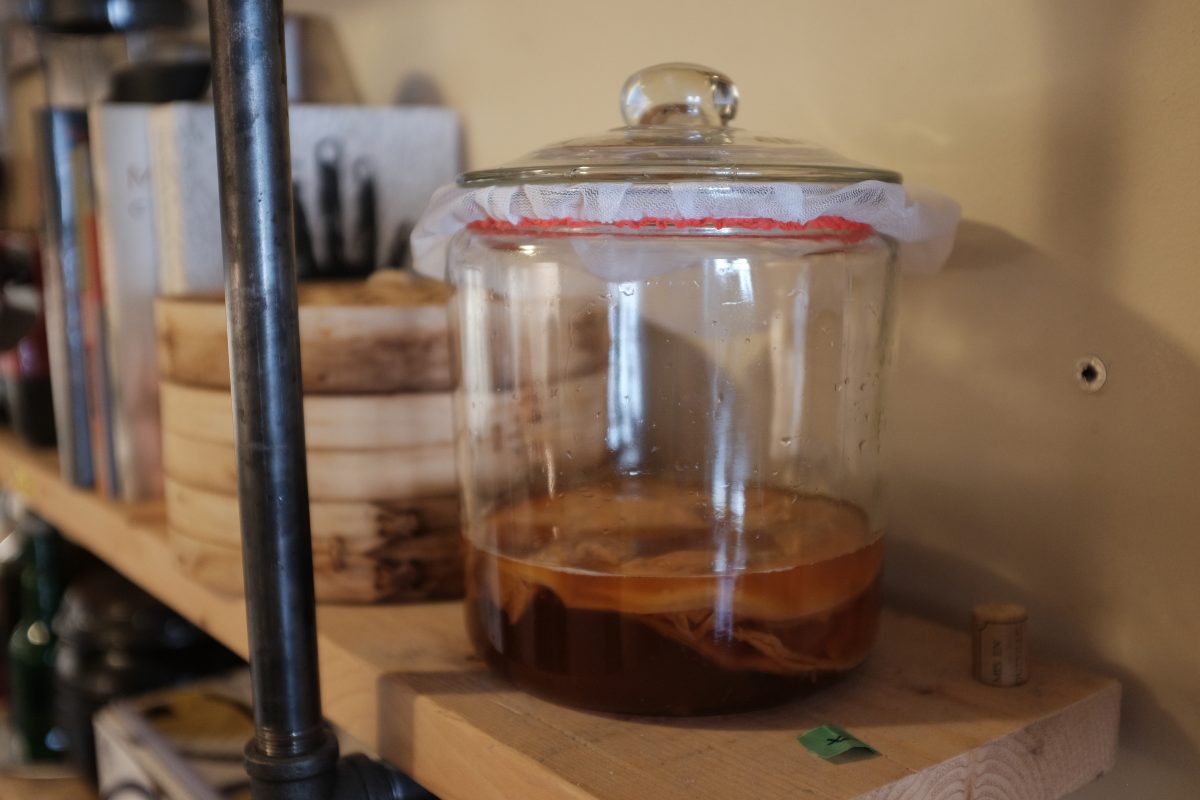
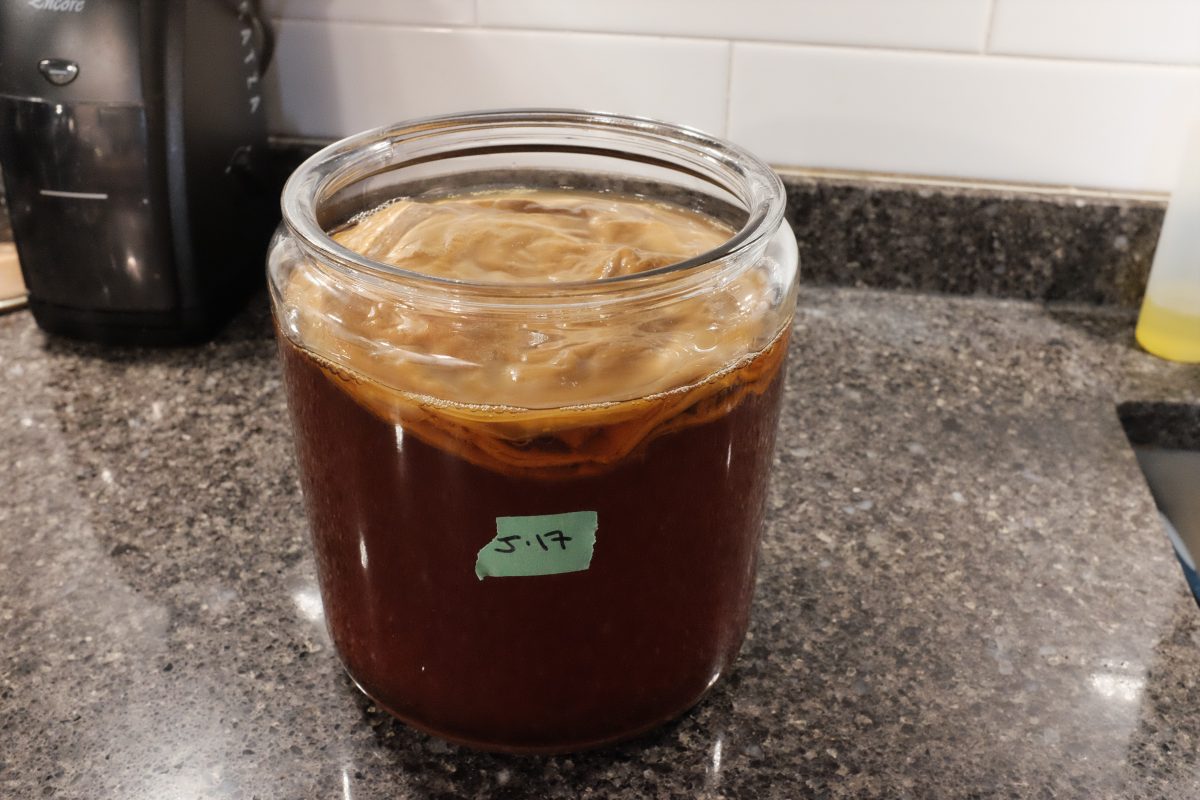
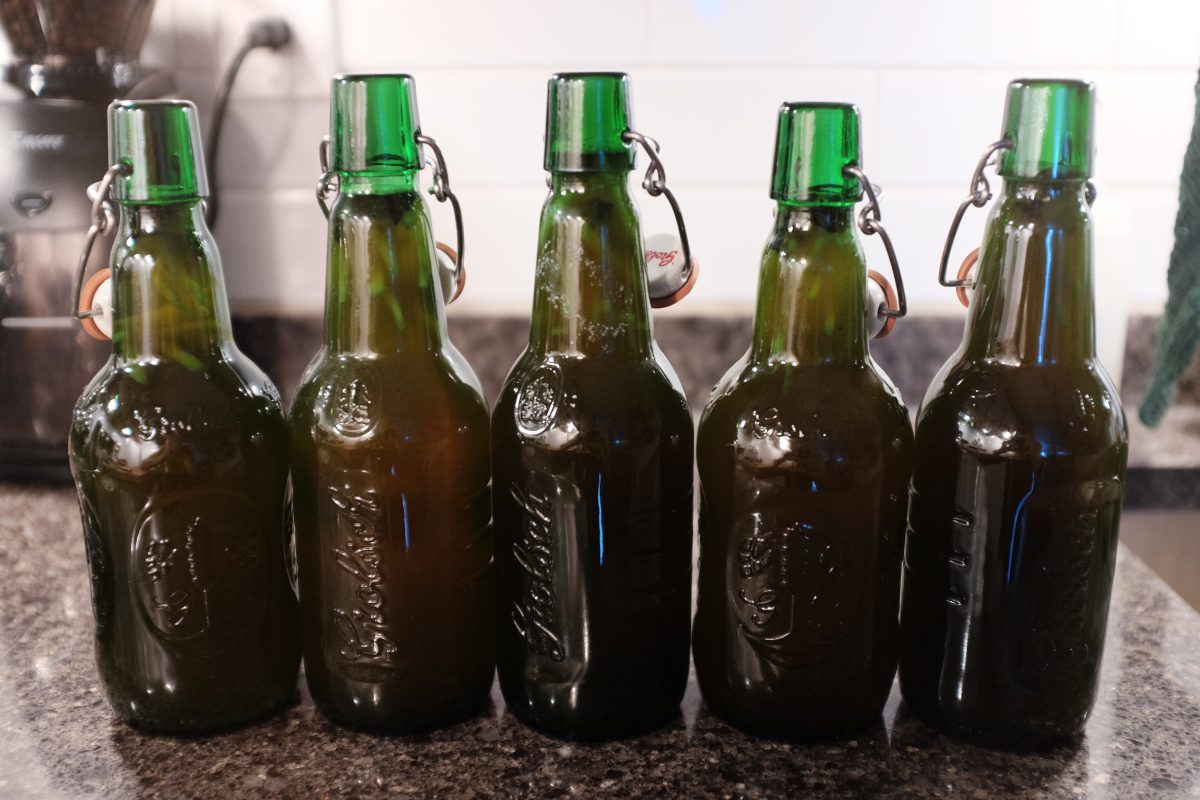
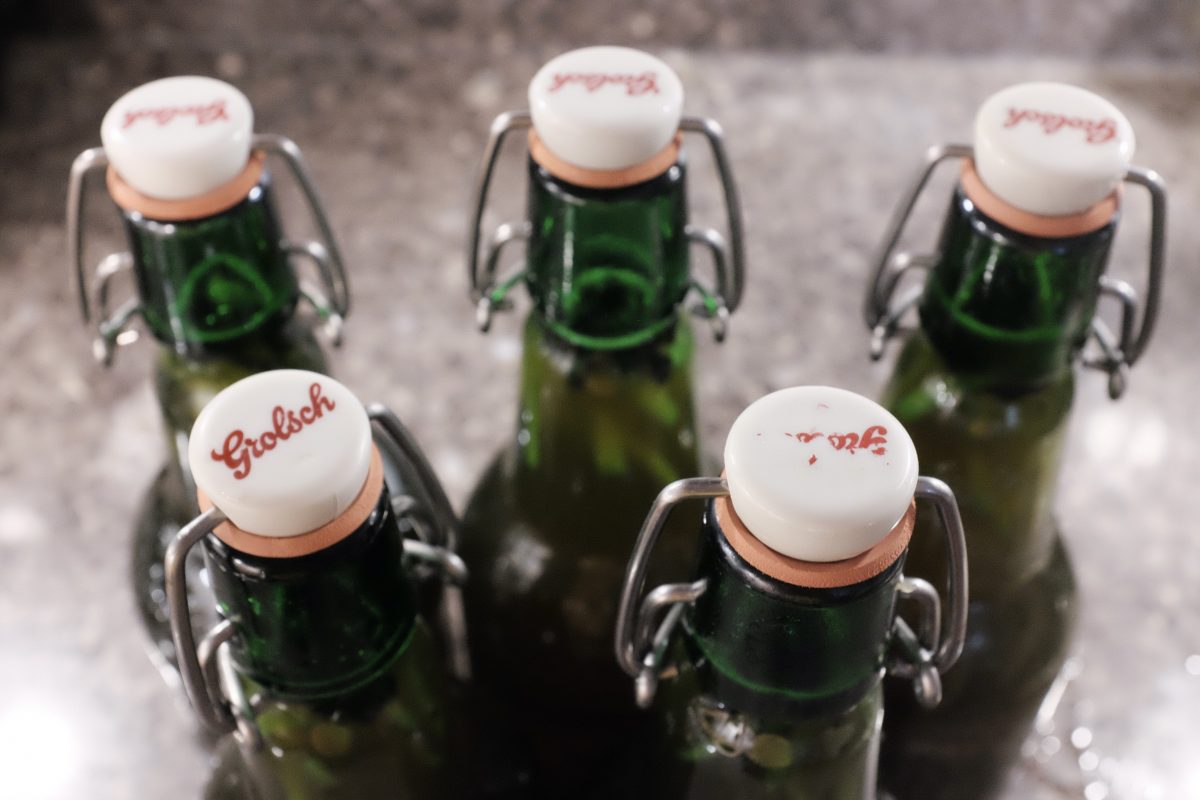
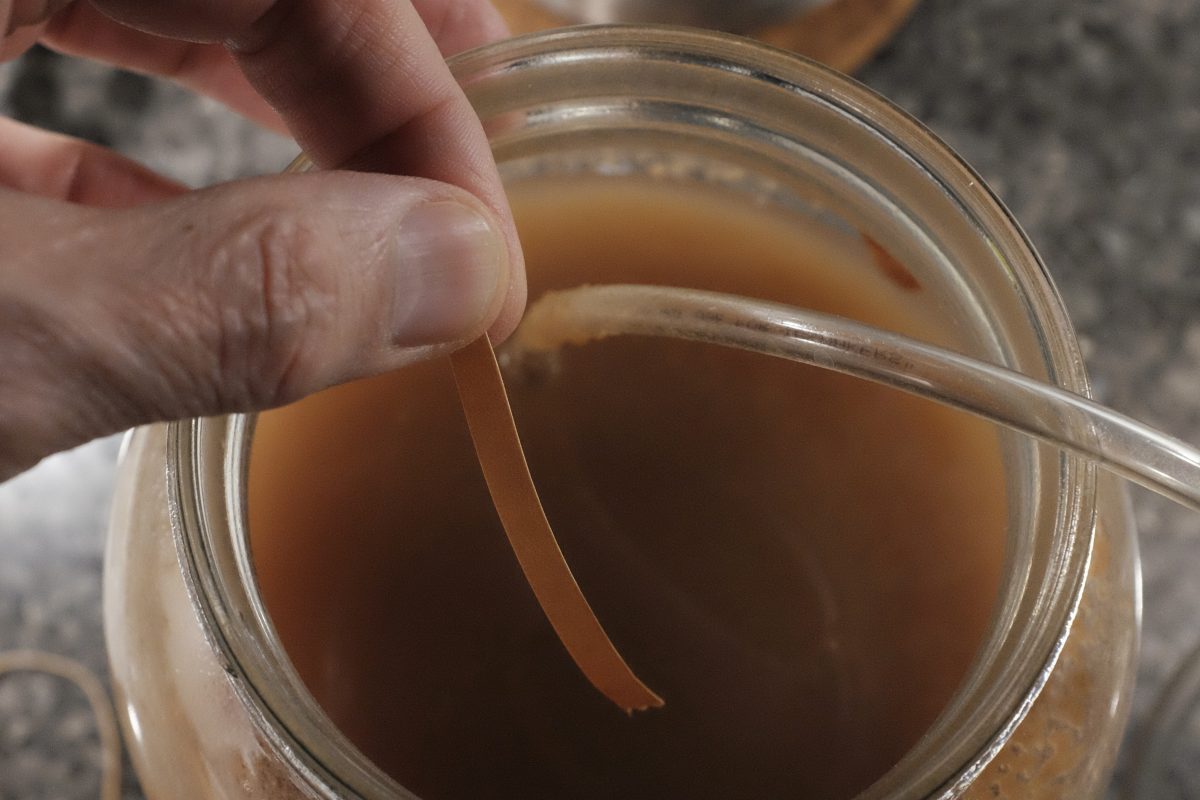
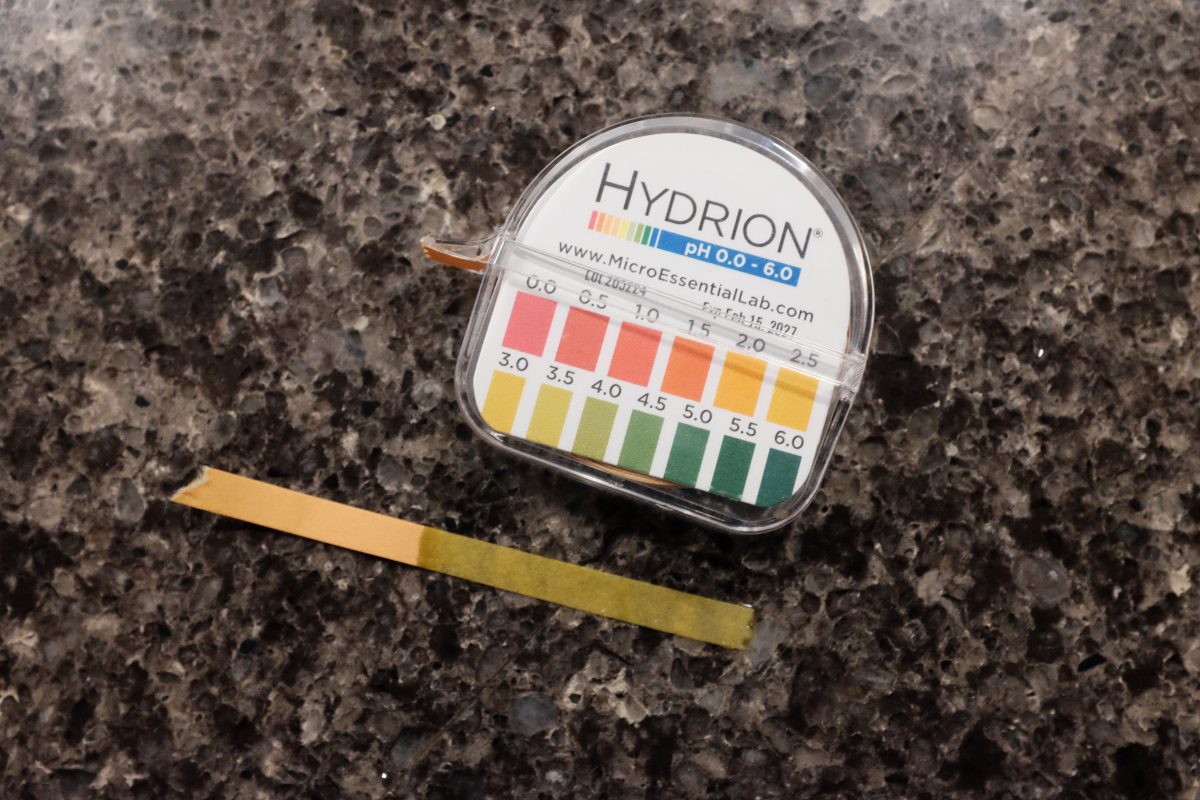
3 days later…
After 3 days in the bottle at room temperature, place the bottles in the fridge. The brew is done.
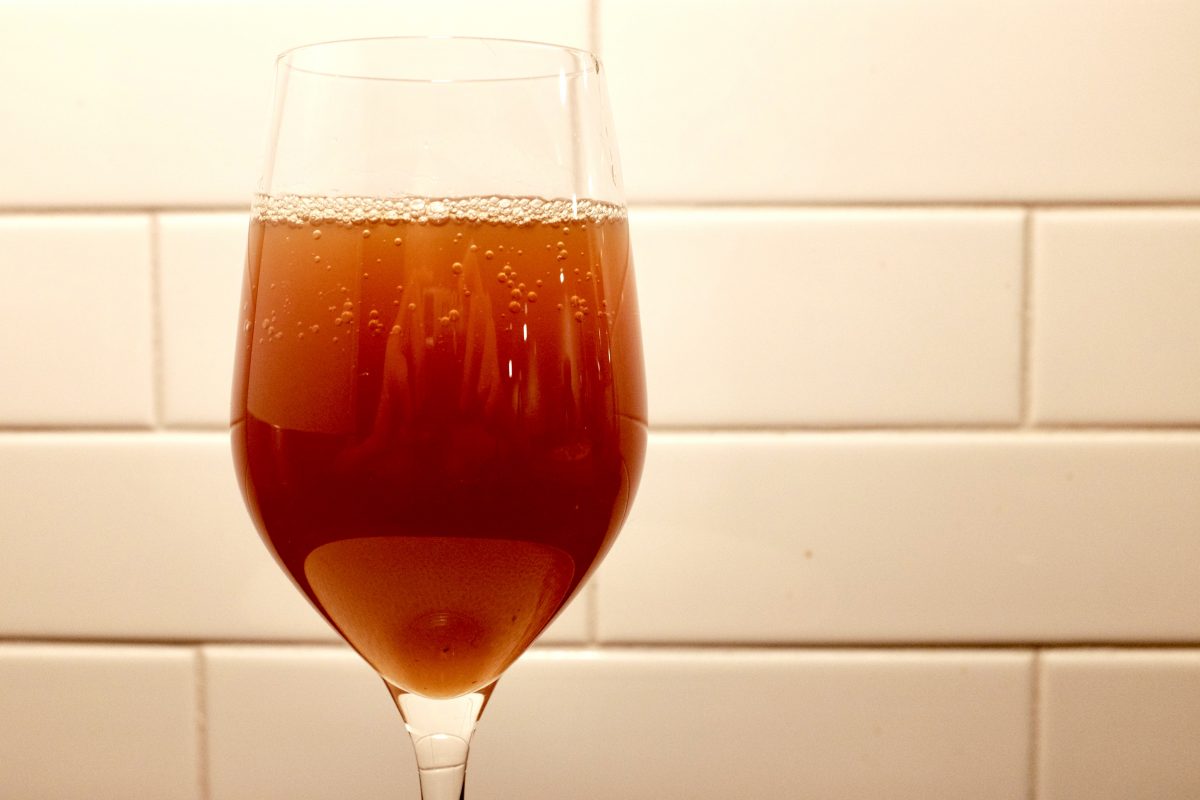
The finished brew is perfect as is but, feel free to add a squeeze of lemon or a few drops of honey or anything else you might want to try. If the flavour is too intense, you can cut it with bubbly water. I often do this if I am drinking this with more subtle flavoured foods.
If you have any questions, comments or suggestions, please leave them below. I always look forward to hearing from you. If you enjoy the content and would like to contribute towards website maintenance and development, you can make a donation here. Thank you for reading TigerSalad.
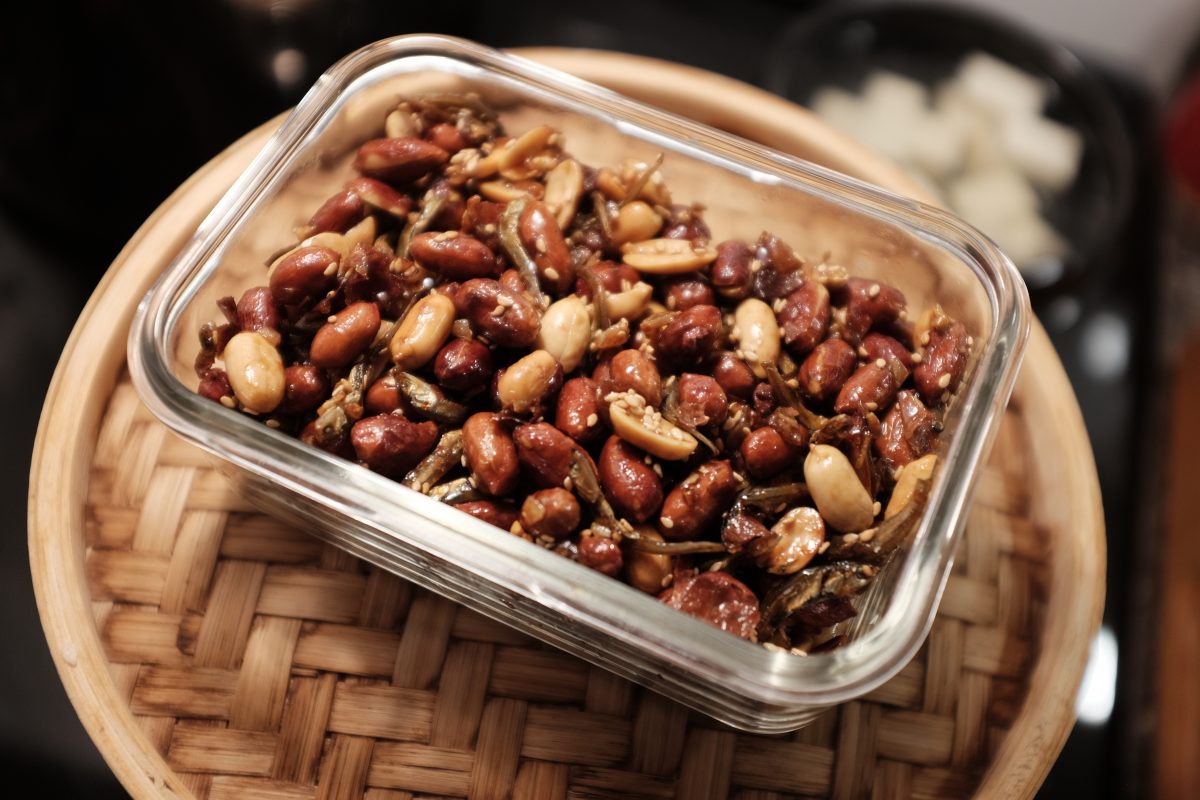
Roasted Peanut and Anchovy Banchan
Roasted Peanut and Anchovies:
This is one of my all time favourite Korean side dishes. It is much more common to see it called Fried Anchovy and Peanut / 멸차땅콩볶음 but this version has far more peanuts than fish so I reversed the name to Peanut and Anchovy / 땅콩멸치볶음. There are a few different grocery stores around me that sell ready made versions and I have tried all of them. Some are spicy, some are not and the ratio of anchovy to peanut is all over the place. Some are mostly anchovy, some half and half and some (in the cheaper places) are mostly nuts with just a few fish. Peanuts are cheaper than dry anchovies by far. This recipe is a mostly peanut version..which is really the one I love most. I also have an anchovy only recipe here.
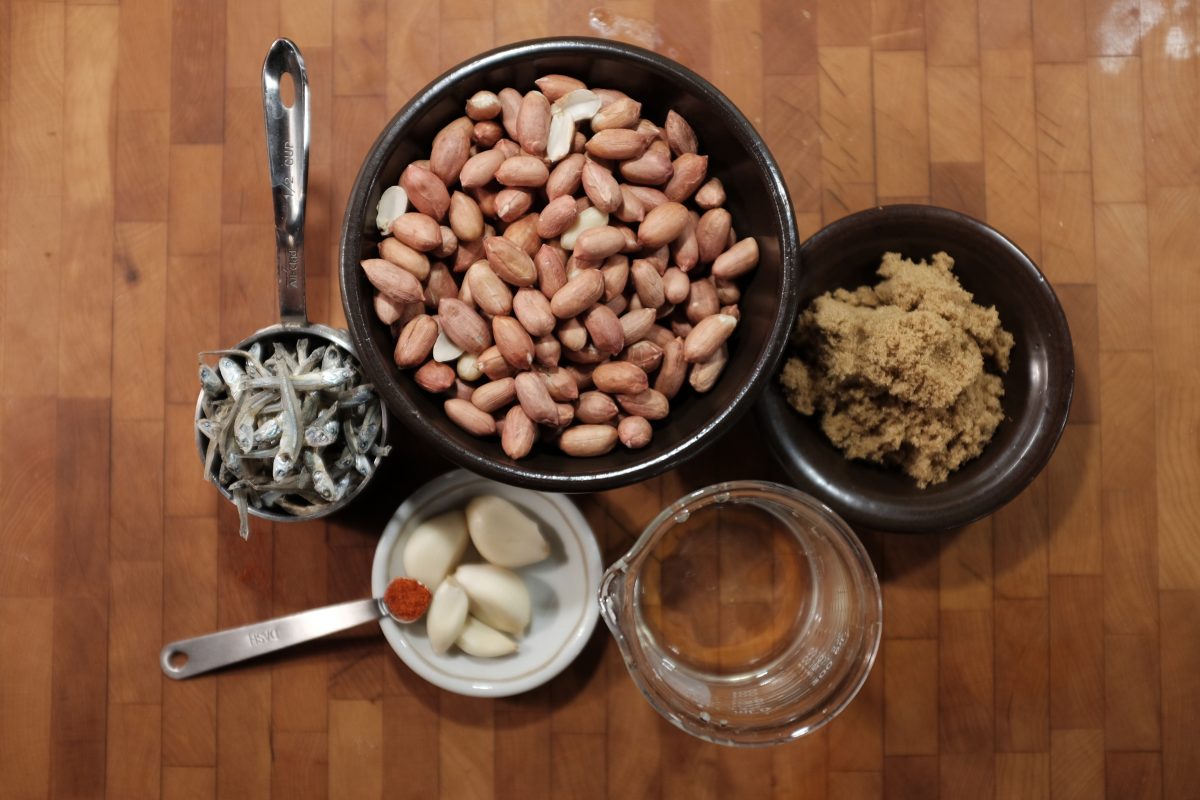
Ingredients:
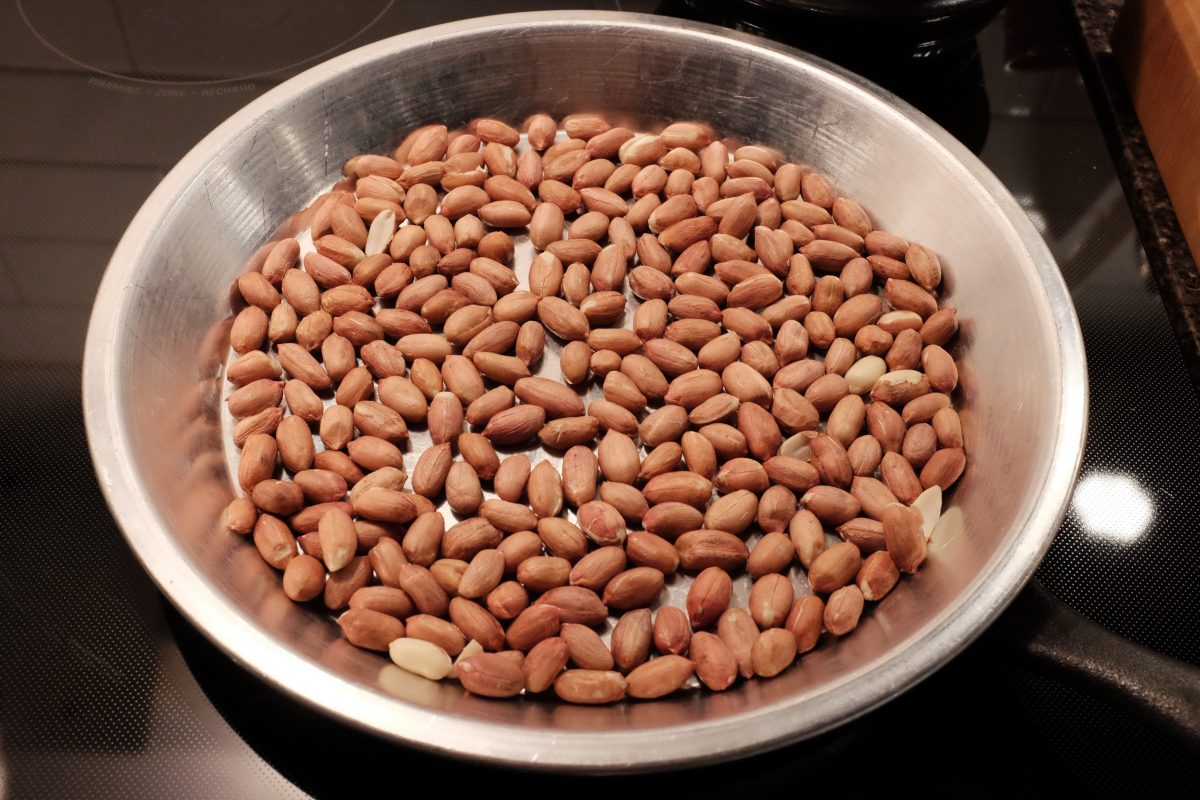
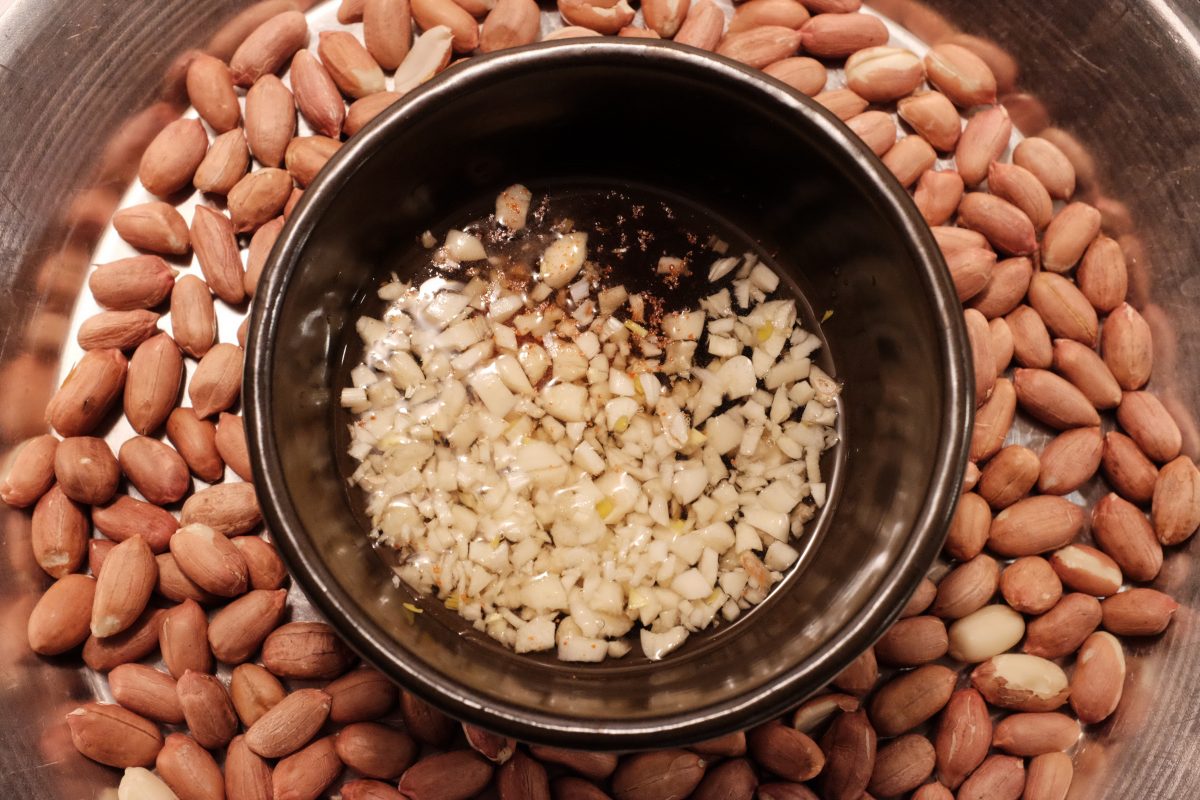
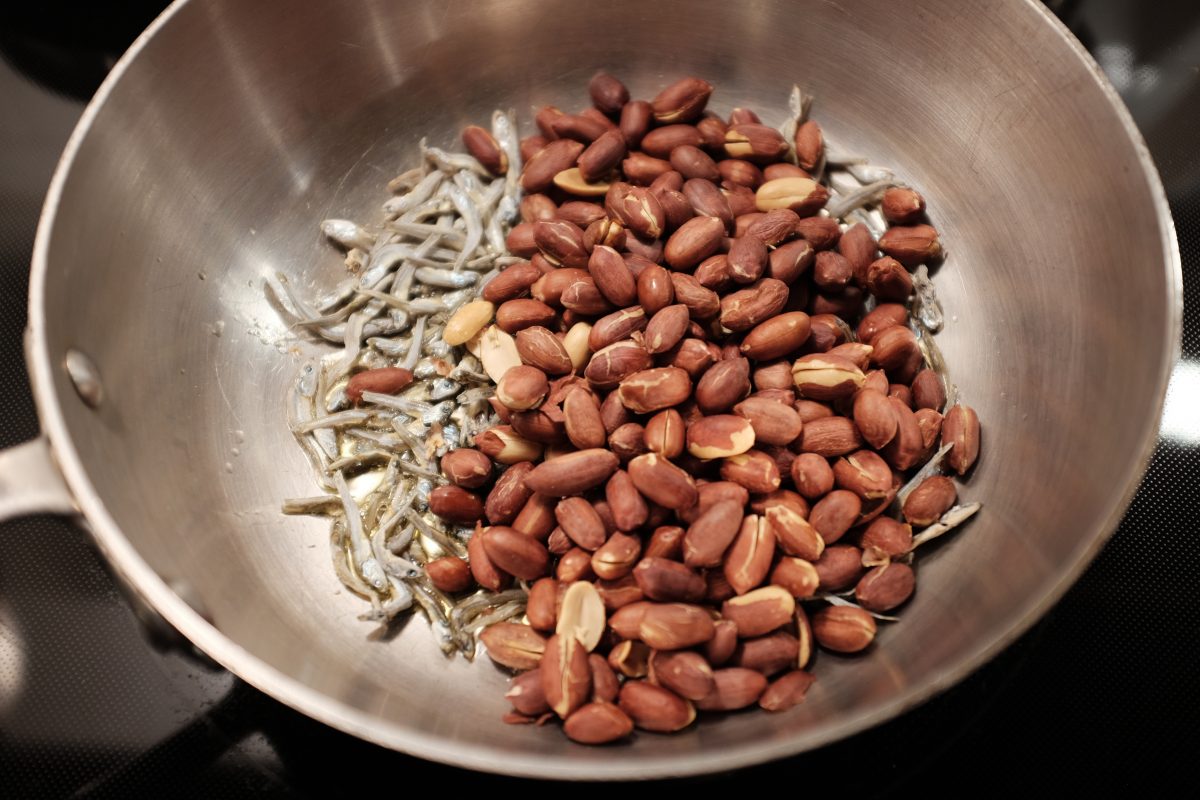
- 250 grams (about 1.5 cups) dry non-roasted peanuts
- 25 grams (1/2 cup) medium small dried anchovies
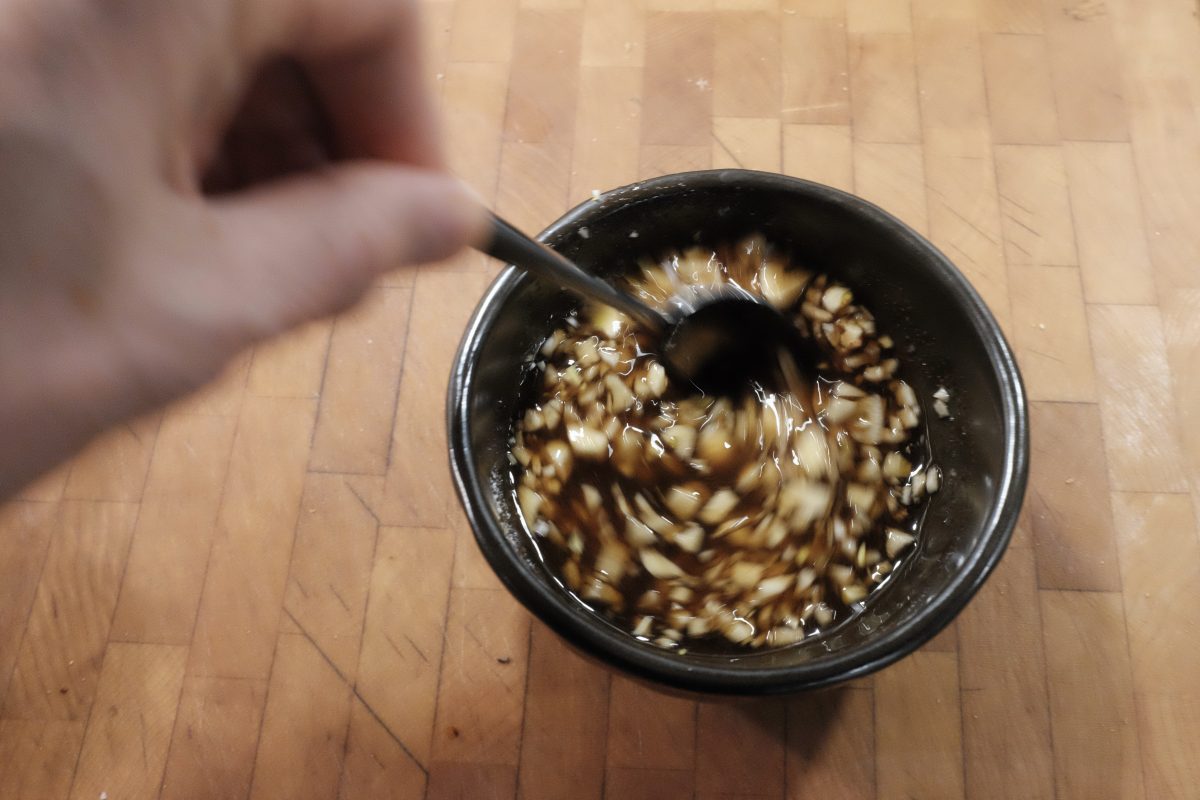
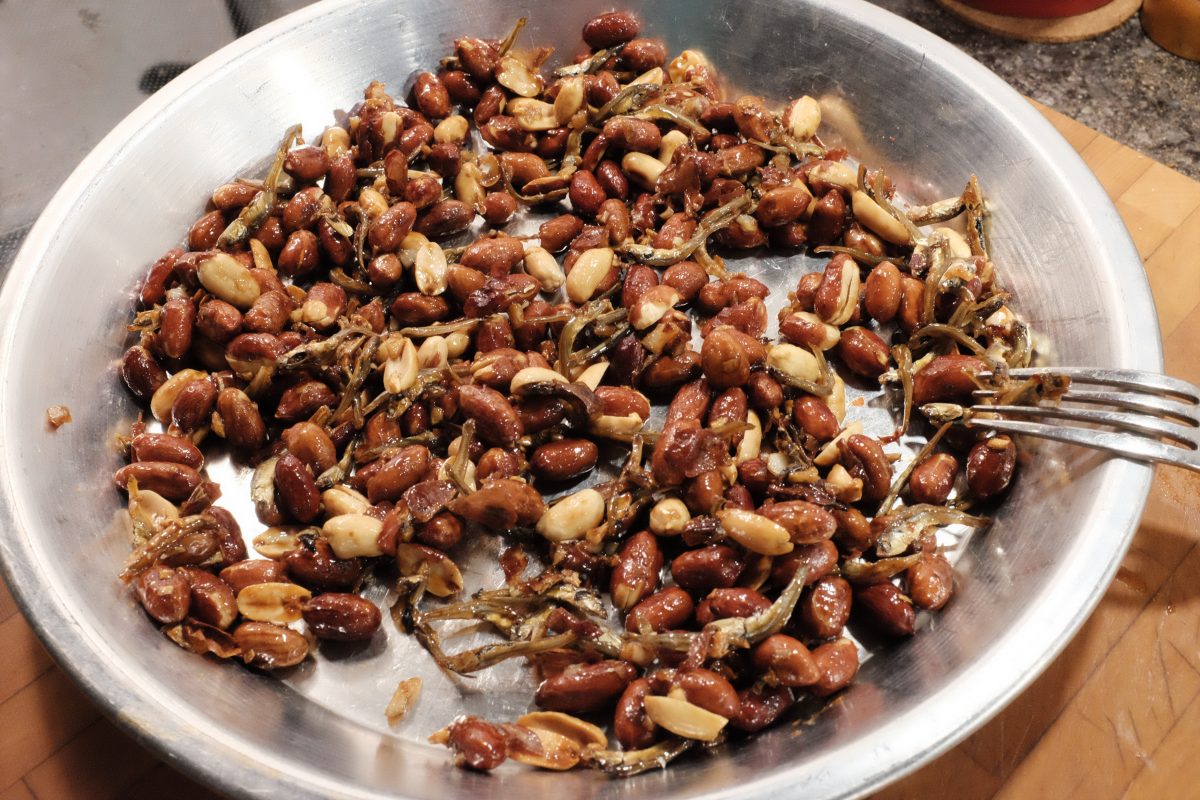
- 45 grams (3 tablespoons) brown sugar
- 50-60 ml (4 tablespoons) water
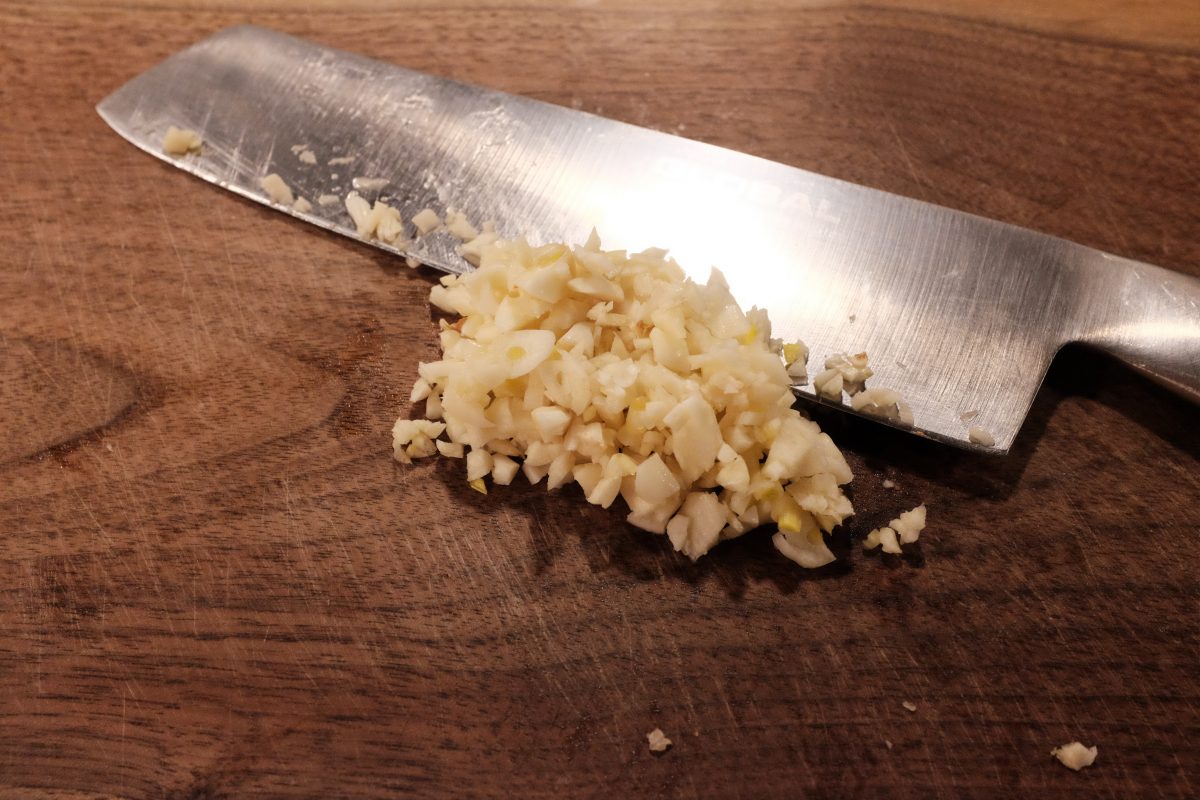
- 4-5 cloves of garlic
- pinch of korean chili flakes (gochugaru)
- sesame oil and sesame seeds (optional but tasty)
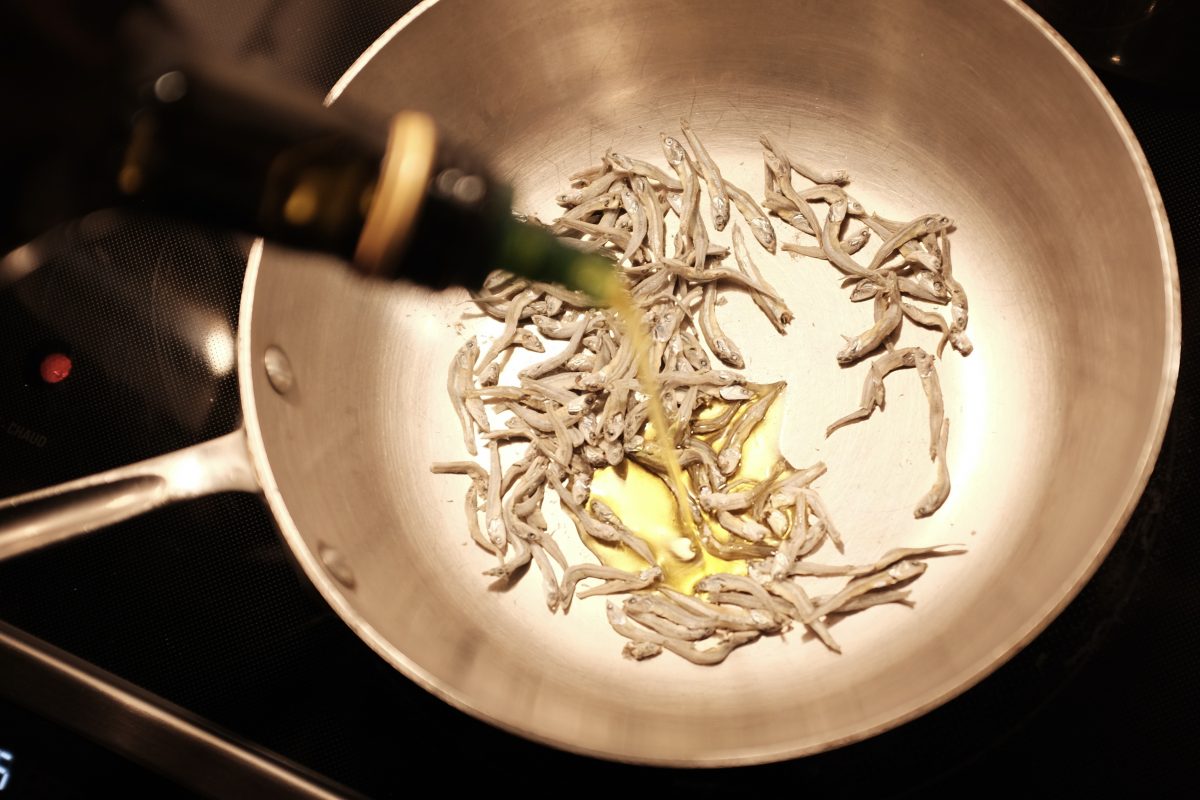
- olive oil for frying
Feel free to change the ratio of peanuts to anchovies. You can even make this without anchovies for a vegan side dish.
The peanuts should be non-roasted and unsalted. I found these red skin dry (but not roasted) peanuts at a local asian grocery store. If you can’t find raw peanuts…you can substitute roasted peanuts and skip the oven step.
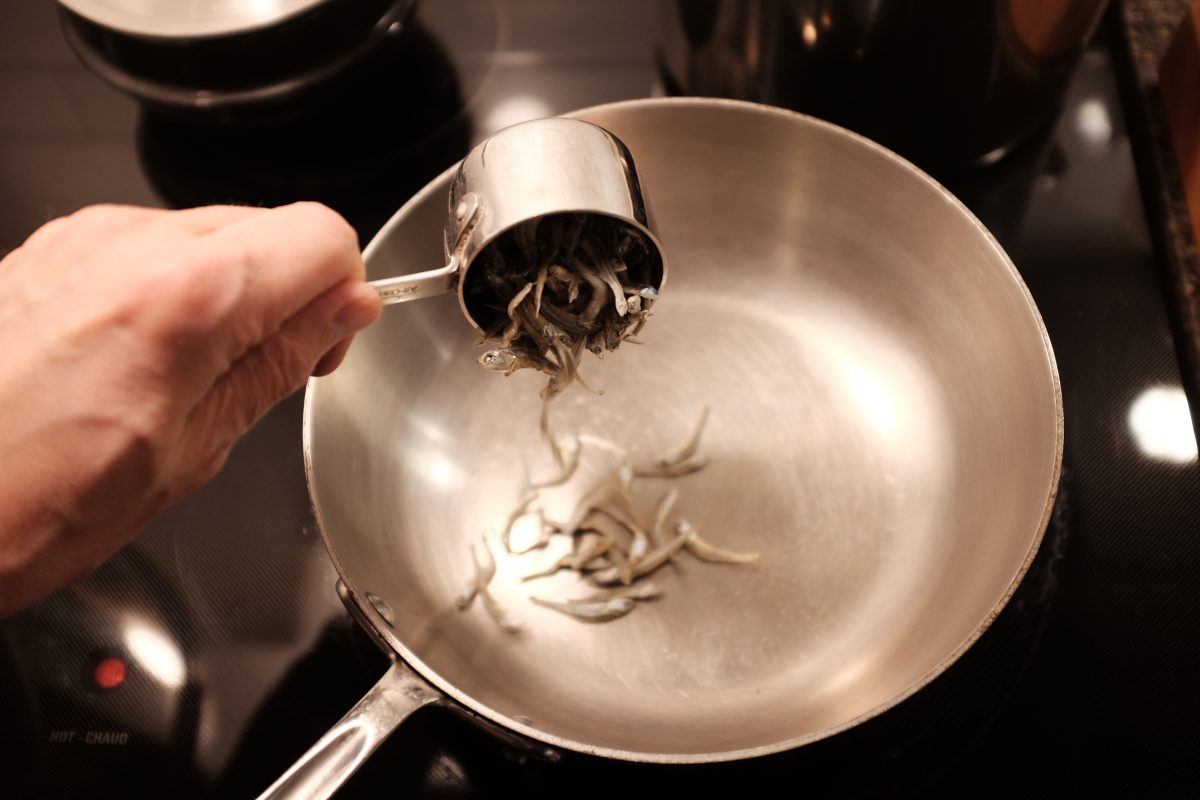
I am using medium small dried anchovies. They are roughly twice the length of a peanut and probably the biggest anchovy I would use without gutting them. I found these at a Korean grocery store in the freezer section.
You can use white sugar instead of brown.
Process:

How to eat them
These are delicious to eat straight out of the container with a beer, like a bar snack while you watch a movie. You can, of course, serve them as a side dish to any food. Probably my favourite way to eat these is to use them as a crunchy topping on fresh salad. The deep savoury and nutty sweetness can really make a pretty plain salad extraordinary.
If you have any questions, comments or suggestions, please leave them below. If you enjoy the content and would like to contribute towards website maintenance and development, you can make a donation here. Look forward to hearing from you and thank you for reading TigerSalad!
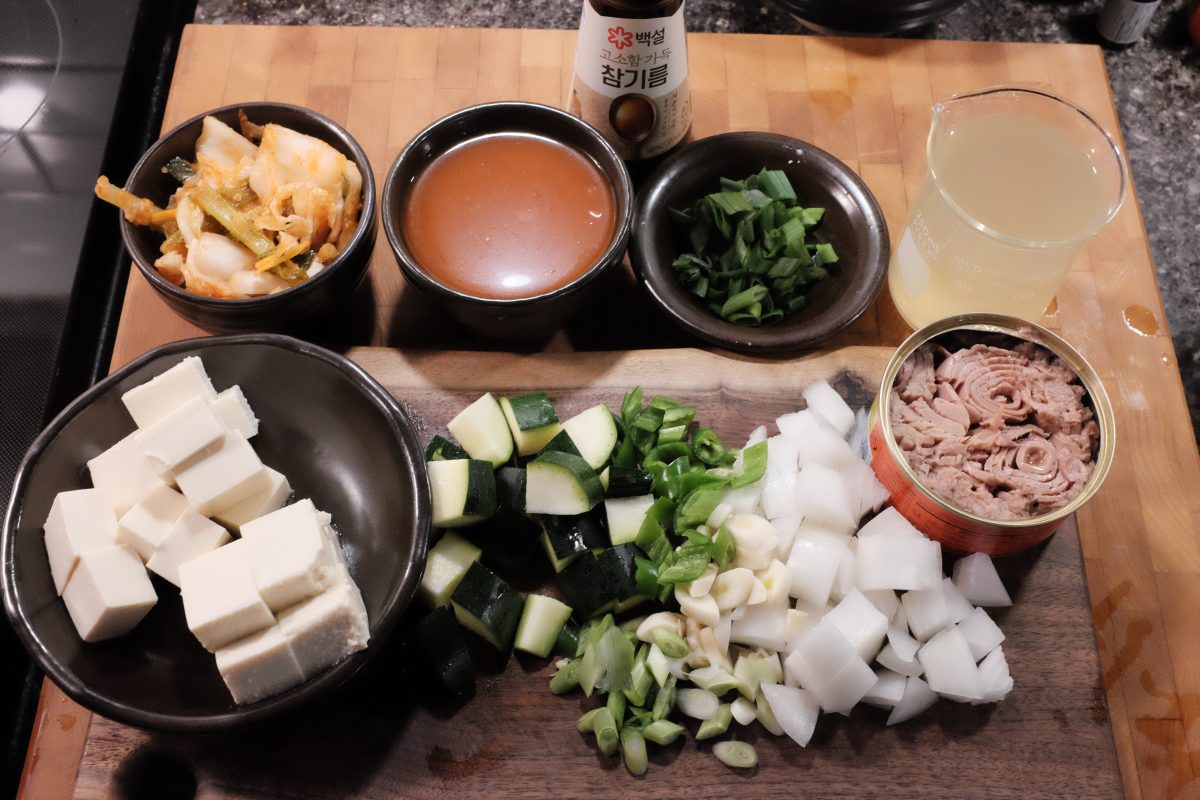
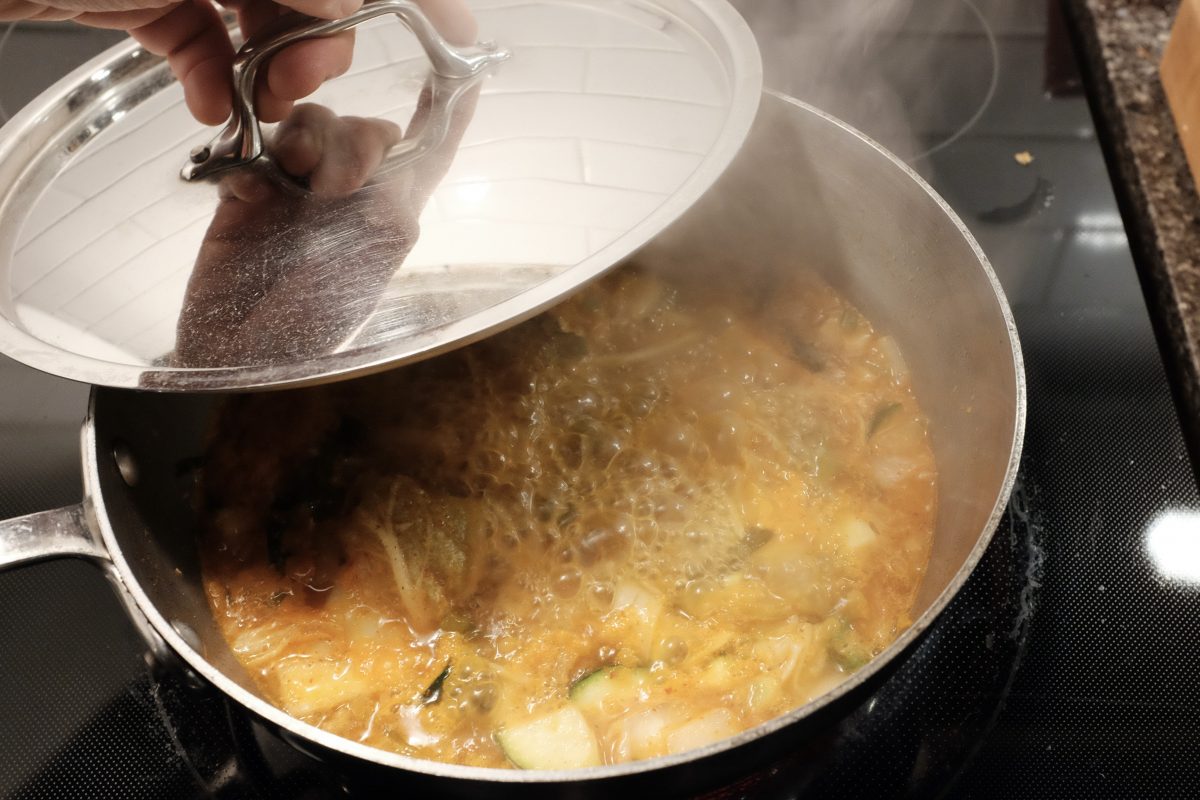
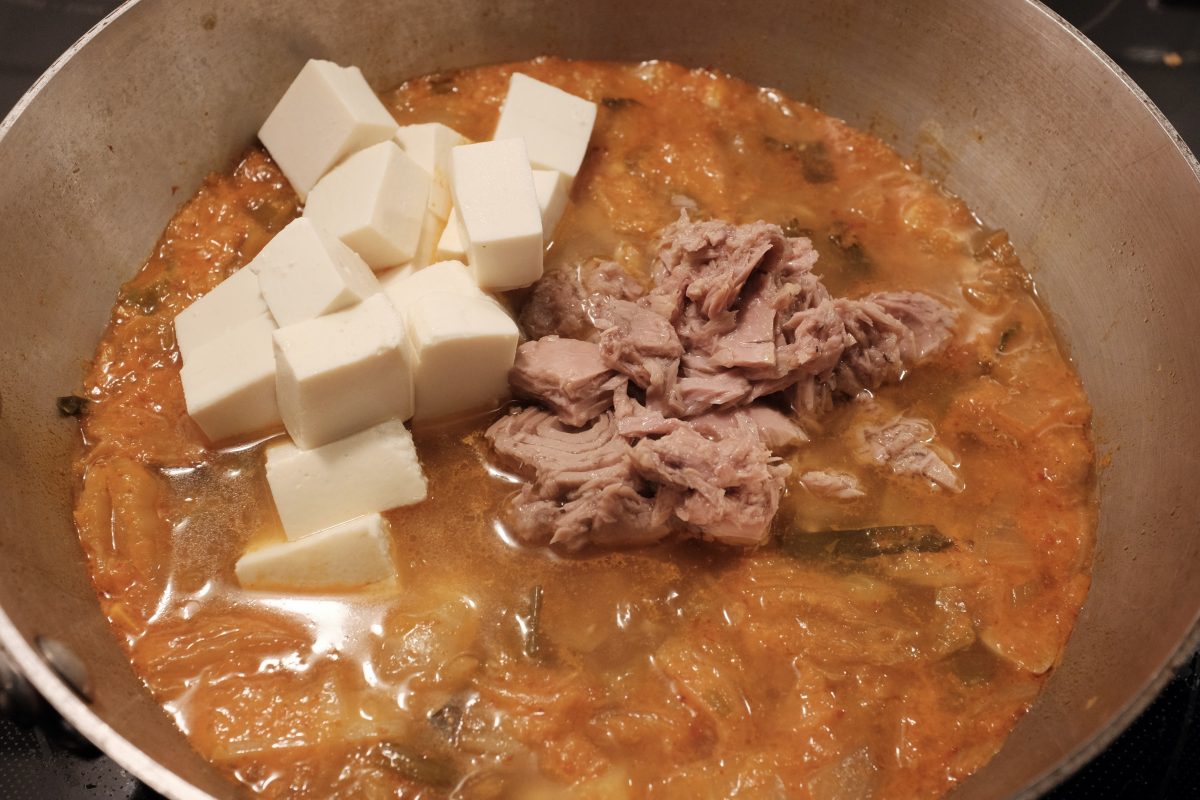
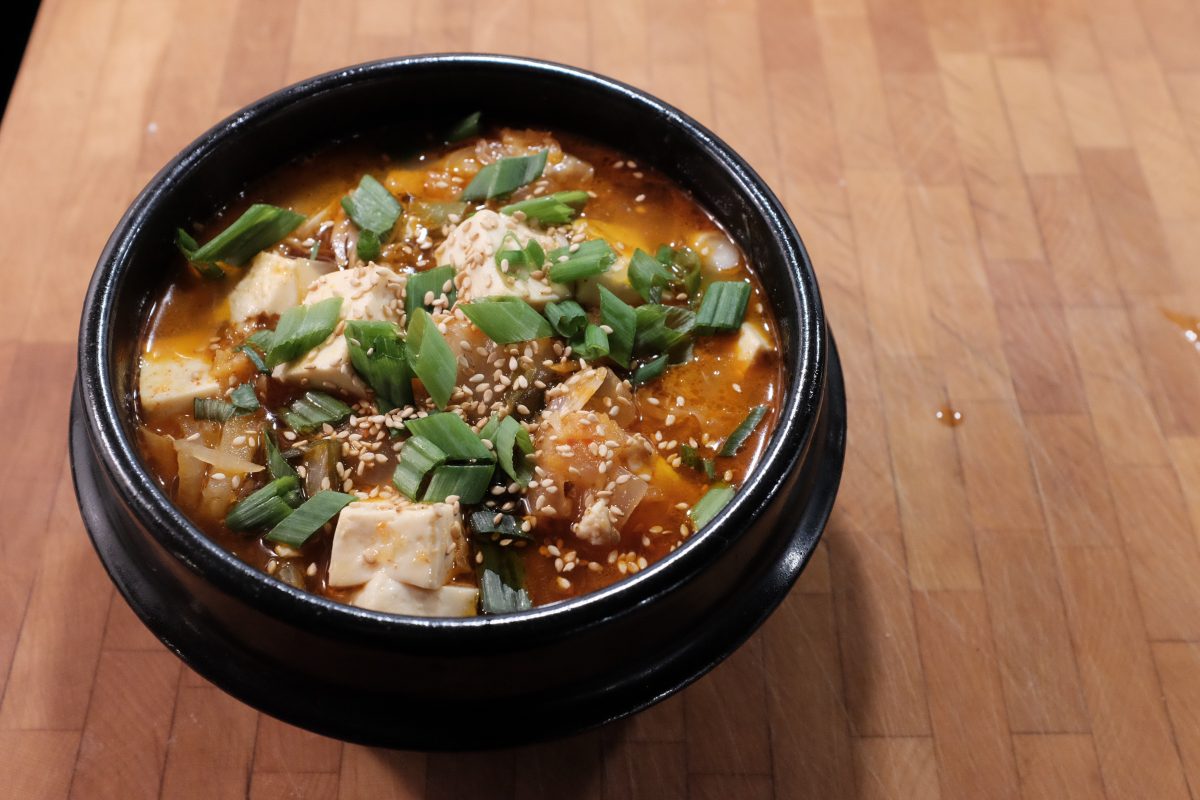
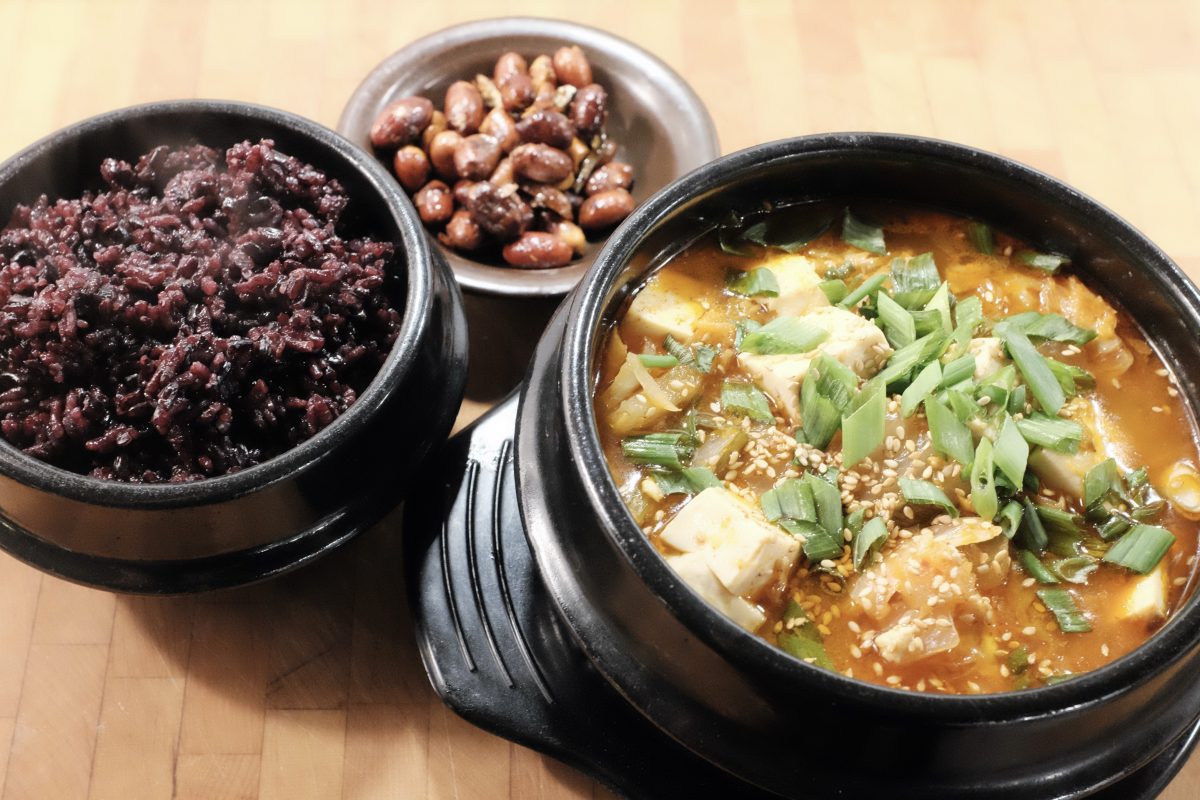
Kimchi Jjigae with Tuna
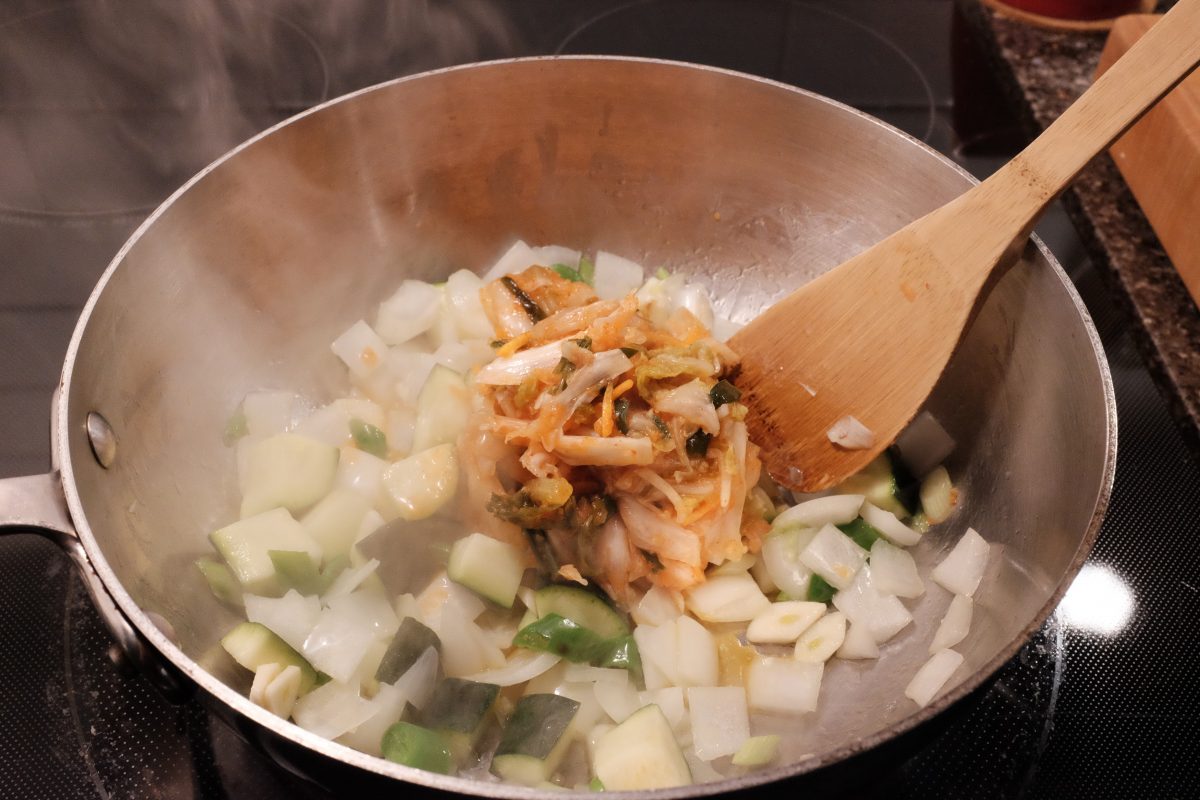
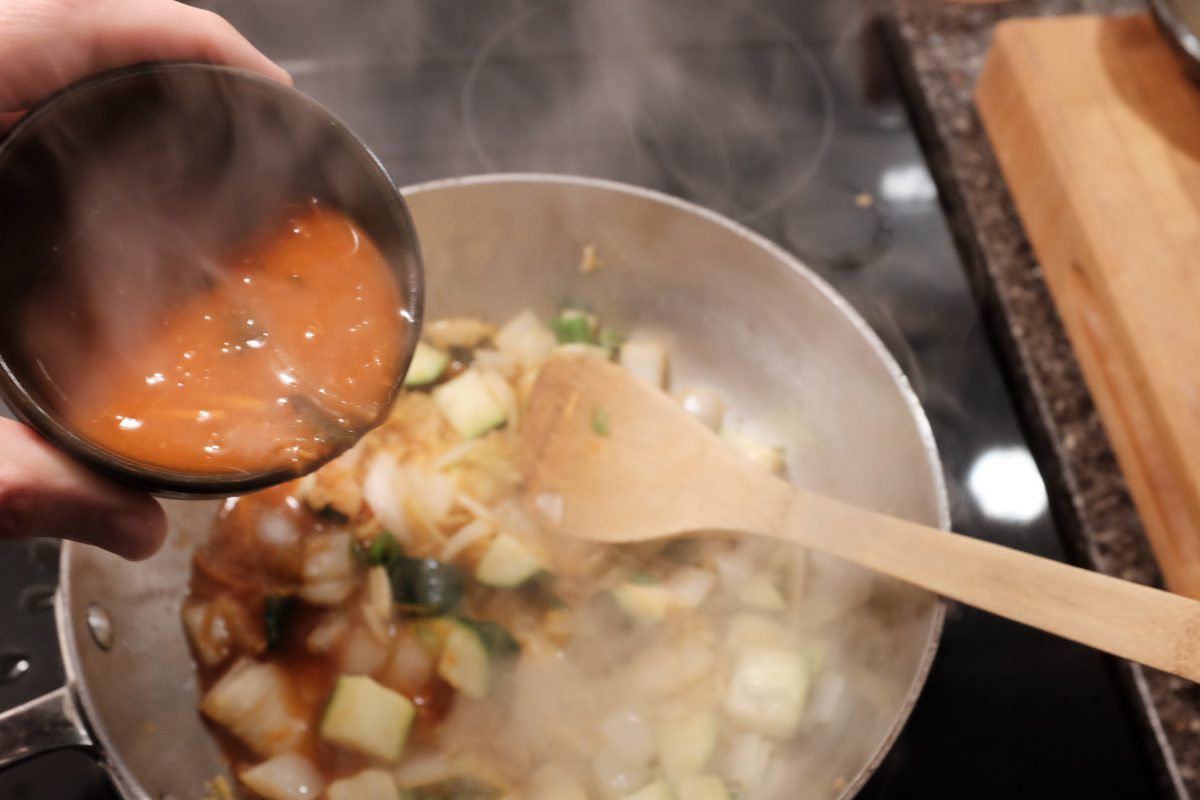
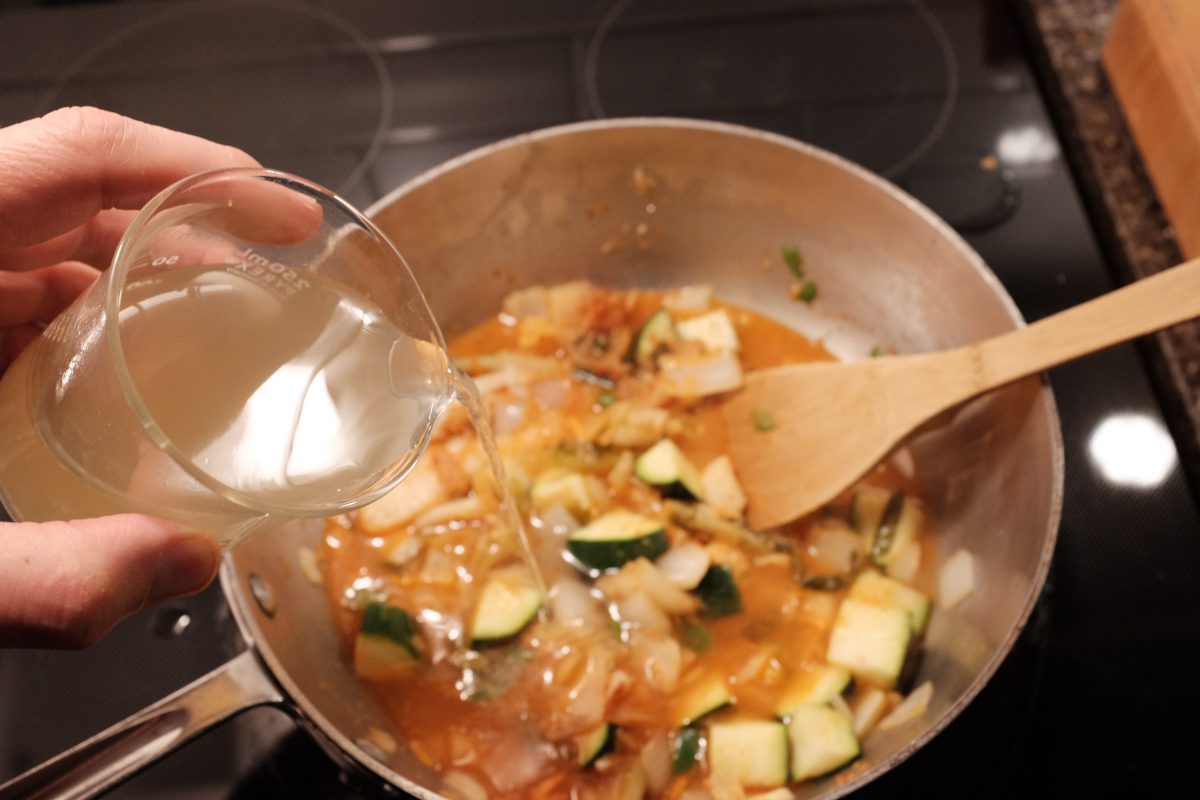
Kimchi jjigae with tuna (참치김치찌개) is a hot and satisfying dish that you can put together in a few minutes with as little as two or three ingredients. Below is a list of ingredients that I like to use but really, almost anything goes. Feel free to add different vegetables or leave out anything you don’t like. This recipe will make two smaller portions or one very large portion.
Ingredients:
- 1 can of tuna in oil
- 1 cup sour kimchi
- 1/2 cup kimchi juice
- 1 cup anchovy broth (or water)
- 1/2 zucchini
- 1 korean green chili pepper
- 1 cup diced tofu
- 1/2 onion
- 3 cloves garlic
- 2 green onions
- sesame oil
- salt
- sugar
The ingredients in bold are essential. Everything else is optional. I am using veggies I have in the fridge. You can add or subtract anything you like. As long as you have some fermented kimchi and a can of tuna, you can make this. I like it with extra veggies and especially with tofu.
Use canned not fresh tuna. It is not the same. I am using Korean tuna in oil but any canned tuna is fine.
There is a link in the ingredients to a recipe for anchovy broth. You don’t need it but, it adds a lot of depth to dishes like these if you use it in place of water.
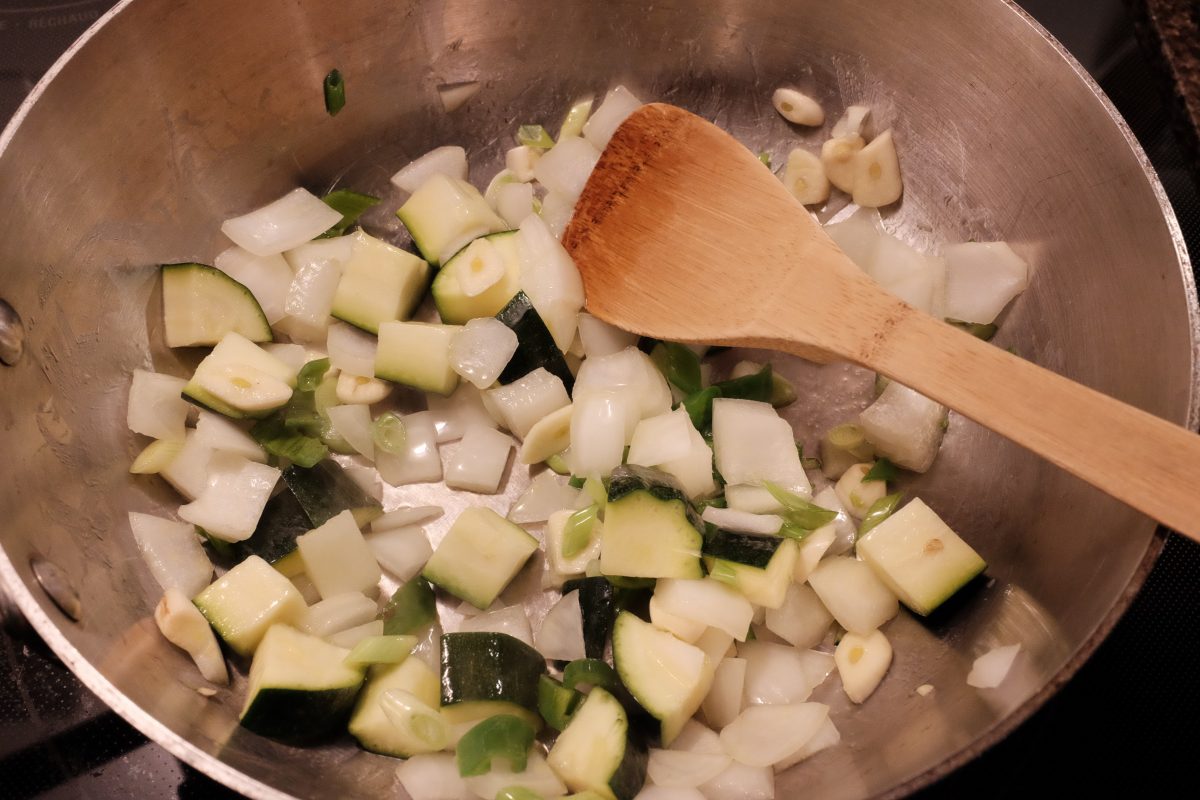
Process
Variations
As I mentioned at the start, you can put just about anything you want into this dish. There is no definitive recipe for kimchi jjigae. Aged sour kimchi and a can of tuna are the only must haves. Experiment with all kinds of veggies. I also love smoky bacon in this dish. Fry it up with your veggies at the start.
If you are using water instead of kimchi juice, you can stir in a little gochujang for extra colour, flavour and spice if you like.
If you do not have anchovy broth but you do have anchovies and kelp on hand: take a square of kelp and a few dry anchovies and tie them in a little sack of cheesecloth. Add them to the simmering jjigae at the start. This will give you a similar flavour to anchovy broth. Just pull them out and discard after 15-20 minutes.
For a good recipe for homemade kimchi have a look HERE.
If you have any questions or comments or suggestions, please leave them below. I always look forward to hearing from you. If you enjoy the content and would like to contribute towards website maintenance and development, you can make a donation here. Thank you for reading TigerSalad!
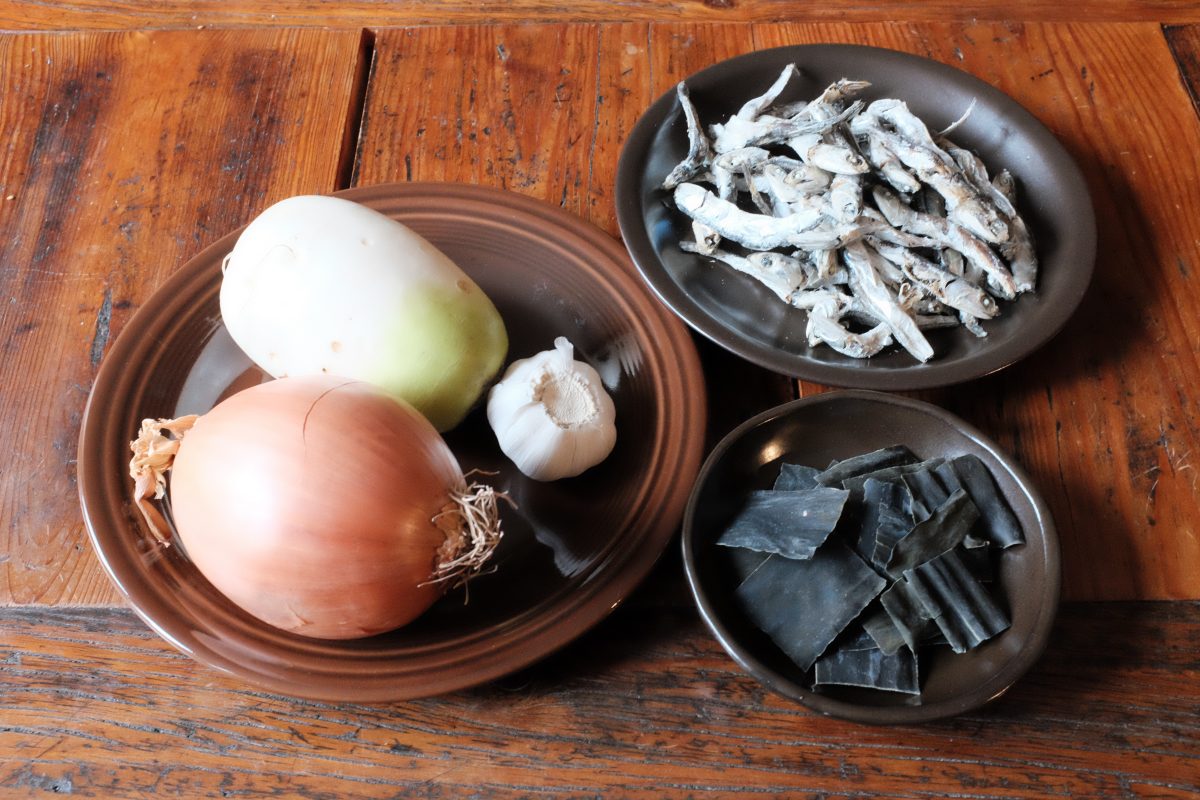
Anchovy Broth
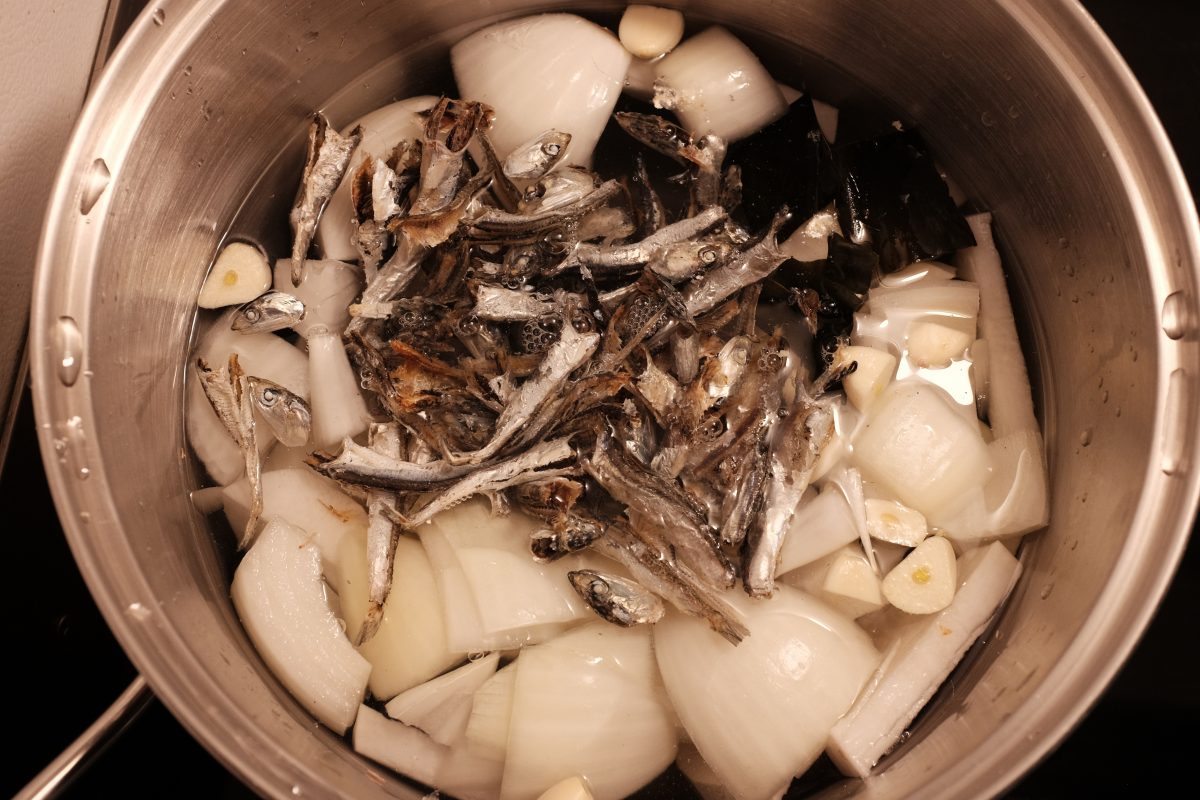
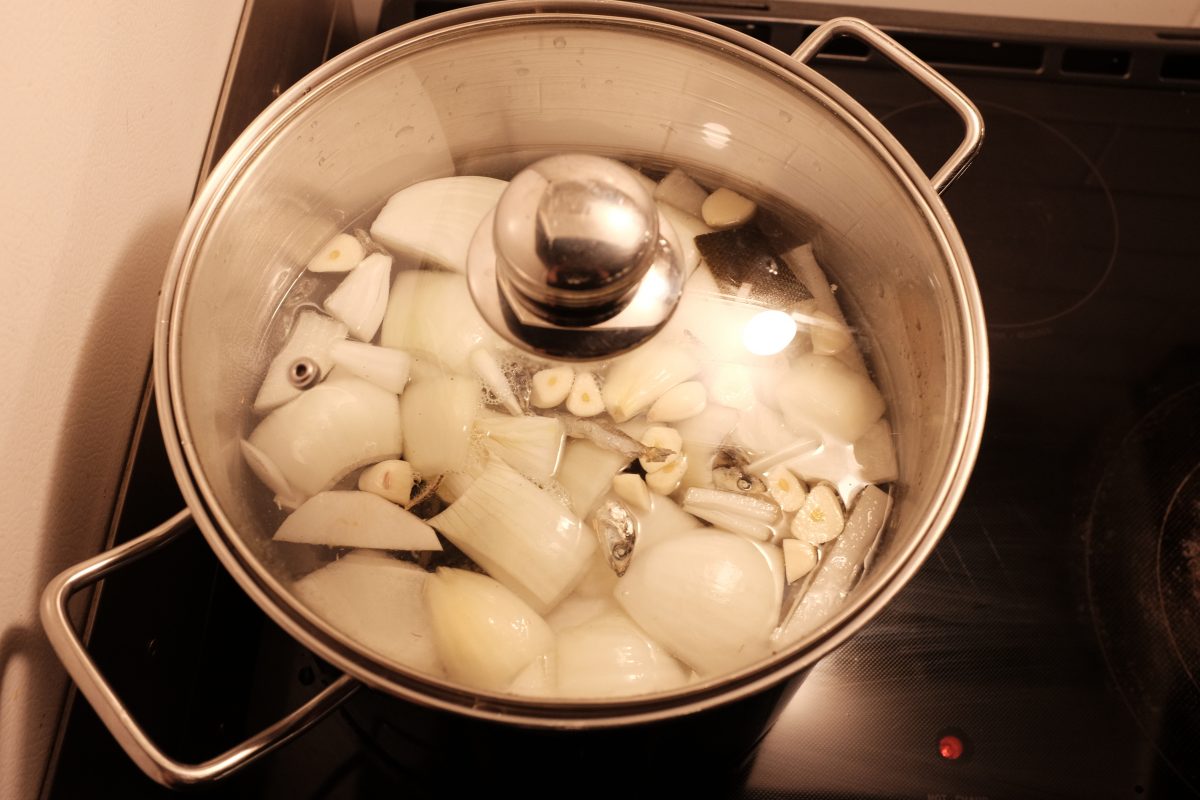
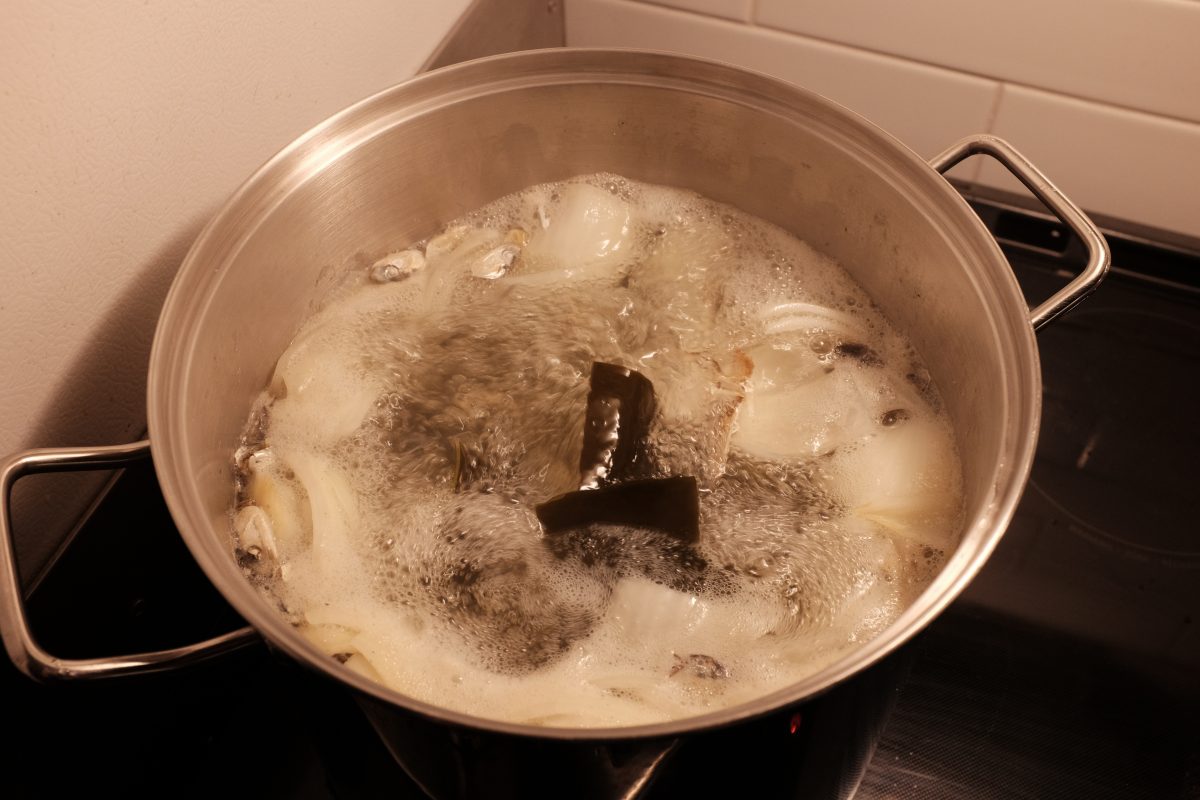
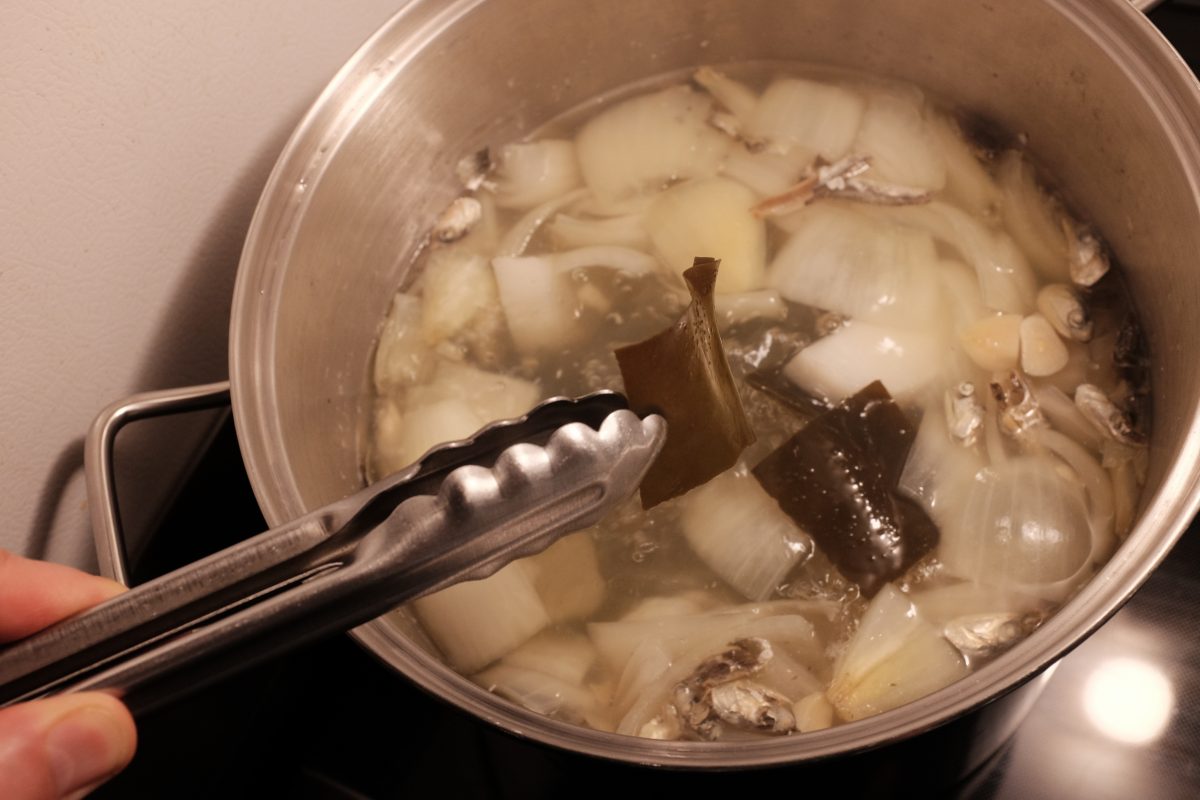
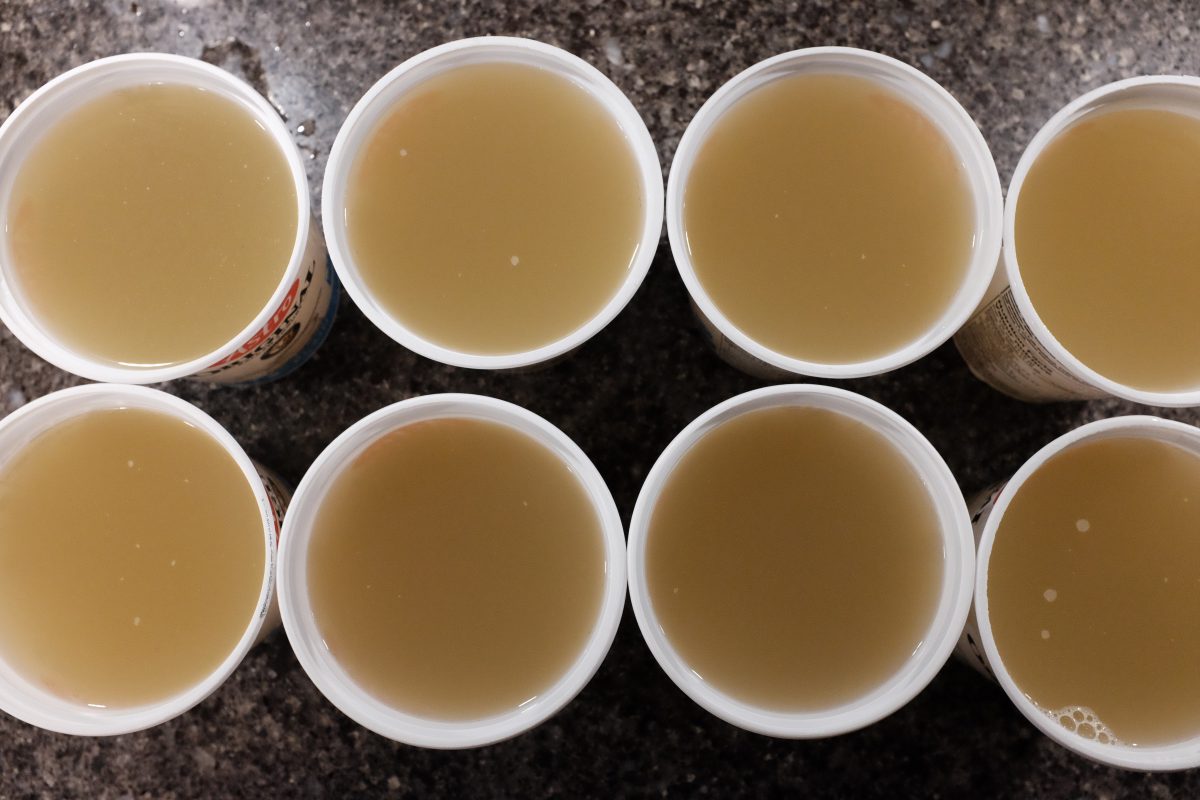
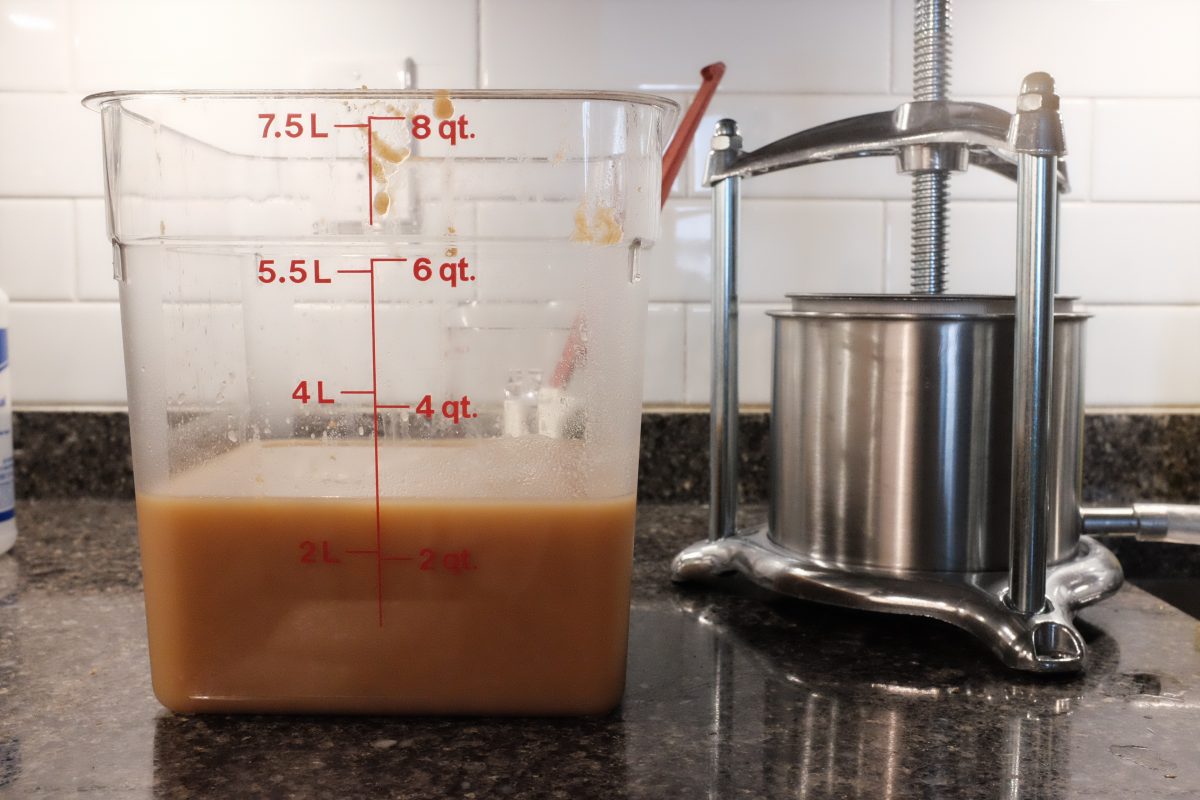
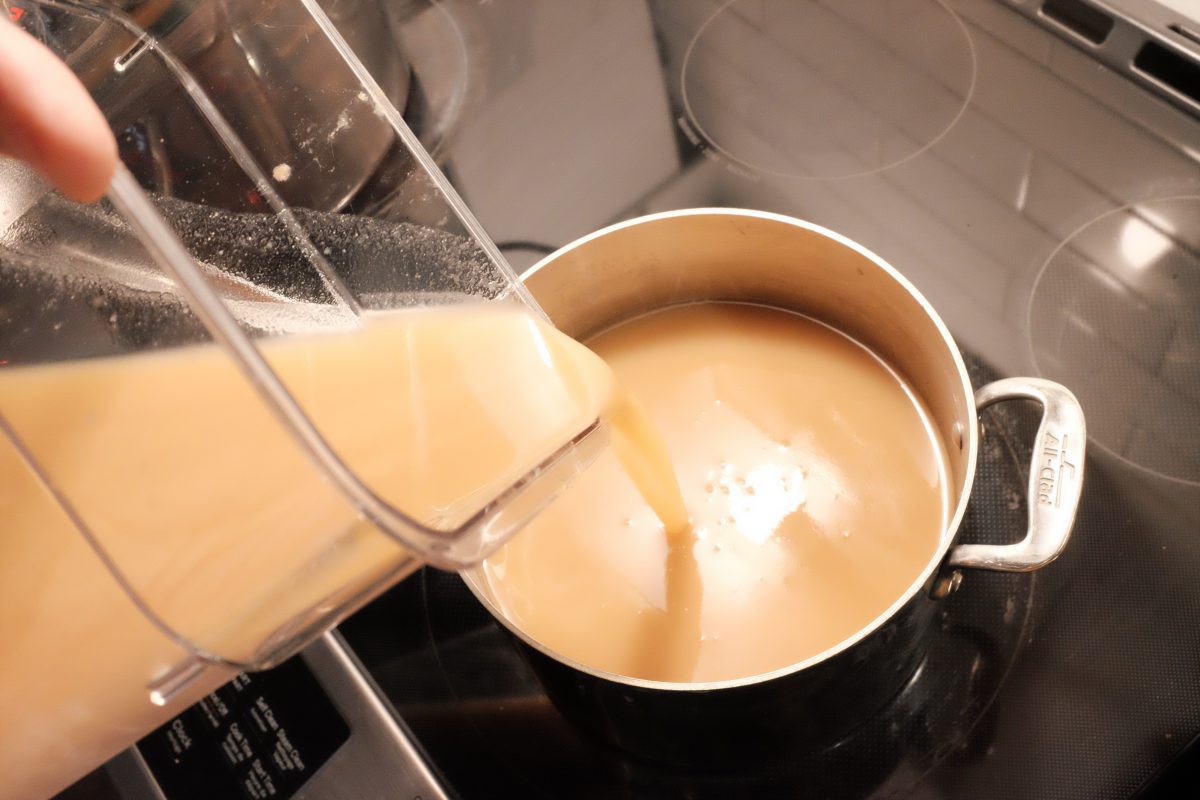
Anchovy broth or myeolchi yuksu (멸치육수) is a basic fish stock. It is an essential base for many Korean dishes. It is very easy to make, has endless uses and large batches can be frozen in single use containers to use later on. The recipe can be as simple as just anchovies and water or it can incorporate a number of aromatic vegetables or even seaweed and dried mushrooms. The recipe below uses anchovy, kelp and just a few other ingredients to make a delicious stock. This recipe gives you about 8 litres / 2 gallons of stock. If this seems too big, just half or quarter all of the ingredients.
Ingredients:
- 8 litres / 2 gallons of water
- 40-50 medium large dried anchovies (around 100 grams)
- 8-10 small squares of dashima seaweed aka kombu (around 10-15 grams)
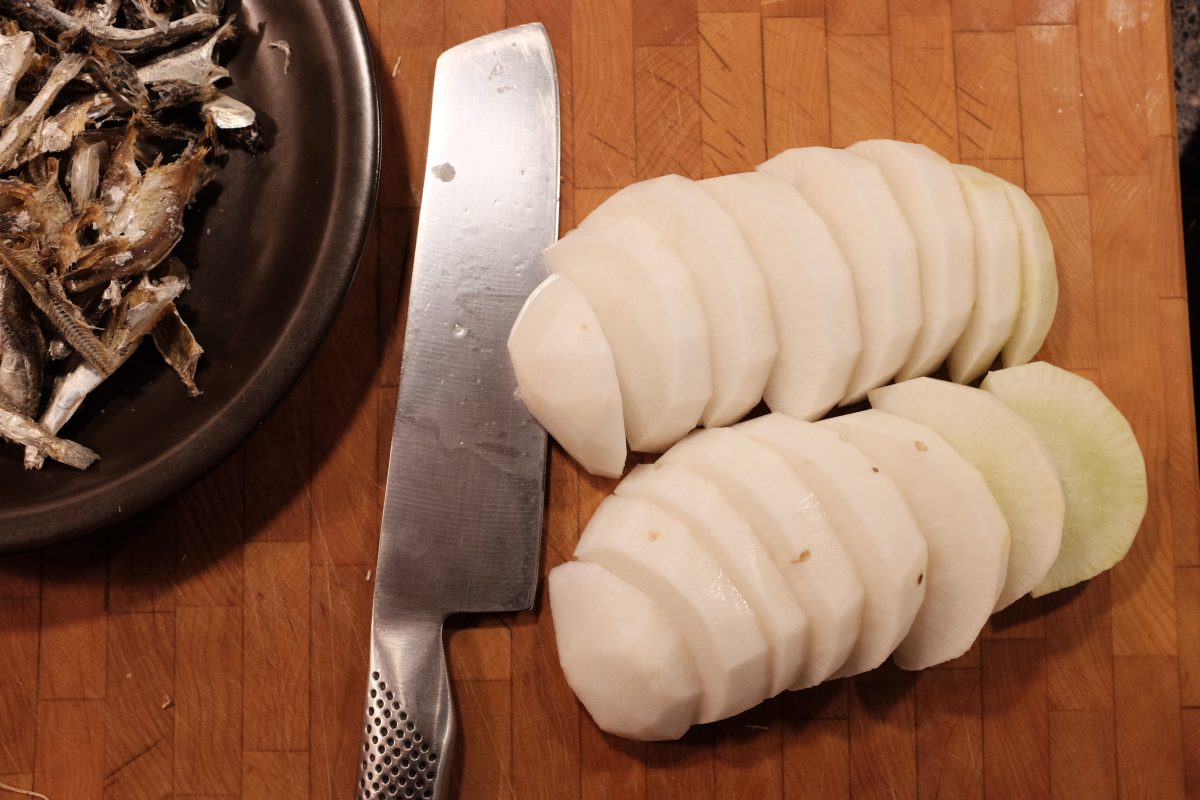
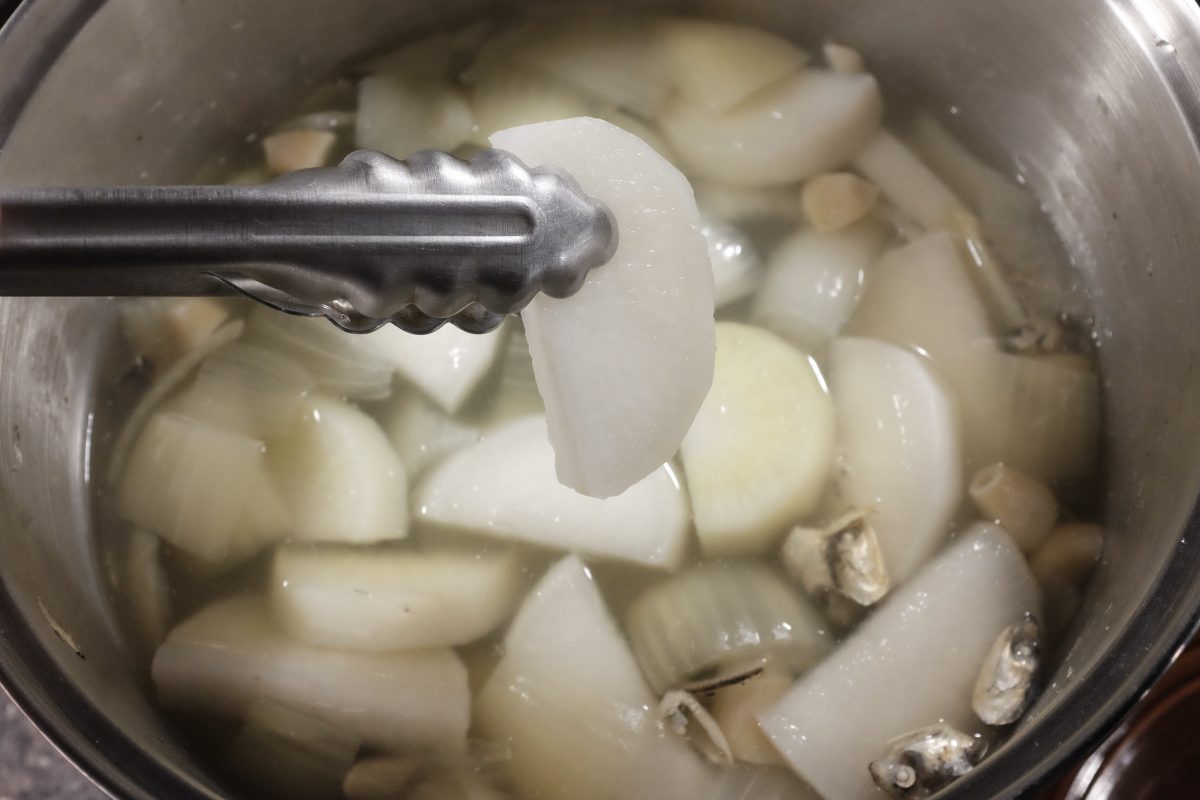
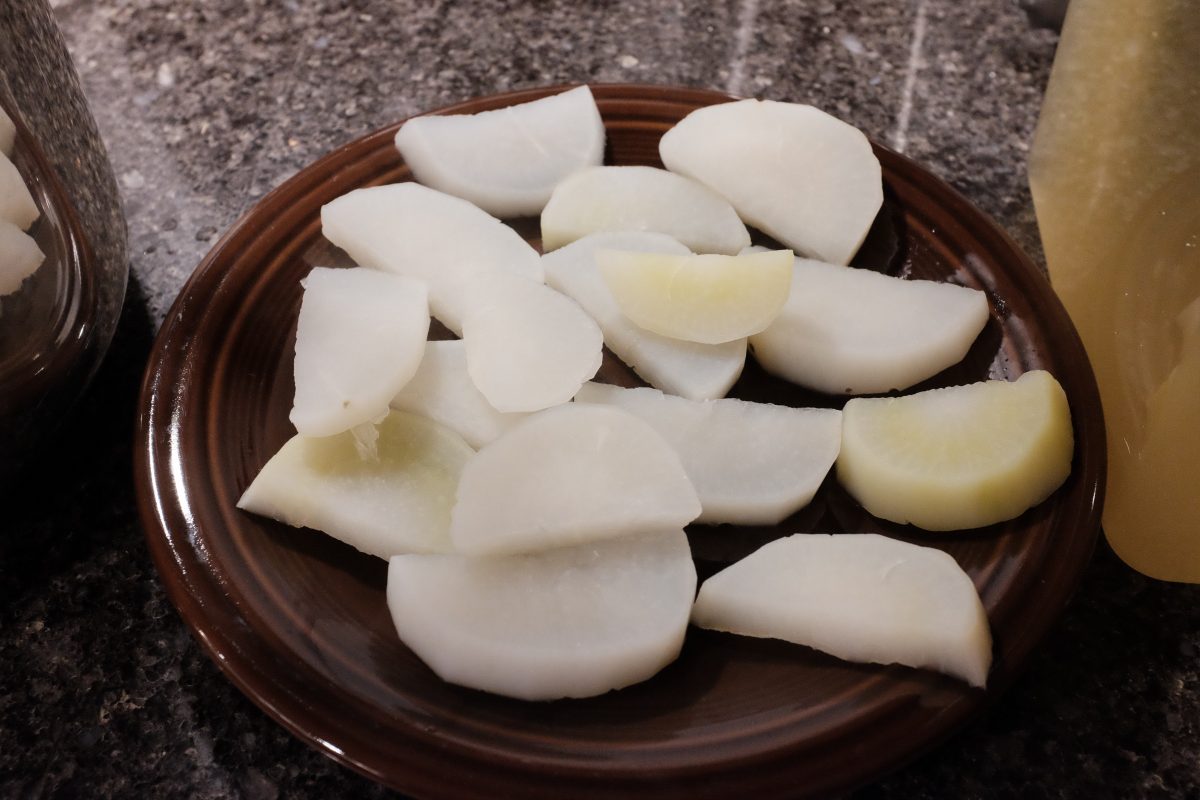
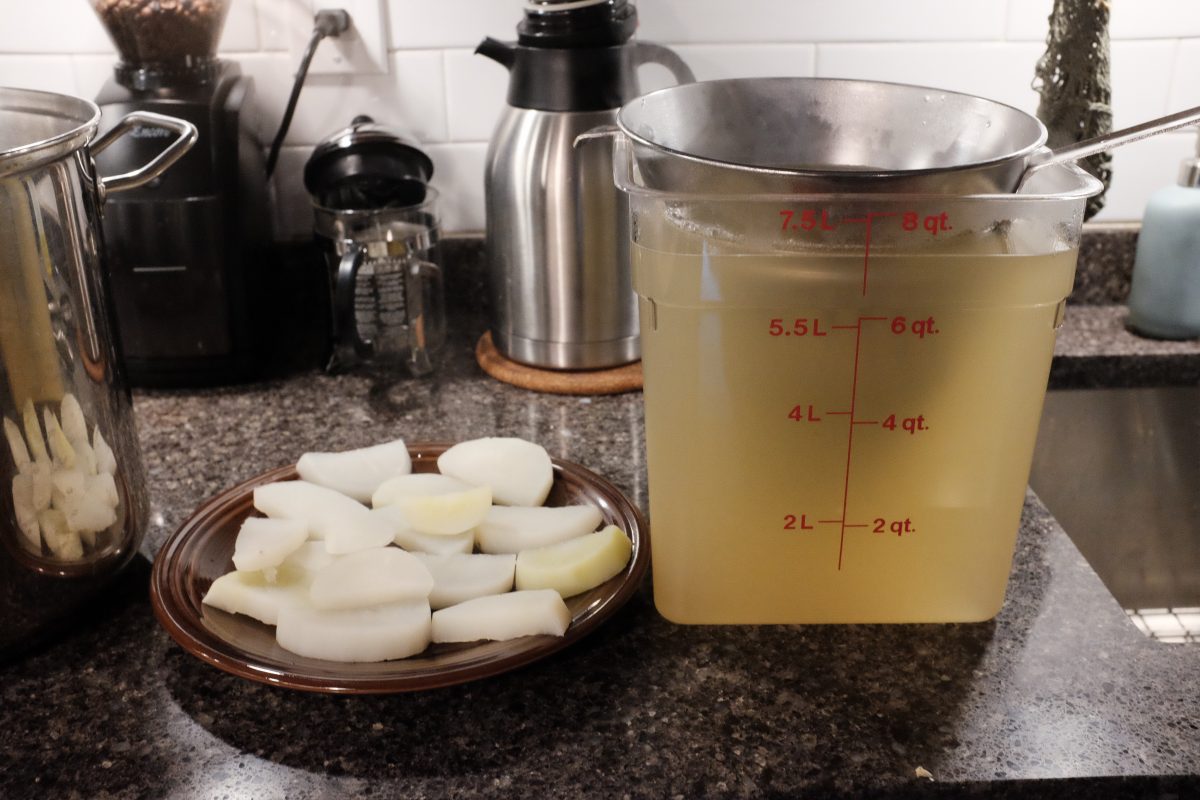
- 500 grams Korean radish
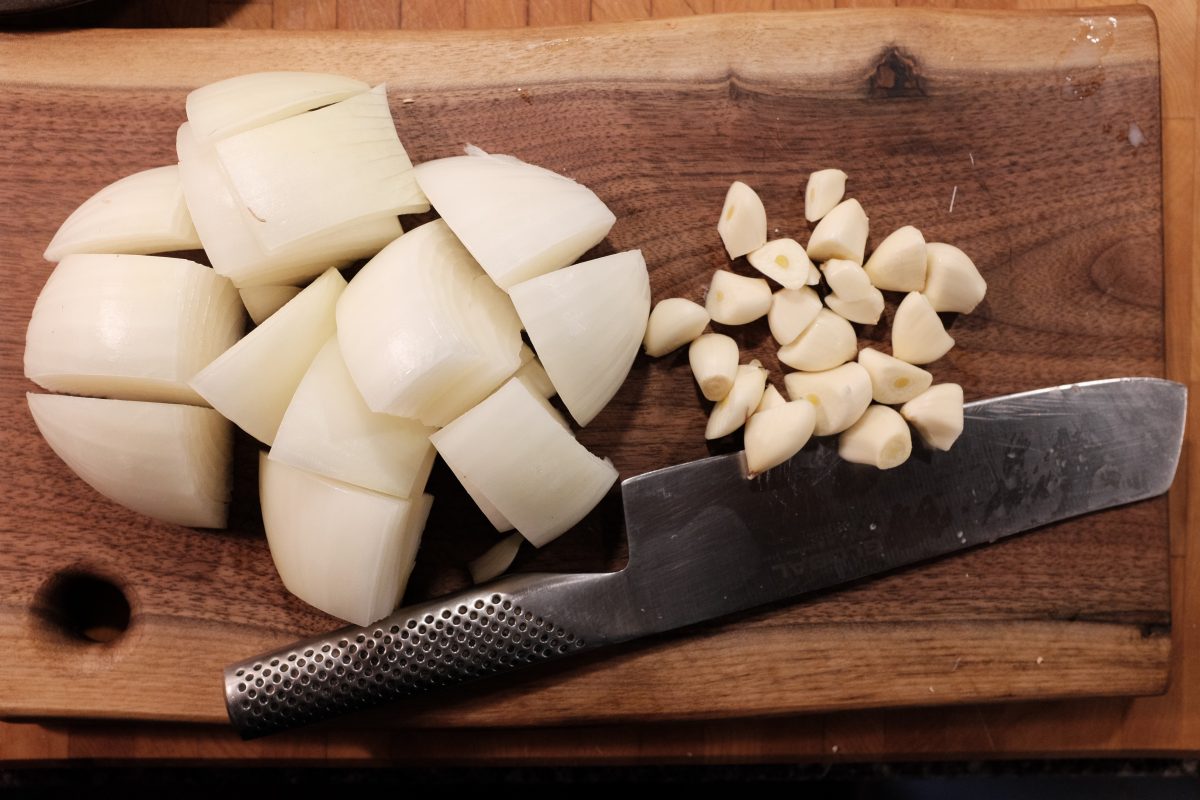
- 1 large onion
- 12 cloves of garlic
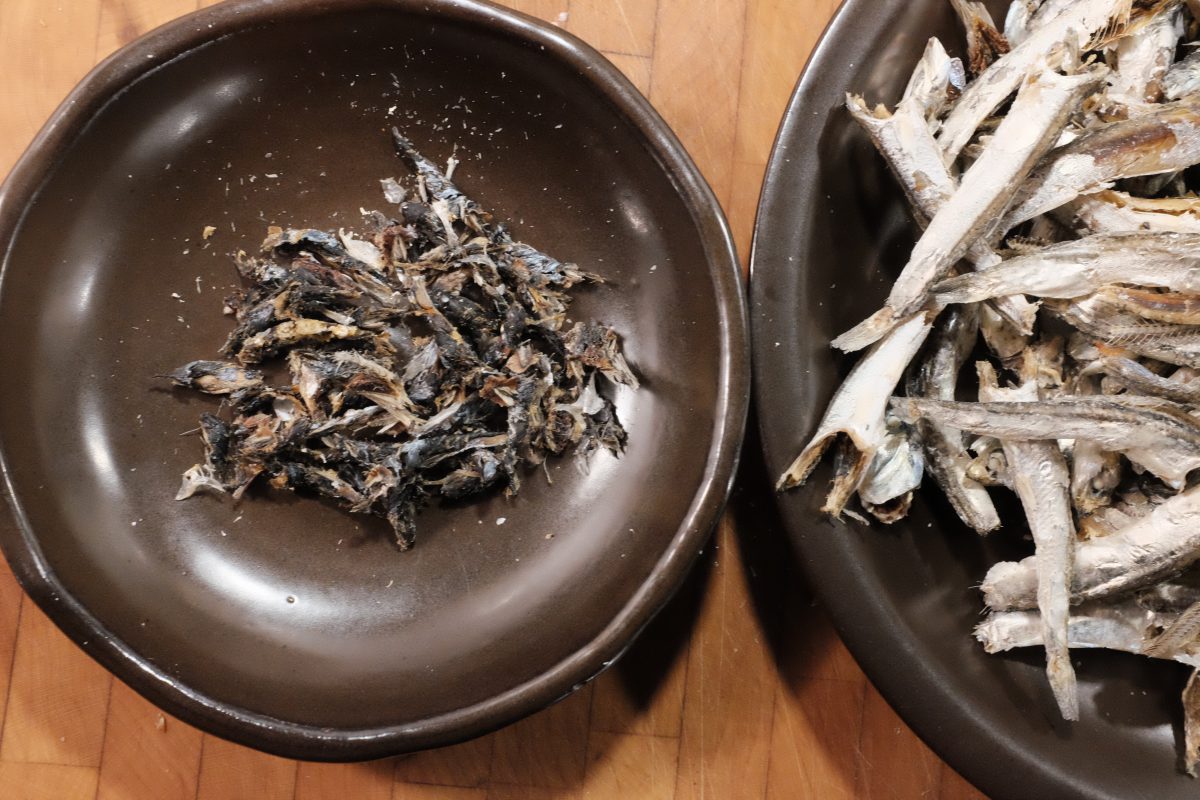
Dried anchovies can be found at Asian grocery stores. They come in a few different sizes from very tiny (1 cm) to fairly large (about the length of a finger). The ones I am using are on the larger side.
Dashima is thick, rigid and sometimes powdery looking dark green seaweed. You can find it in the dry goods section of Asian grocery stores in big long strips or a smaller bag of pre-cut squares. Either work fine. I prefer the little squares just because they are easier to work with in smaller recipes. There are lots of different dry seaweeds on the shelf. The one we are using here will say Dashima / 다시마 or Kombu if it is from Japan.
Process:
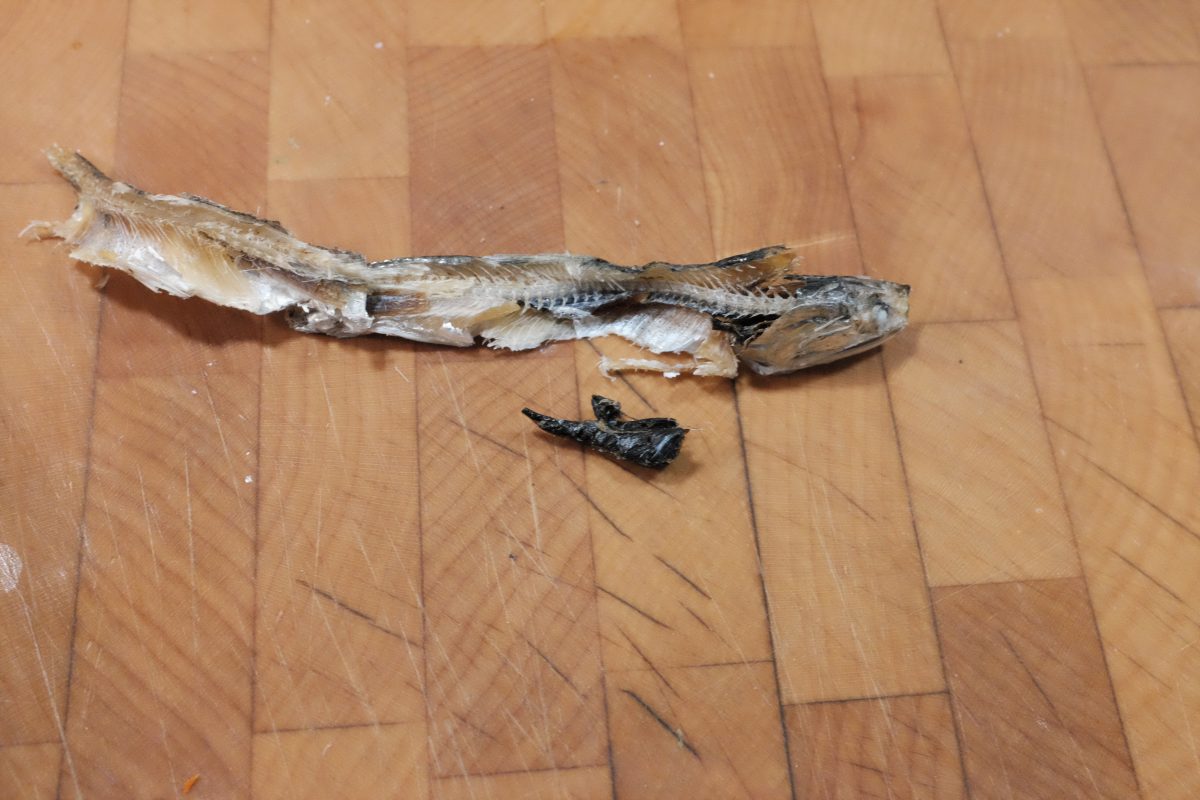
Remove the guts from the anchovies.


Uses:
This stock is the base for many Korean dishes including sundubu jiggae, kimchi jiggae, noodle soups, etc. In almost any savoury recipe that calls for water, substitute with this stock to make it extra delicious. Dishes like Tteokbokki reach new heights of tastiness when made with a good strong anchovy stock.
In the heat of summer, I will even drink this stock ice cold as is. It is that delicious and refreshing!
If you have any questions, comments or suggestions, please leave them below. I am always happy to hear from you. If you enjoy the content and would like to contribute towards website maintenance and development, you can make a donation here. Thank you for reading TigerSalad : )
How To Make Vinegar
How does fruit become vinegar?
If you throw a bunch of sweet fruit into a container, natural yeasts already present on the skins will eventually consume the sugar in the fruit and produce alcohol. This alcohol will then get consumed by acetic acid bacteria in the environment and produce vinegar. Nature does all the work.
The problem with letting natural yeast go wild is that it is hard to know what flavours will result (good or bad), how much time it will take, and how much alcohol will result. Because the final acidity of the vinegar depends on the alcohol content, it is worthwhile to use a yeast with a known strength and flavour profile.
As for conversion of the alcohol into acetic acid, we could just leave a jar of fermented fruit juice covered with a cloth and allow naturally occurring acetic acid bacteria in the environment do the work. The problem here is that it takes a long time…several months at least. To shorten this time, we can inoculate our alcoholic fruit juice with a splash of live culture vinegar to get it started and provide it with a steady supply of oxygen via an air pump.
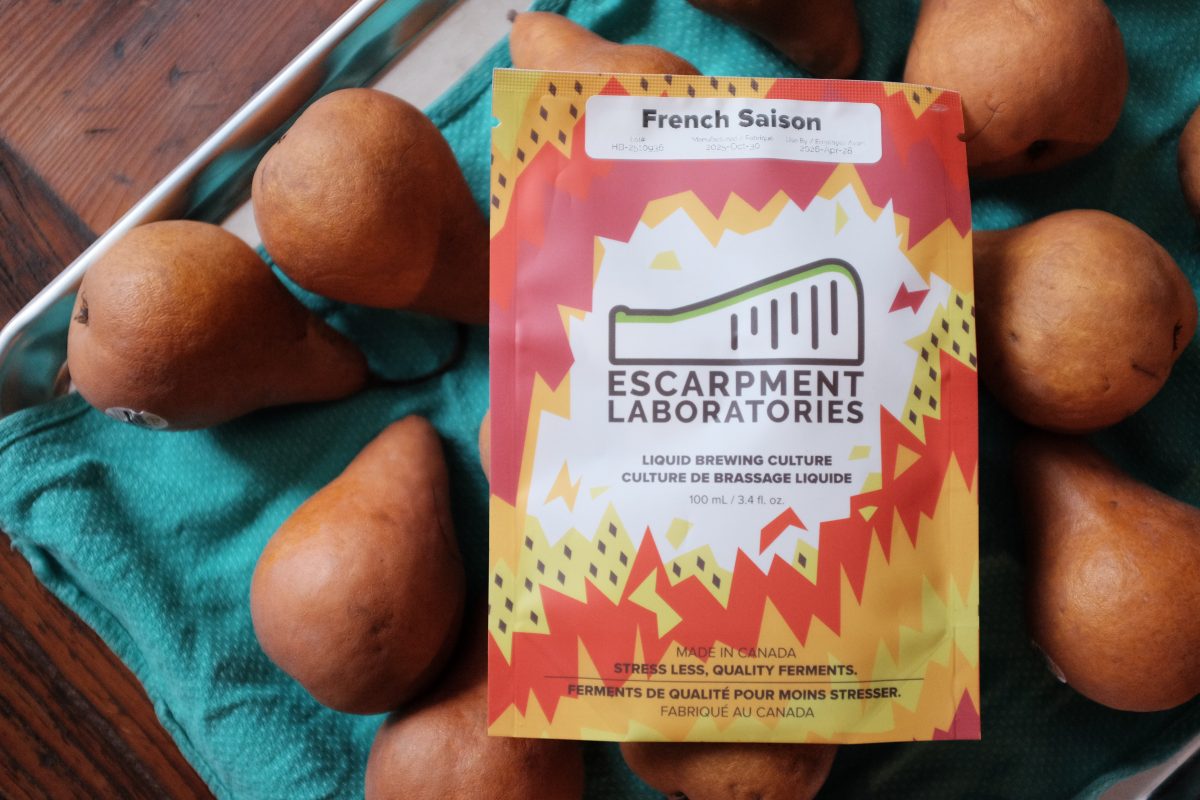
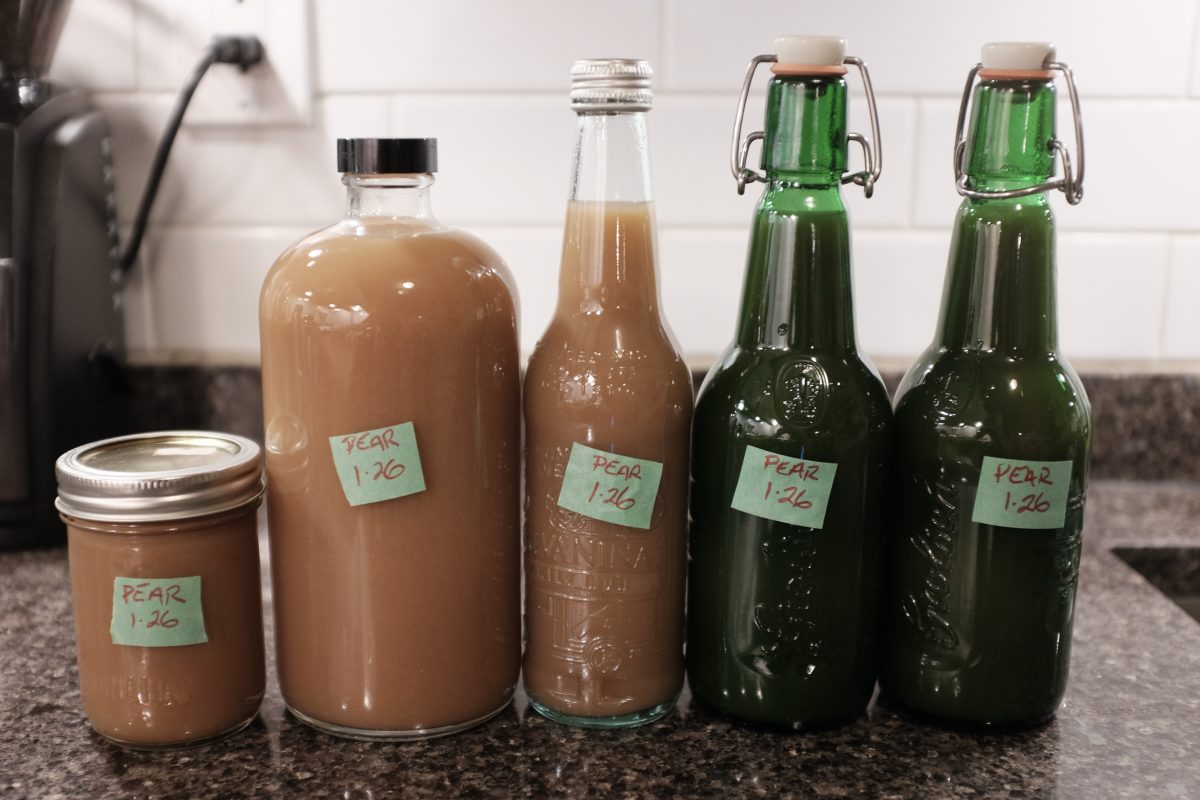
Making pear vinegar at home
In this recipe we will take ripe bosc pears and, over a month or so, ferment them into pear vinegar. I am mostly following a recipe from this excellent book by Rene Redzepi and David Zilber:

Ingredients:
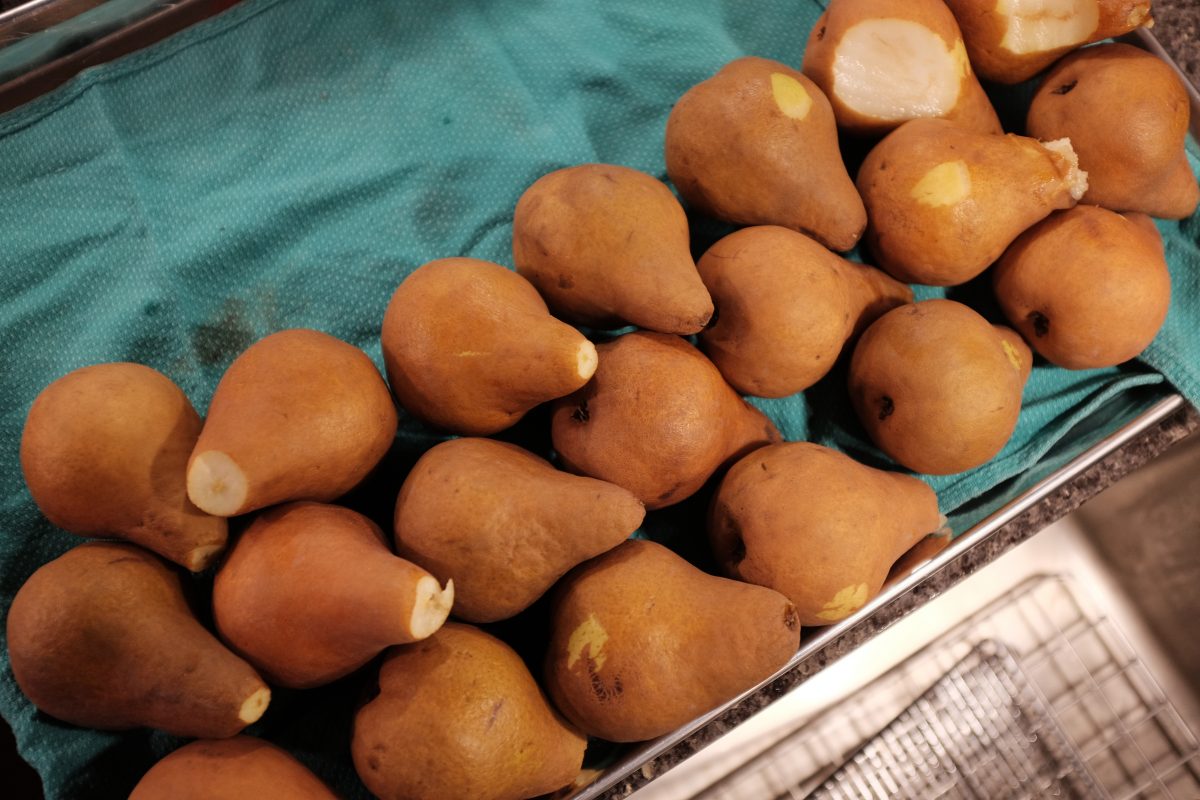
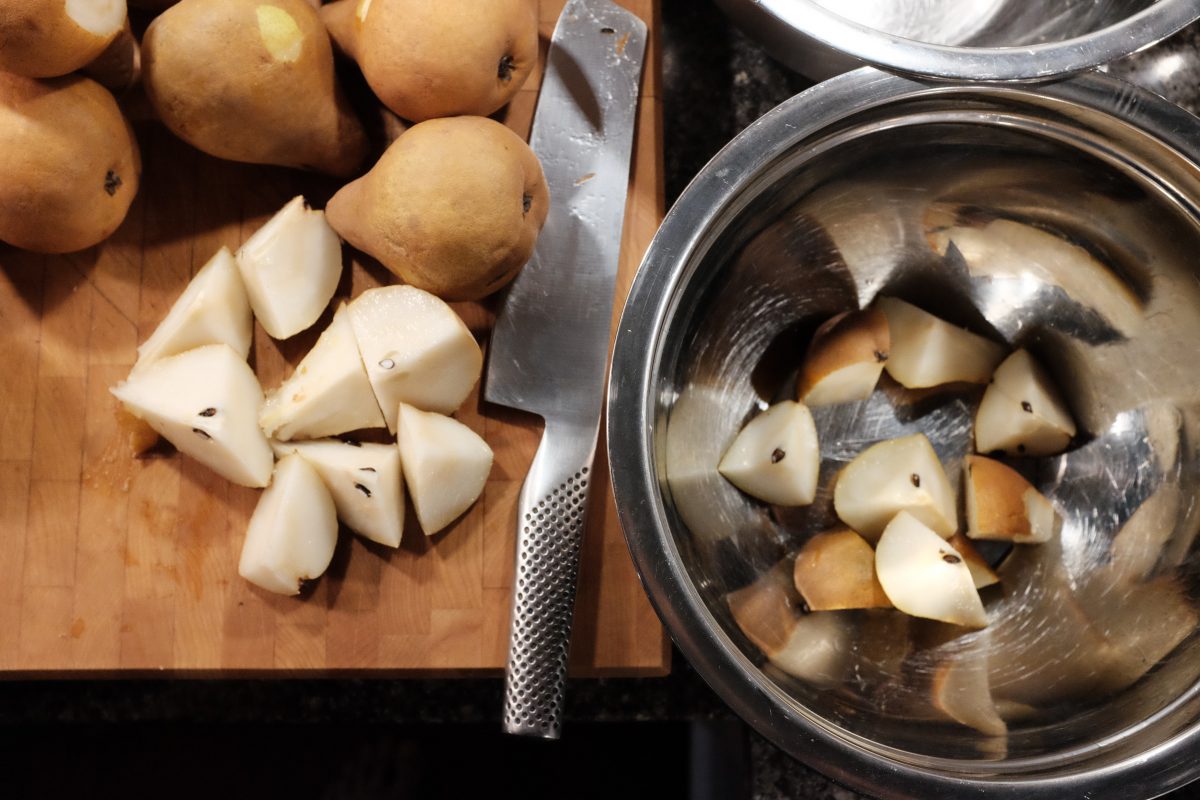
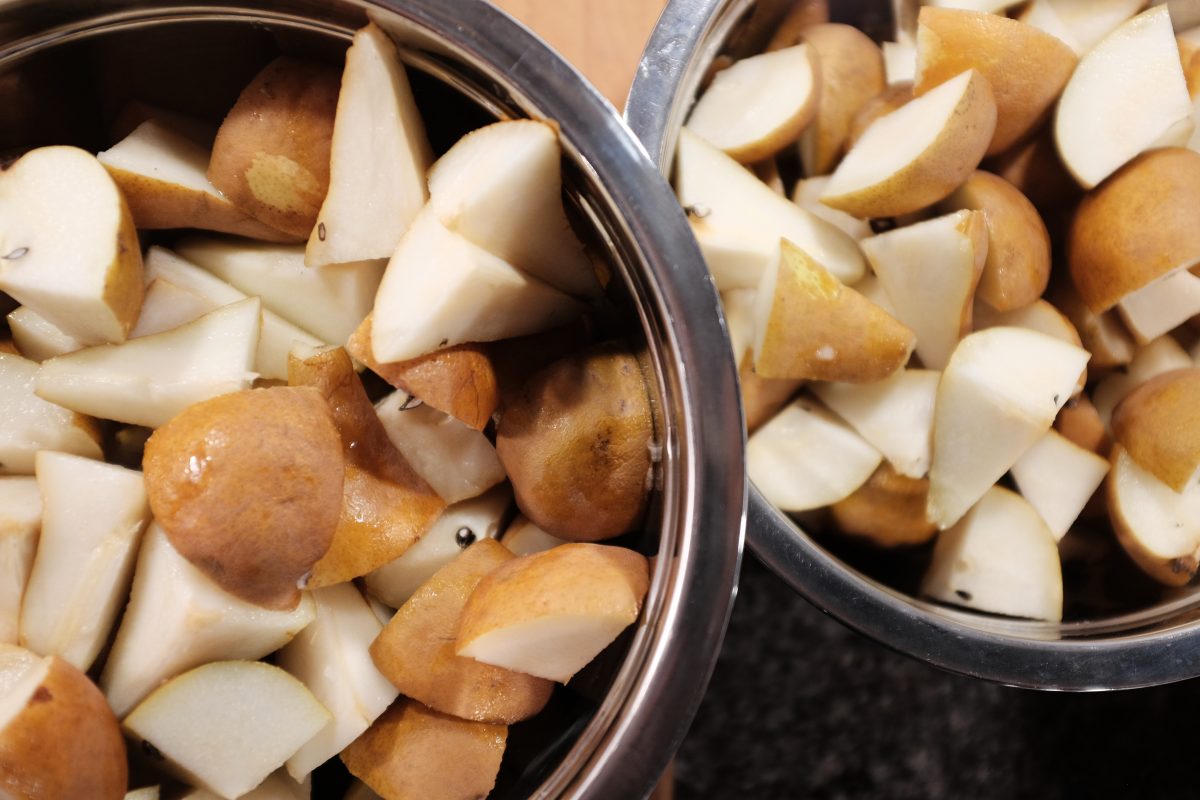
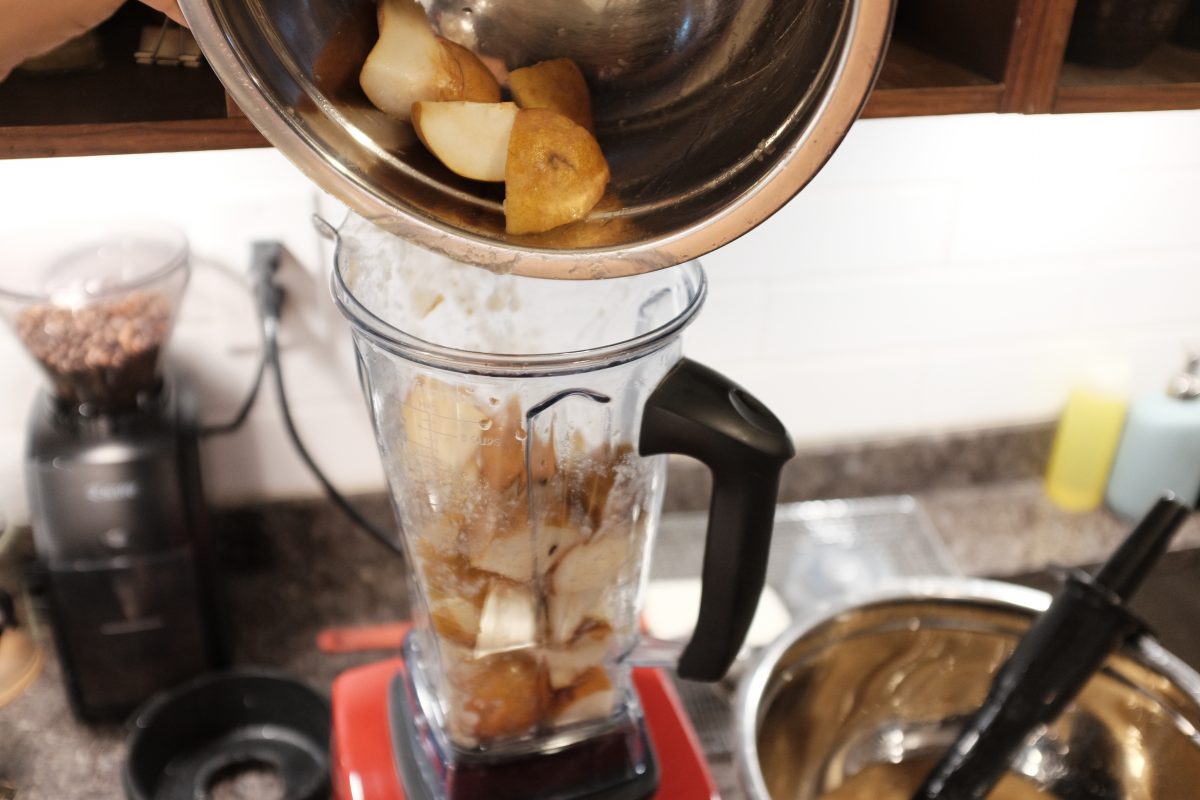
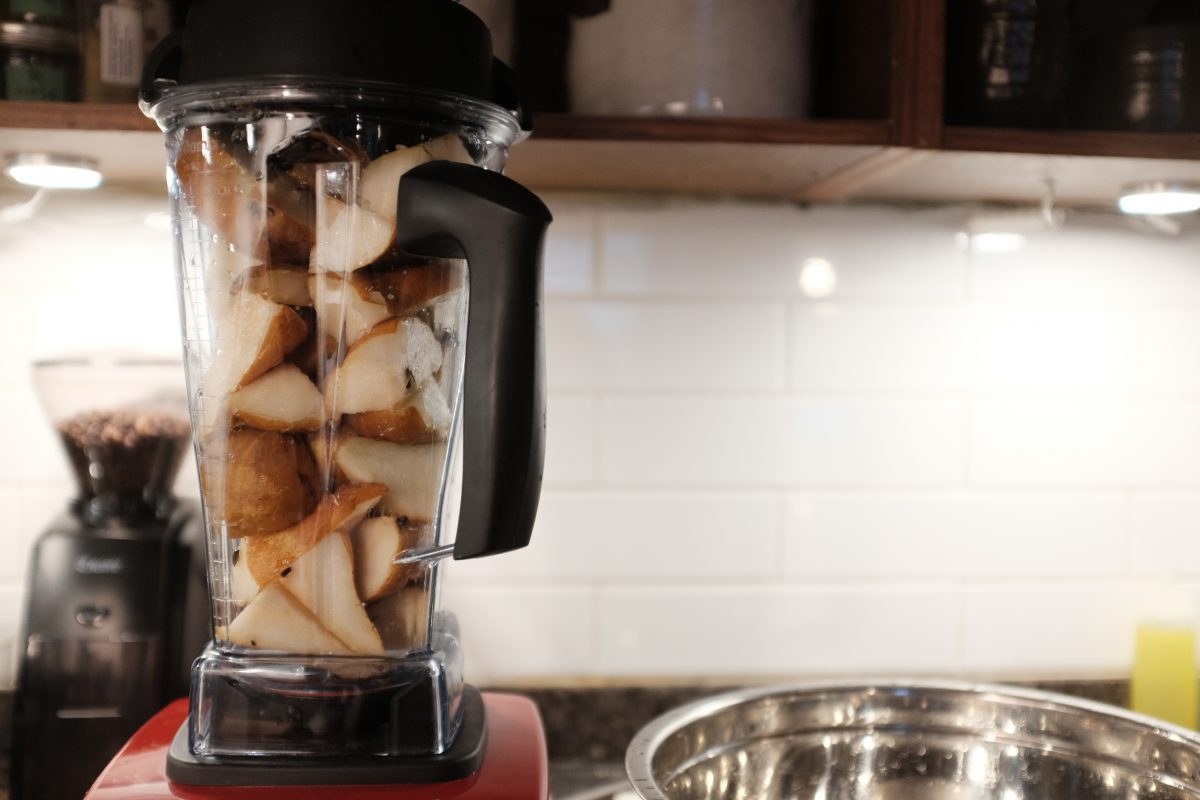
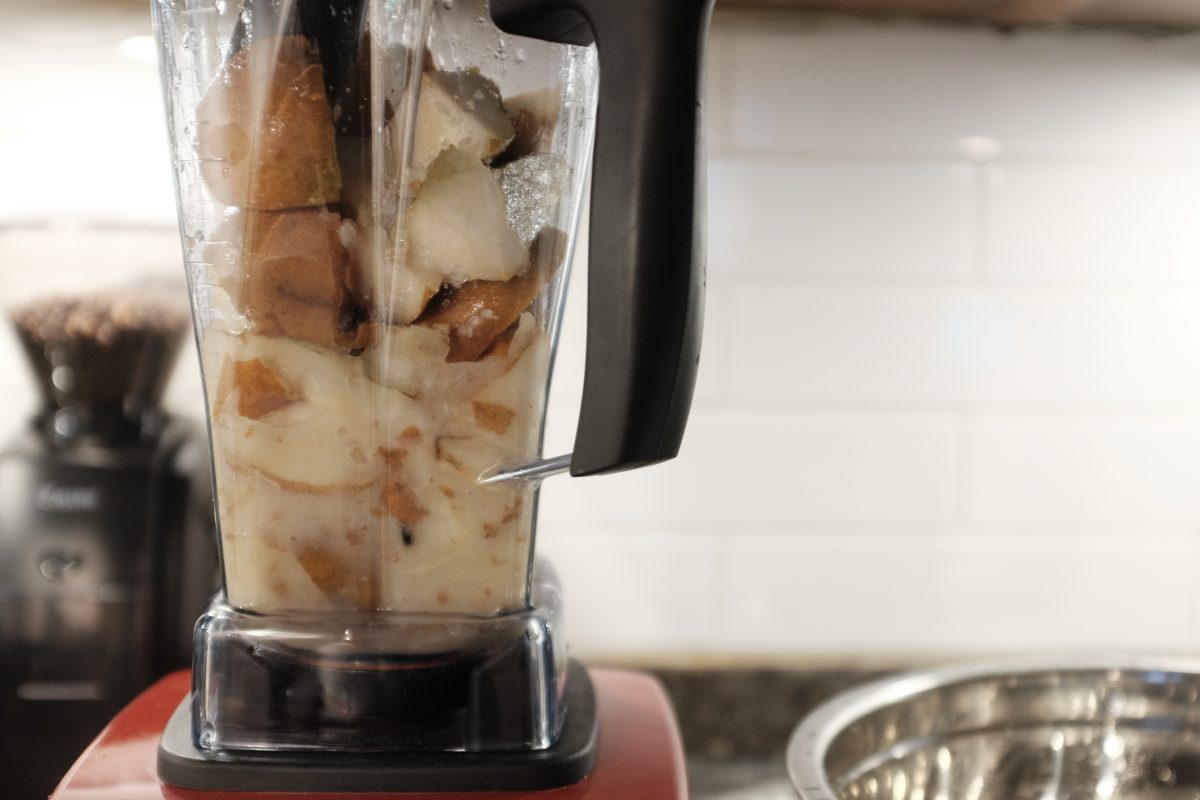
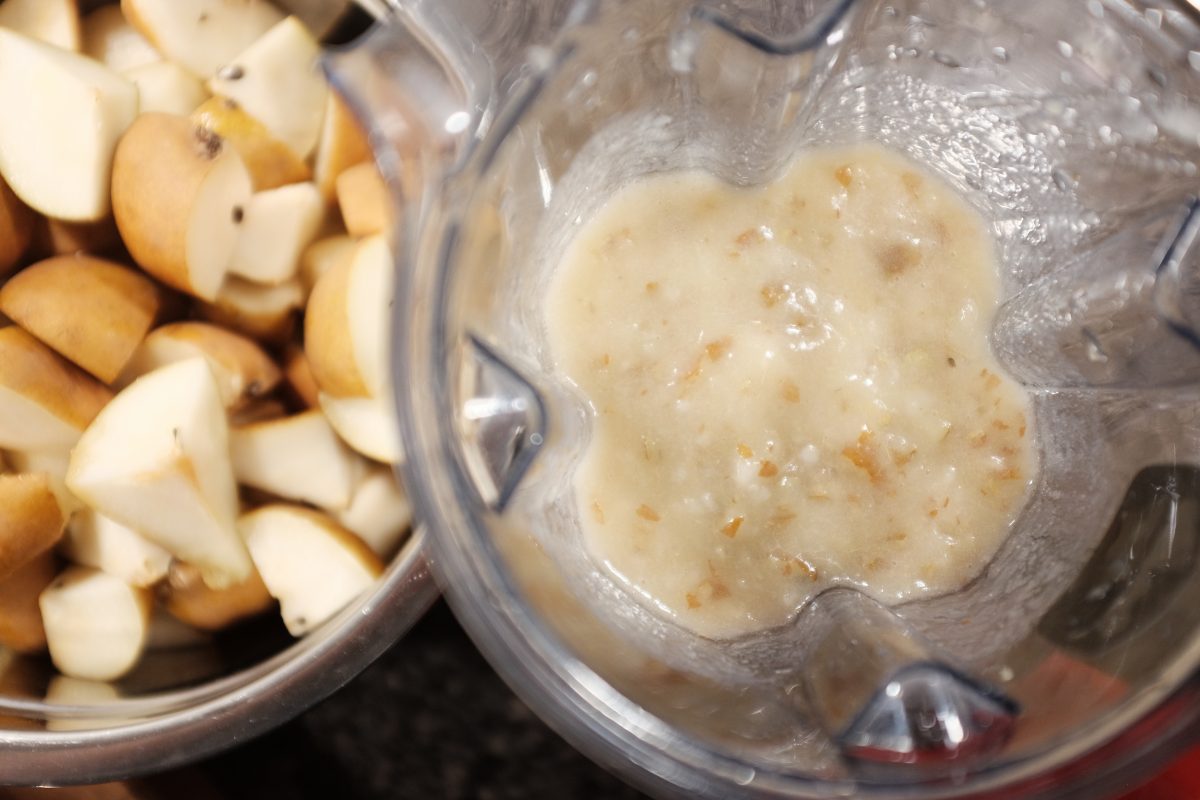
- 4 kilograms ripe pears
- 35 millilitres liquid saison yeast (or another brewers yeast)
- live culture (“contains the mother”) pear or apple cider vinegar for inoculation
Equipment:
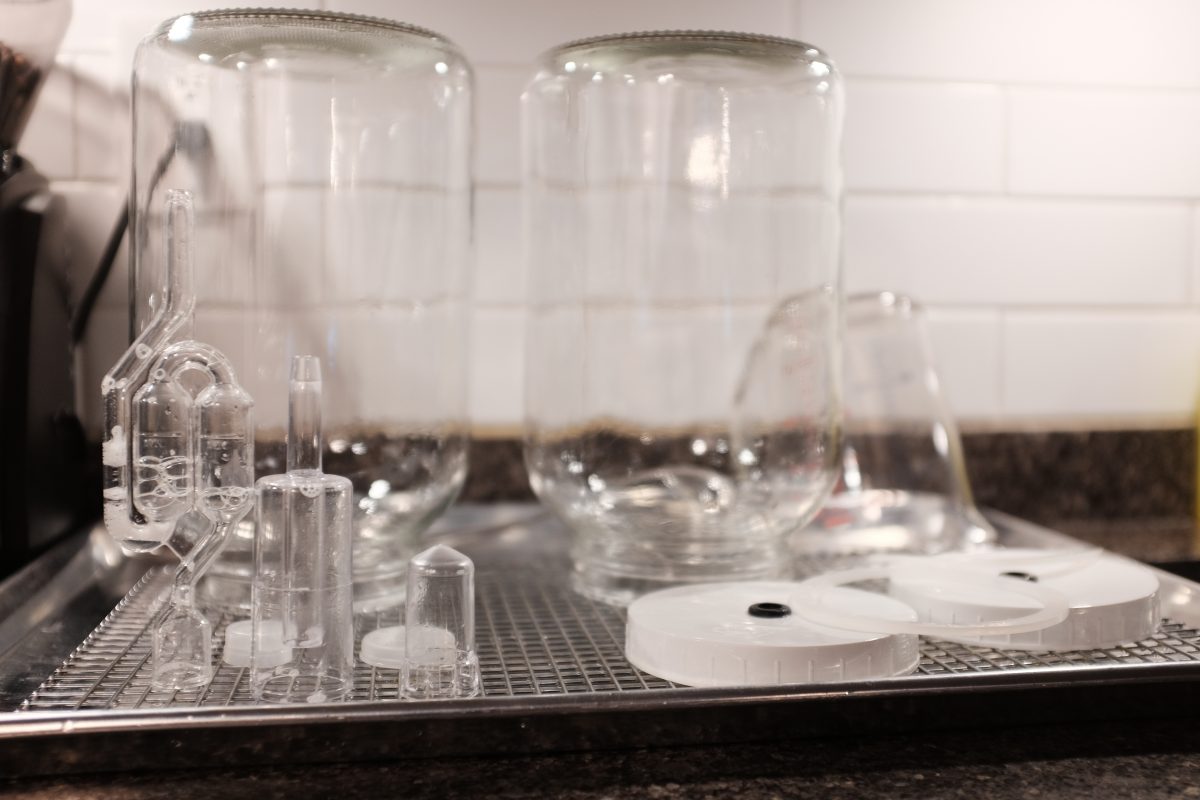
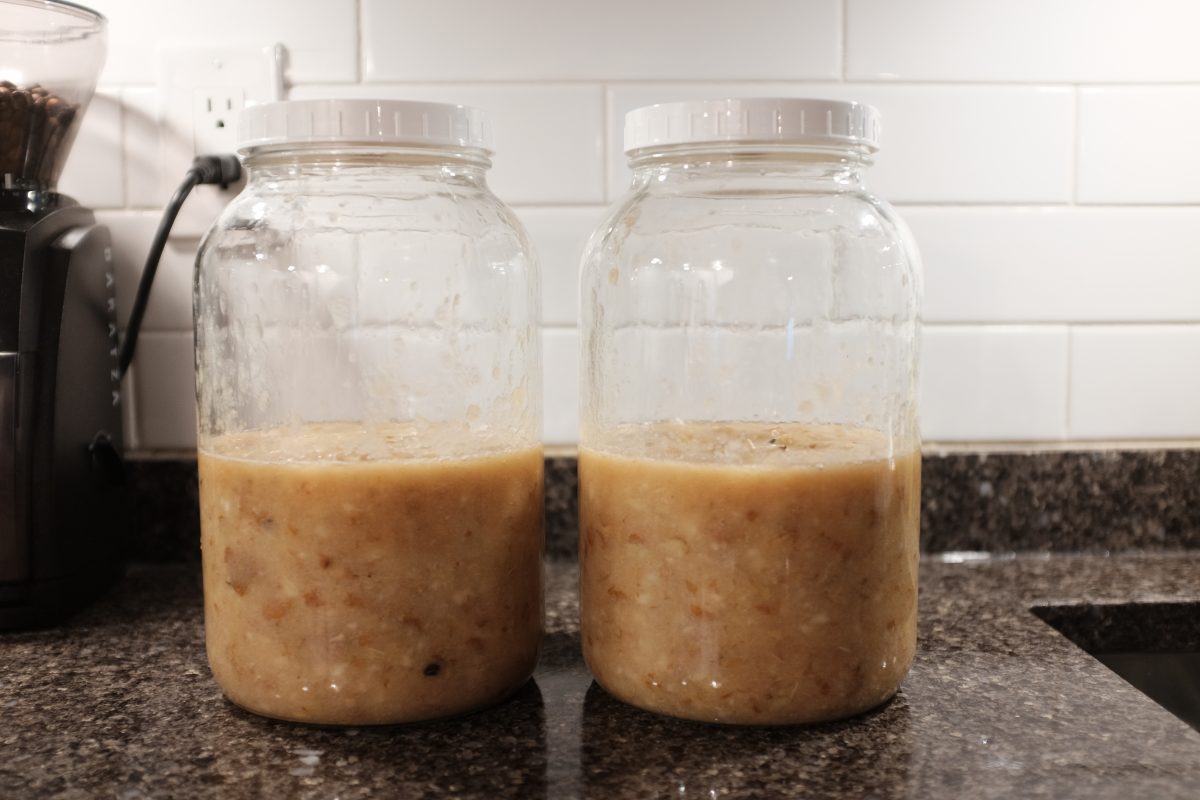
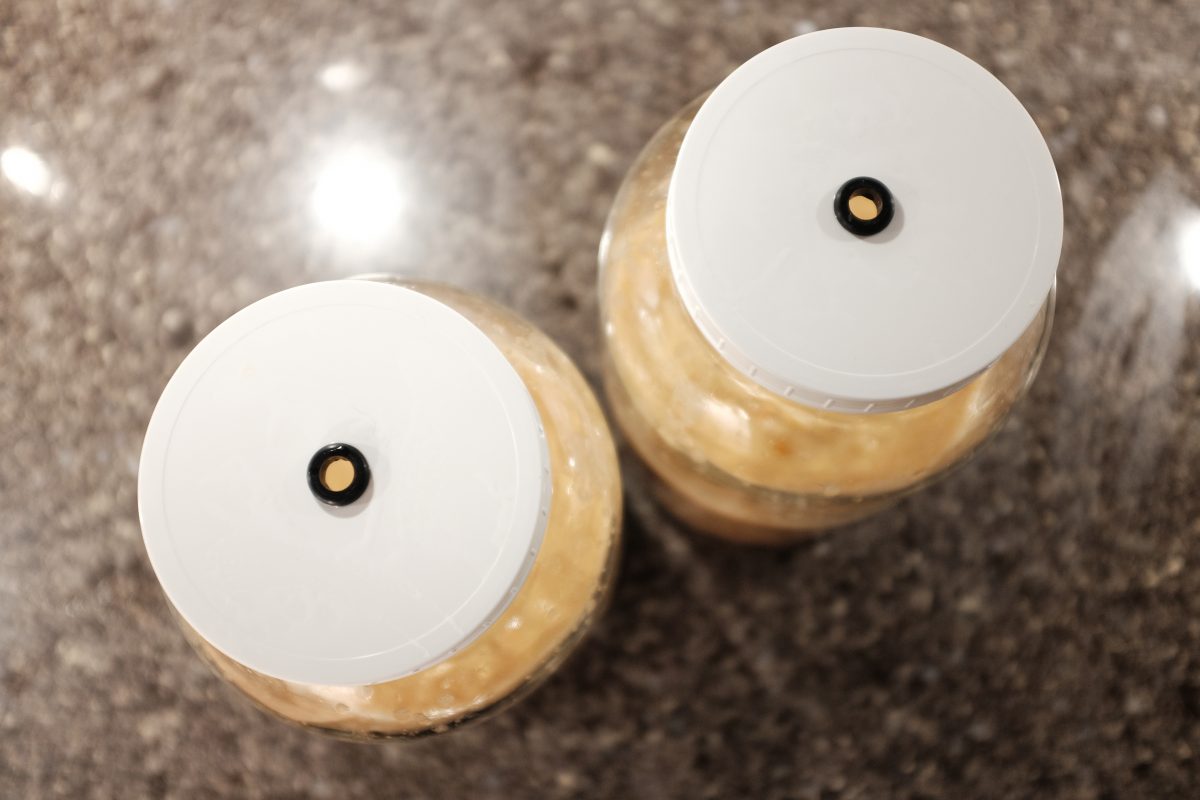
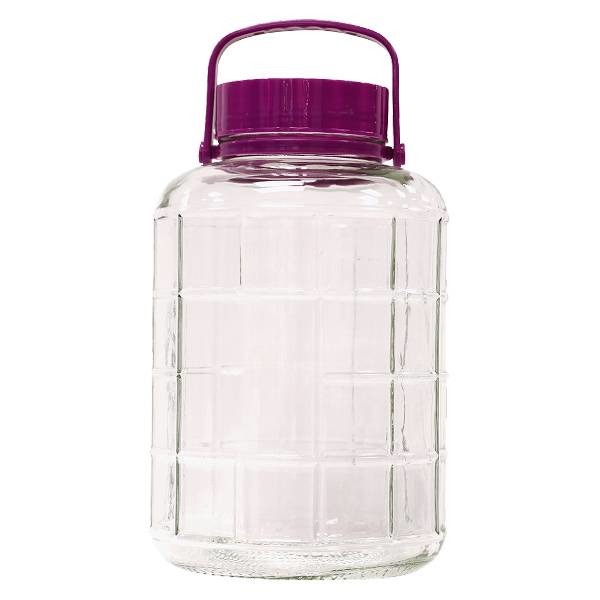
- A container large enough to hold your pears and leave at least 25% extra space. For this recipe I will be using two separate 4 litre / 1 gallon glass jars with lids and airlocks.
- A tight lid and a brewers airlock (more on this below) for each container.
- a strainer or fruit/cider press
- a small aquarium air pump, hose and air stone (any pet shop will have these)
- a blender or food processor is helpful but not necessary
Sanitizing Equipment:
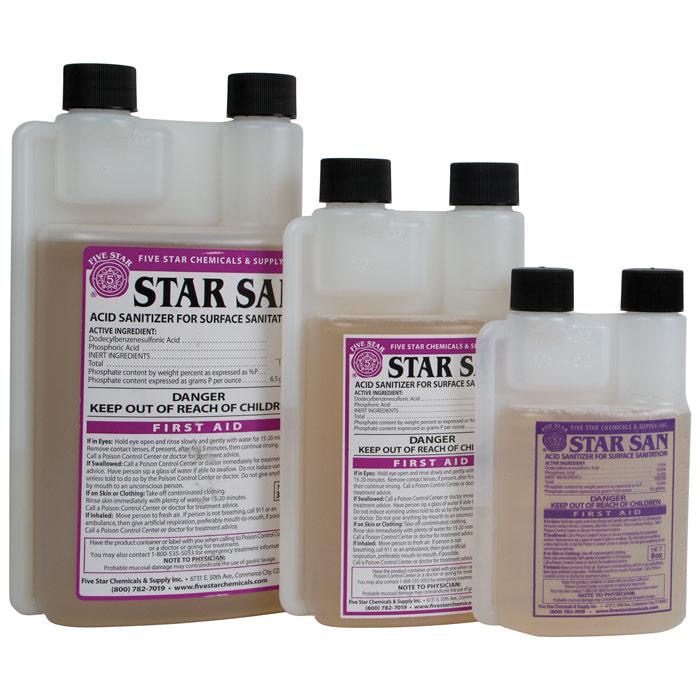
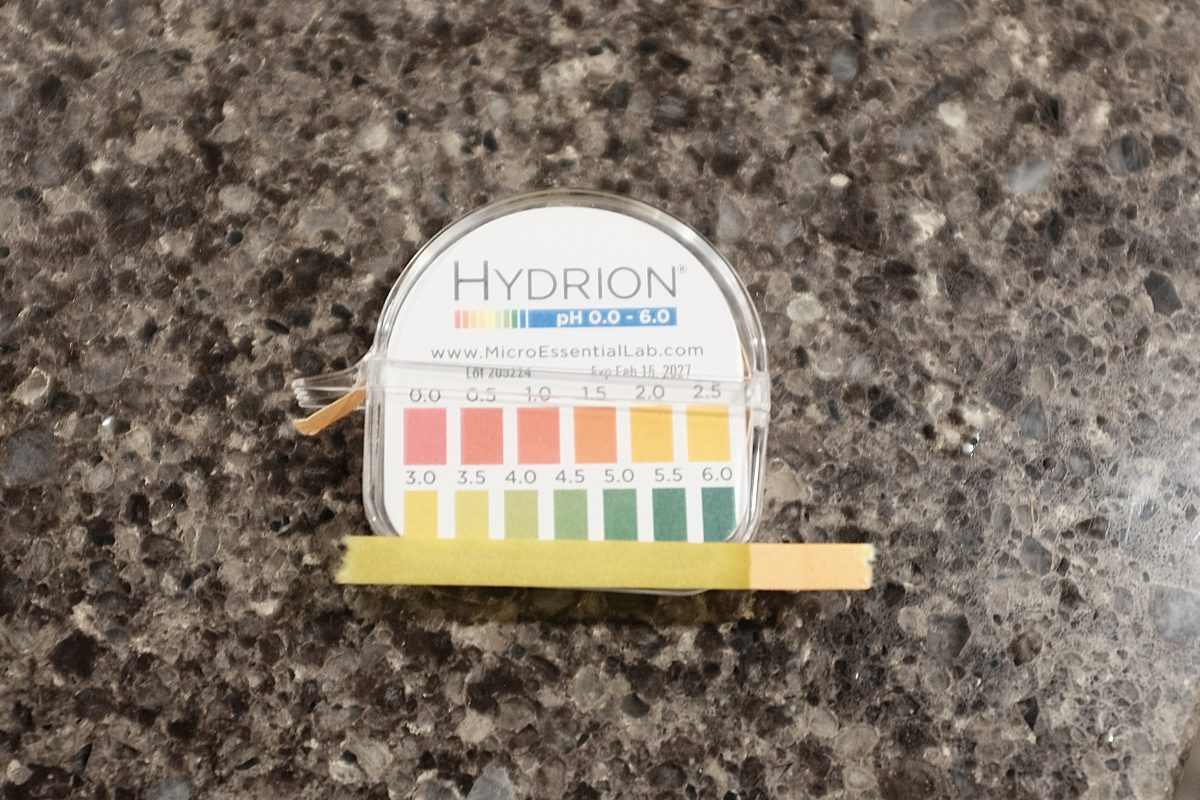
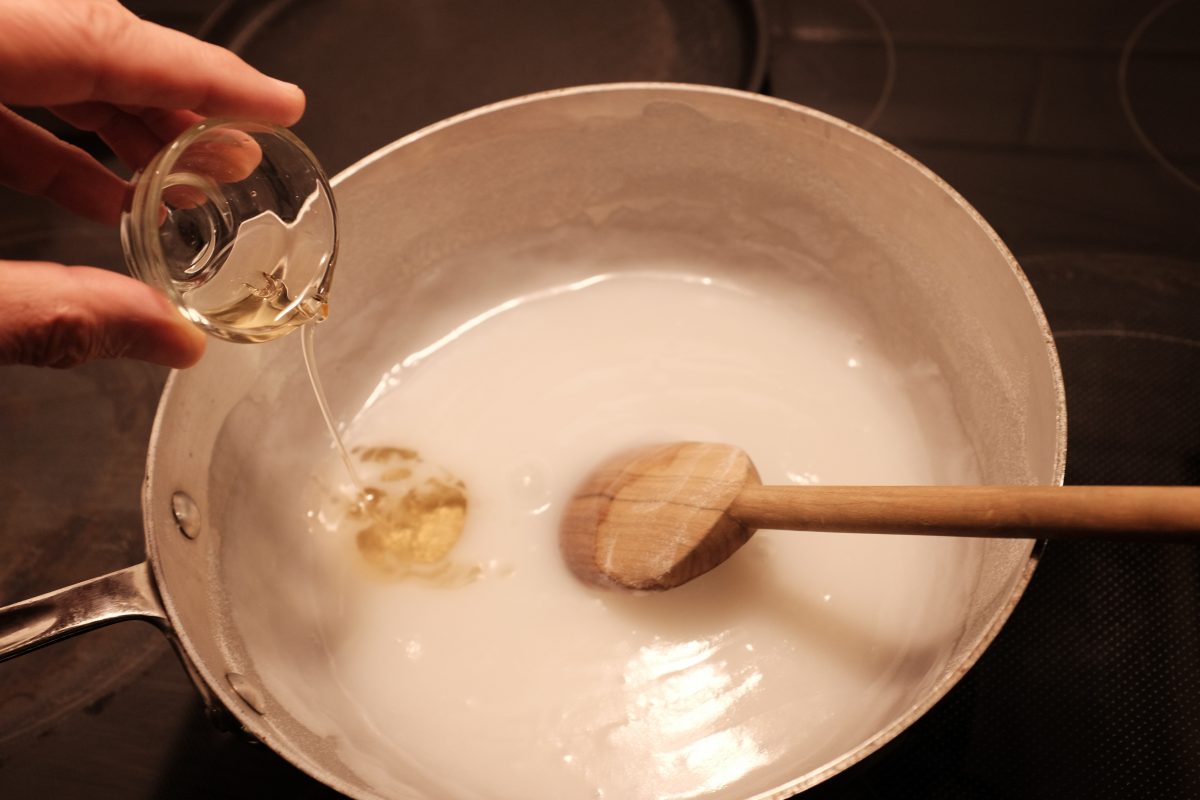
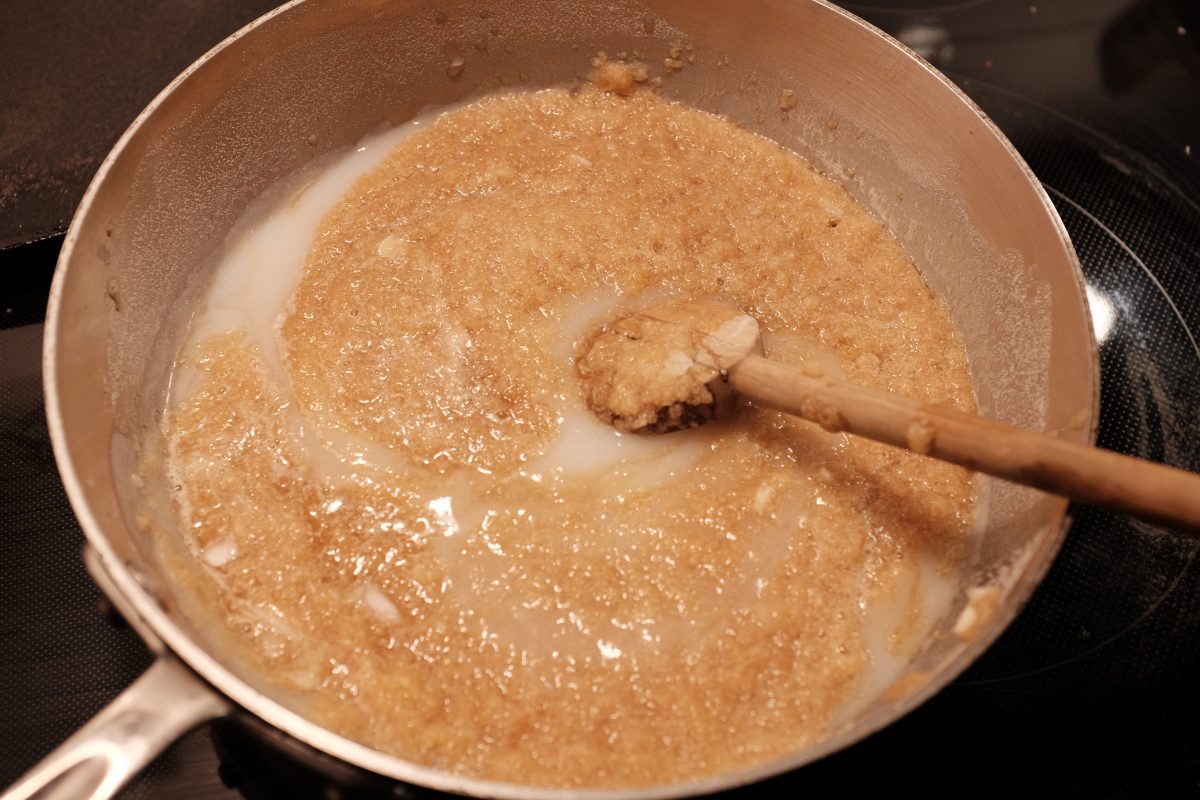
Everything that comes in contact with this brew should be sanitized. Wash everything with soap and hot water, then sanitize whichever way you find convenient. Boiling, steaming and weak bleach solutions will work, but for convenience, I use a sanitizer called Star San.
Star San is available at home brew shops or online. You can mix a tiny amount with fresh water in a spray bottle for very effective and easy sanitizing. My local home brew supplier sells tiny bottles. Unless you are brewing huge amounts with massive equipment, a small bottle will last forever. I dilute it at about 2.5 millilitres per litre of water…that’s around 1/4 teaspoon per spray bottle…a tiny amount. This makes more than enough sanitizer for this whole process. It comes in a few different sizes and looks like this:
Process:
This recipe is divided into 2 parts. In part 1, we make alcohol. In part 2, we make vinegar.
Part 1: making alcohol


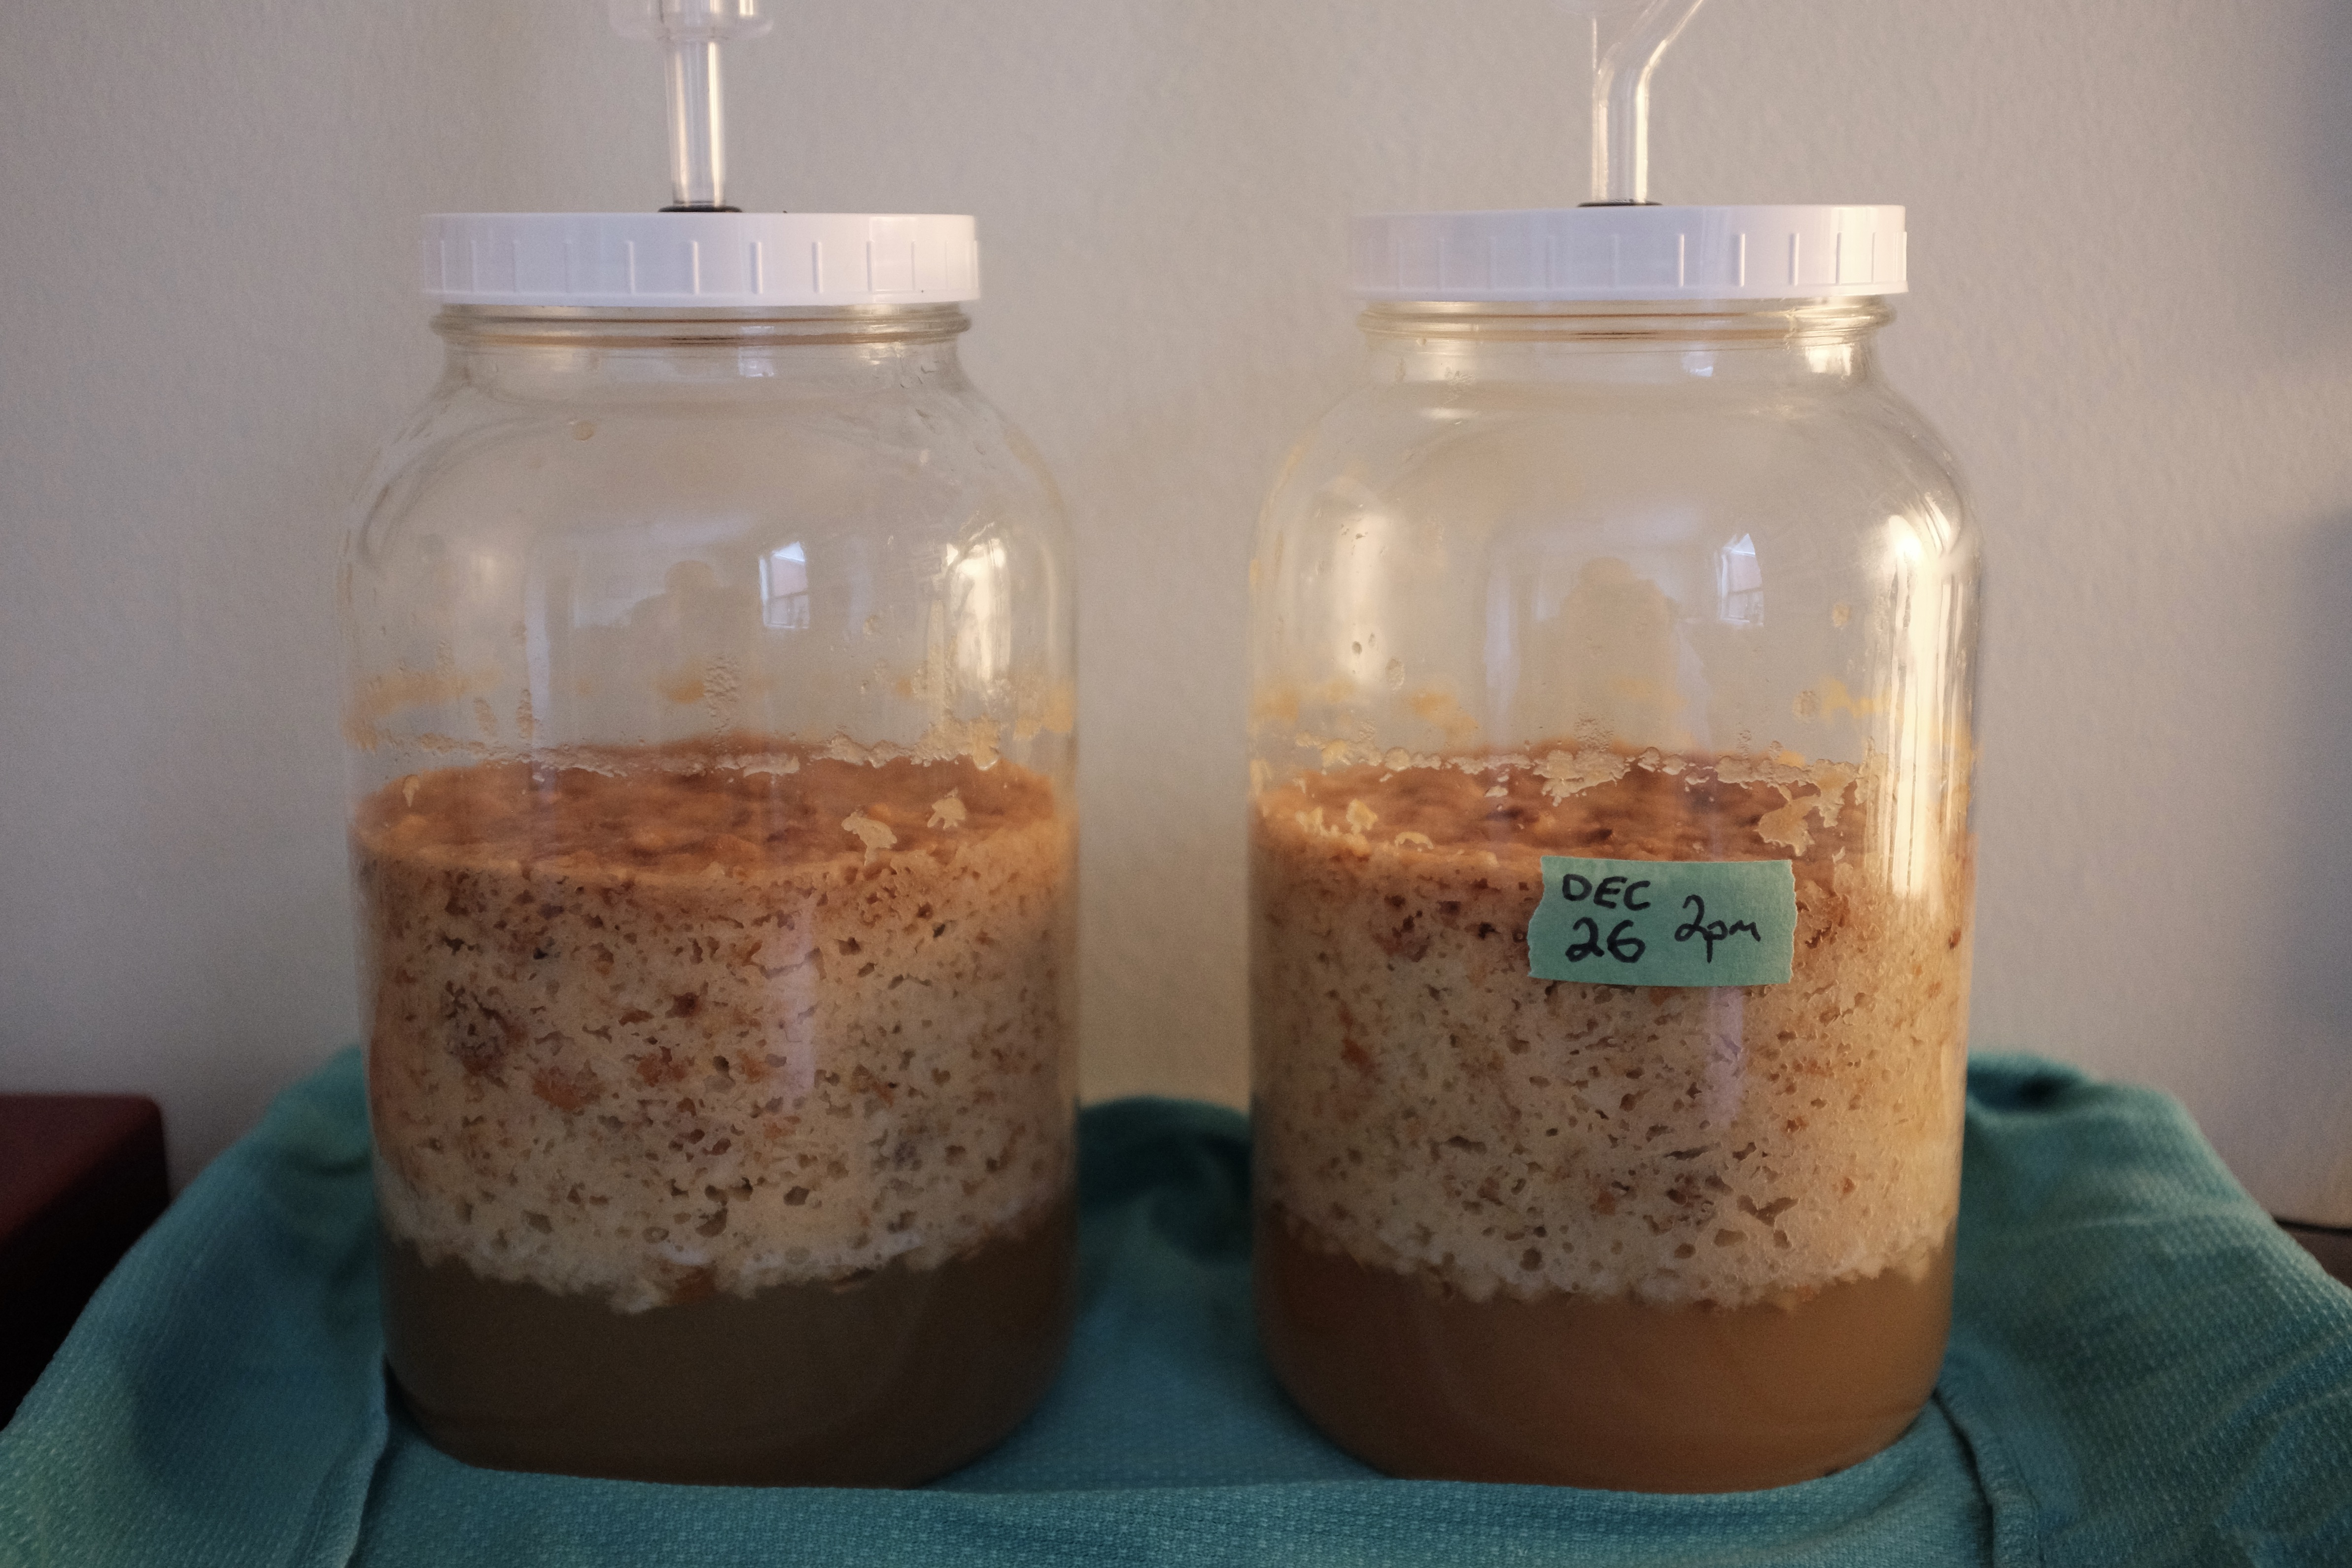
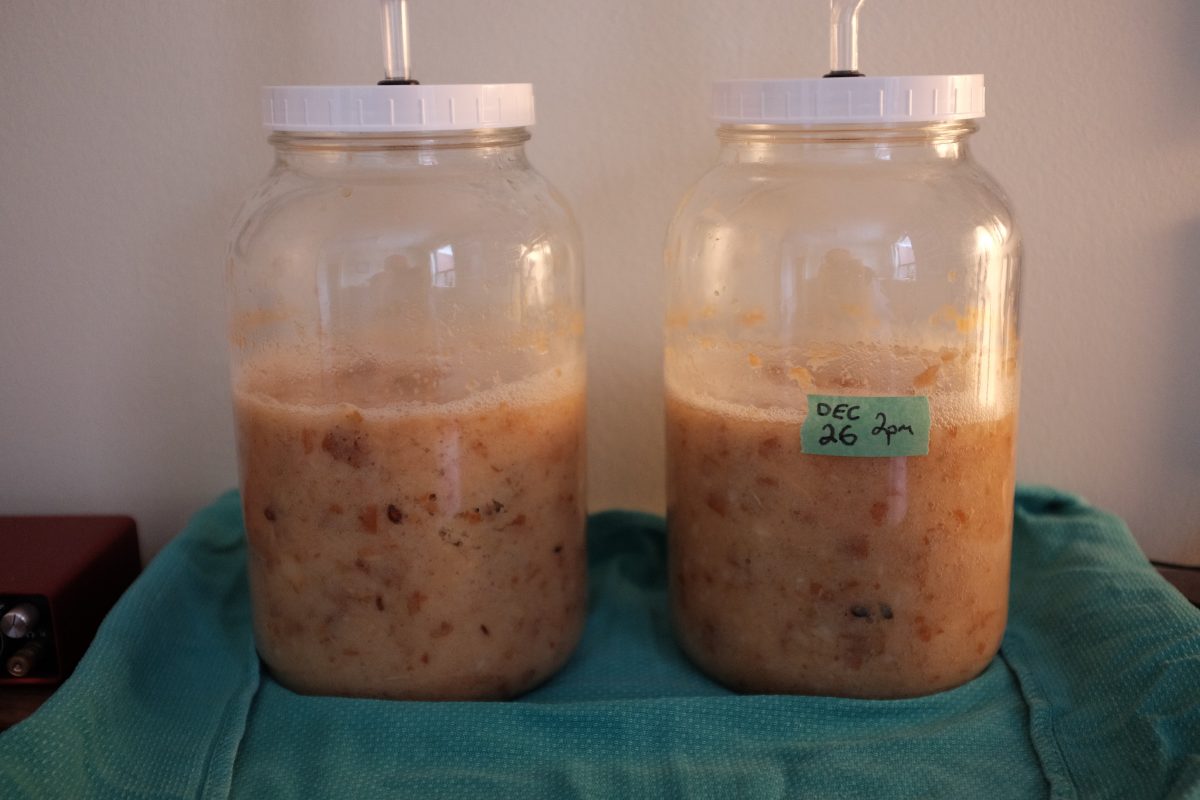
Once the jars are filled, the lids are on tight, and the airlocks are assembled…move them to a spot that is not in bright light and is at a cool room temperature. Around 20 Celsius or even a little cooler is ideal. Sometimes a basement works, or a garage. I have one or two poorly insulated outside walls which stay at a perfect 18-20 degrees in the winter so that is where I do my fermenting.
First Signs of Life
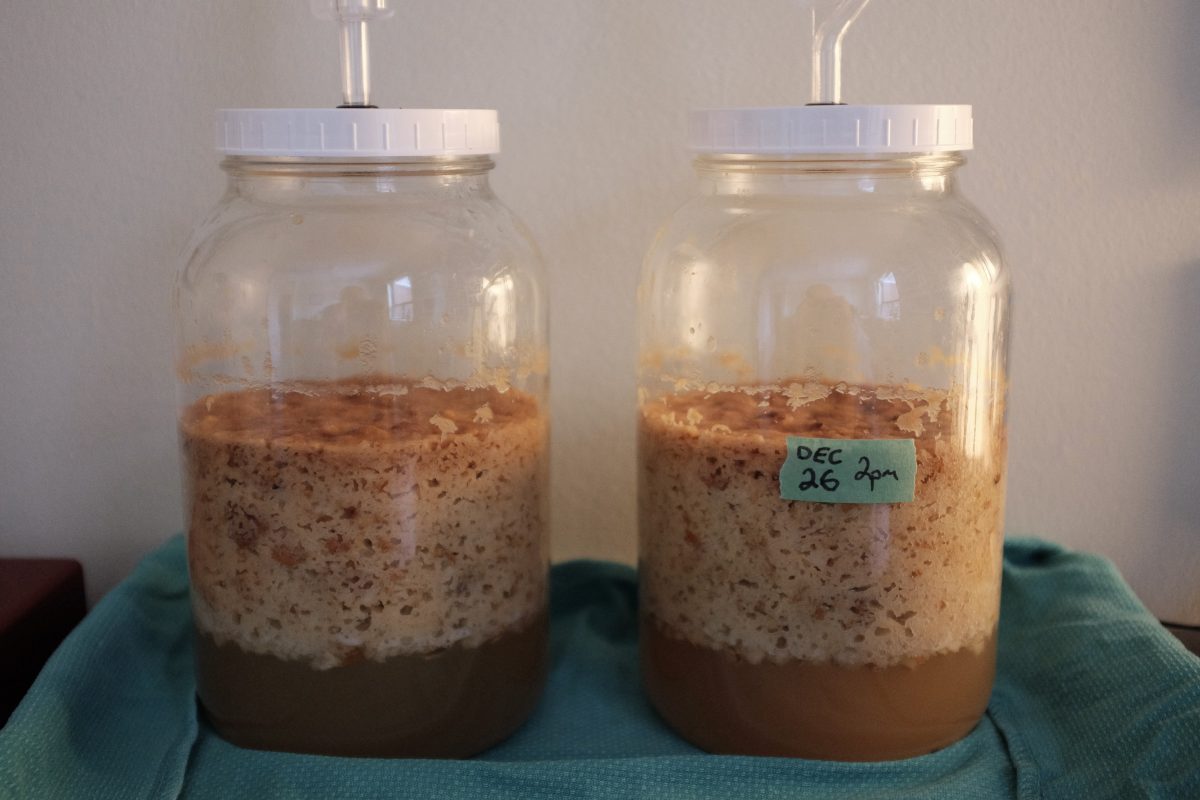
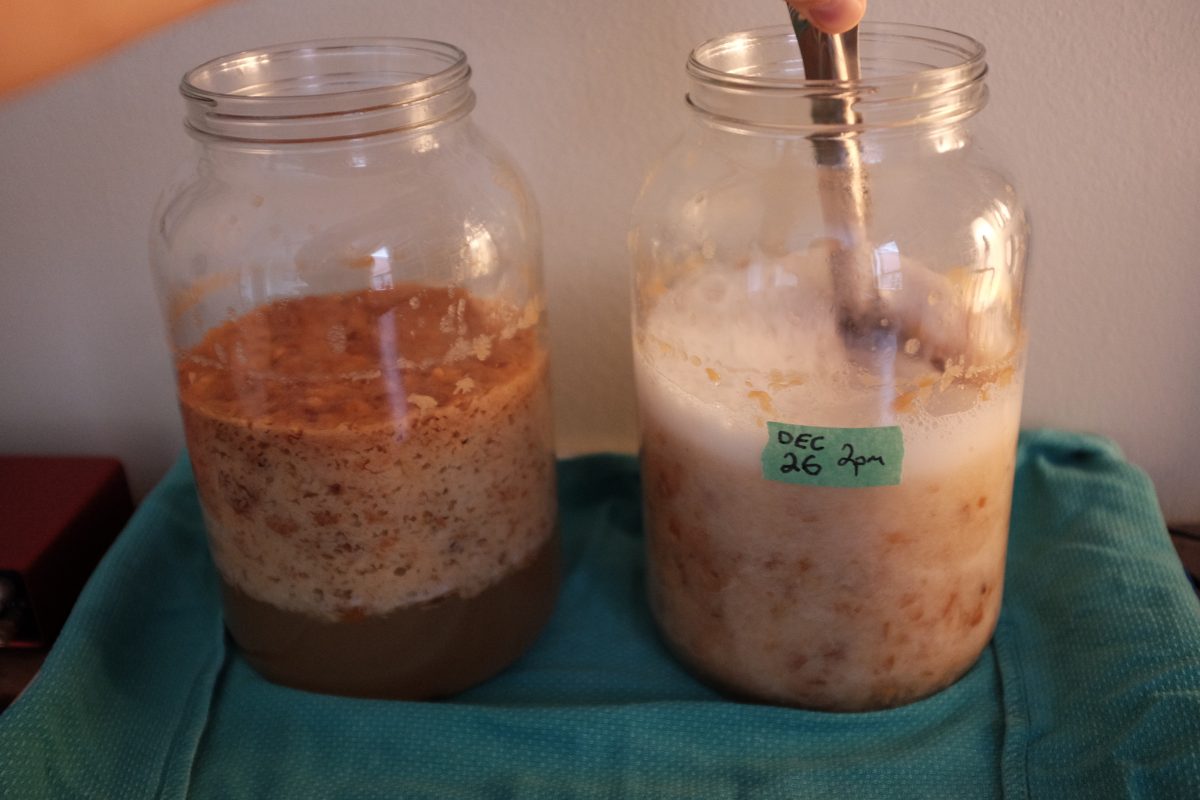
Fermentation slows down…
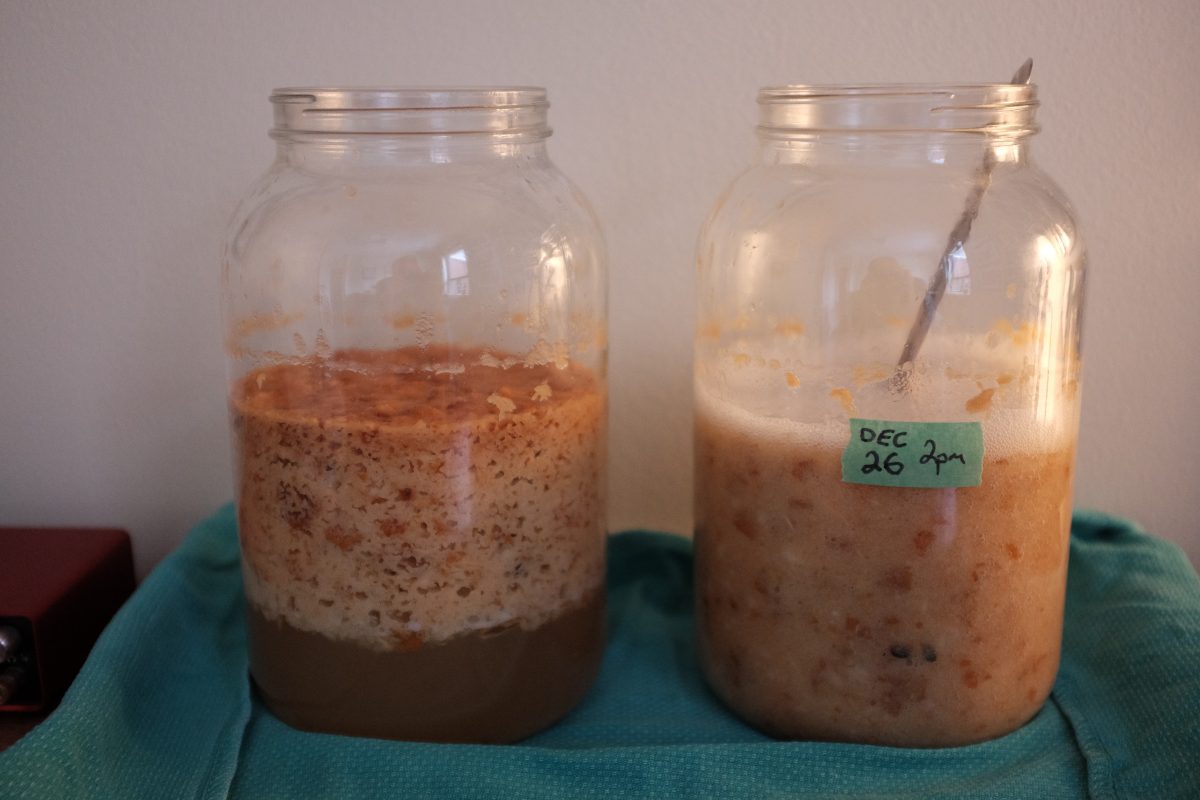
For the first 2 days, fermentation was very active with both airlocks bubbling constantly. Towards the end of the second day the fermentation has slowed noticeably. The airlocks will bubble up a couple of times a minute at most. There is less fizzing when stirring and there is a slight taste and smell of alcohol on the spoon. By day 3, fermentation was very slow. Apparently, this very active initial fermentation followed by a very slow and steady period is characteristic of “saison” yeast. If you are using a different brewers yeast, the fermentation may be more consistent over time.
Keep stirring once a day, tasting for sugar and alcohol balance. Monitor activity at the airlocks.
Day 7:
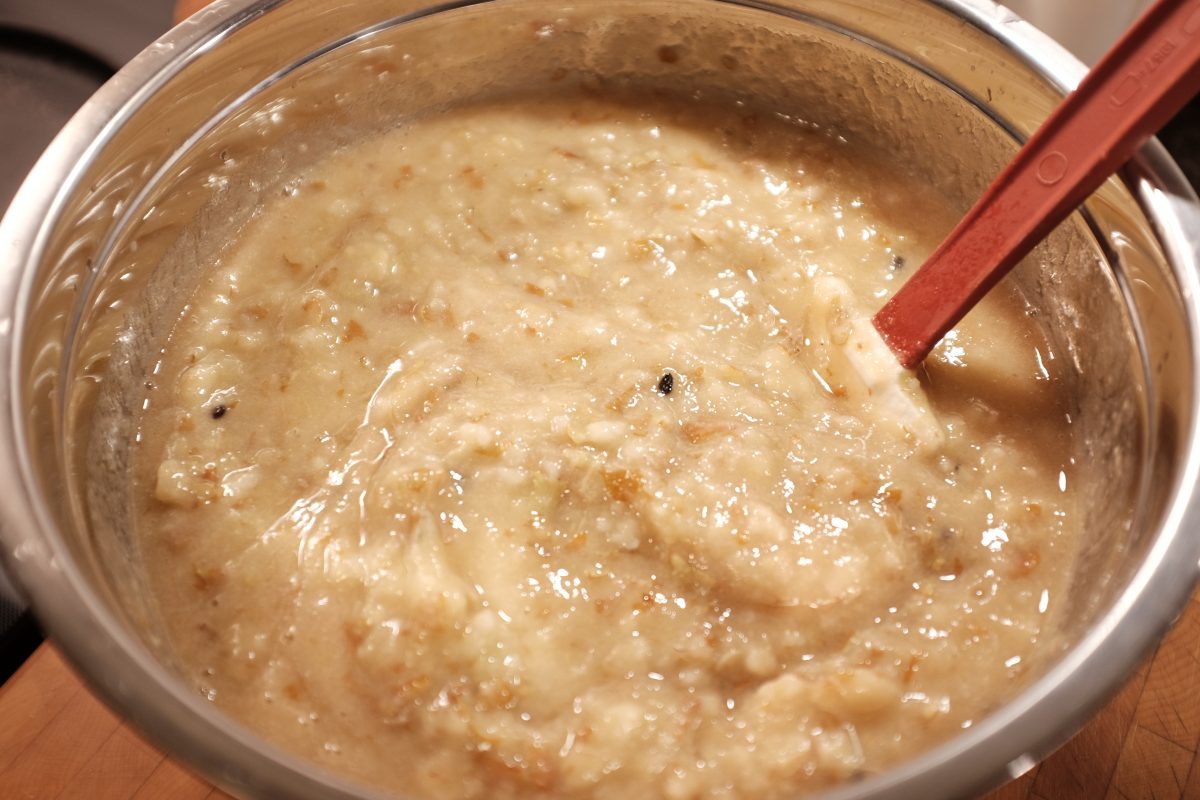
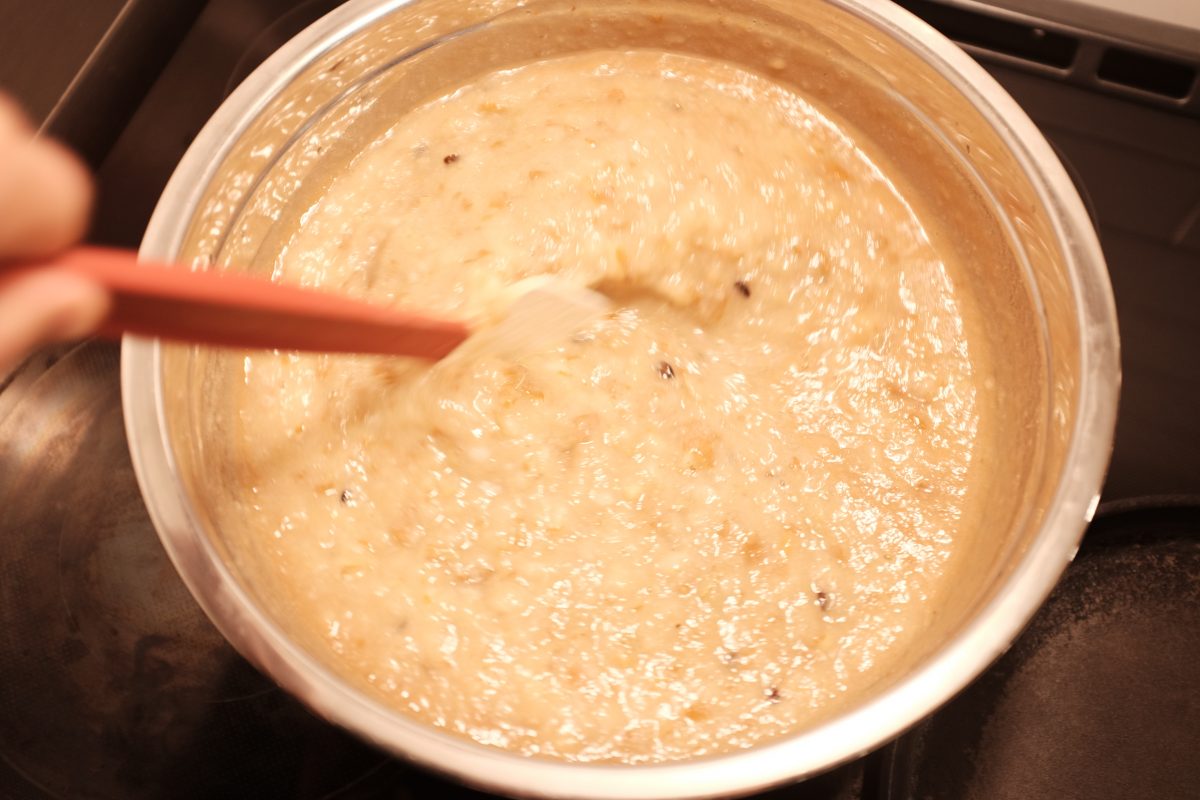
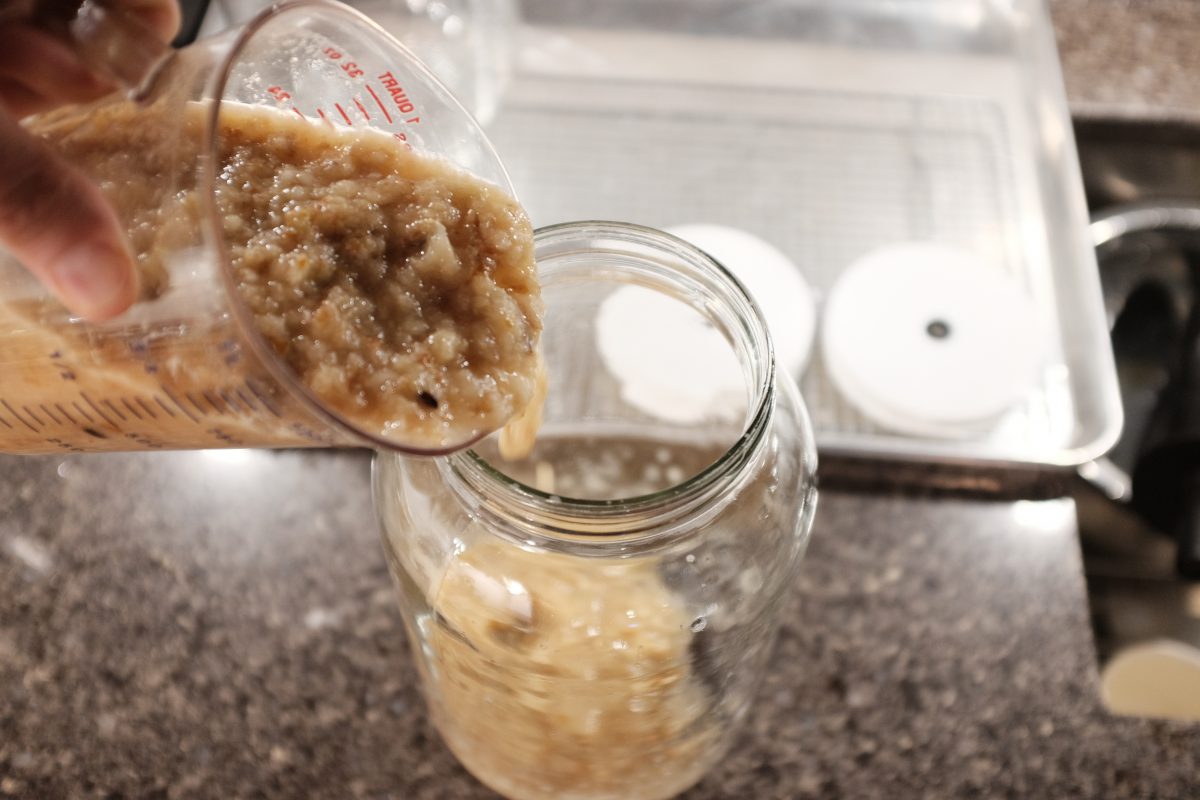
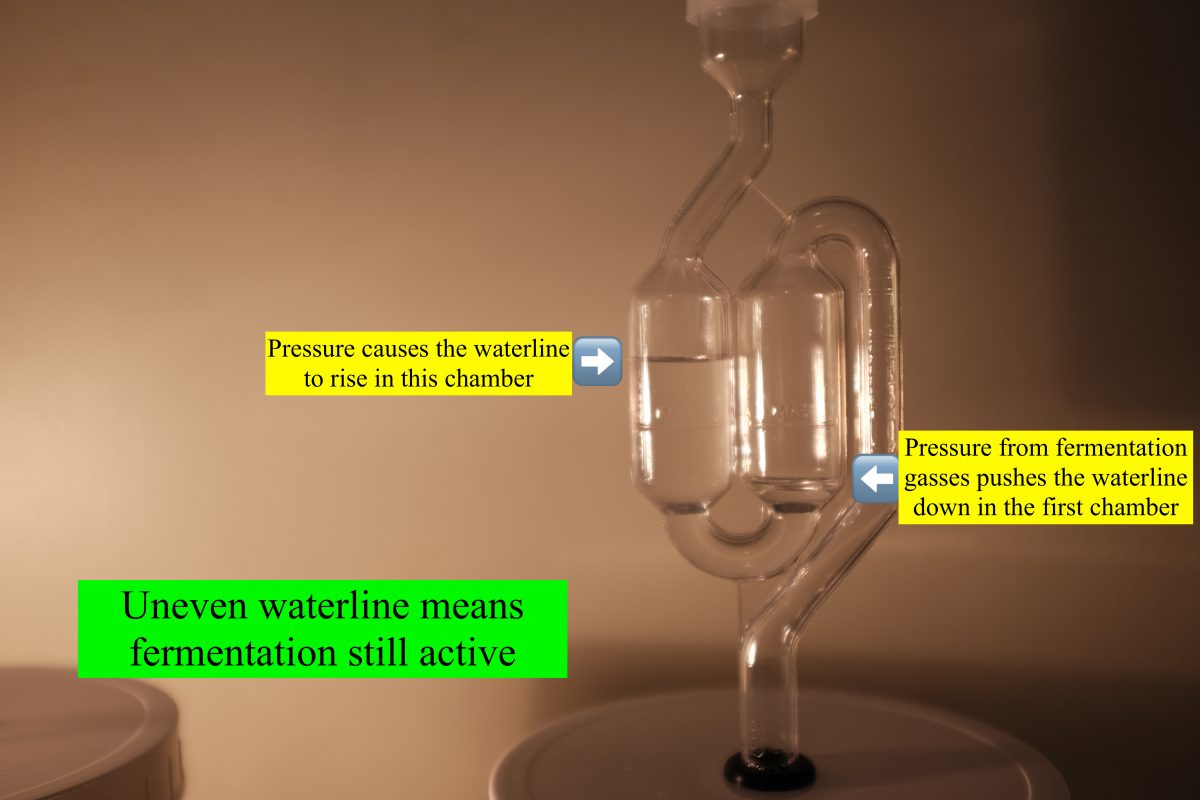
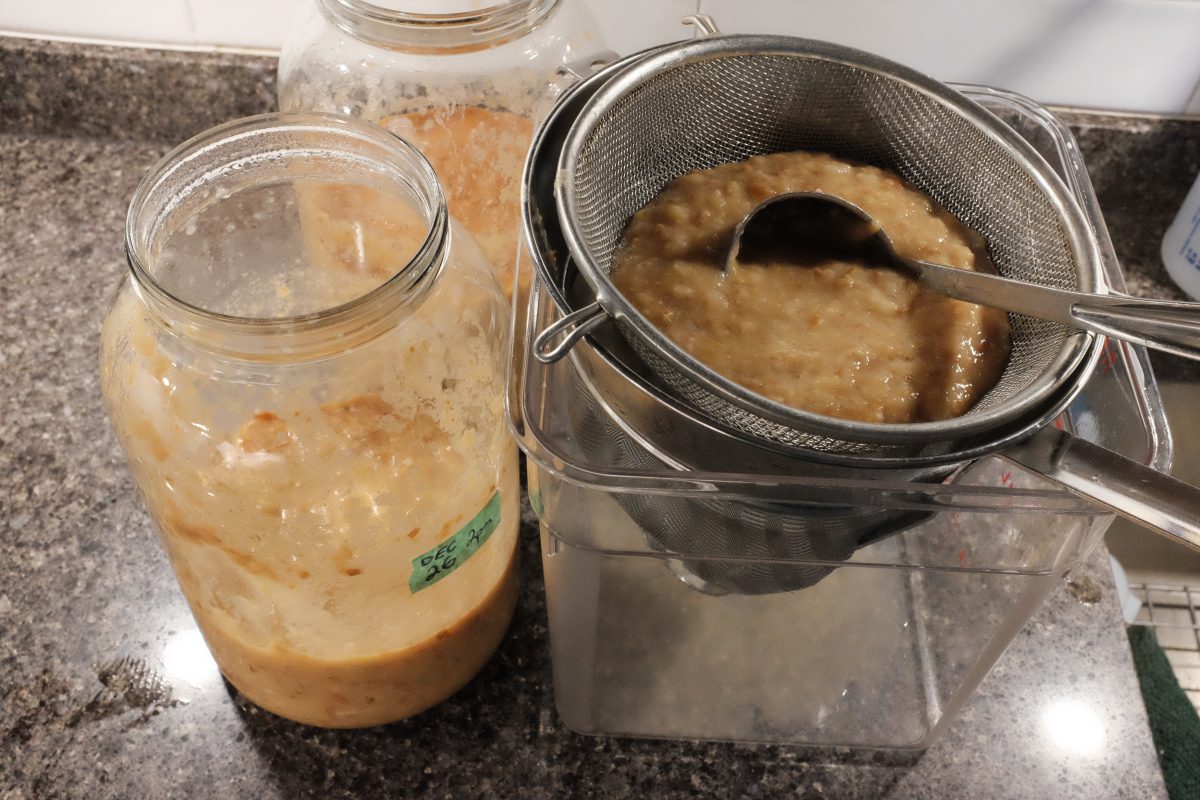
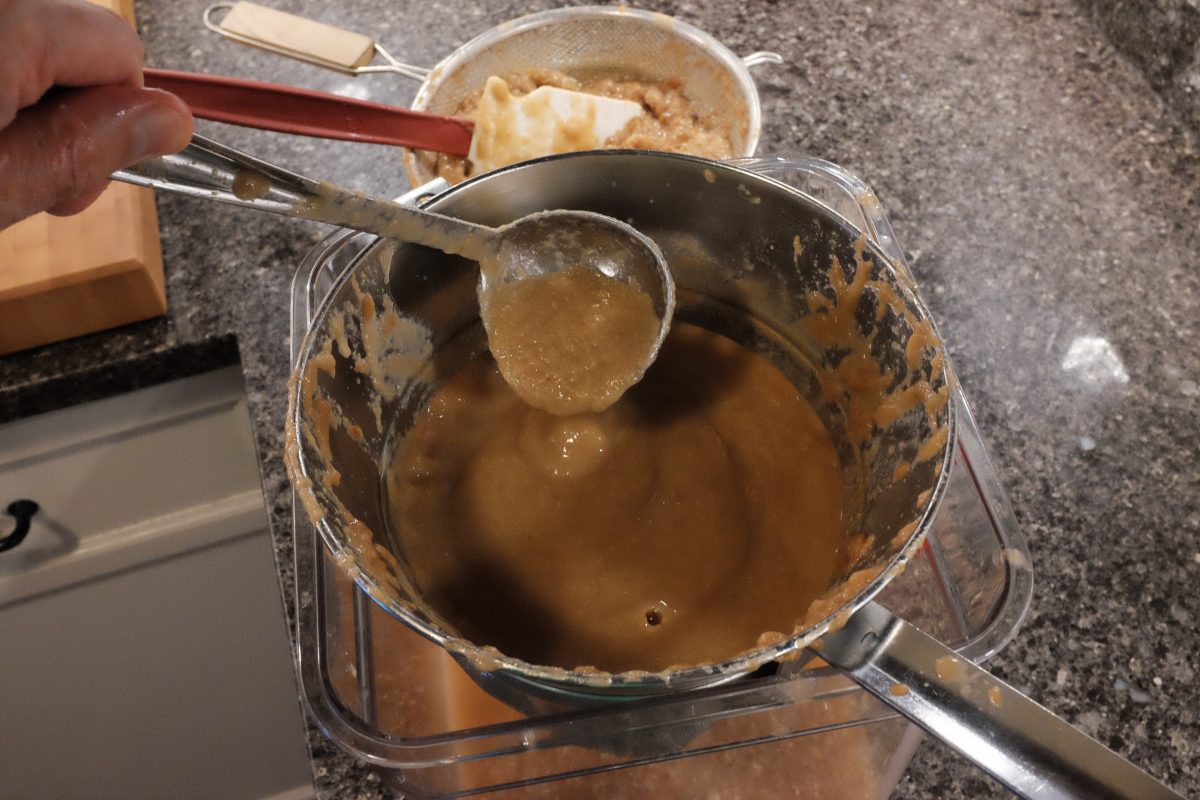
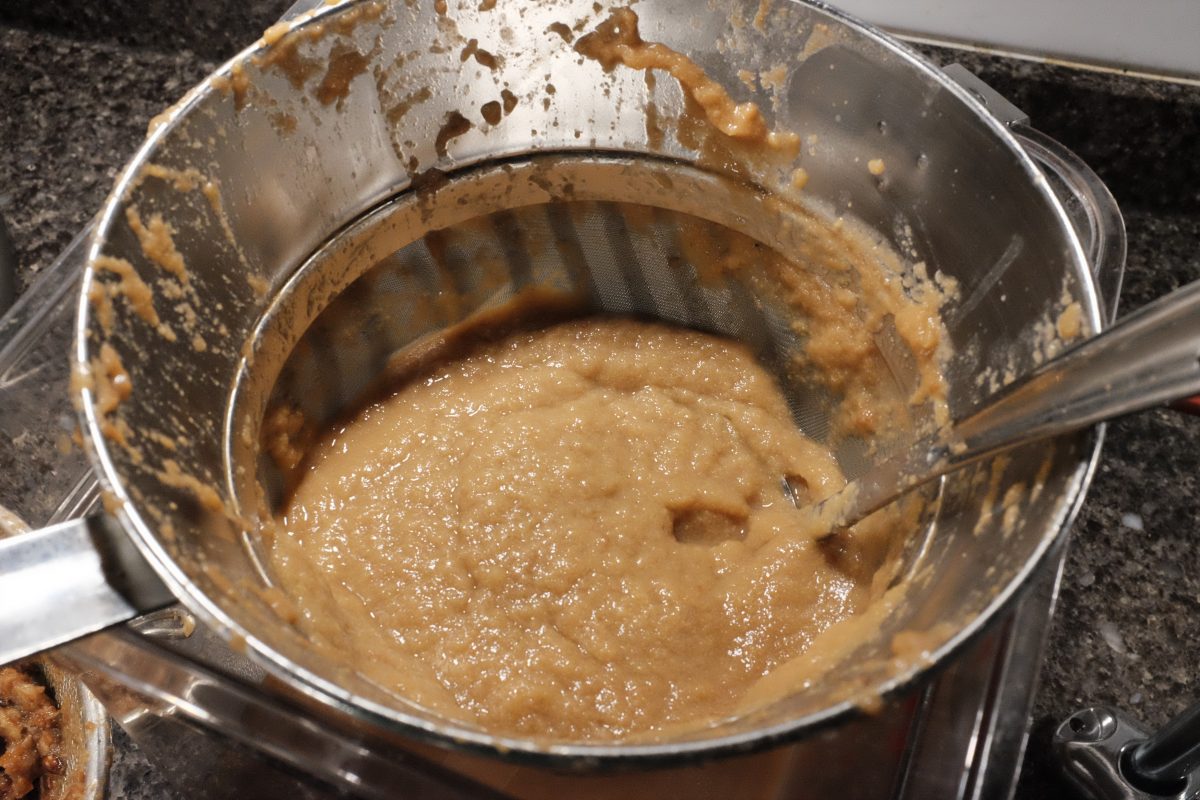
By the 7th day, there is little to no detectable fermentation happening…no bubbling, no sounds, and the pressure in the S-airlock is equalized with both chambers showing the same water level. The mash tastes and smells of alcohol but the sweetness and perfume of pears is still there. This is perfect. It is time to strain the mash and move on to vinegar fermentation.
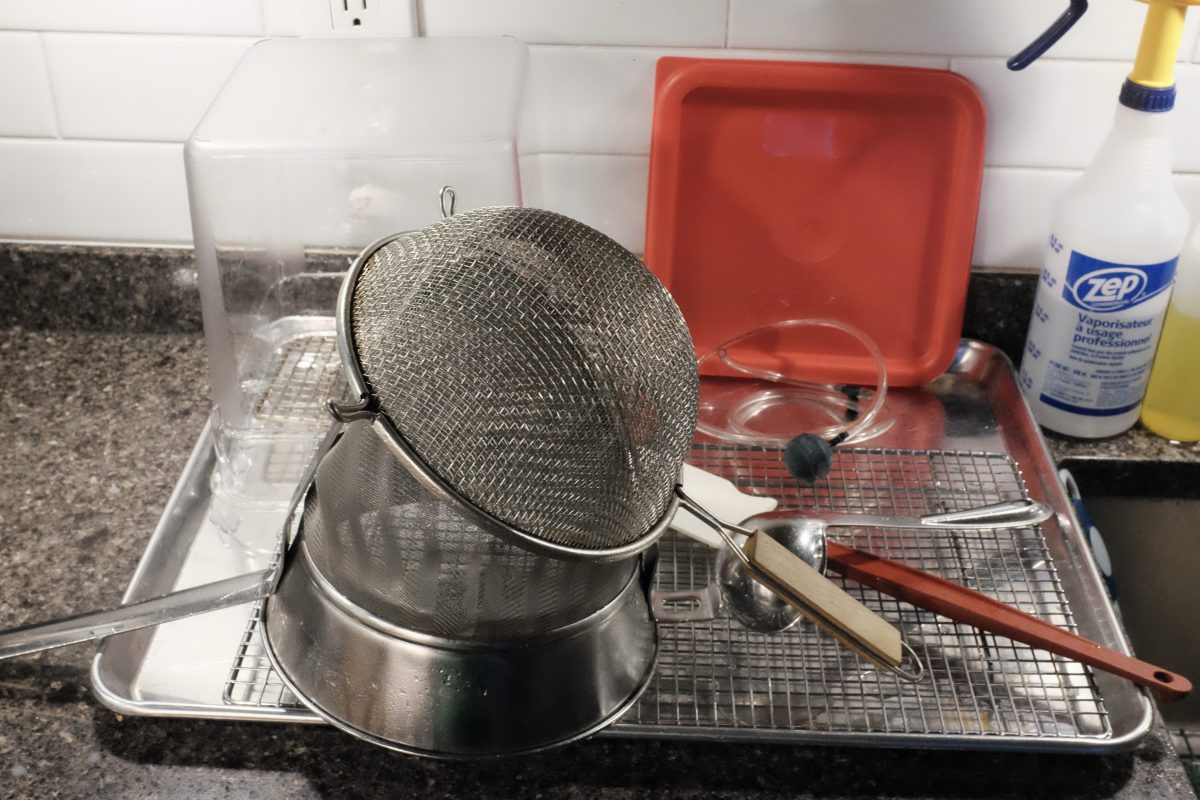
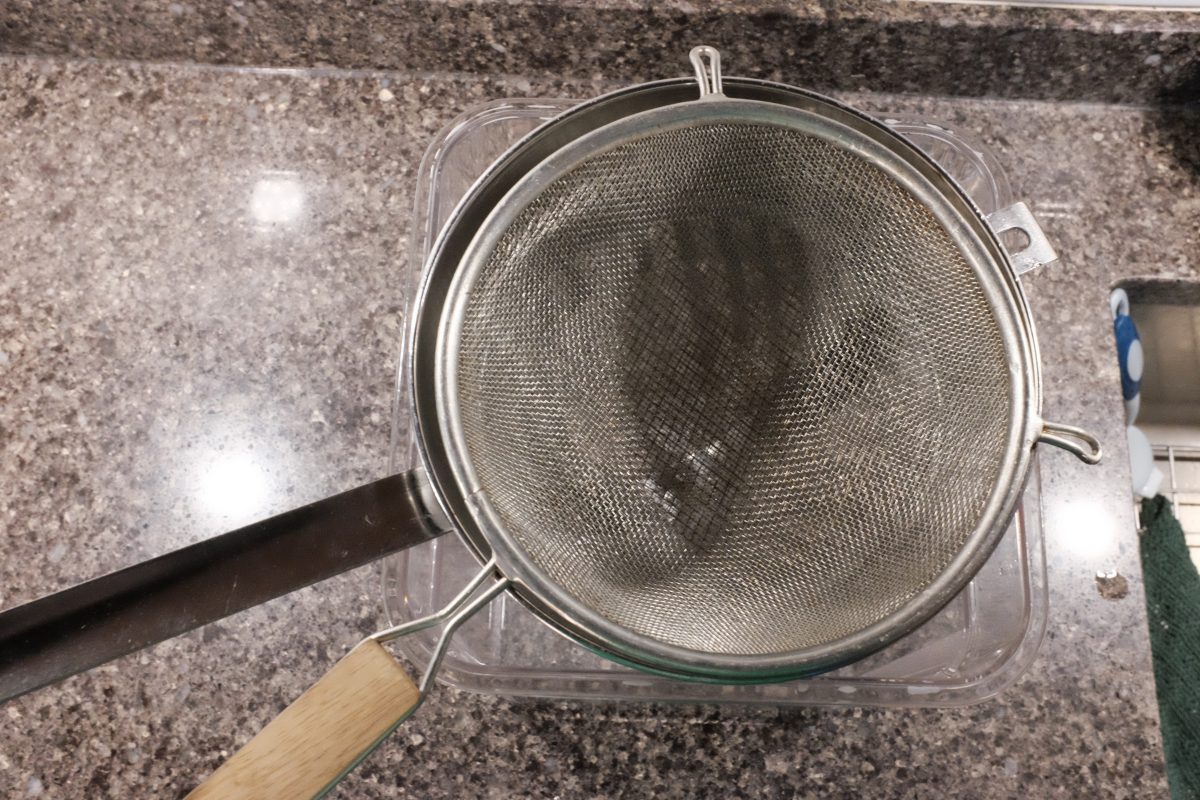
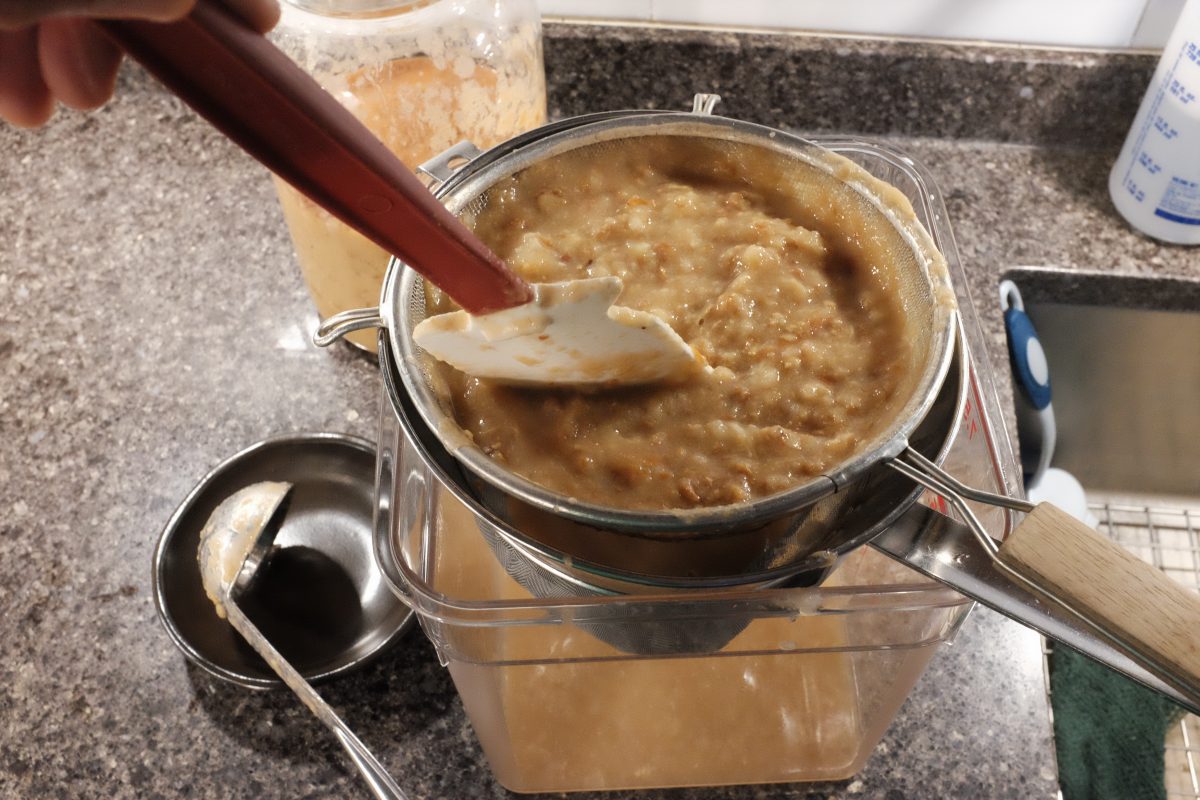
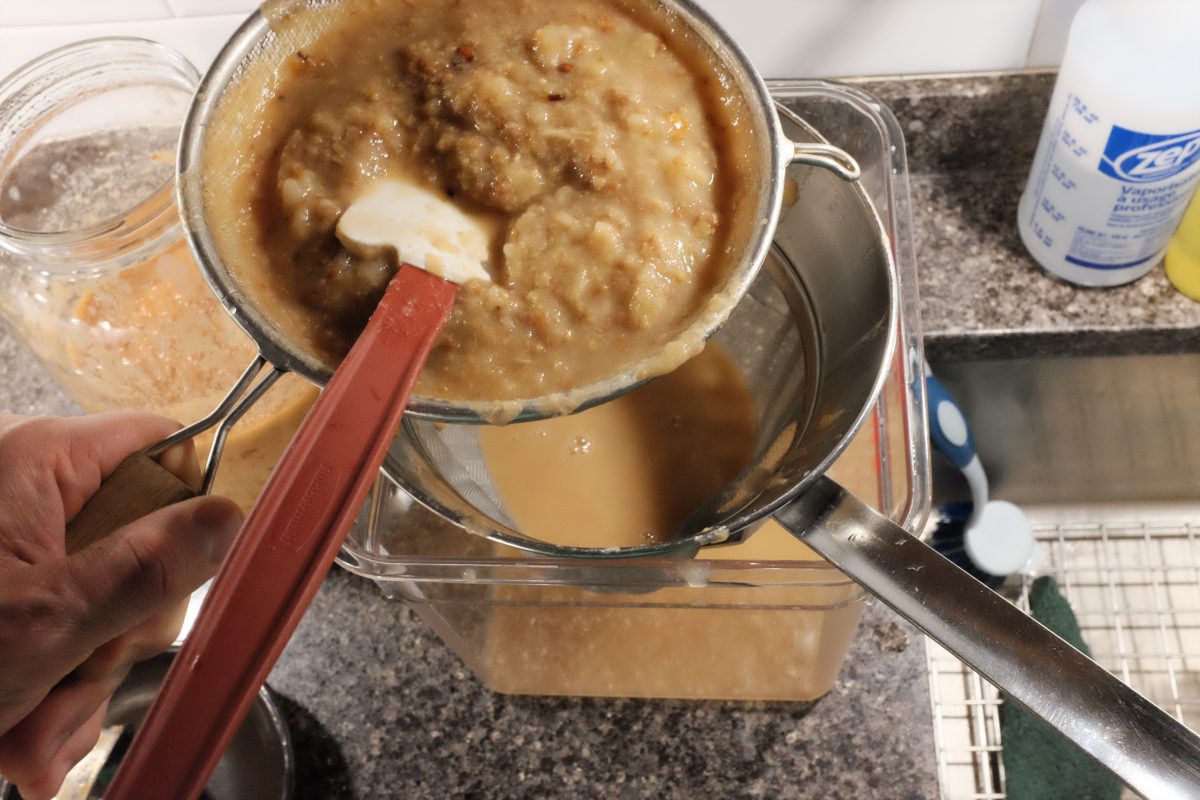
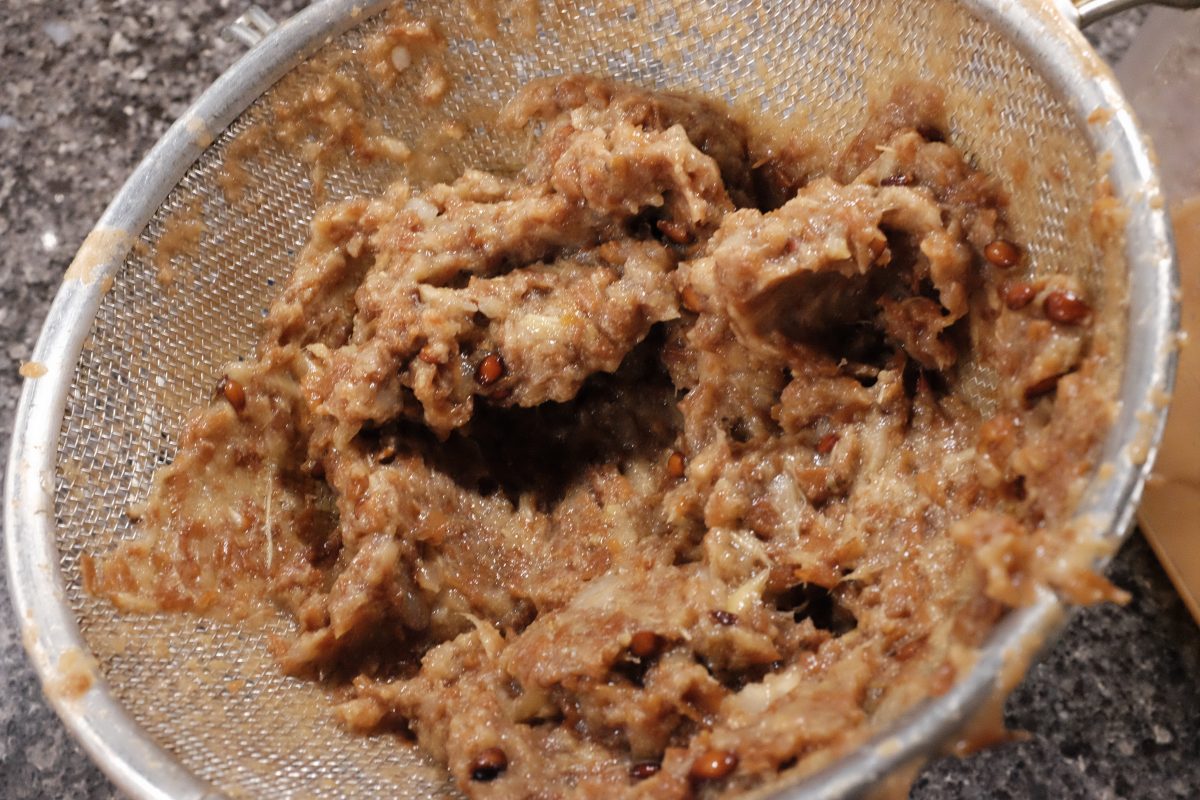
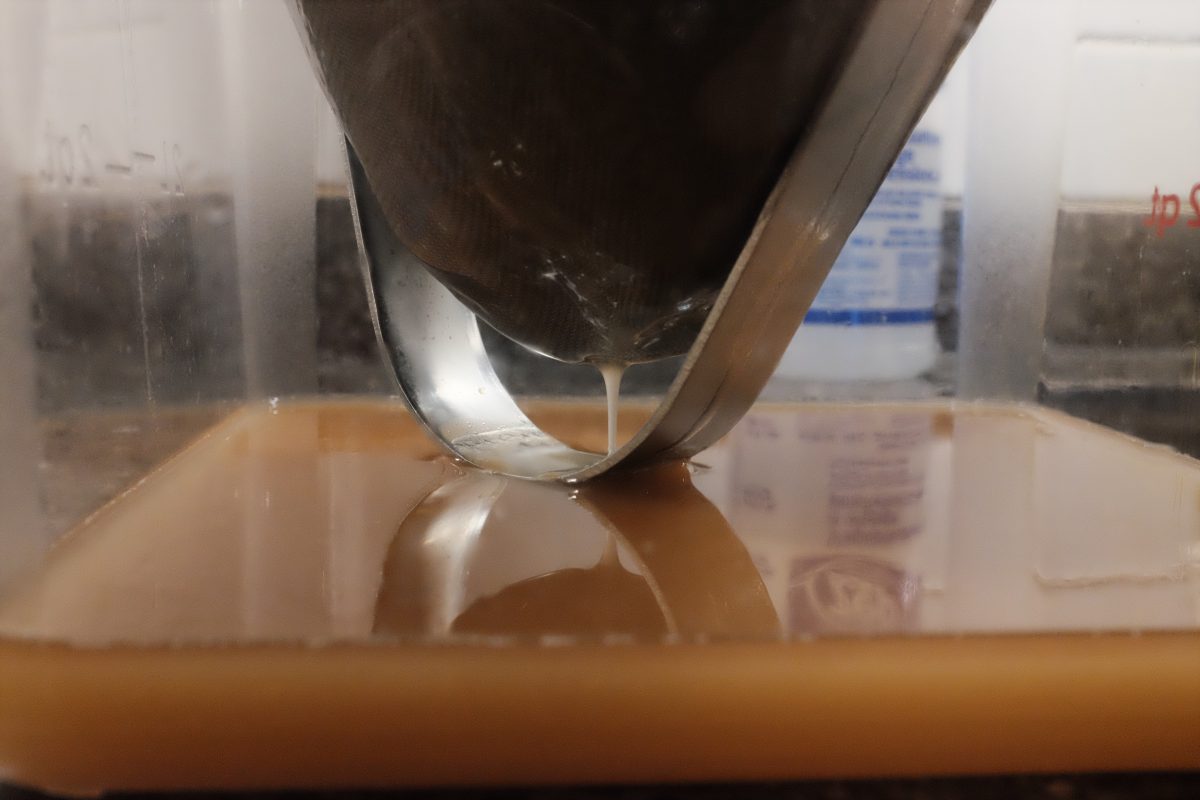
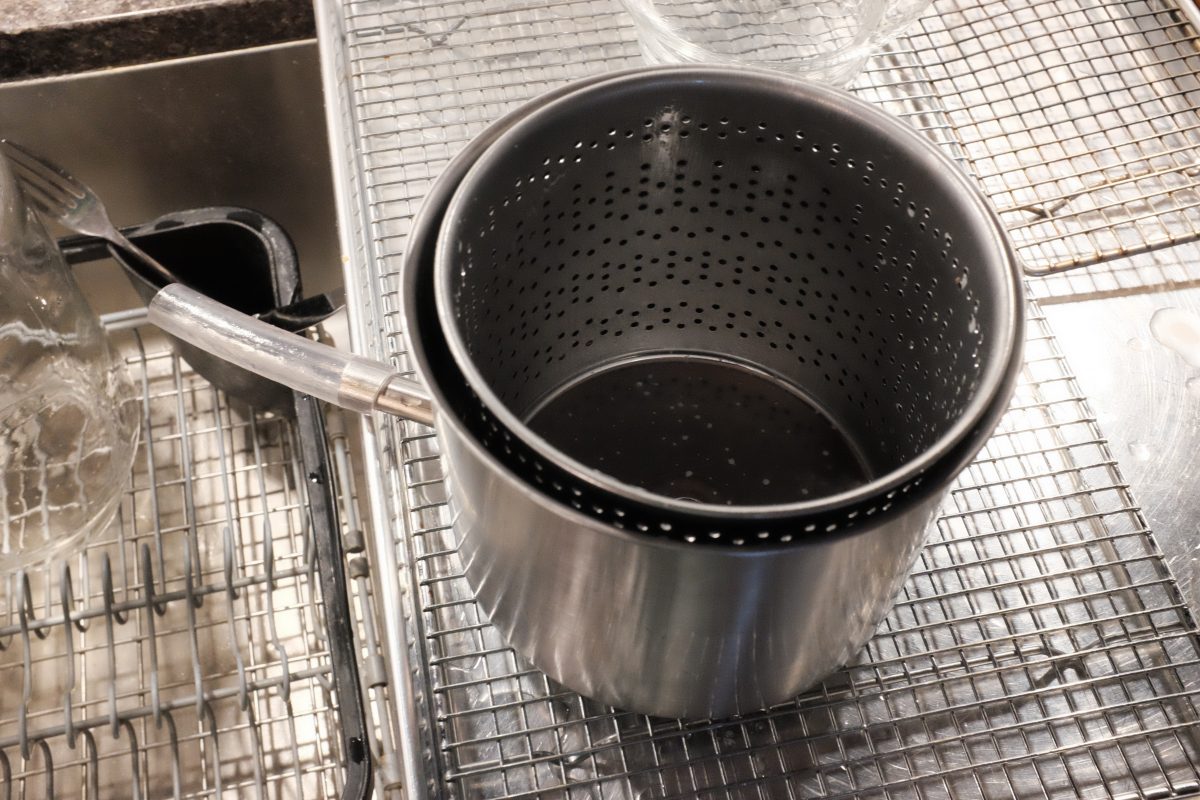
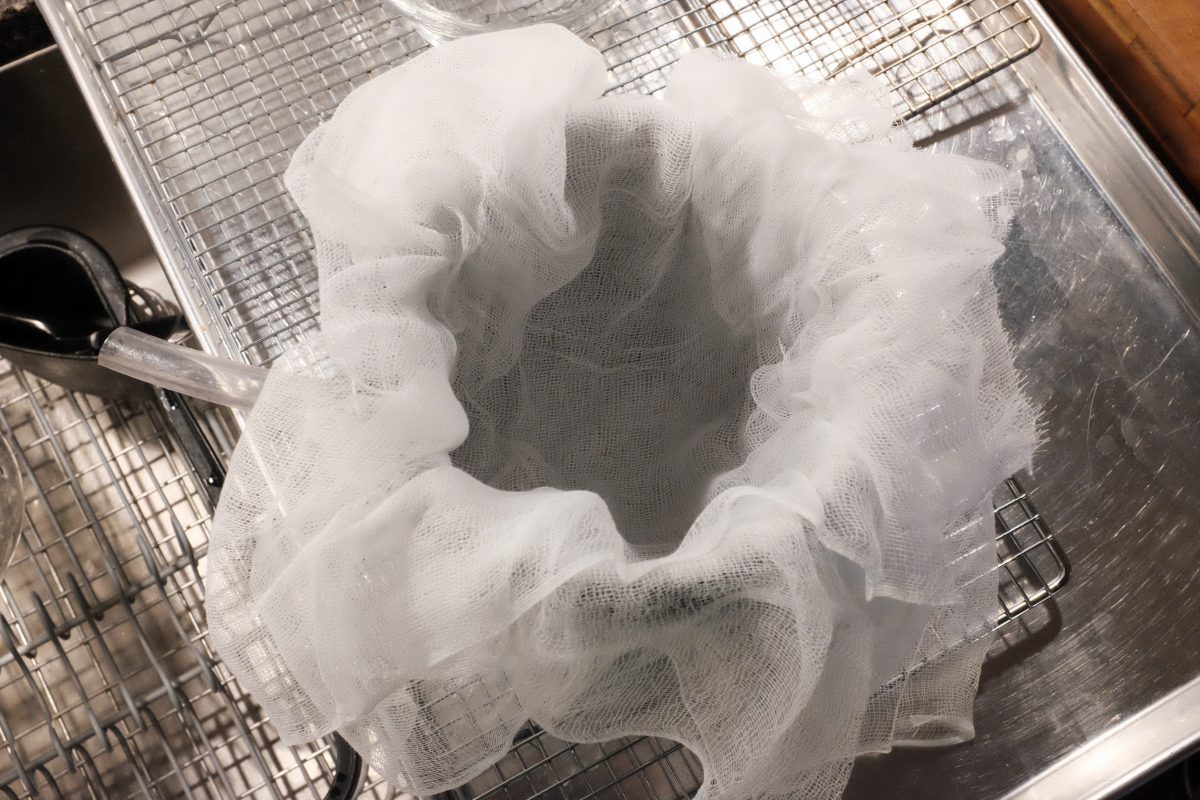
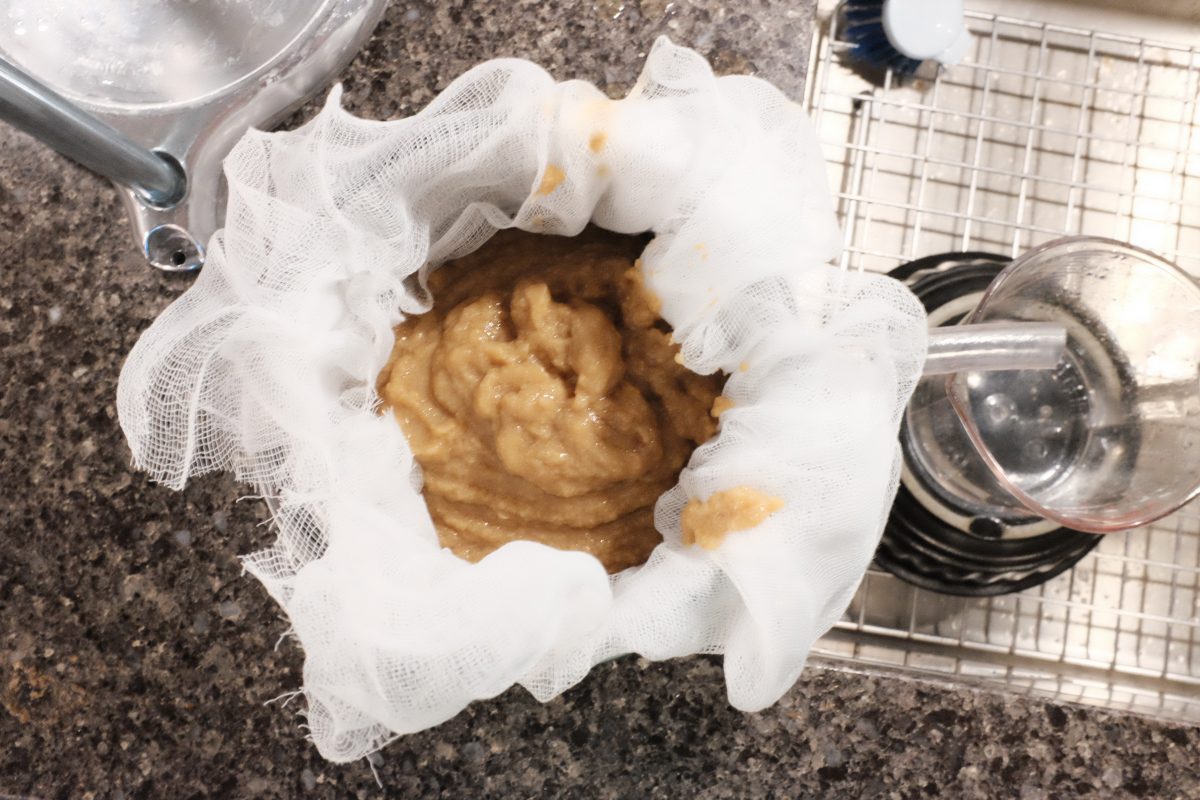
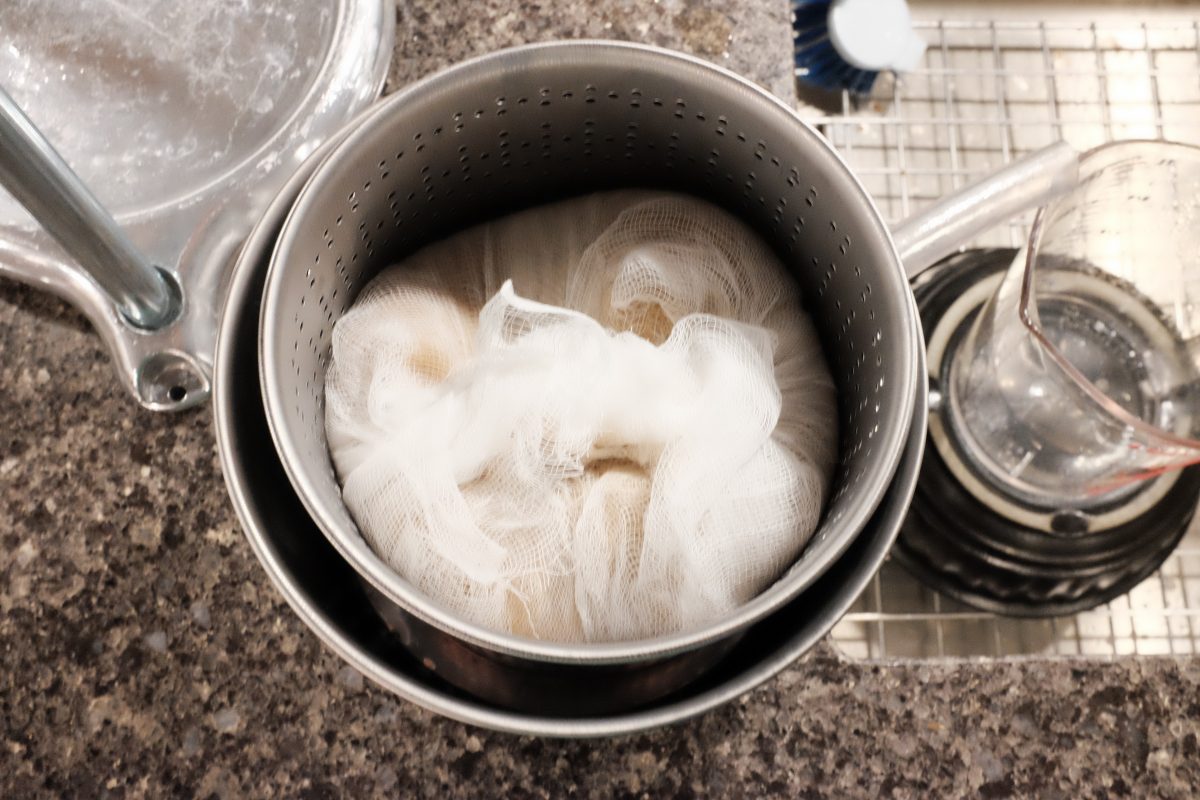
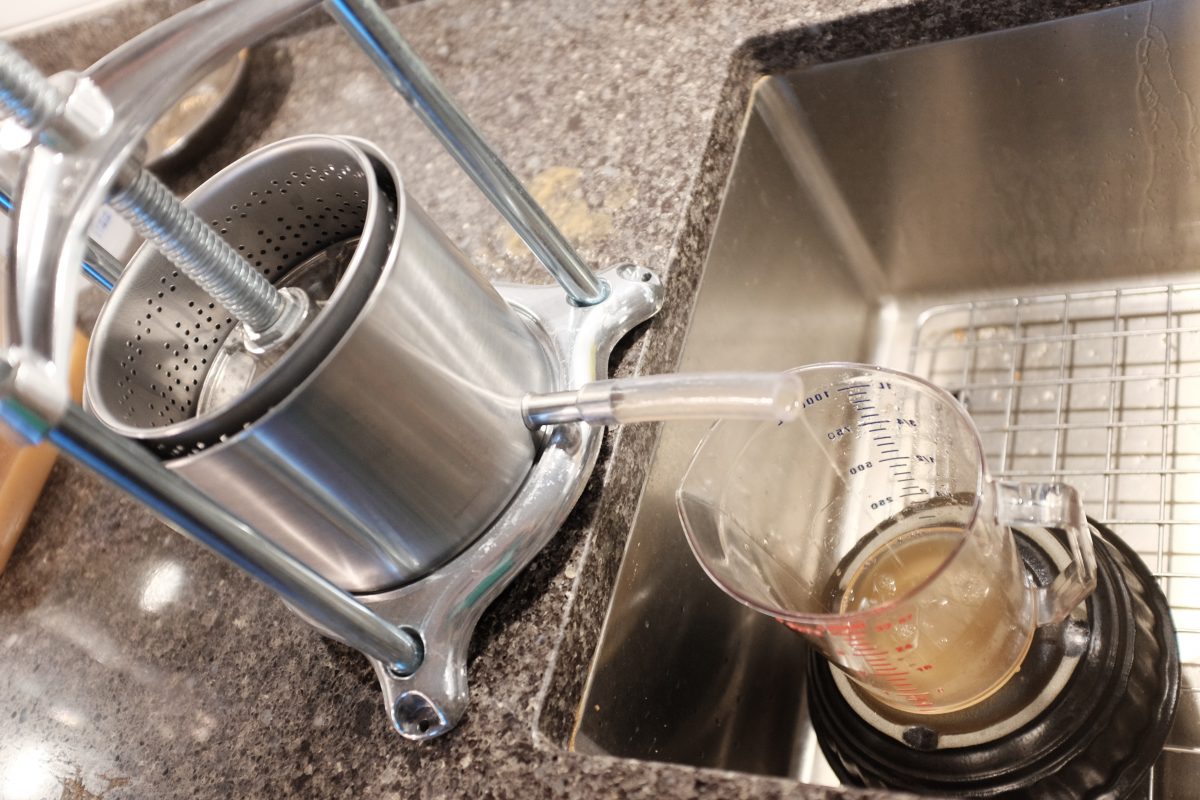
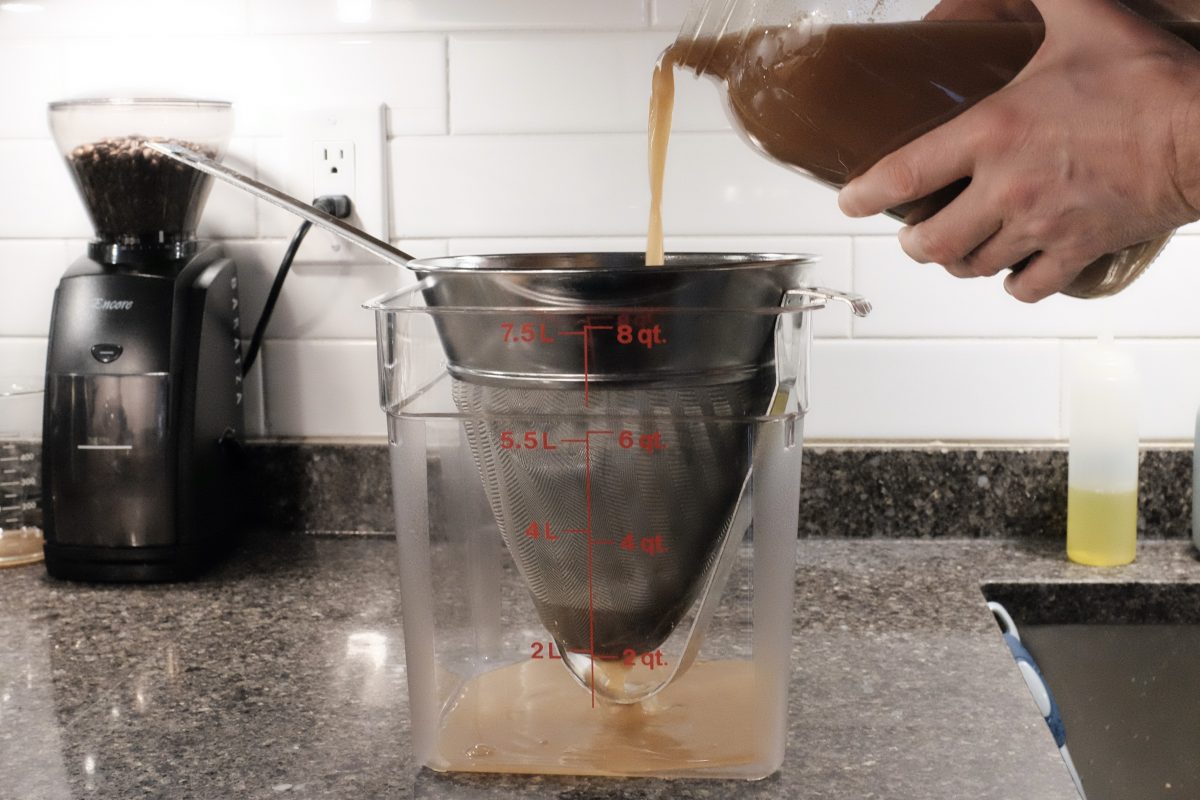
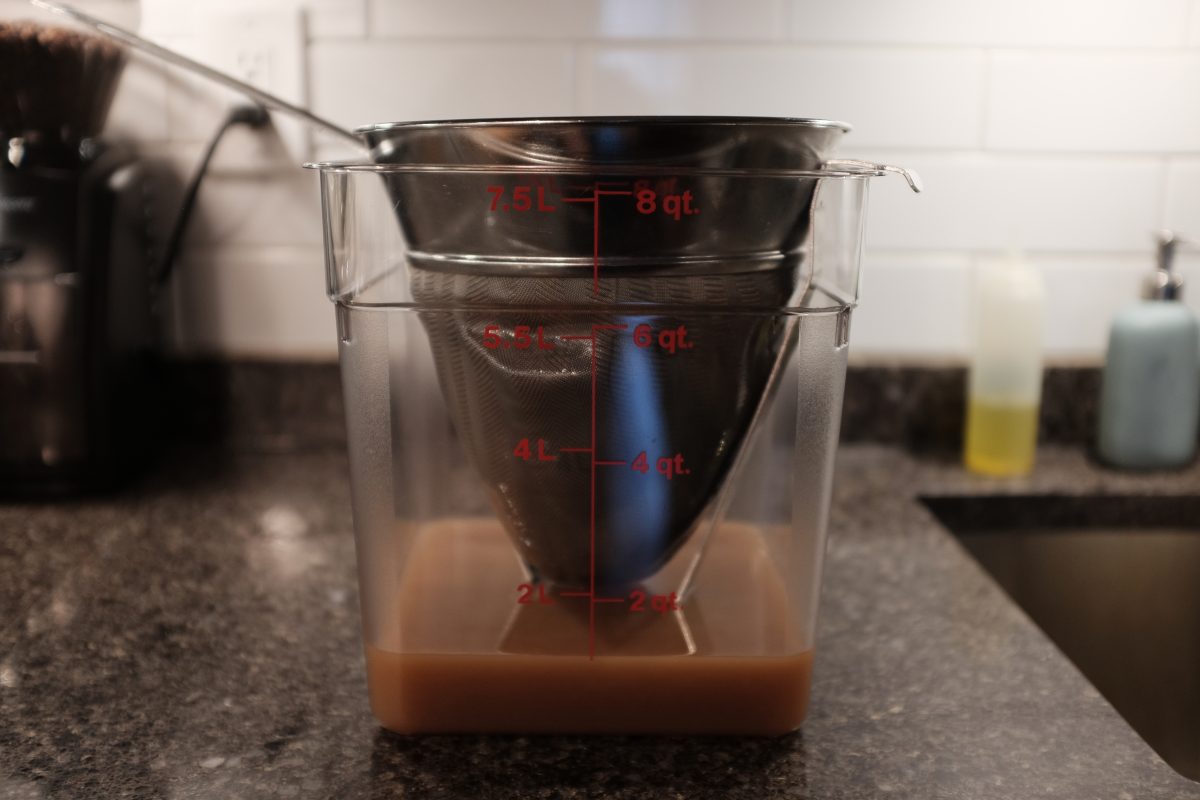
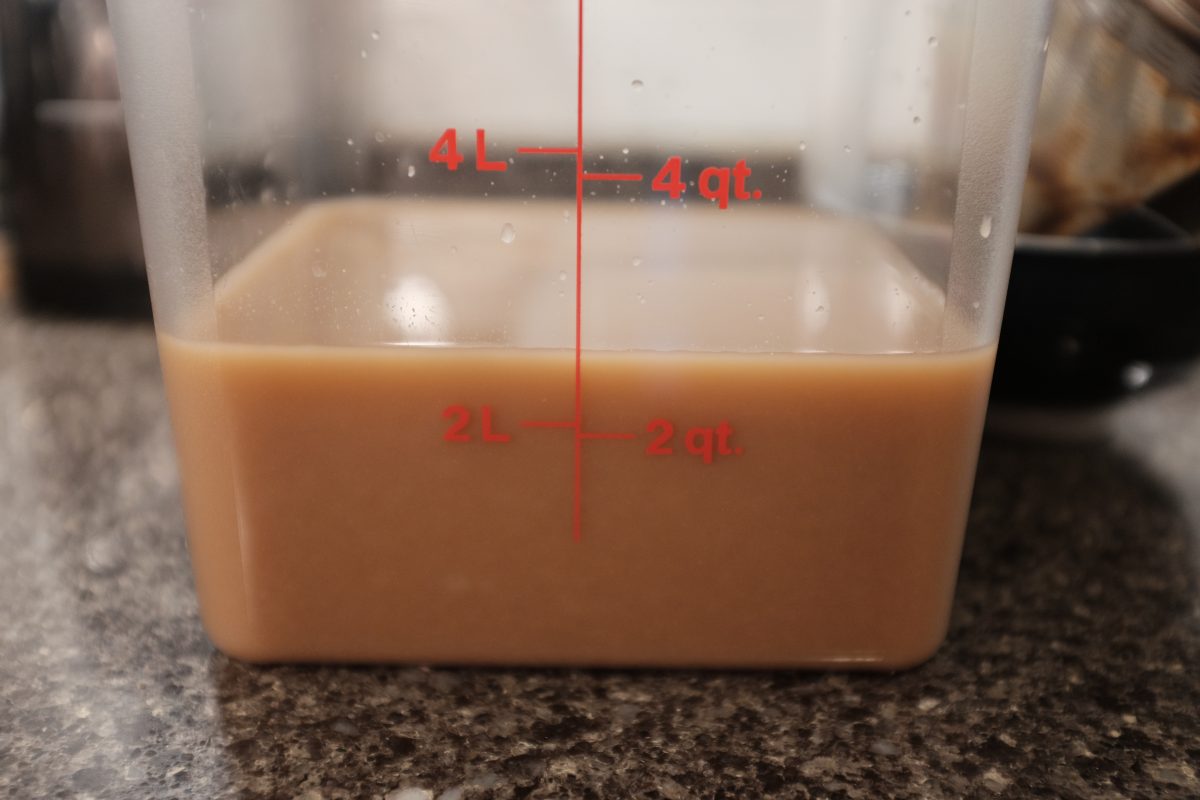
Straining the Mash
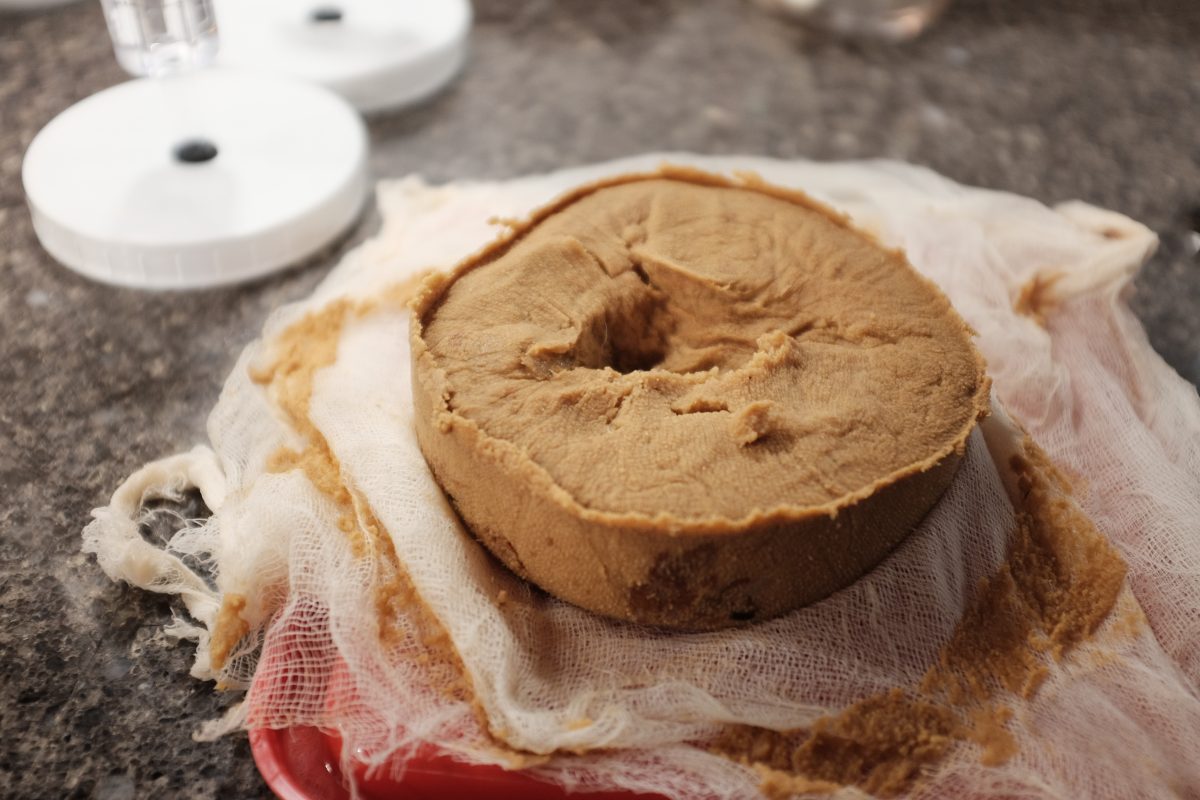
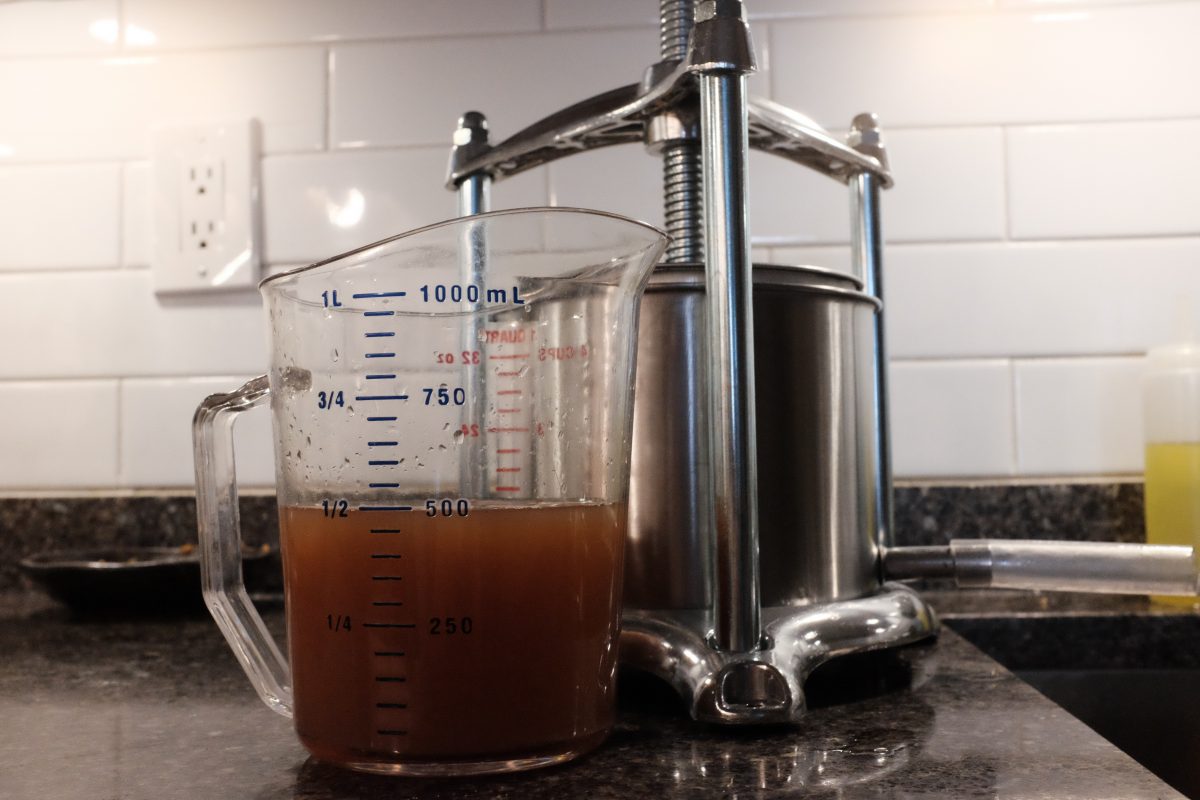
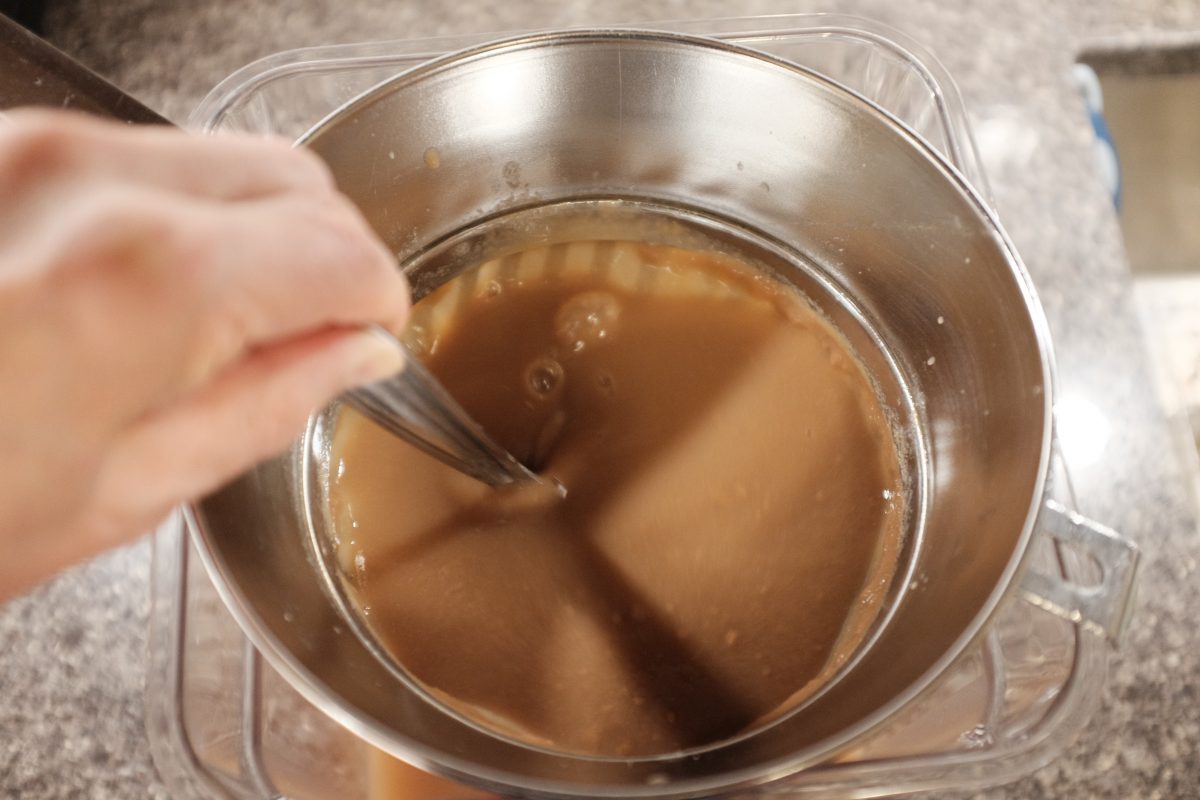
This is probably the most difficult part of this whole process. After doing this a few times, what you see below is the method I prefer but, it is not the only way. The goal is to separate the fibrous parts of the mash from the liquid so as long as you accomplish this, any method is fine.

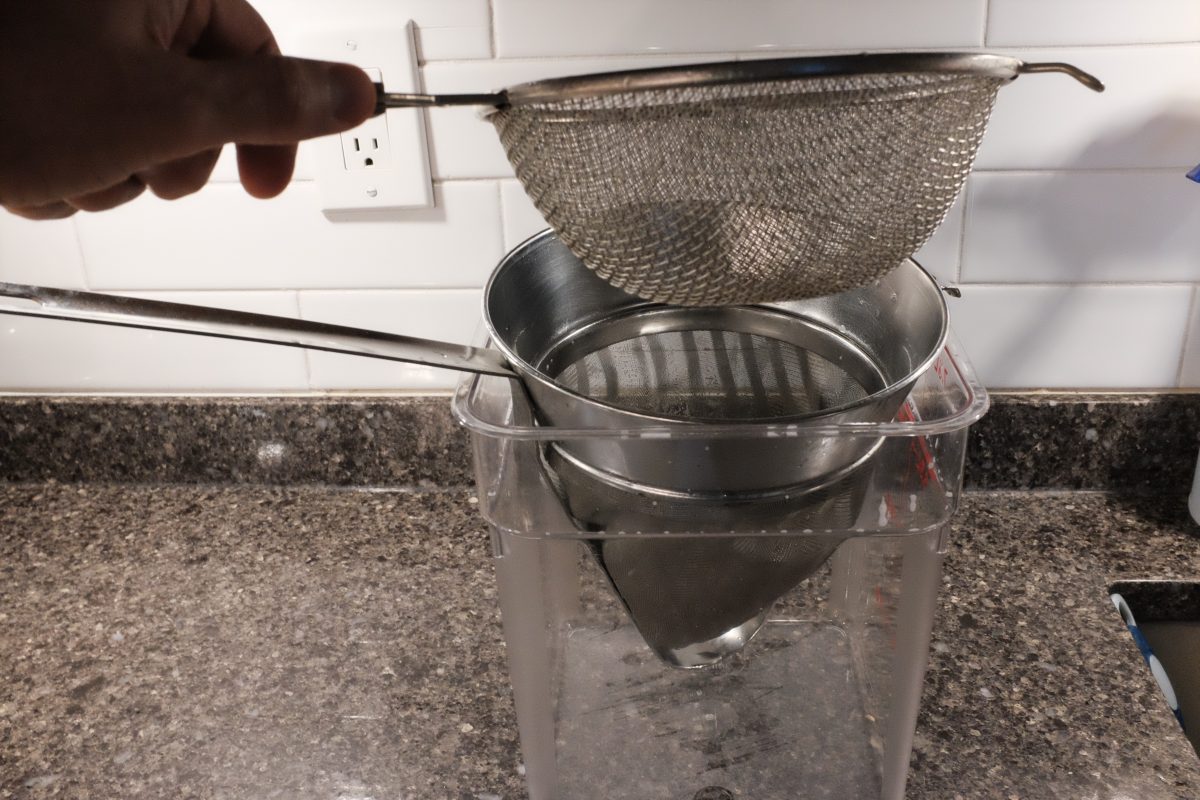
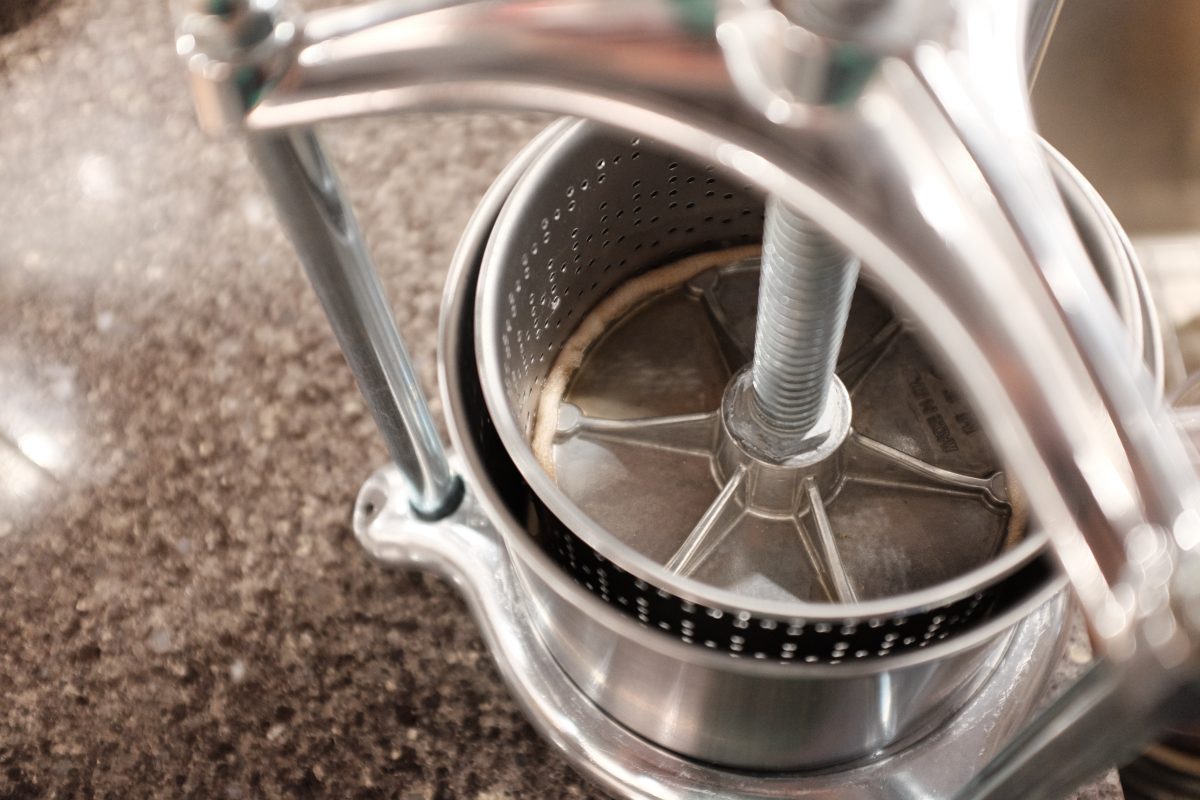
The Fruit Press
If you don’t have a fruit press, don’t worry. Take your strained juice and skip down to “Neutralizing the Brewers Yeast”. If you have a fruit press or if you are interested in how one works , please read on…

Neutralizing the brewers yeast
Part 2: Making Vinegar
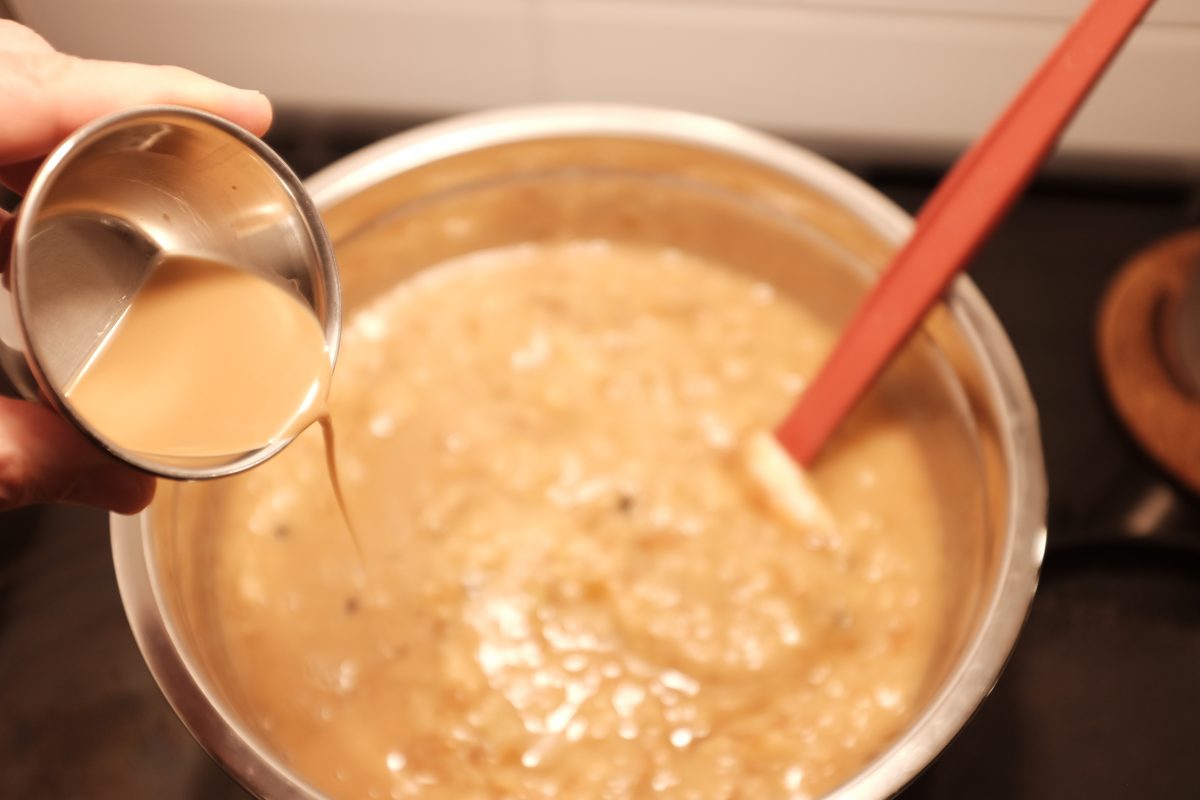
In this second part of the recipe, the pear alcohol will ferment into vinegar with the help of acetic acid bacteria (AAB). We will kick start the fermentation with some live culture vinegar and then aerate it with a pump and air stone until it reaches a pleasant level of acidity.


The alcohol should turn to vinegar within 2 weeks. I will leave this bubbling away for a full week before I taste it. In the meantime, I will give it a good sniff everyday to see how the acidity is developing. Once it begins to smell like mild vinegar, I will open it up once a day for a taste.


Now what?
Compared to most store bought vinegars, homemade vinegar is surprisingly delicious. Use it on salads, spritz it over cooked veggies, use it in sauces…it will brighten up almost any dish. You can even drink it straight up or put a few splashes into soda water for a refreshing and healthy drink.
This is a truly fun and fairly easy fermentation project. There is a small initial investment for a little bit of specialized gear but once you have it, it can be used over and over. Just about any sweet fruit can be made into vinegar using this process. In the past I have made vinegar out of ripe persimmons and it was also delicious. I think I will try plum vinegar next, berries in the summer.
If you have any questions, comments or suggestions please leave them below. I am always happy to hear from you. If you enjoy the content and would like to contribute towards website maintenance and development, you can make a donation here. Thanks for reading TigerSalad!
Makgeolli
What is Makgeolli / 막걸리 ?
Makgeolli is a Korean alcohol (or sool 술) made by fermenting rice with a natural starter called nuruk (누룩, sounds like noo-rook). I have heard it called “rice wine”, “rice beer” and “Korean sake” but it has very little in common with any of those. Makgeolli is its own thing. A few good ingredients and a complex, multi-layered, simultaneous fermentation by a large variety of bacteria and yeasts make this a uniquely Korean sool. It has its own distinct flavours, textures and history. It is unlike any other rice ferment.
The recipe below is not the most simple but the preparation and process are fairly straightforward. My goal was to make the recipe easy to follow so I have included lots of pictures and even some sounds.
Important considerations before you start
There are 2 stages to this recipe and, from start to finish, this brew can take anywhere from 3 weeks to a month. In Stage 1, during the first three days or so you will need to stir it up a few times. In Stage 2, you will need to stir it again for a few days after which it is mostly just waiting and tasting occasionally.
Each stage of this recipe takes several hours to prepare. In Stage 2, you will spend 5 hours just washing, soaking and steaming rice. It’s best to plan ahead so you have enough time to get through the process in one shot.
Temperature is important. You will need to find a spot that is room temperature or a bit cooler for fermenting this brew (20-25C). Higher temperatures can cause your brew to ferment too quickly and may cause some off-flavours. Cooler is always better.
Equipment
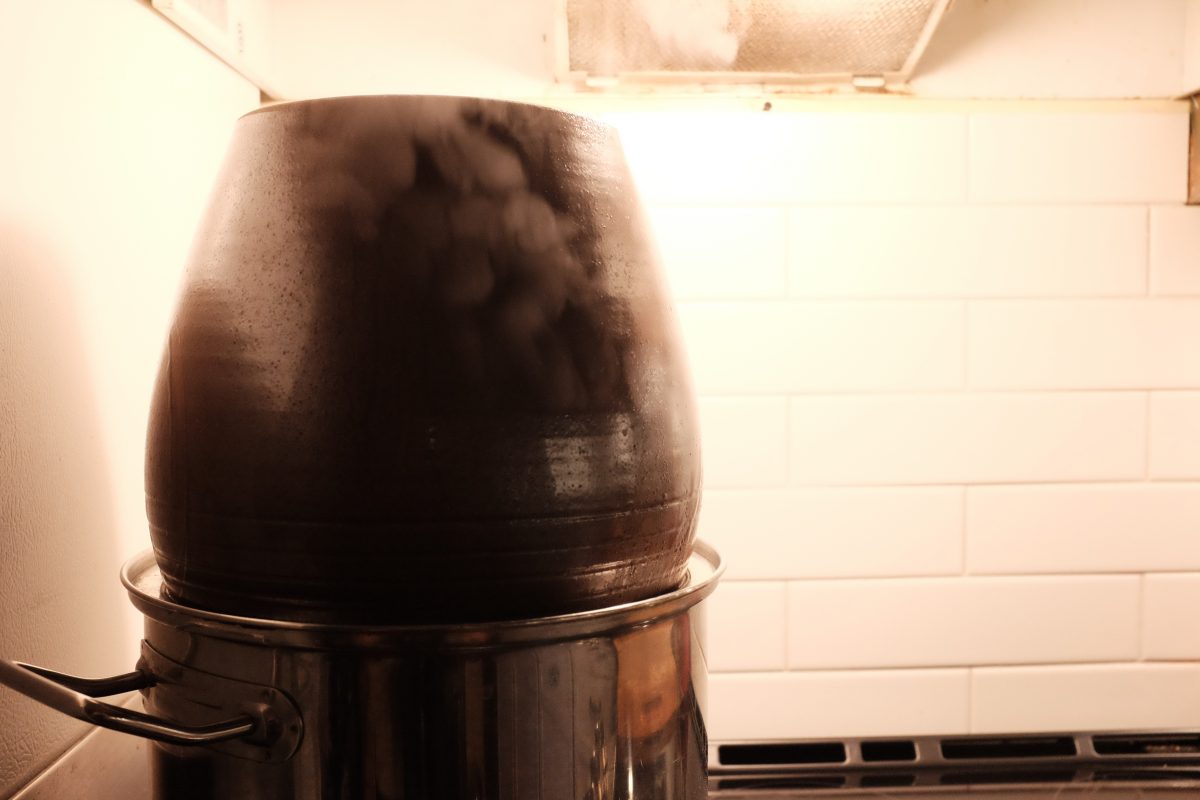
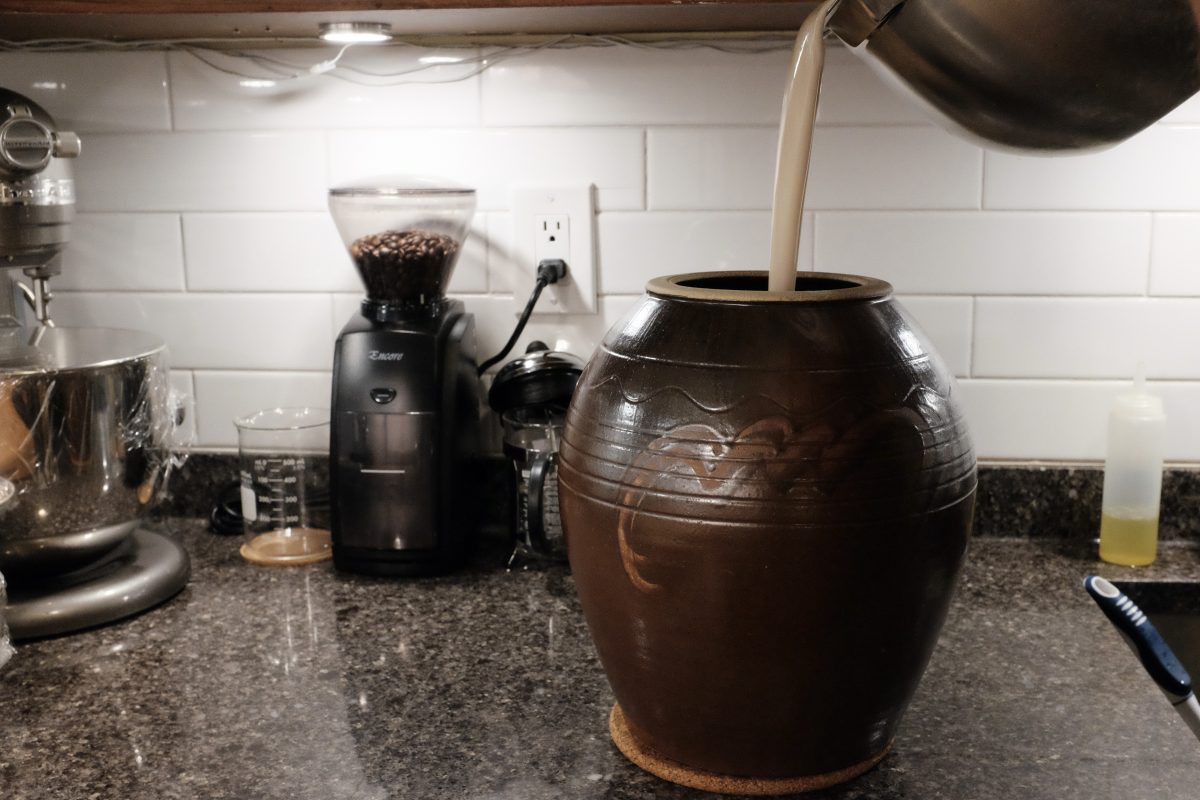
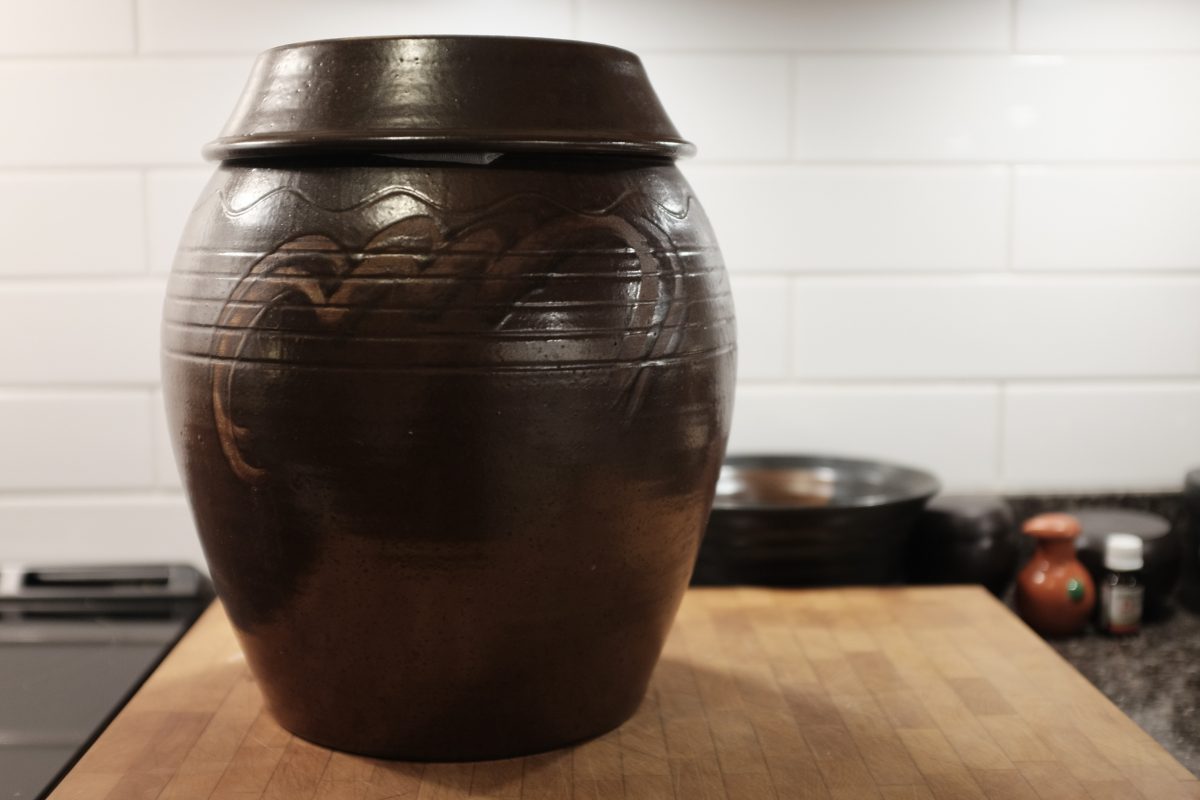
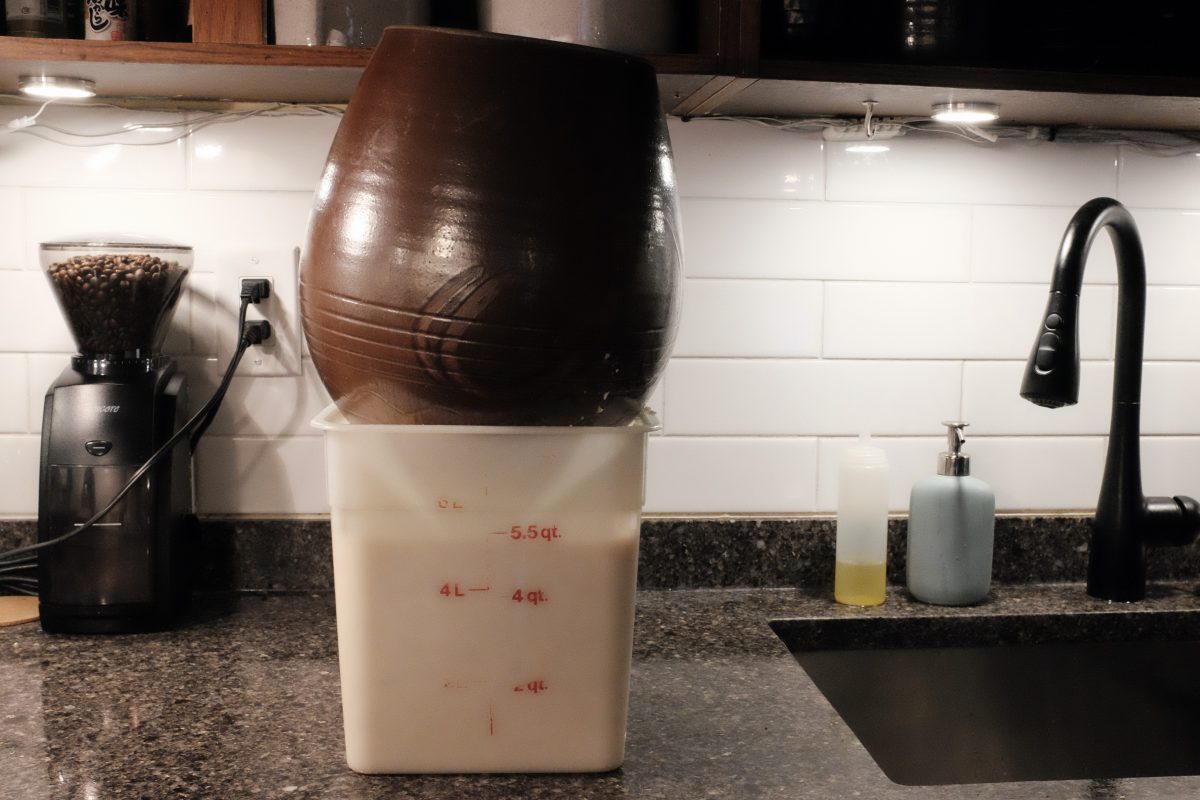
You will need a glass or pottery container to hold your brew. 8-10 litres is a good size.

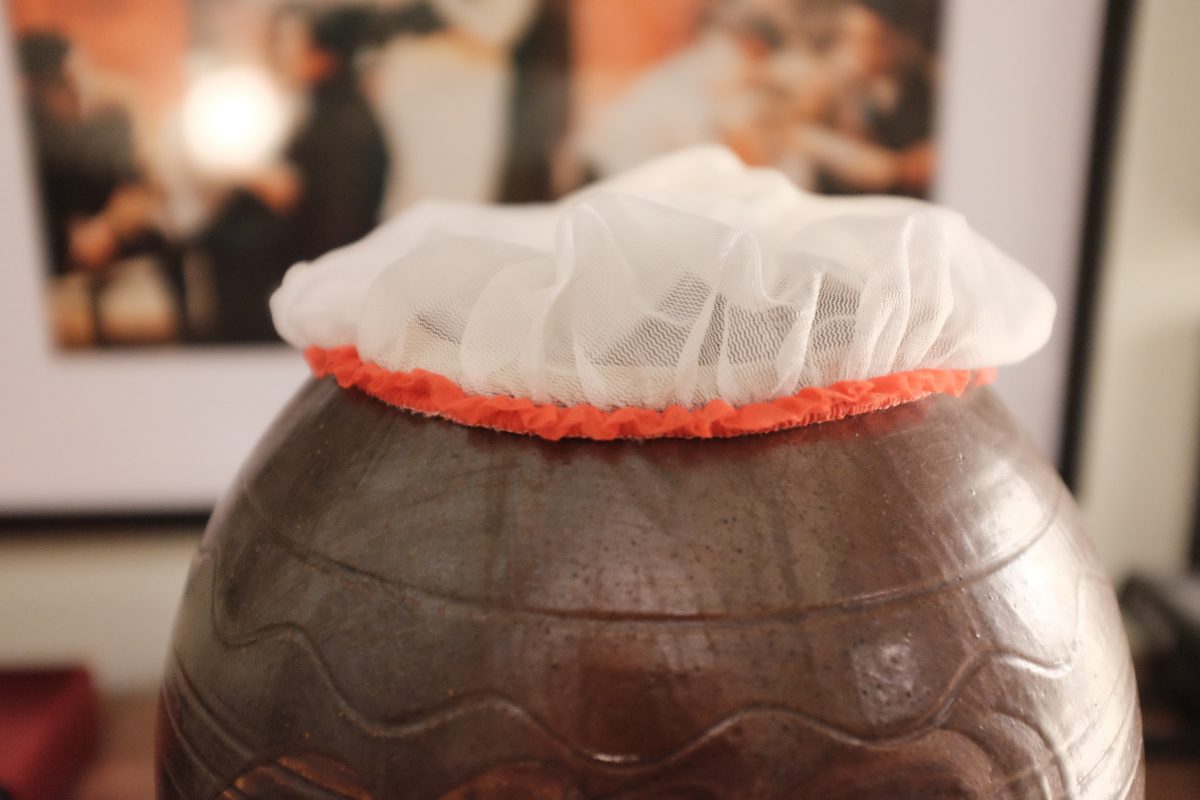
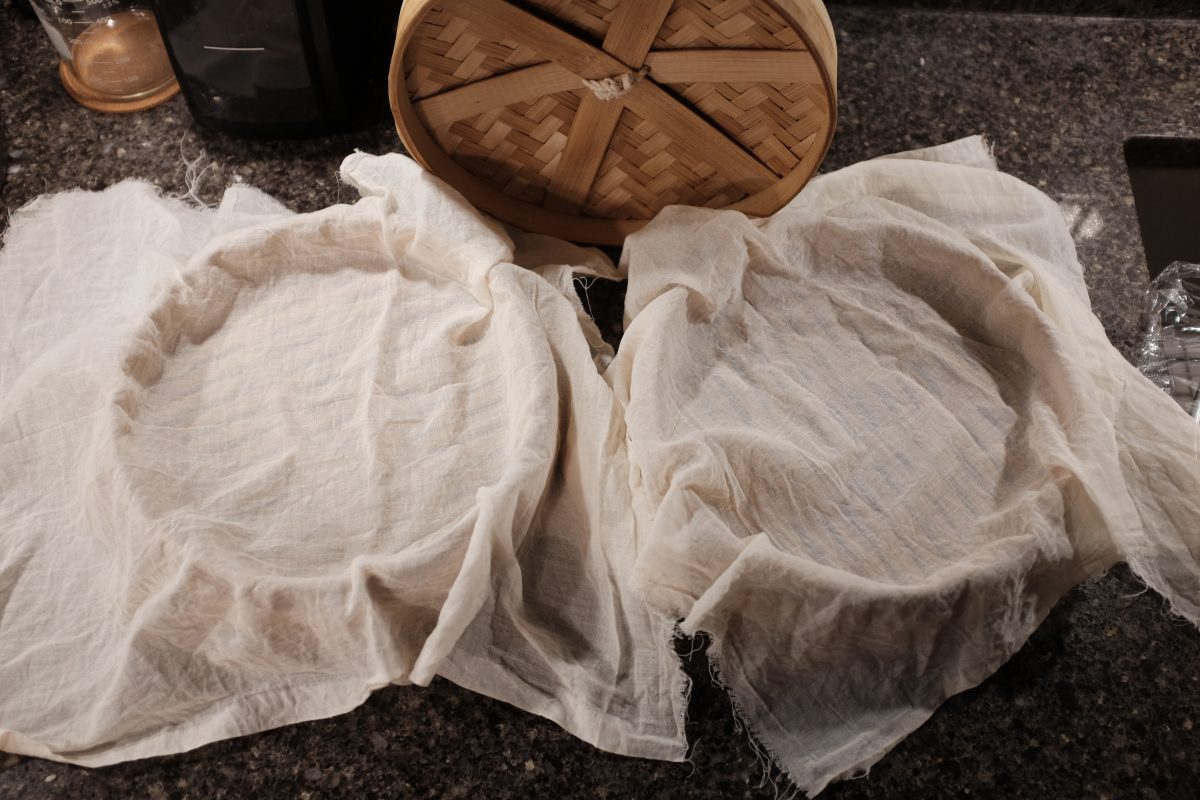
I think most people use glass. I have ceramic onggi jars around the house so that is what you will see in the pictures but either will get the job done. You will also need a piece of fabric or cheesecloth and an elastic band to cover the top of your jar. This ferment needs to breathe and will release a lot of gas. A fabric cover will let it vent and keep insects and dust out.
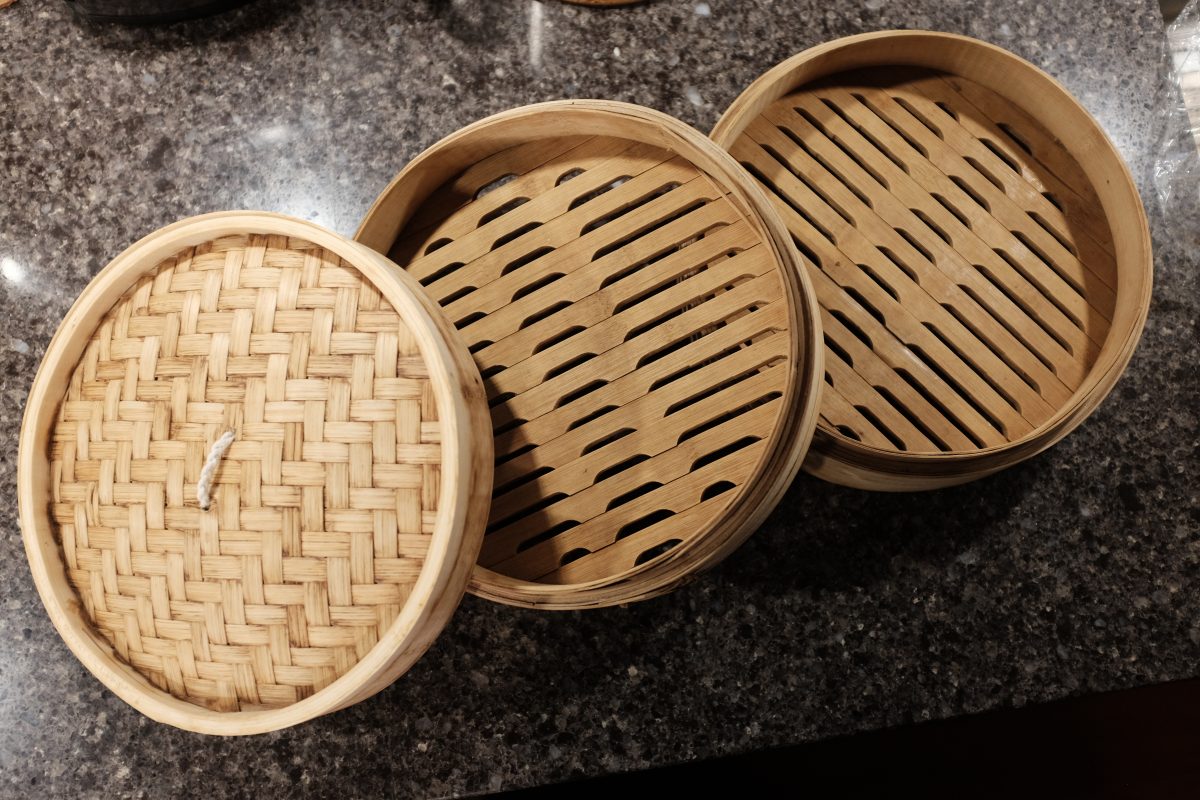
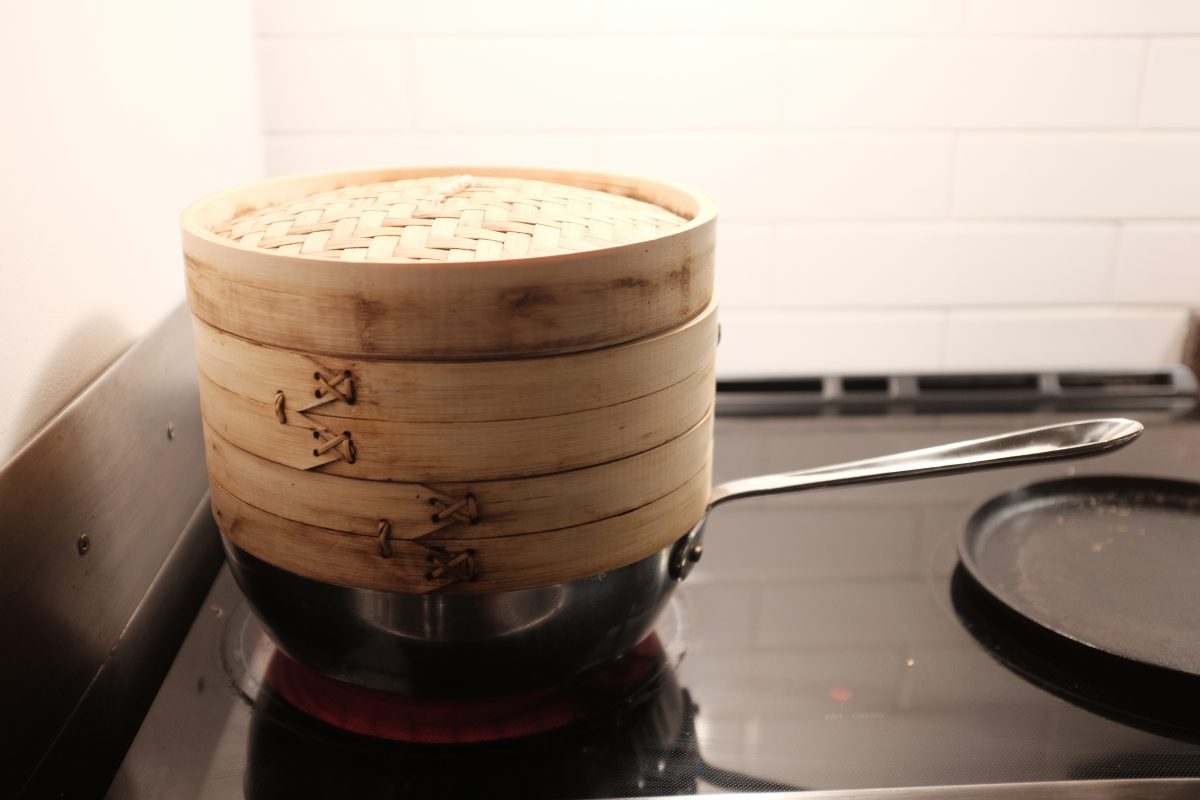
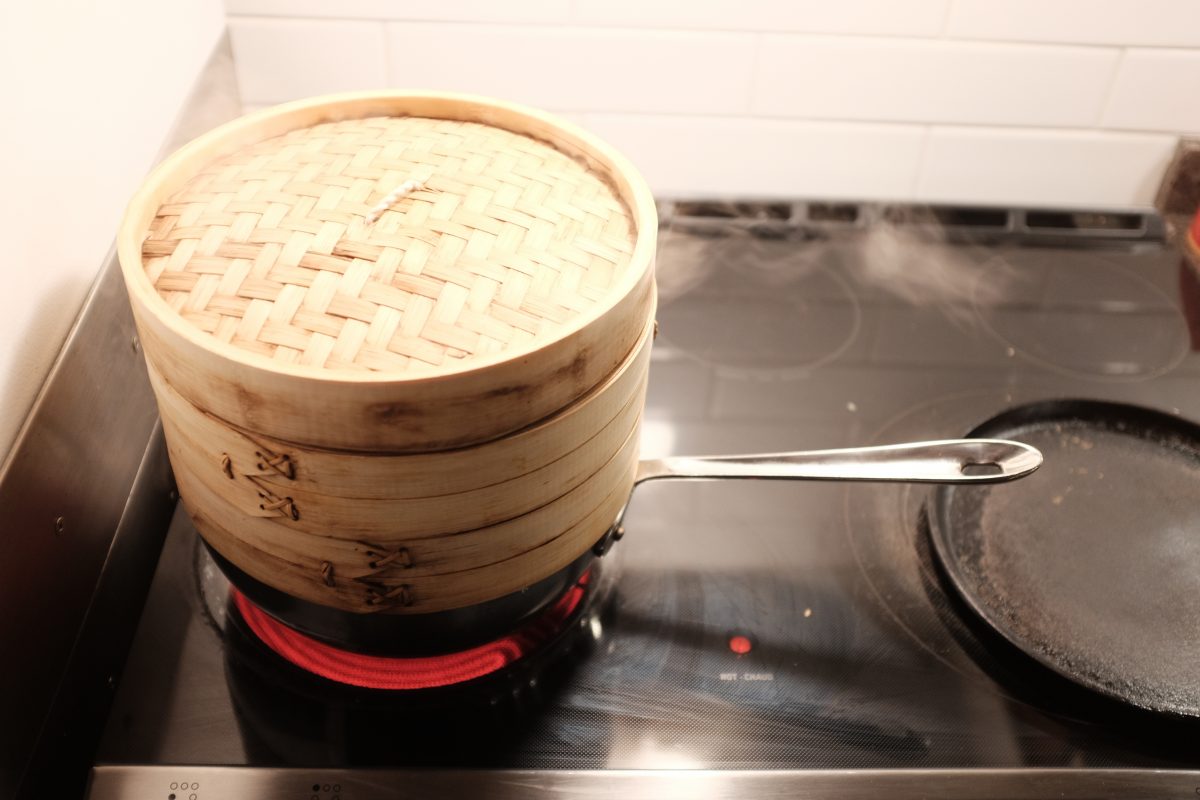
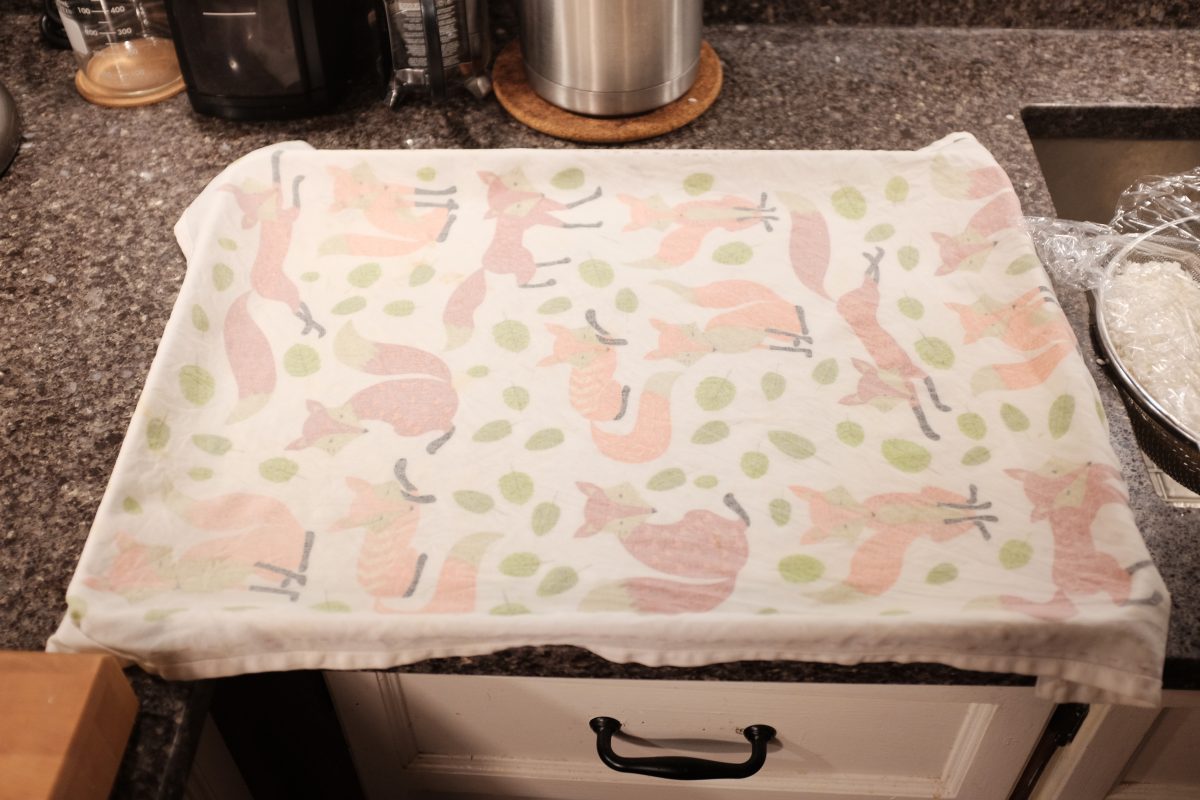
You will need a steamer of some kind. Bamboo steamers are cheap and very useful. I have a medium size one with two decks that I will use to steam rice for this recipe. If you have a pot with a stainless steel steamer insert, that will also work. Lastly, you will need a piece of cheesecloth or other fabric big enough to wrap the rice in the steamer.
Ingredients:
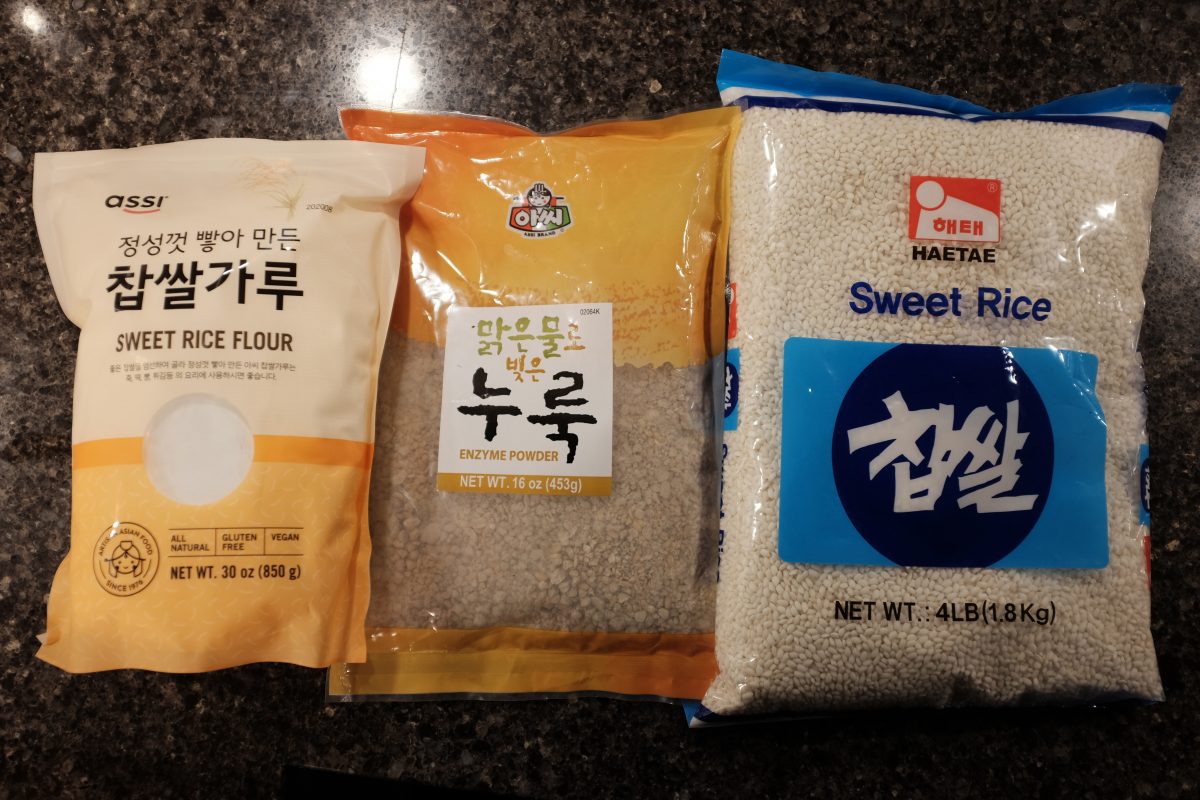
There are only 3 ingredients here: rice, water and nuruk.
Nuruk is made by forming moist cakes of grain (usually some combination of wheat and barley and rice) and hanging them in open air to attract wild yeasts, bacteria and mold as they dry. These are then pounded into rough granules to use as a fermenting starter. Bags of this powder can be found at Korean grocers under the english name “Enzyme powder” or just look for the Korean name “누룩” on the bag. There is a picture of a bag of nuruk in the ingredients below.
You can make makgeolli with many different kinds of rice. For this recipe I am using a short grain sweet rice called chapssal (찹쌀). I think that this rice is most likely to make a successful and easy drinking first brew.
Here is what we need:
- 500 grams sweet rice flour (this is just rice milled into a fine powder)
- 2 kg sweet rice (chappsal)
- 2.5 litres filtered or spring water
- 250 grams nuruk plus another 250ml filtered or spring water to hydrate it
Process:
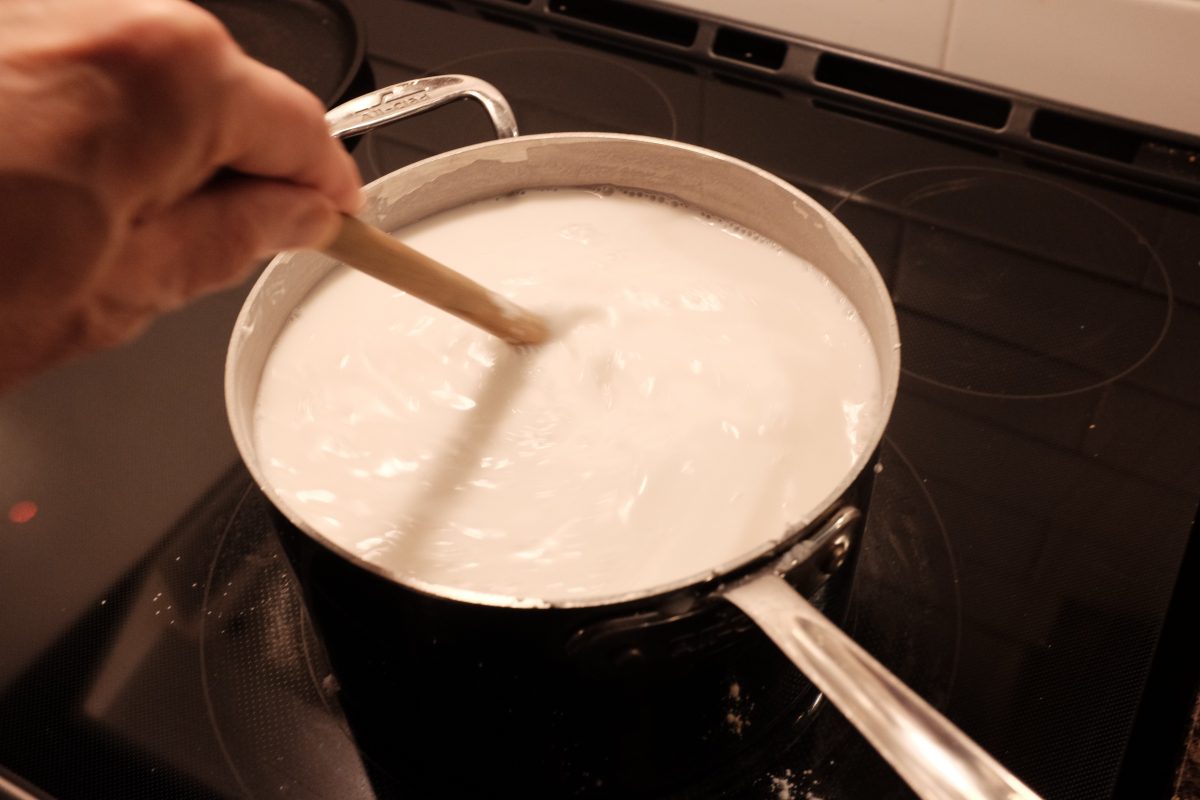
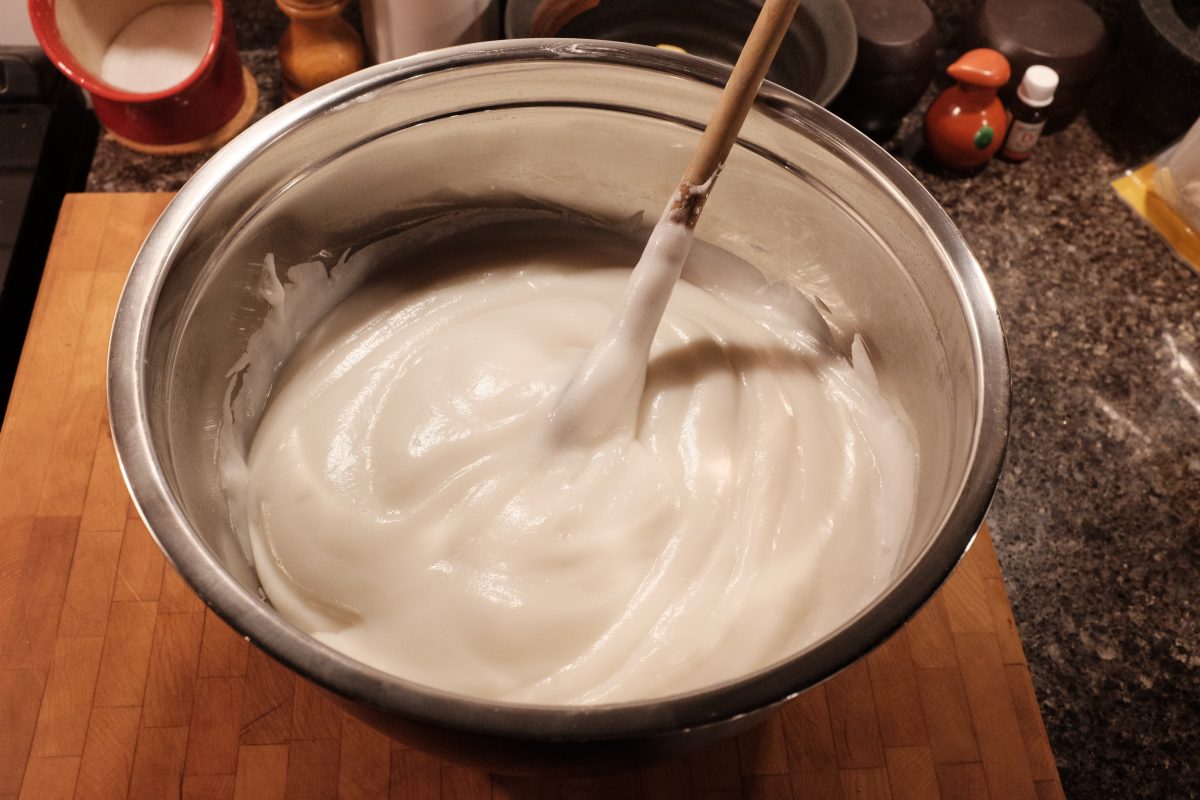
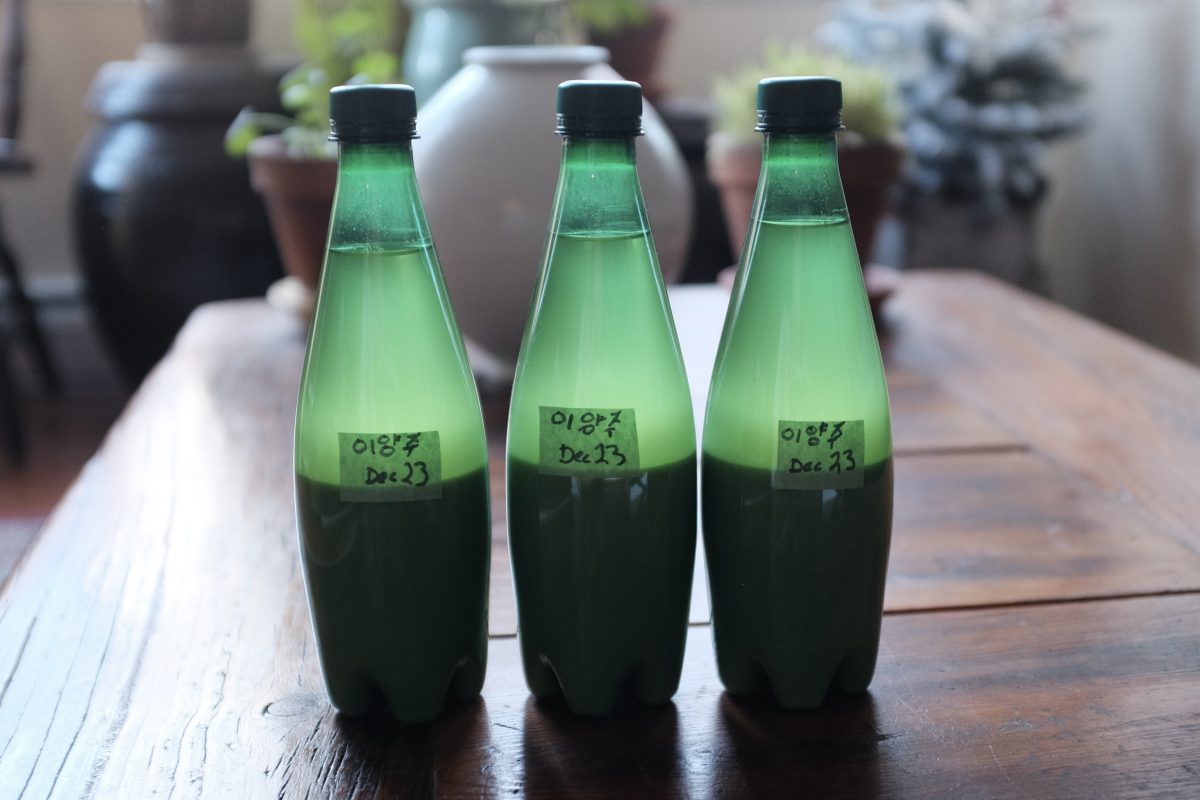
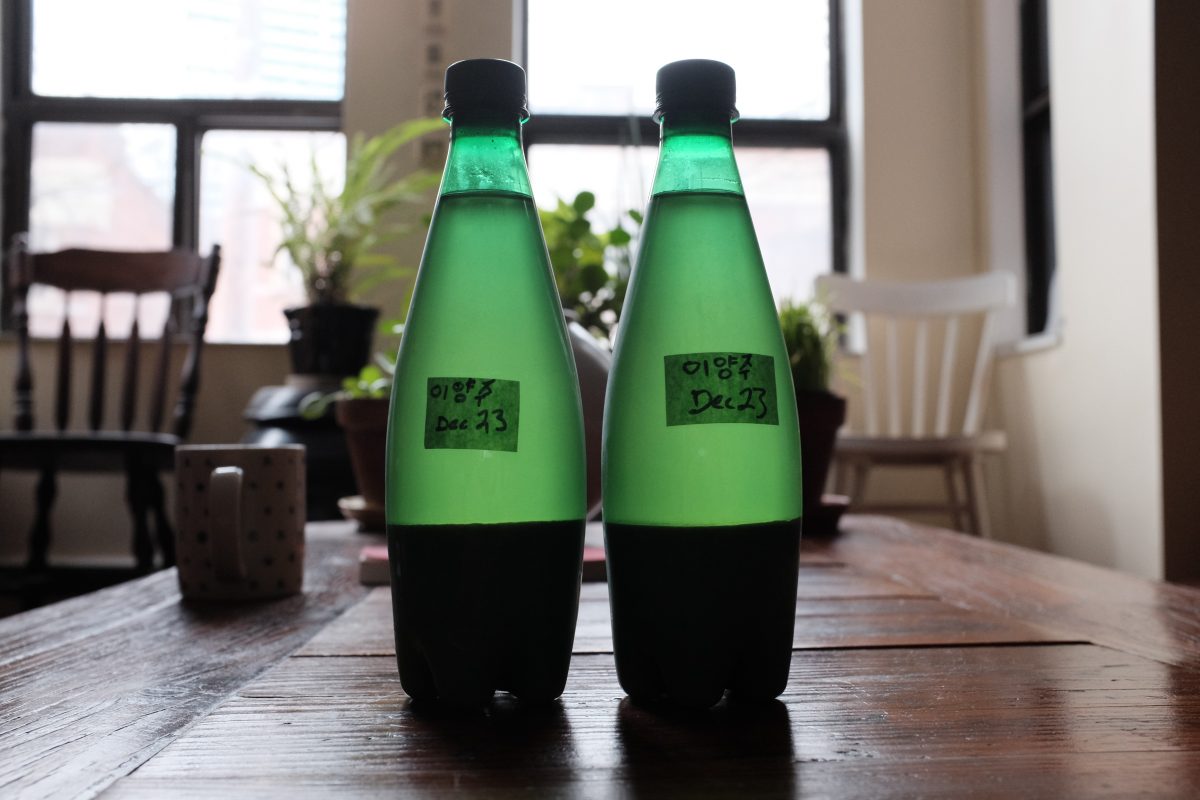
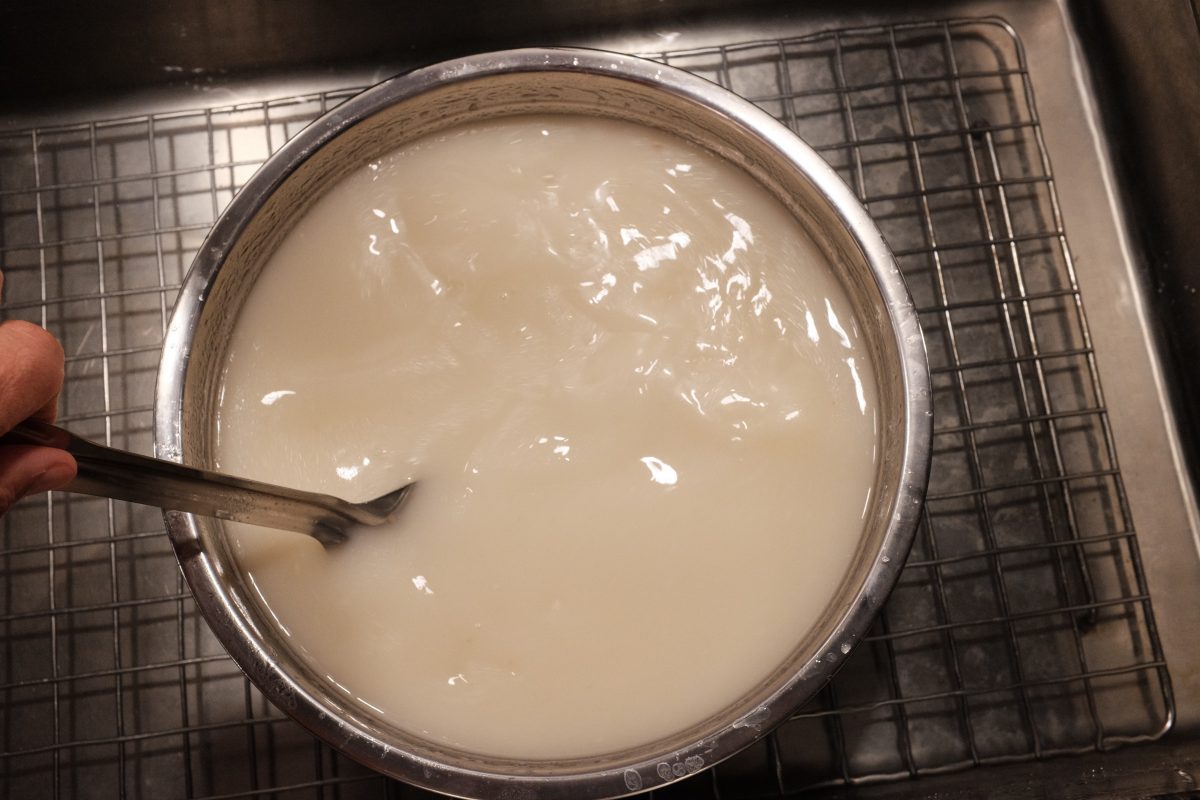
The recipe is broken into 2 parts. In Stage 1, we will ferment the rice flour for a number of days (around 3). In Stage 2, we will add steamed sweet rice and finish the ferment over the next few weeks. A two stage recipe like this is called “Iyangju”.
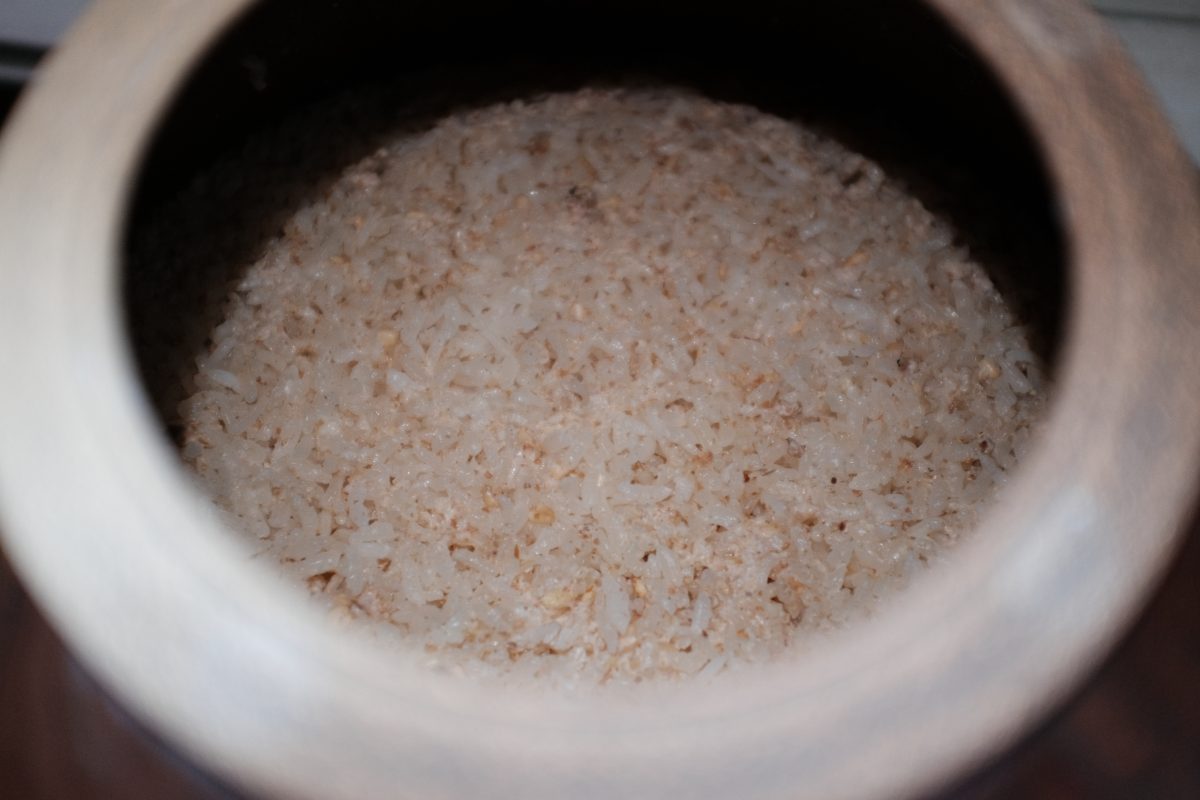
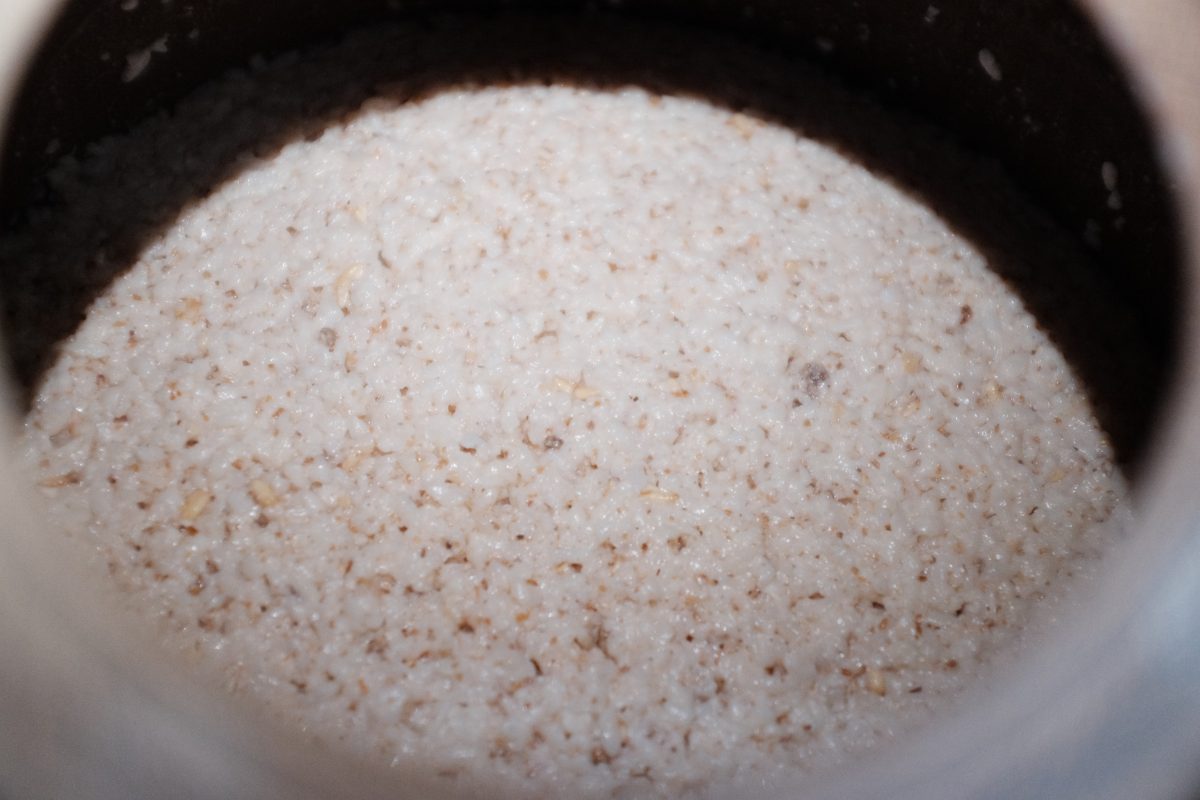
Stage 1

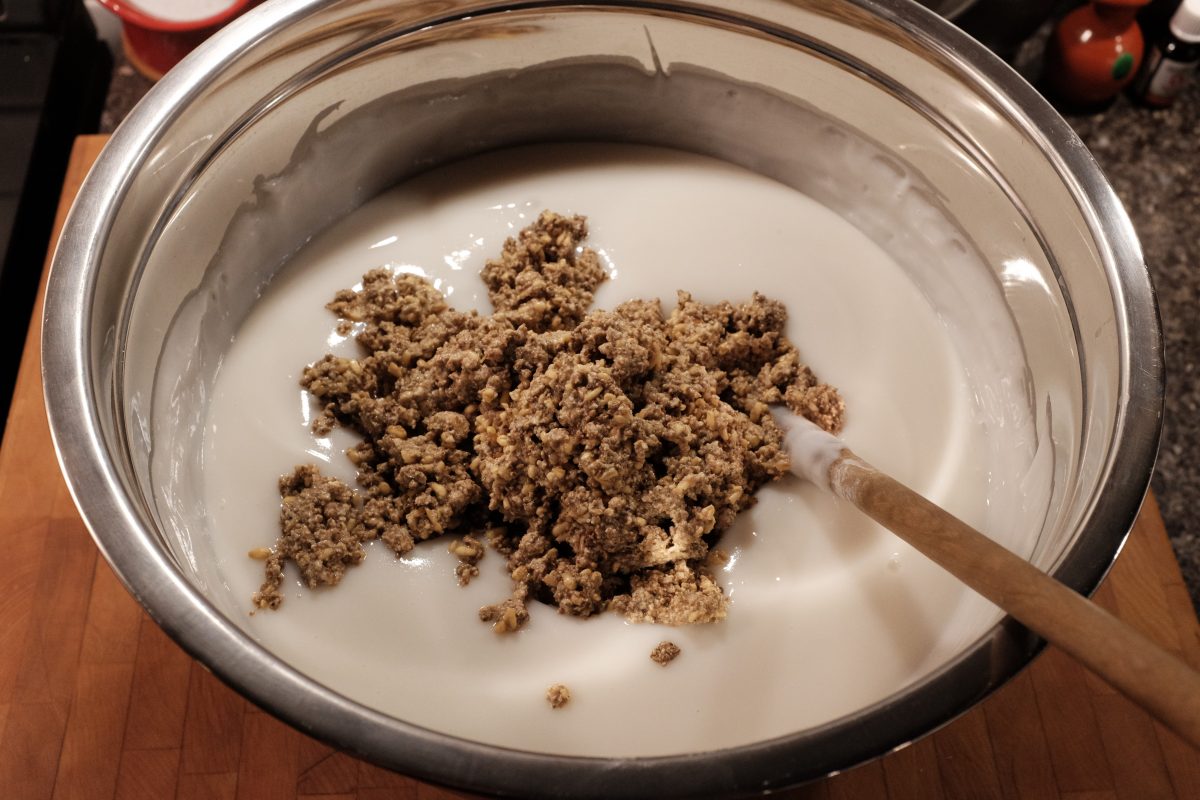
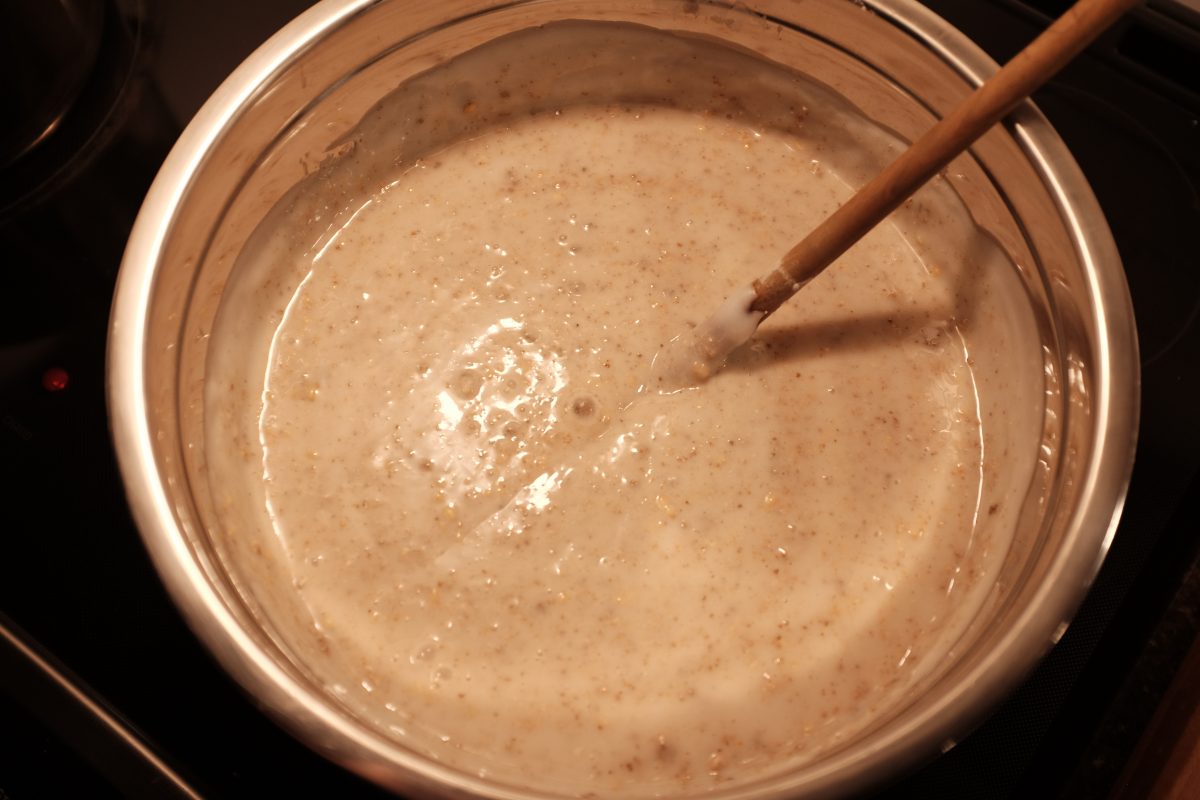

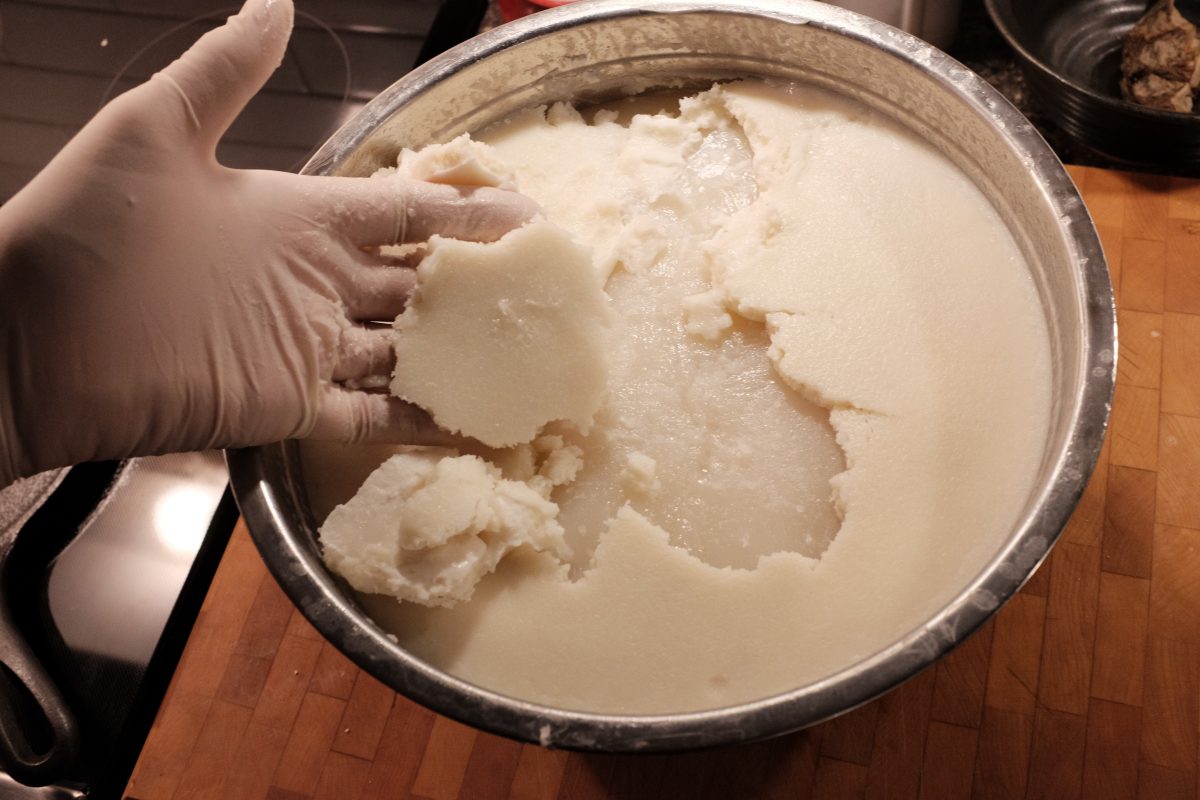
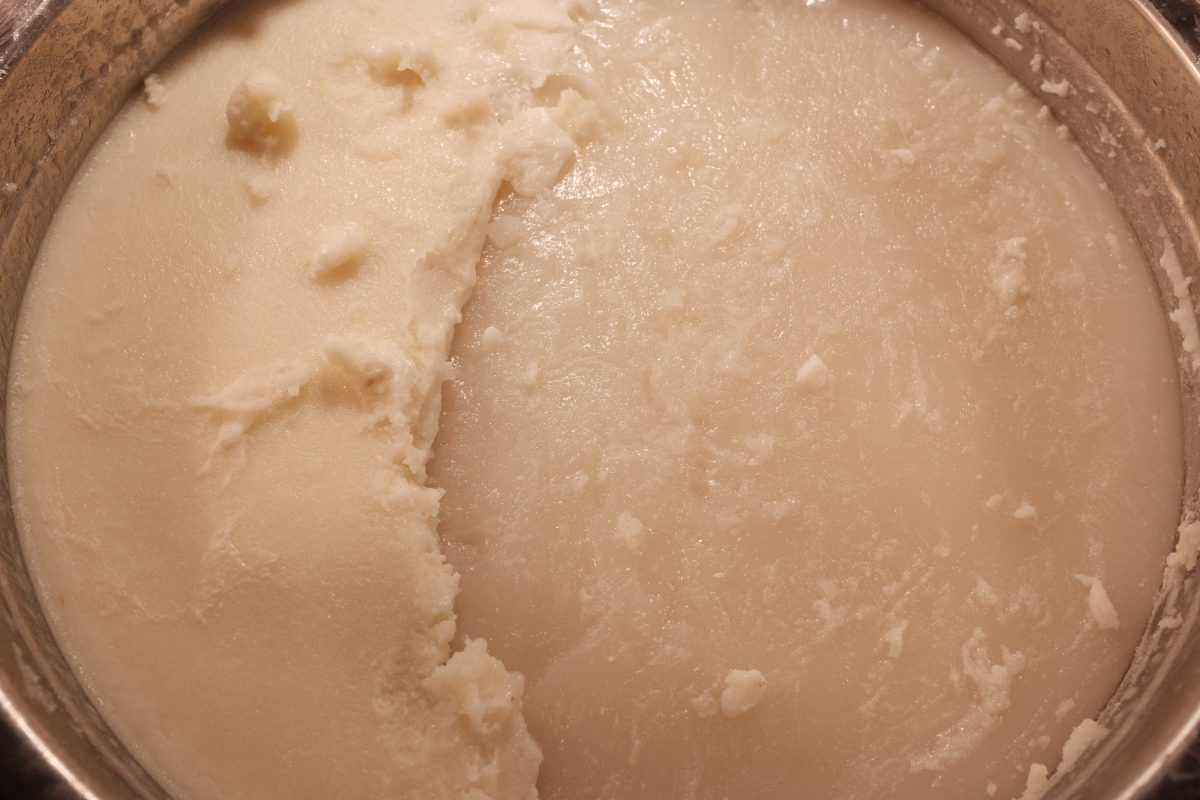
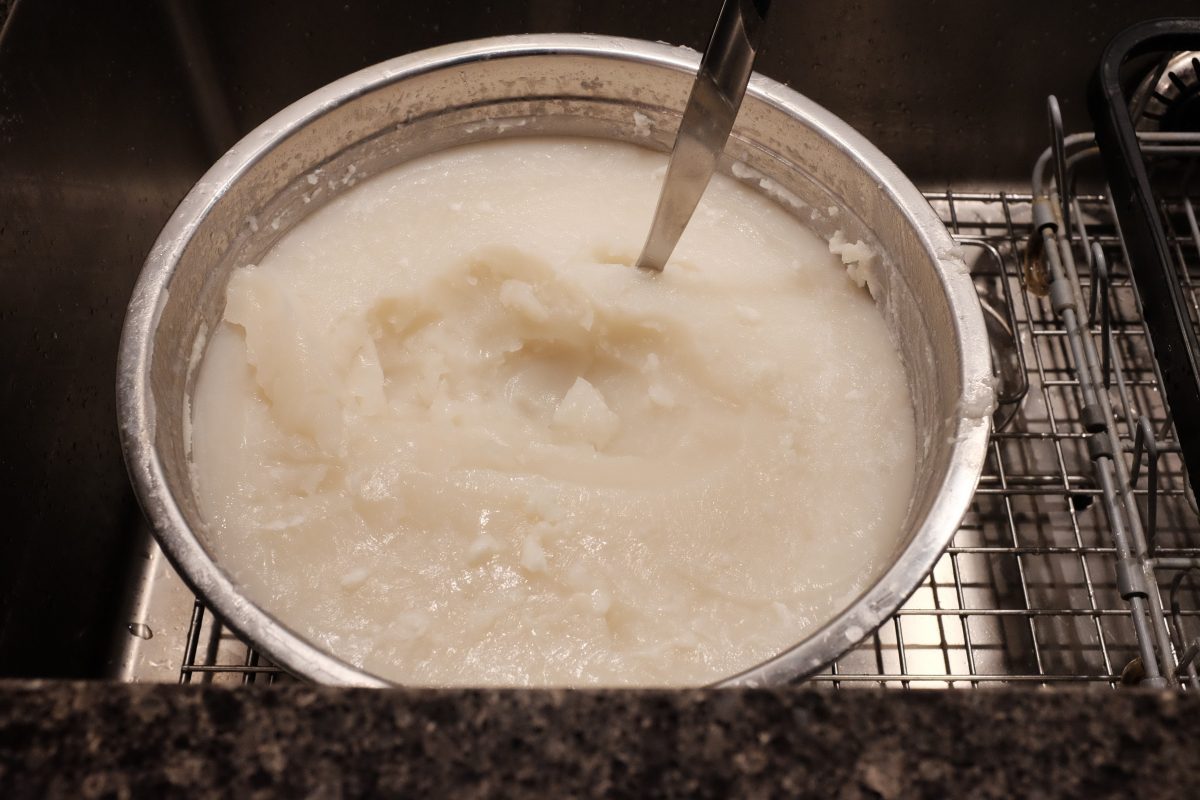
Stage 2:
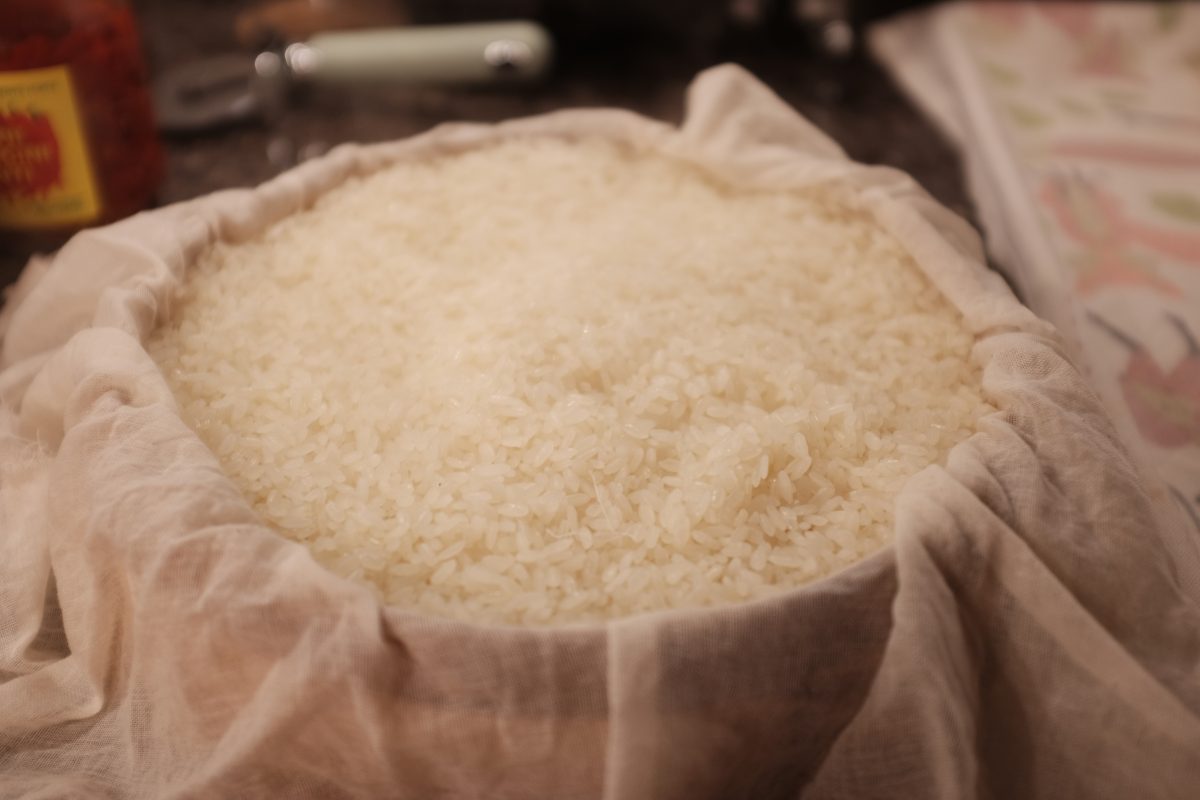
In this stage we will wash, soak, drain, steam and cool our 2kg of sweet rice. And, afterwards, we will add it to our fermenting container.
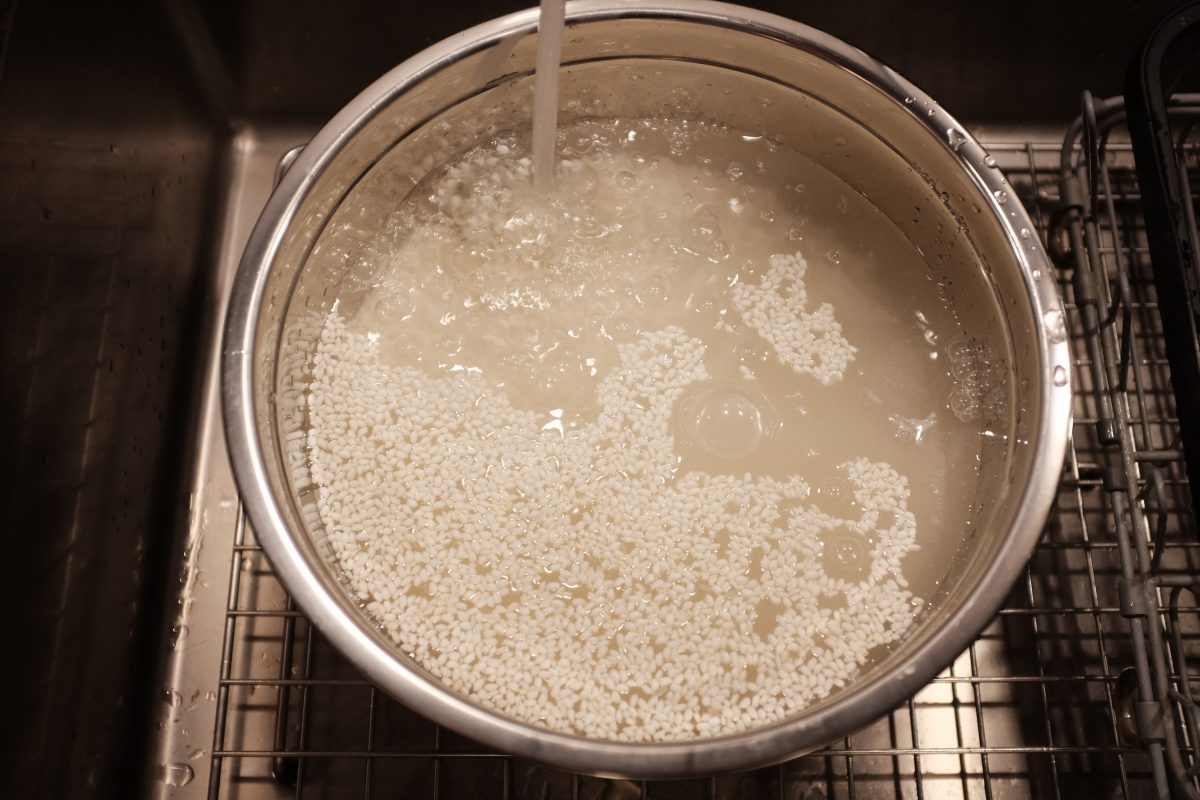
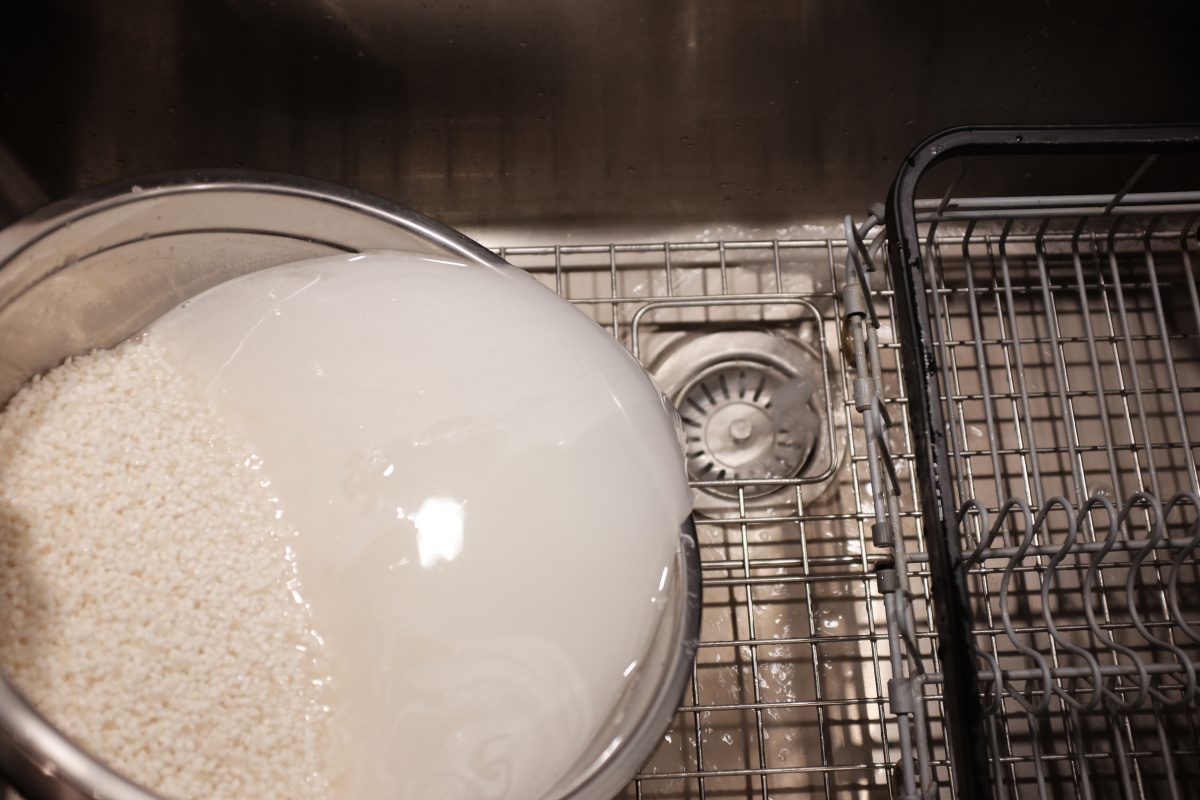
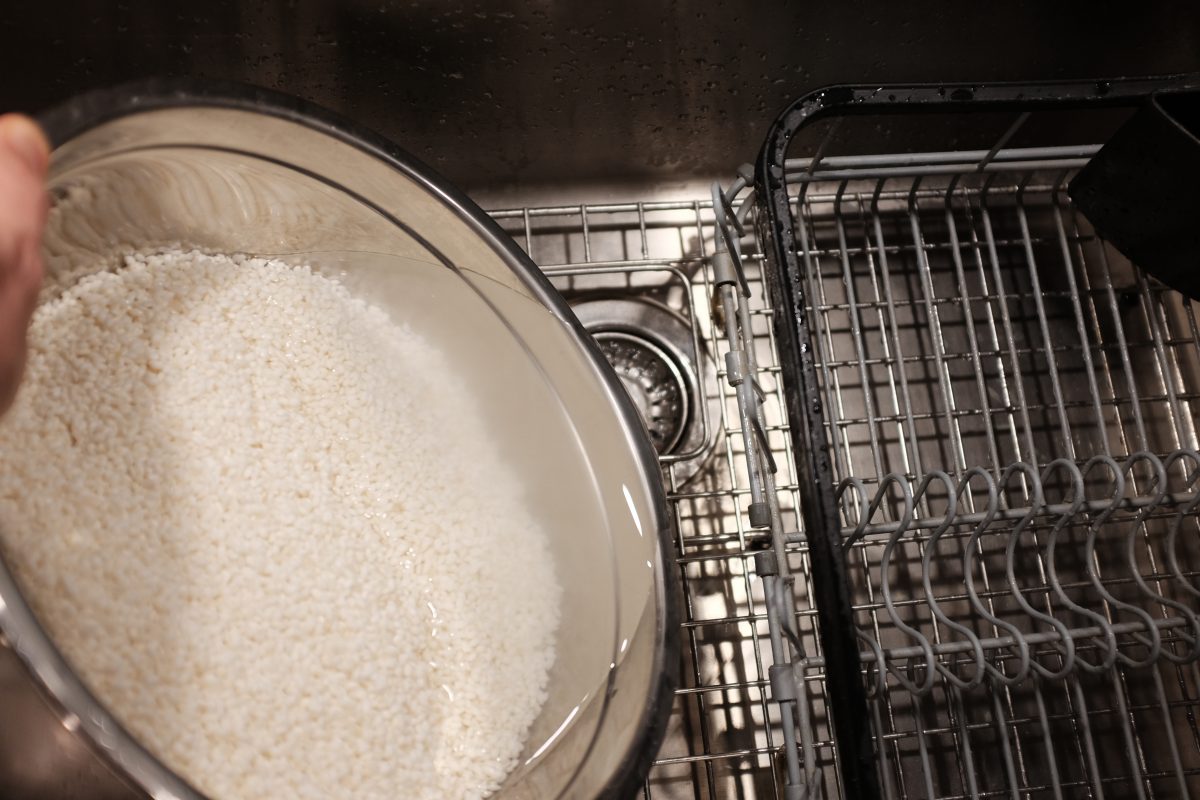
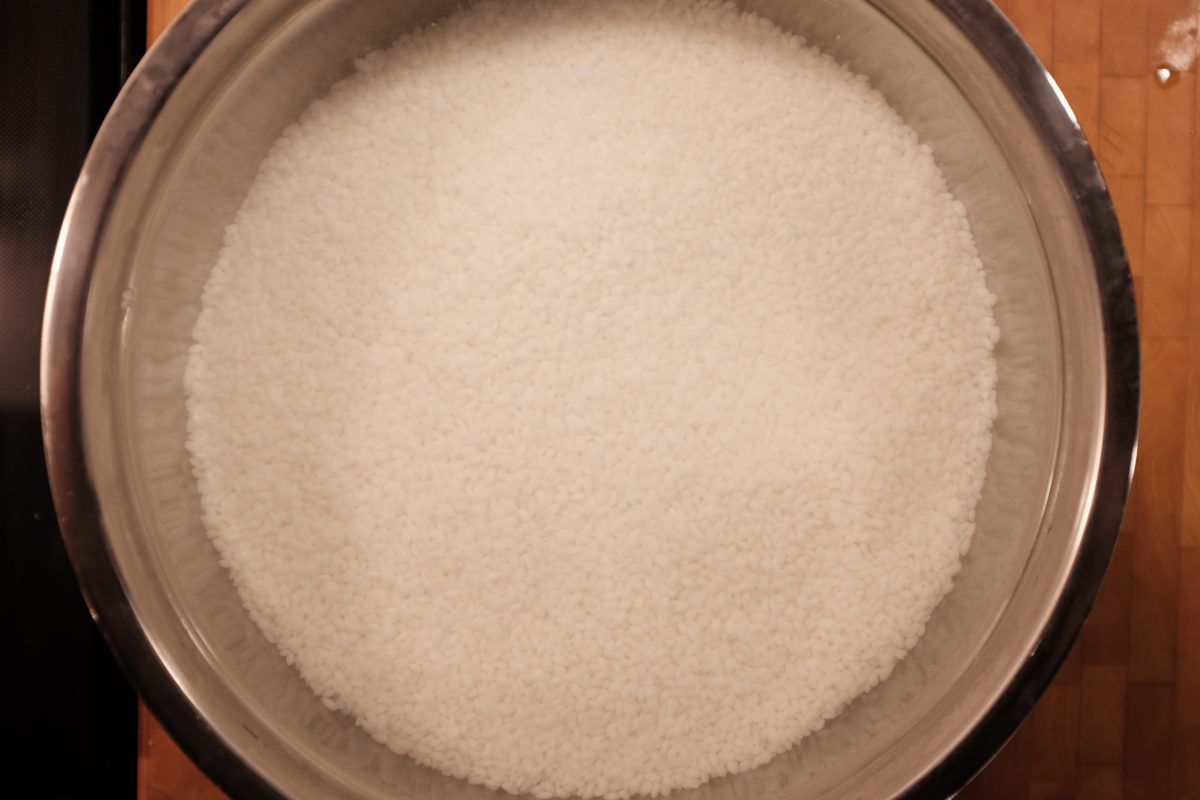
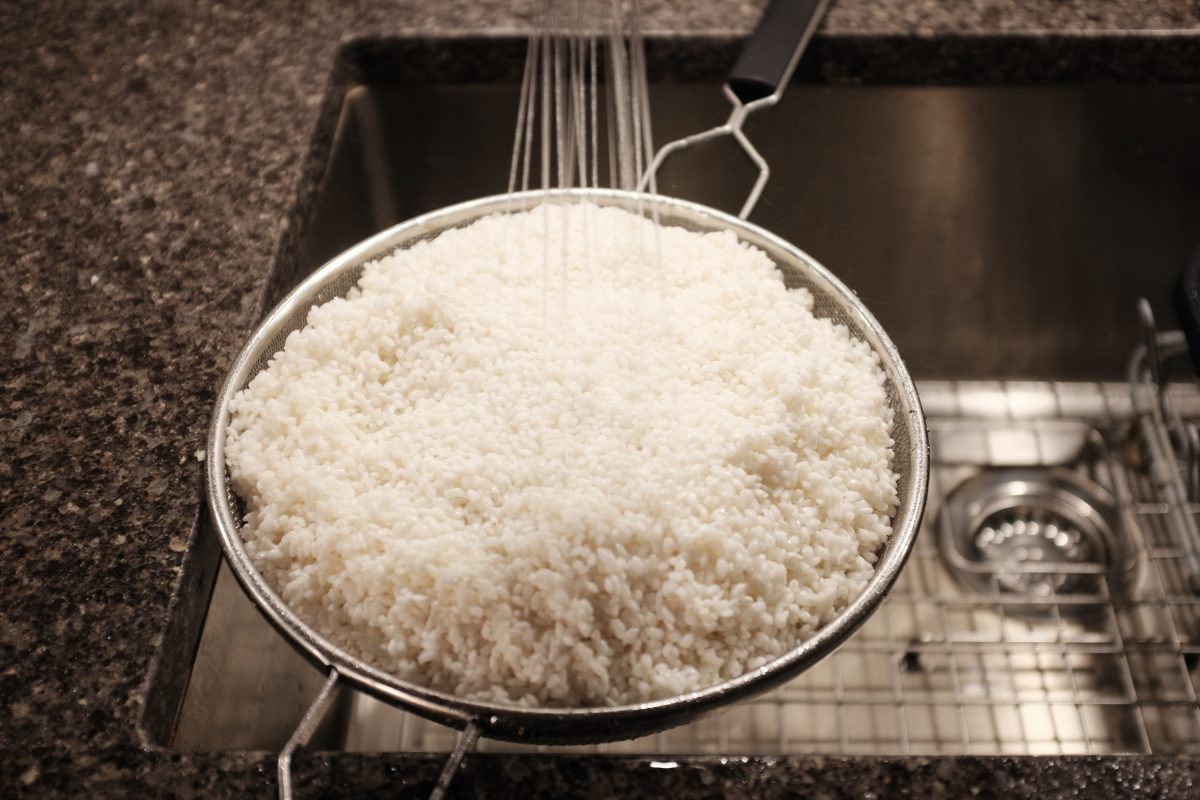
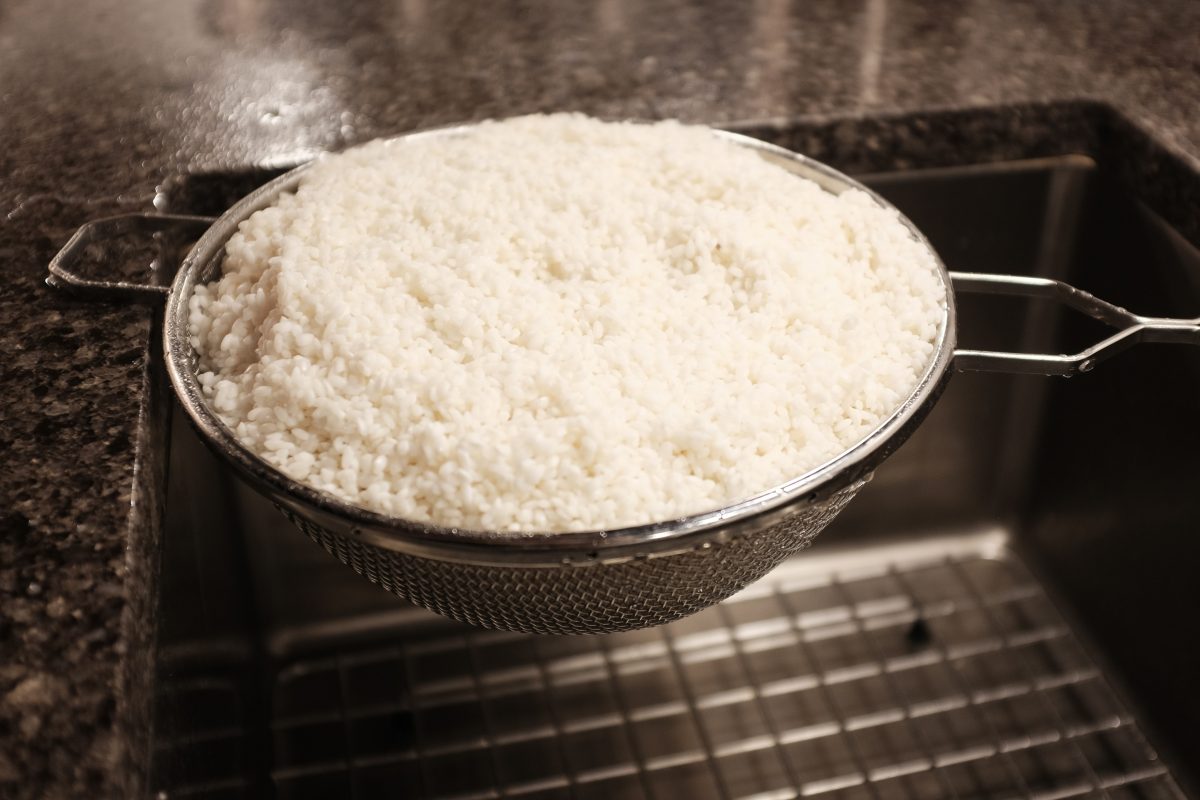
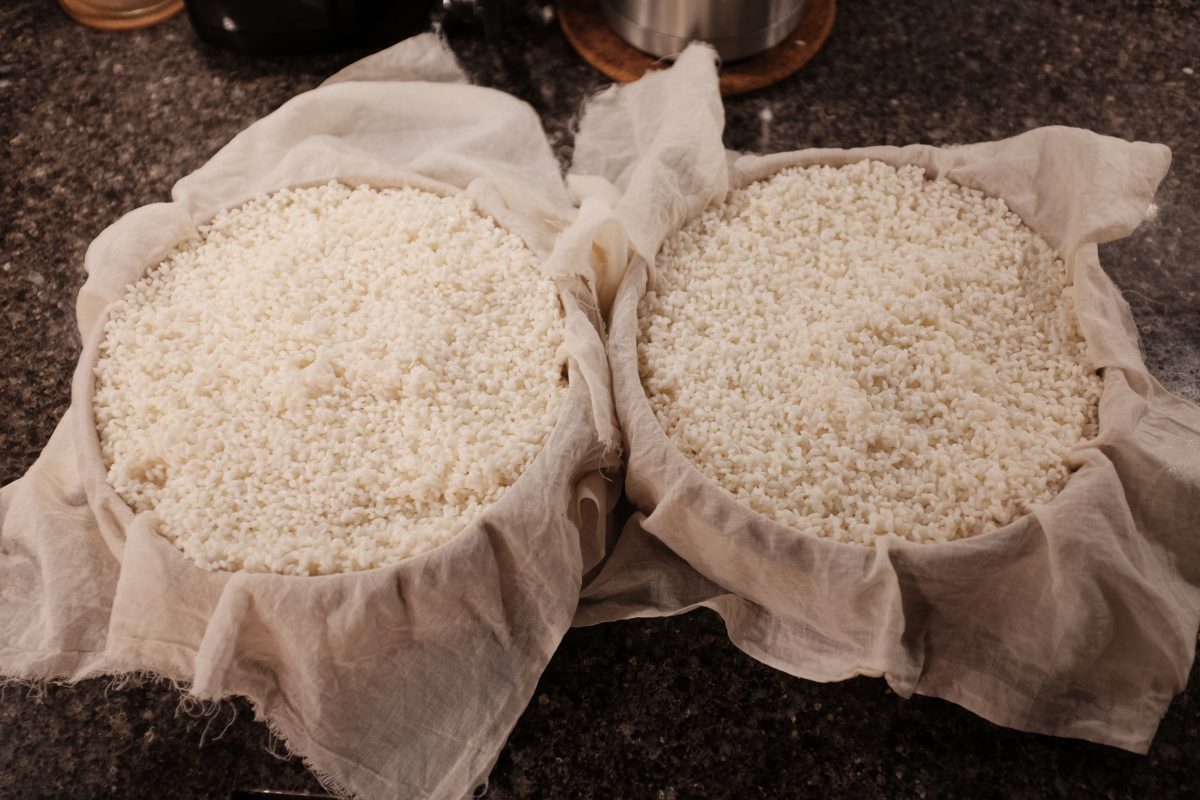
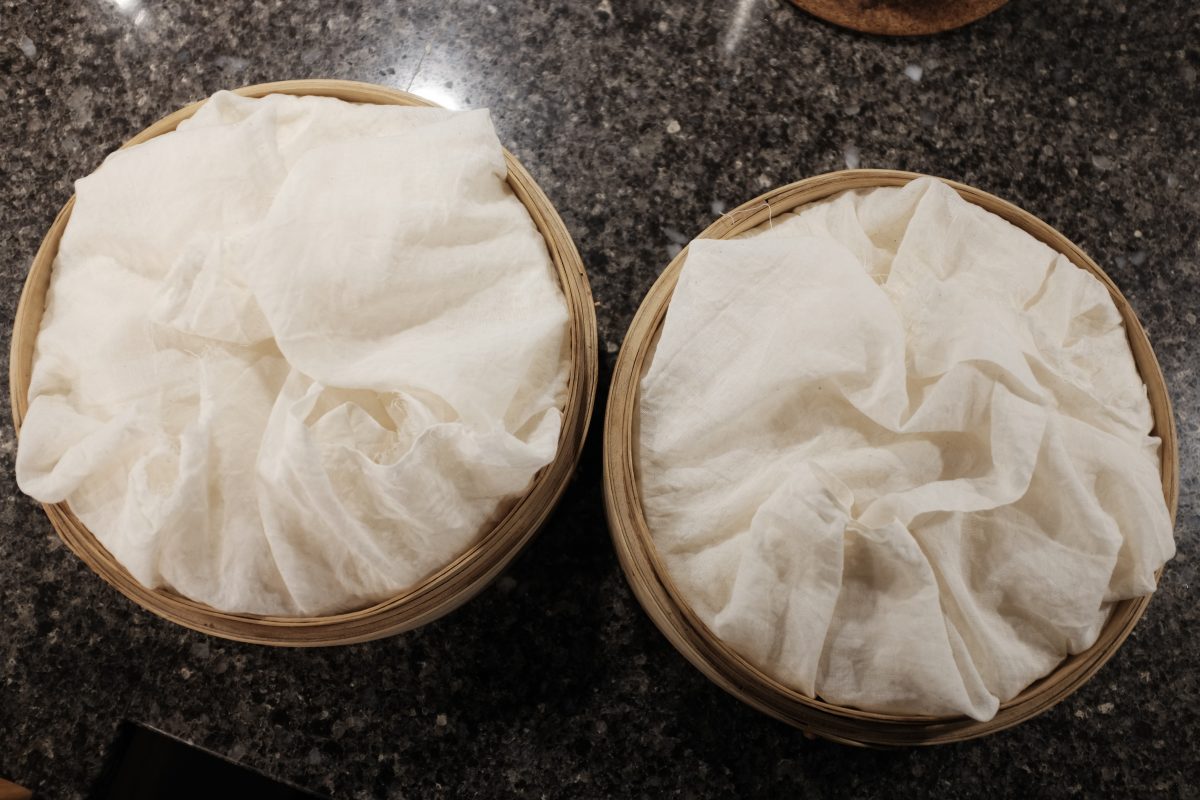
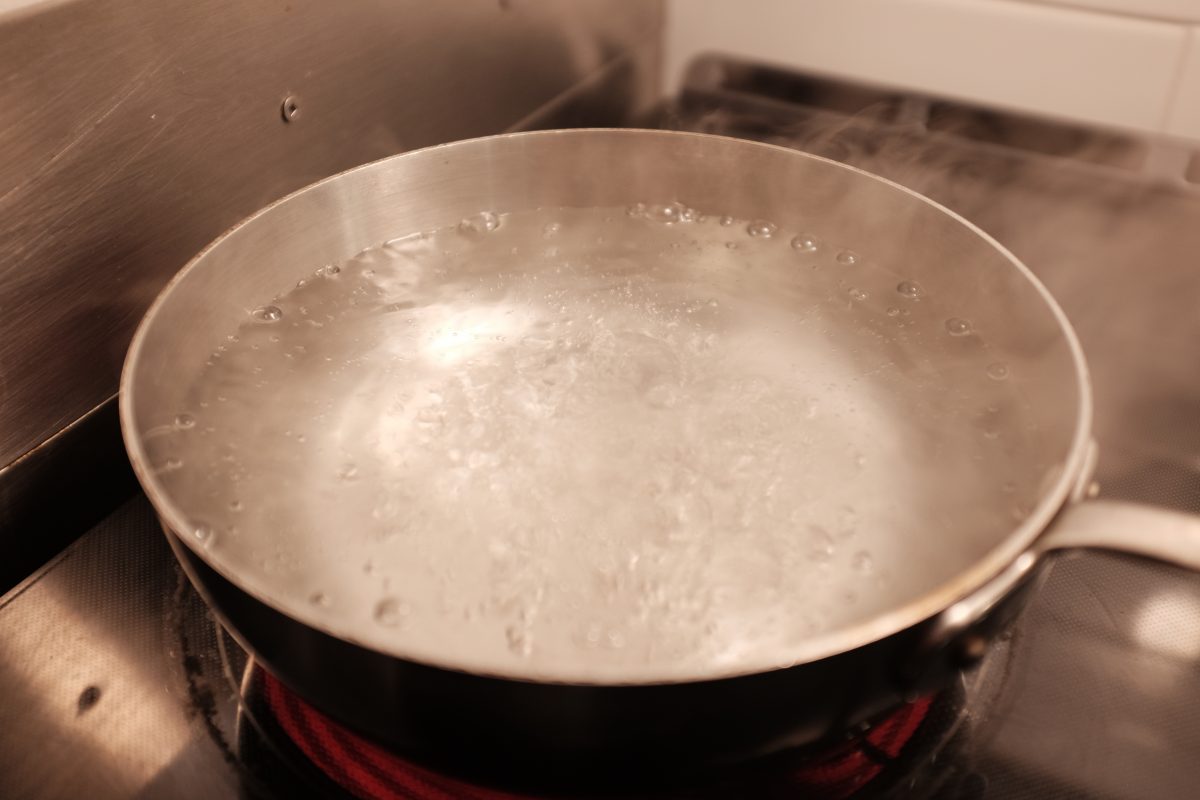
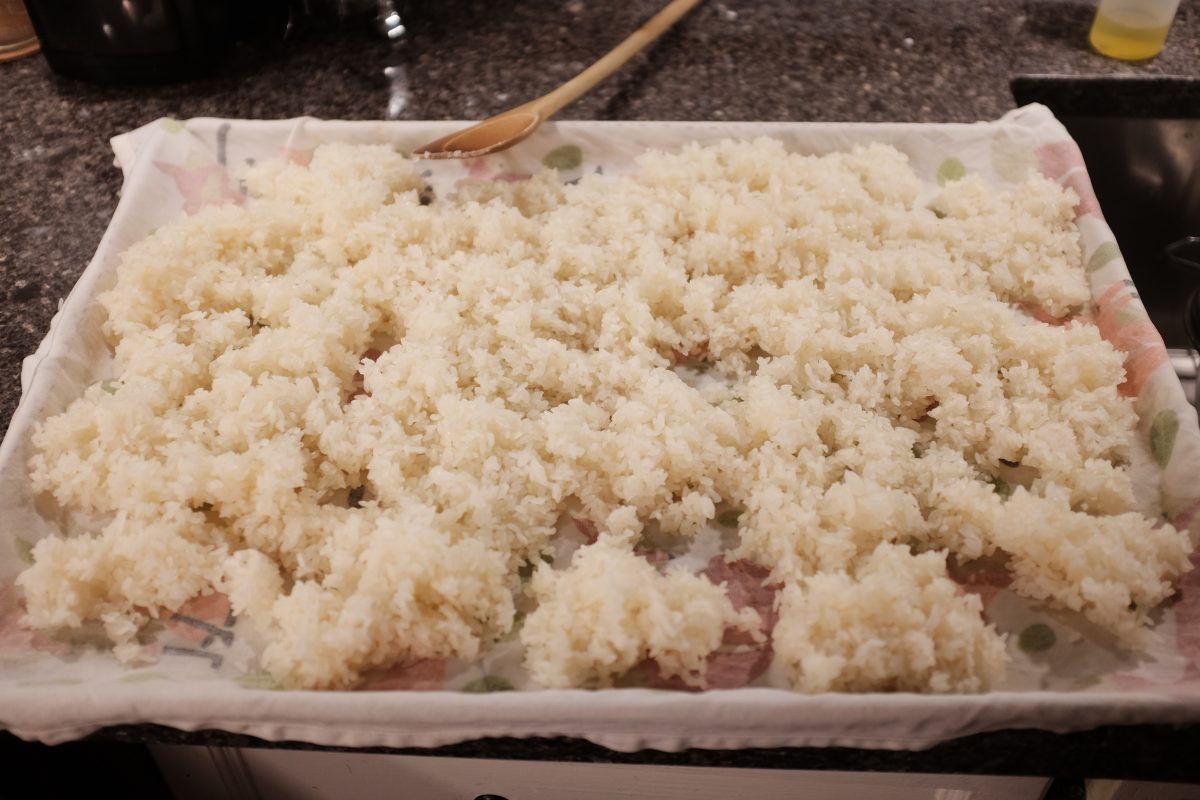
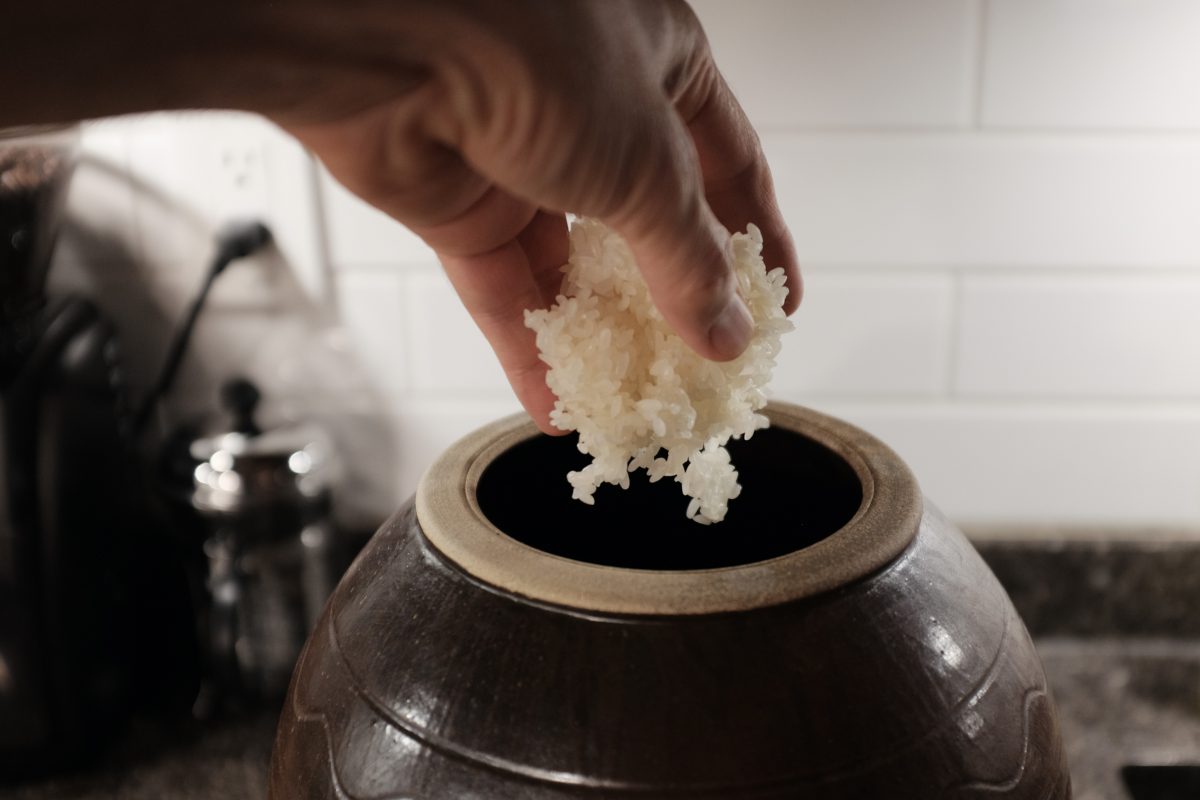
Stage 2, Day 1
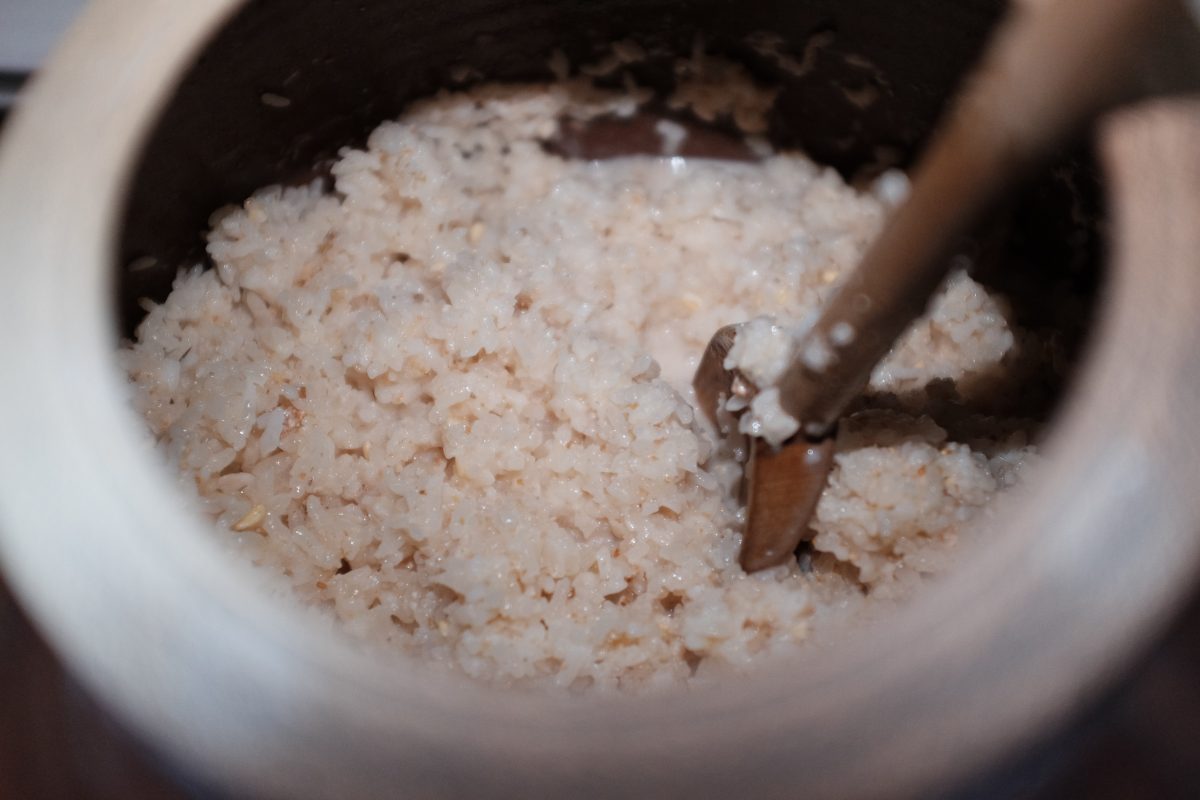
Stage 2, Day 2
Stage 2, Day 3
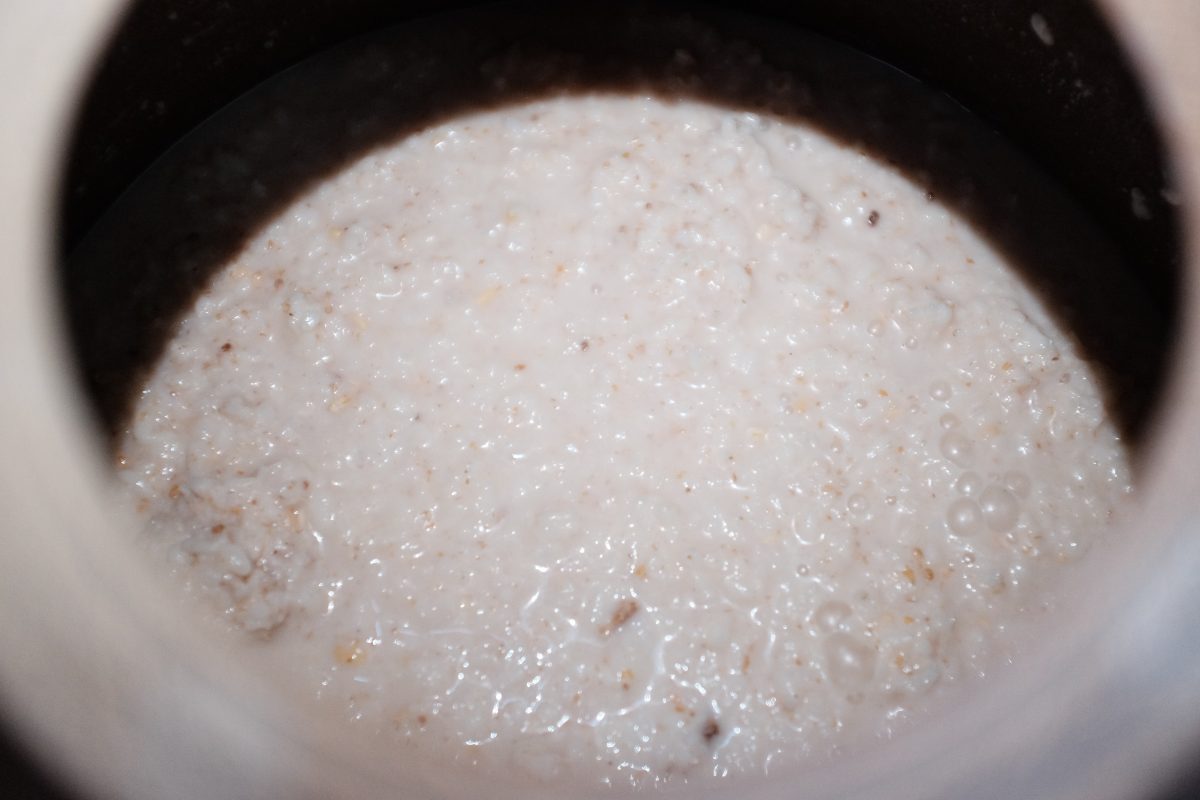
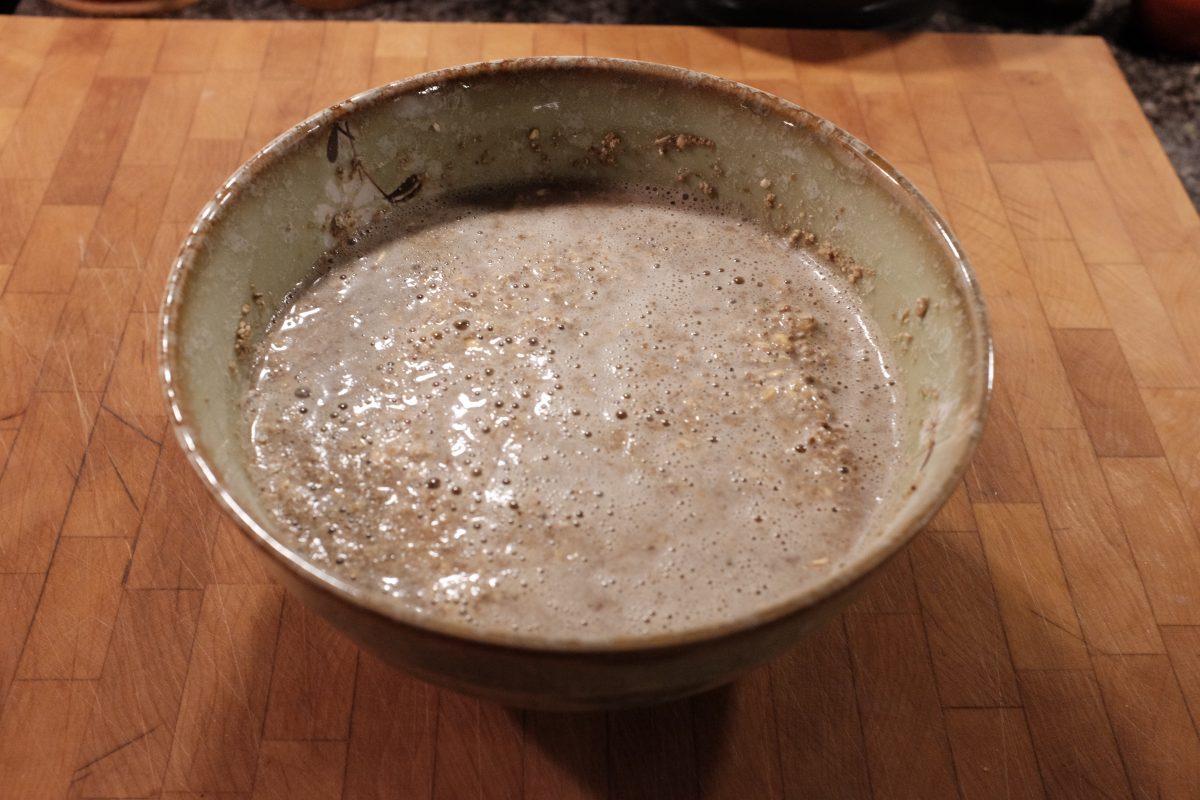
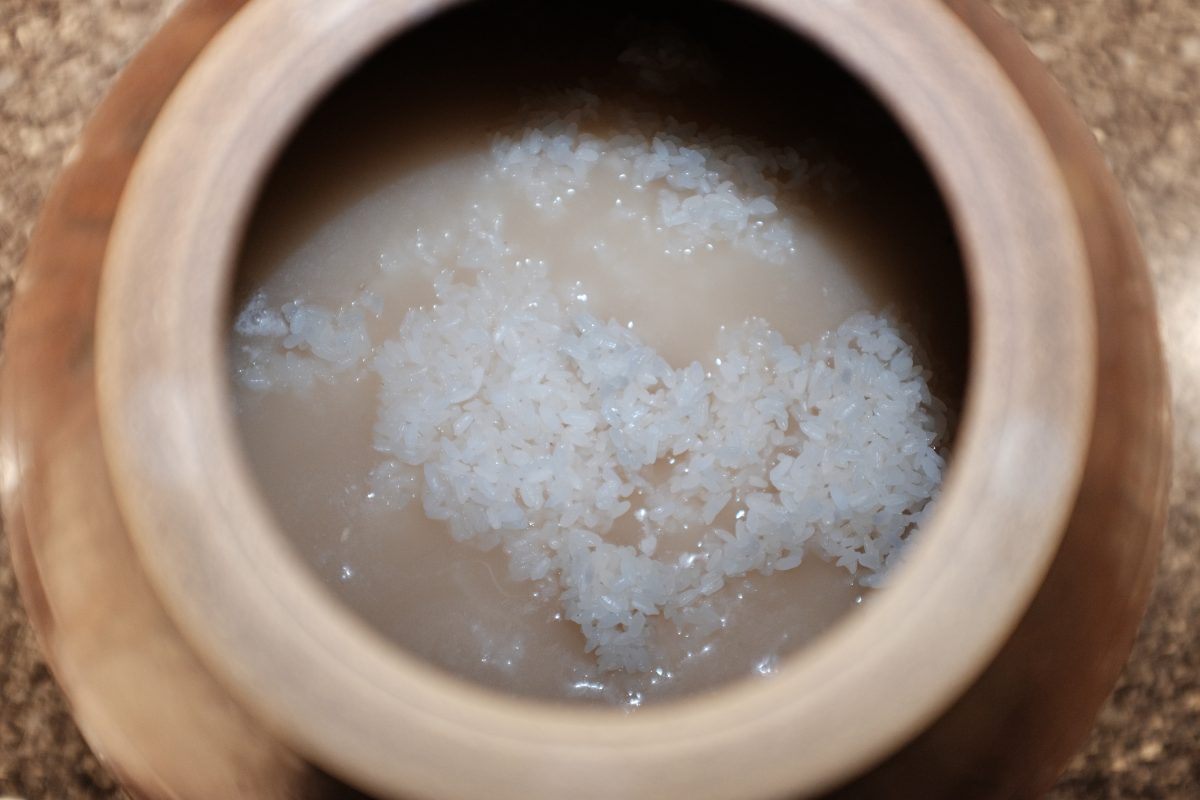
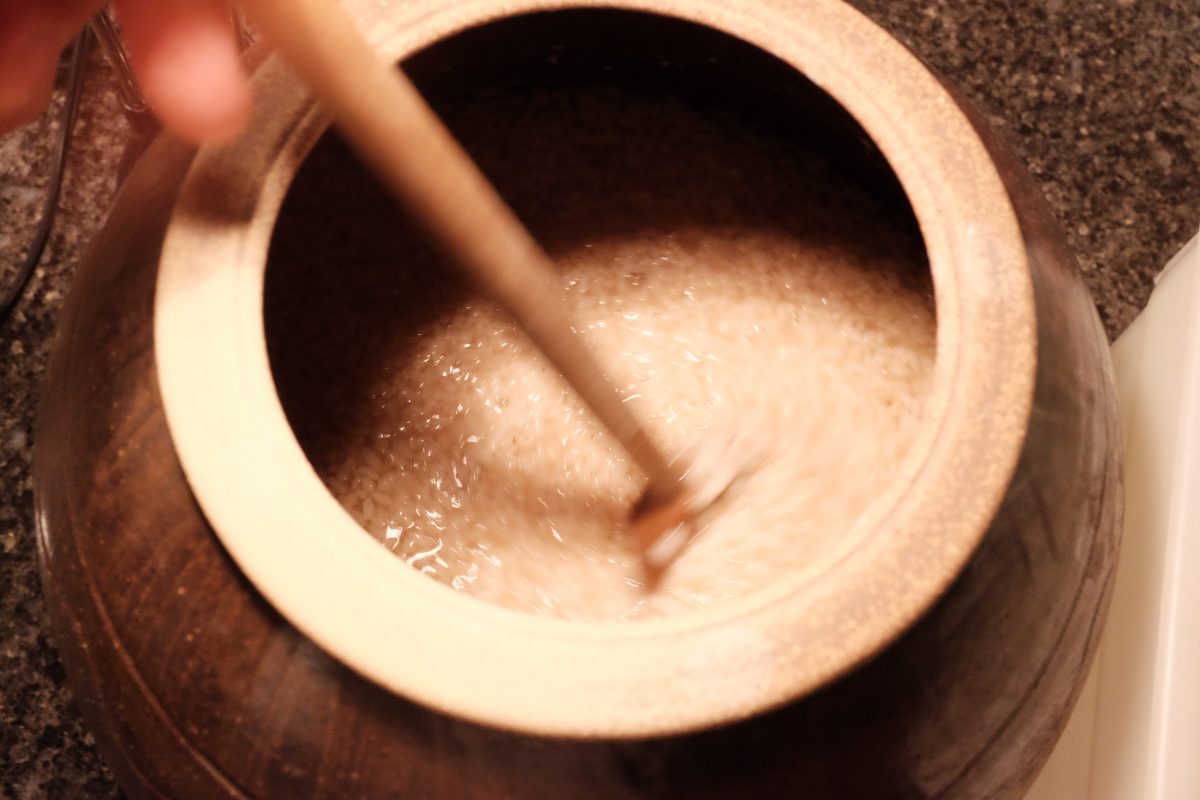
Now we wait
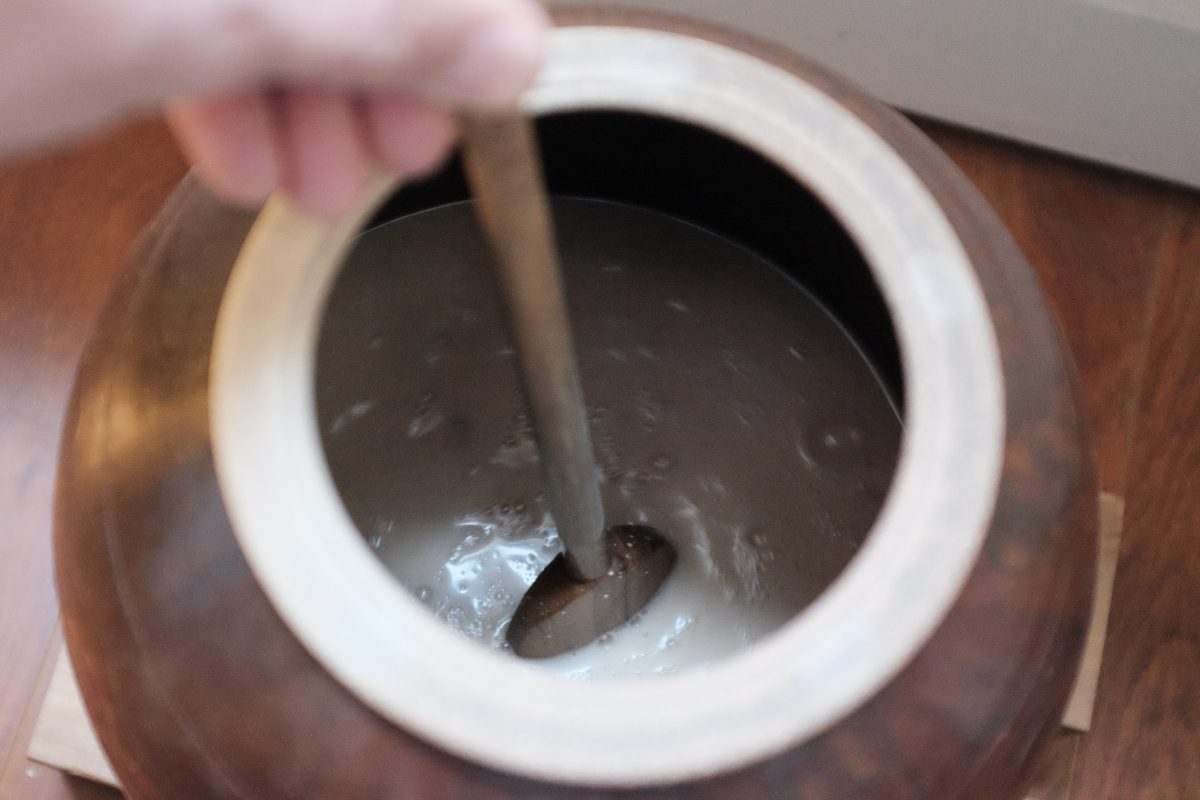
For the next 2 to 3 weeks or so, open up the jar every few days and listen for activity and monitor any changes on the surface. Smell it and taste it for alcohol strength by sticking a spoon or chopstick into the mix.
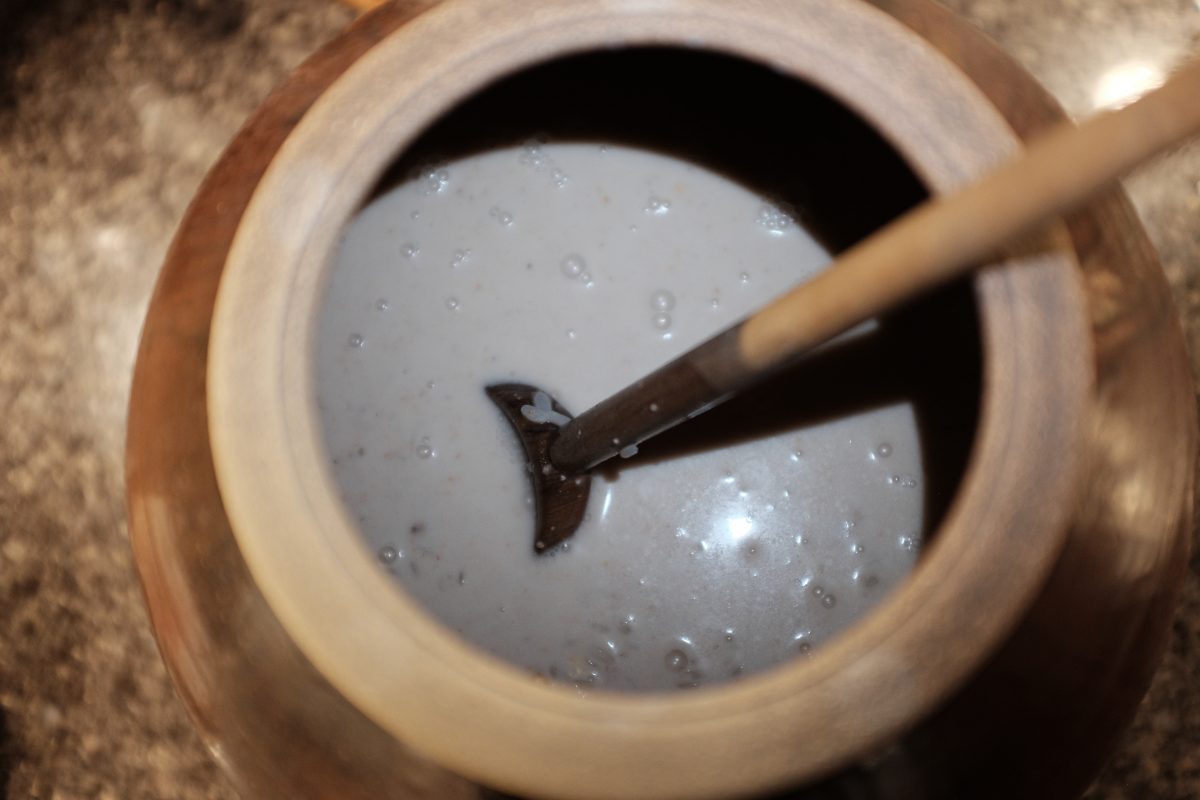
The Match Test
By lowering a lit match into your container, you can get a visual cue for how much fermentation is going on. An actively fermenting brew will give off carbon dioxide. This will snuff a match quickly. The brew below is around 10 days into Stage 2. The match test shows that it is still actively producing CO2. The match goes out as soon as it gets past the rim of the jar. Eventually, as fermentation slows, you should be able to lower a match right to the surface without it going out.
This is just a fun measure of how active the fermentation is.
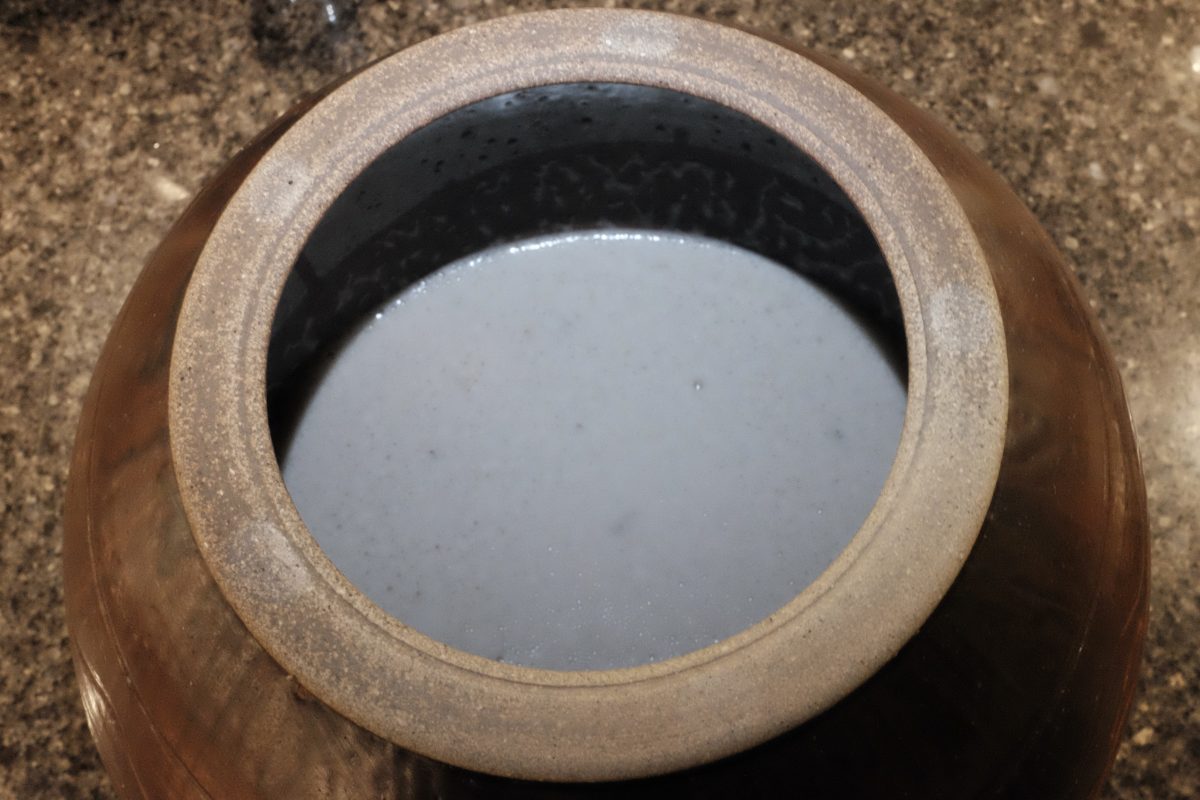
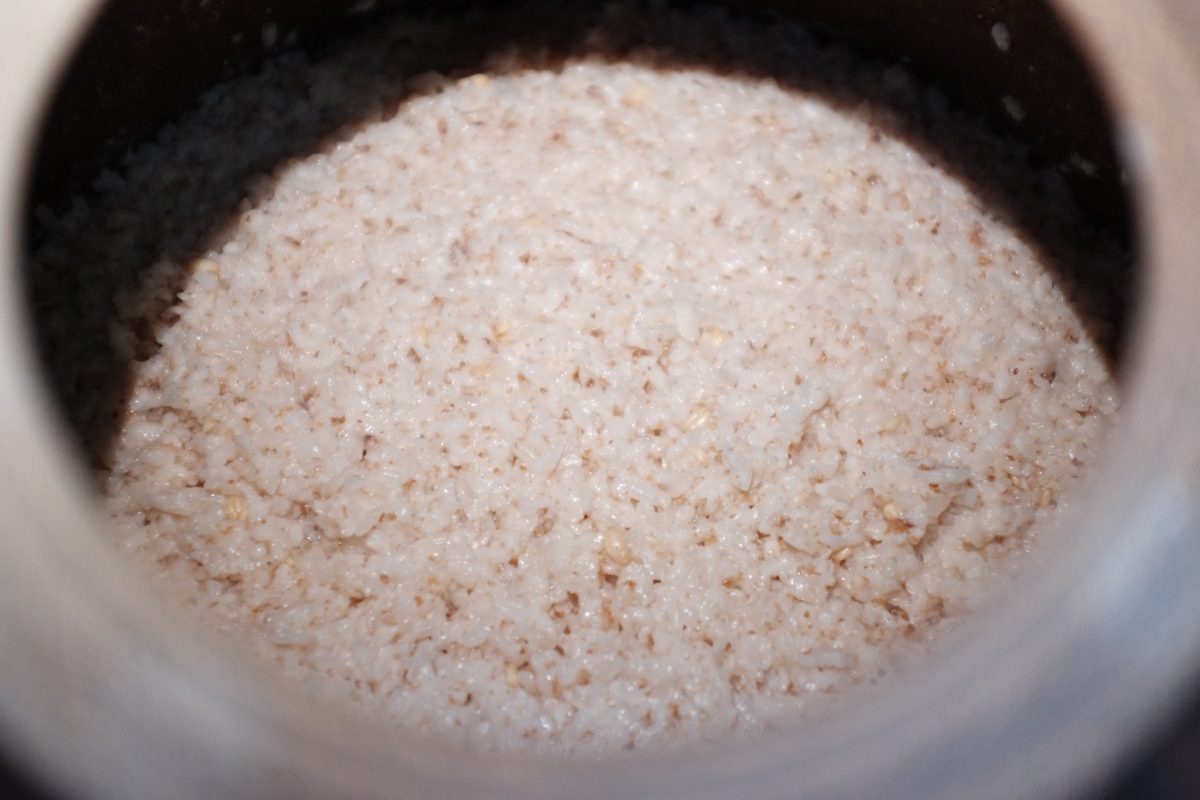
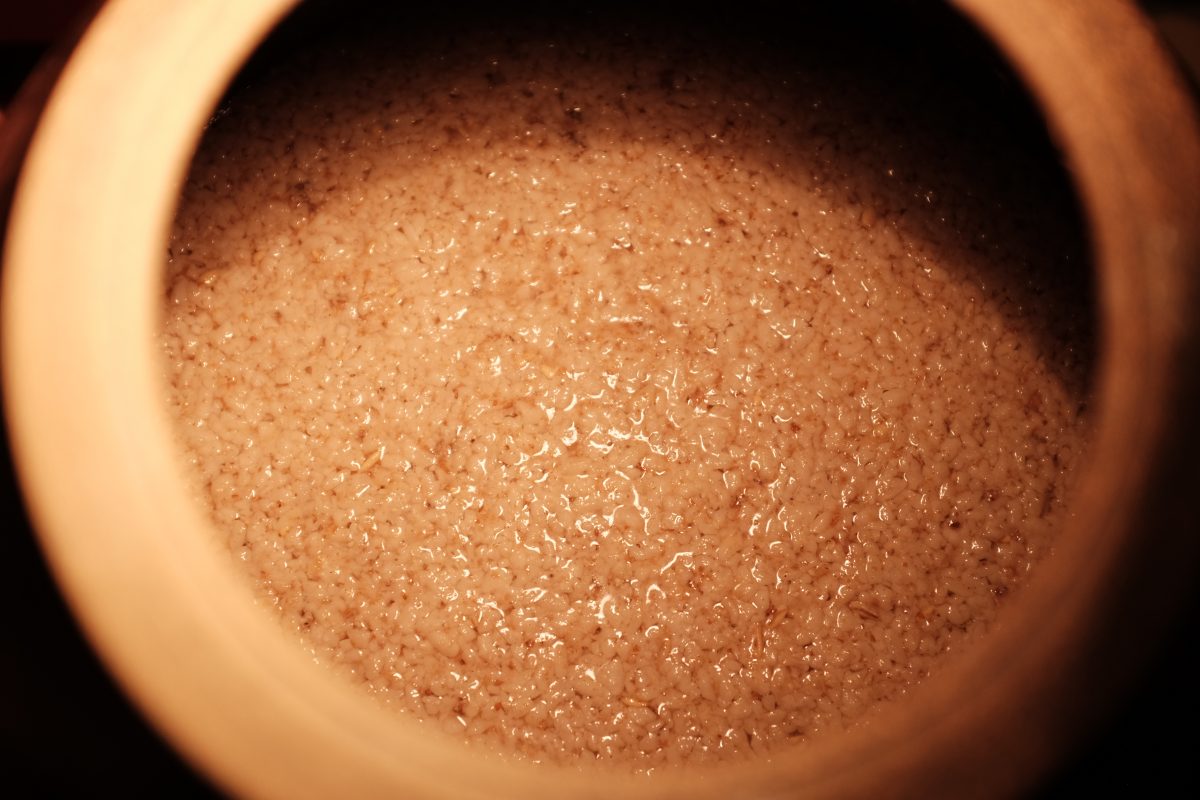
Stage 2: 2 weeks after adding rice
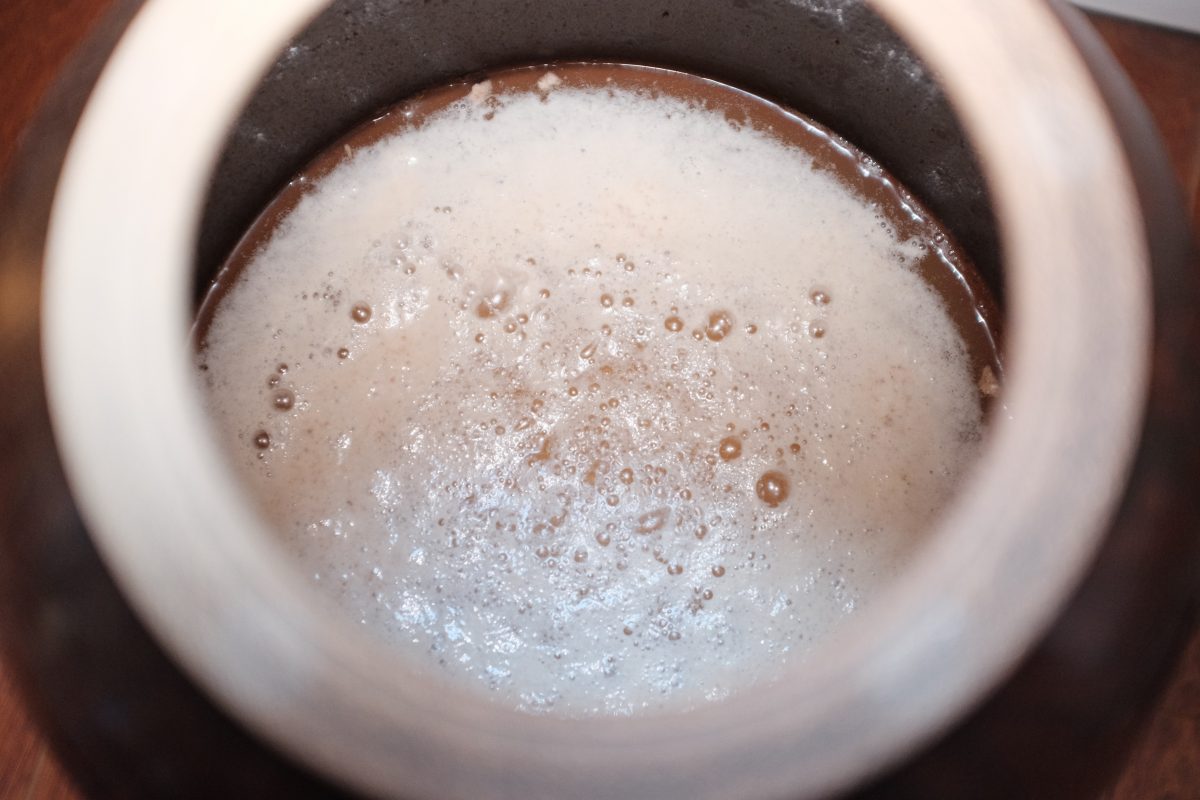
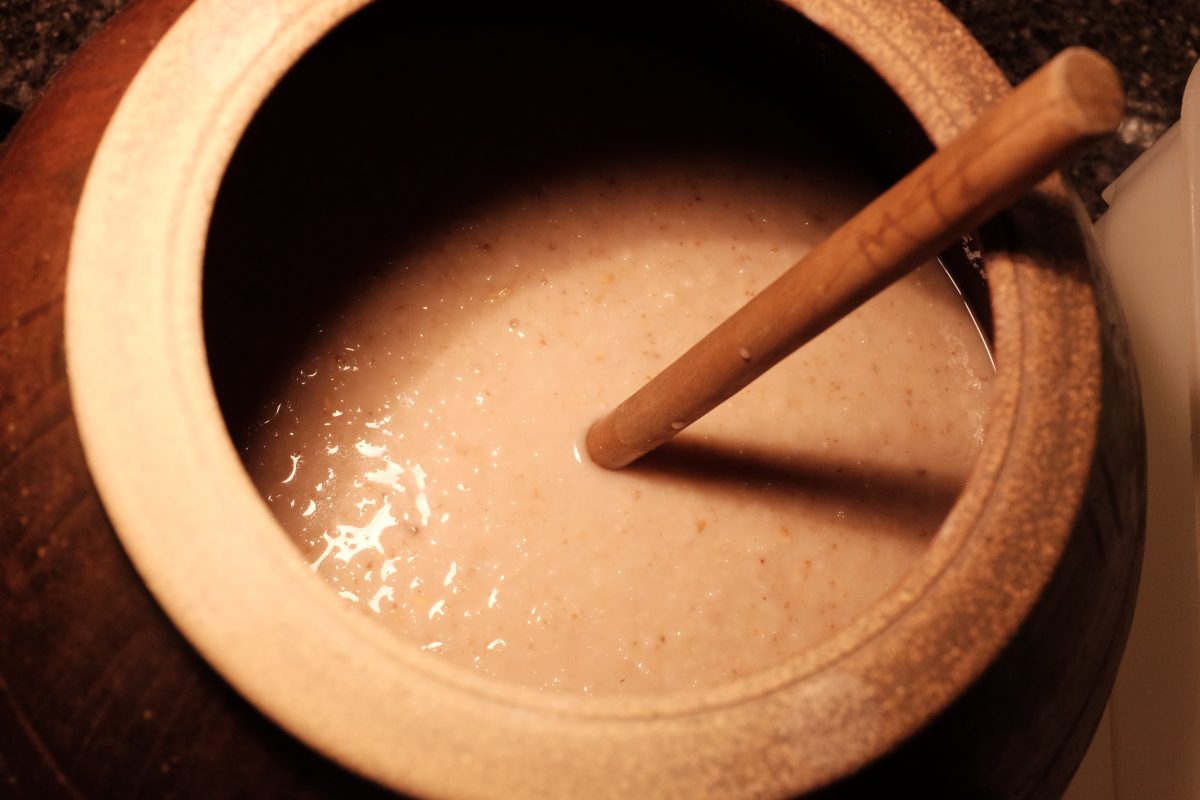
The brew is starting to have a nice boozy sweet smell. There is a thin shiny layer of liquid forming on top of the rice mash.
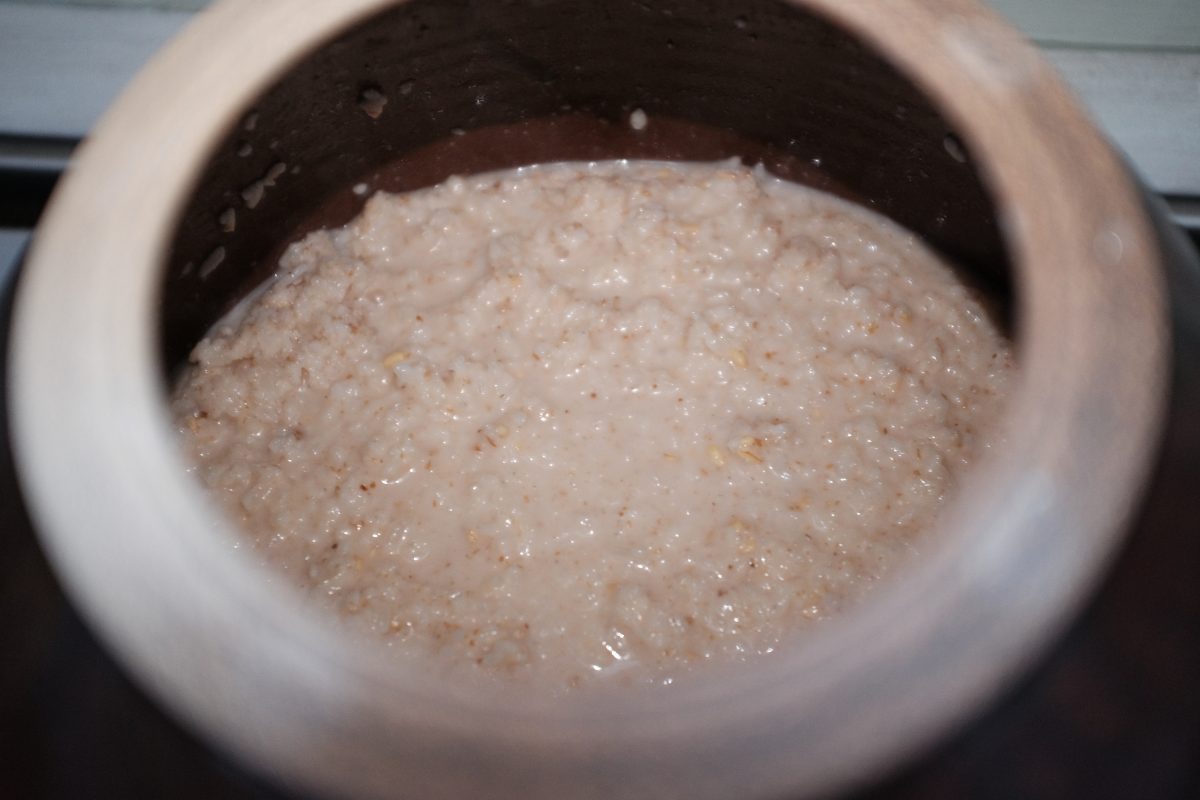
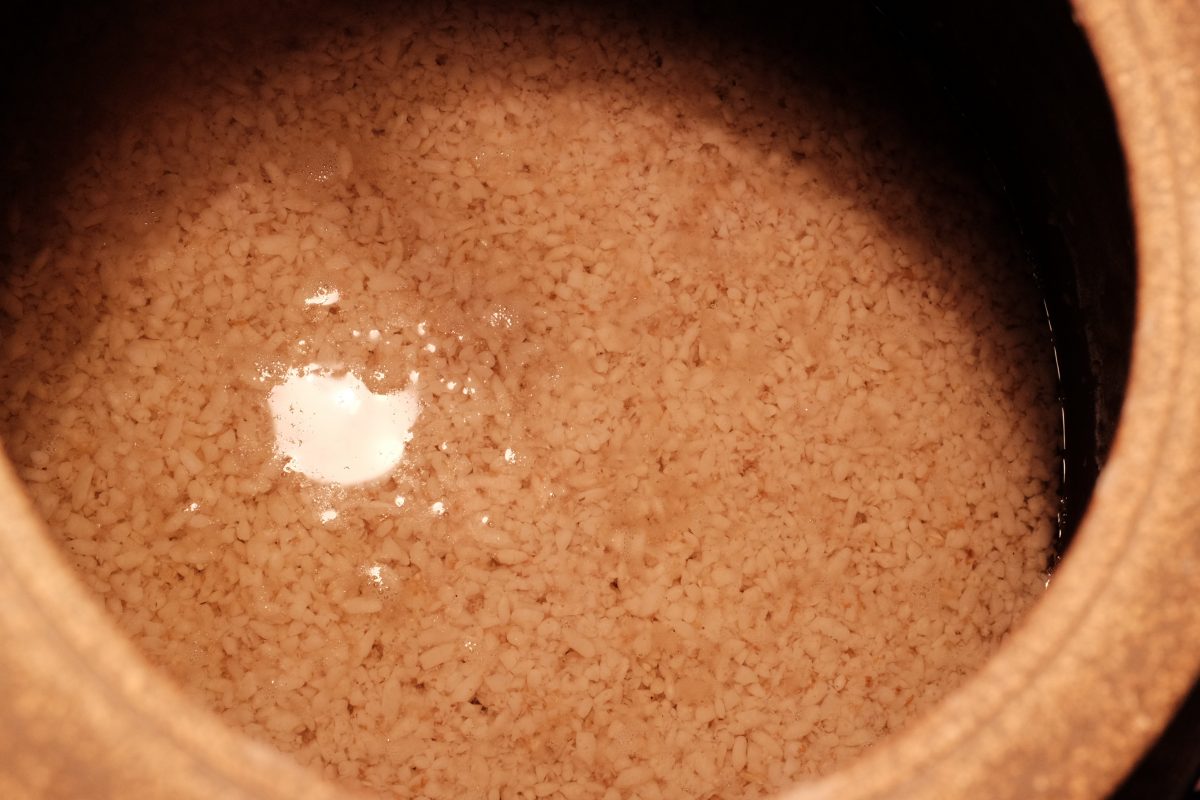
Brew is showing signs of being done
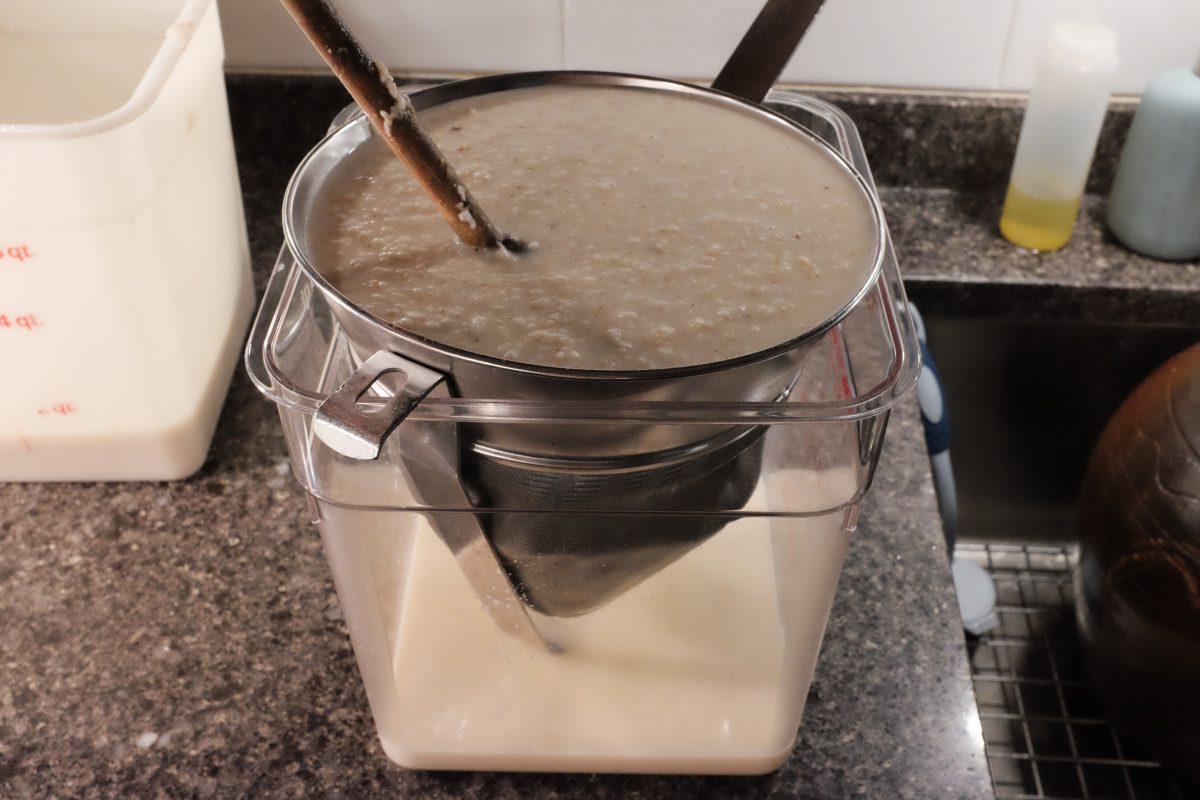
We are now 18 days into Stage 2 (3 weeks total fermentation time measured from the start of Stage 1). The bubbling has practically stopped with very little activity (not enough to even get one bubble during a 10 second sound recording). The brew smells and tastes of alcohol. Compared to a few days ago, there is now a very clear layer of liquid on top.
The Match Test Take 2
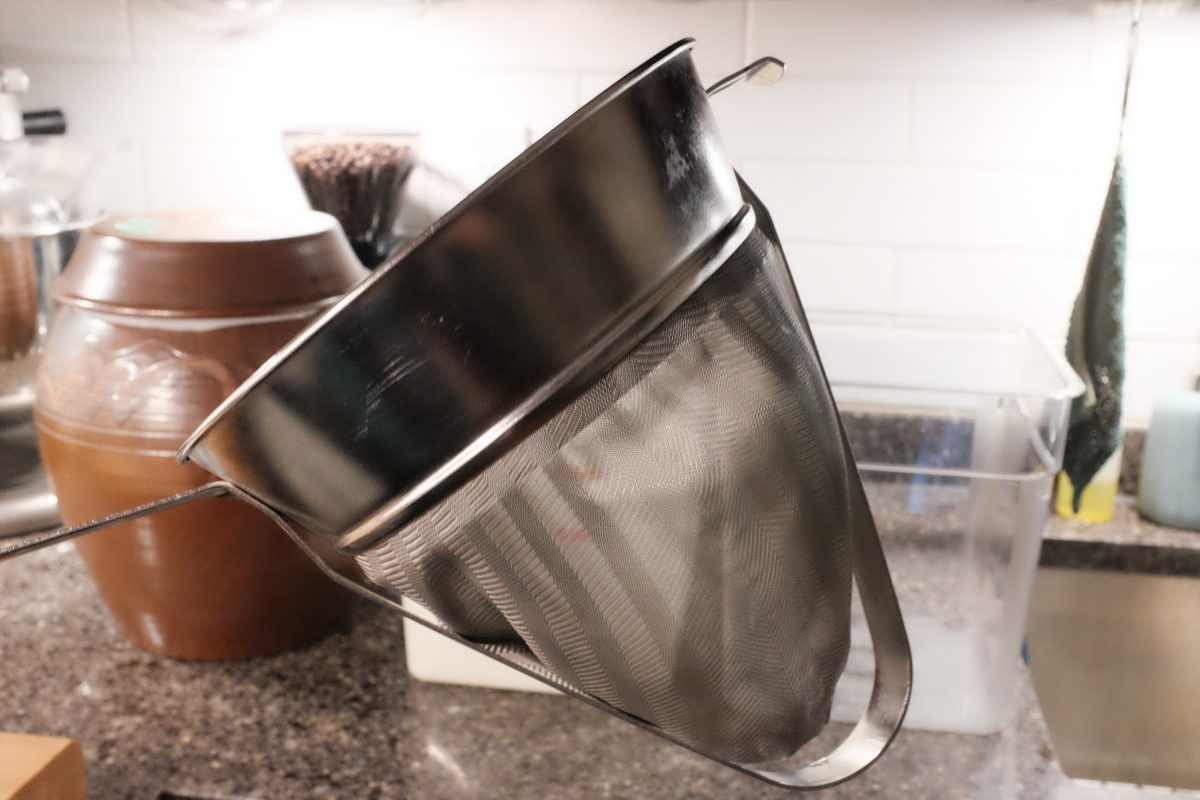
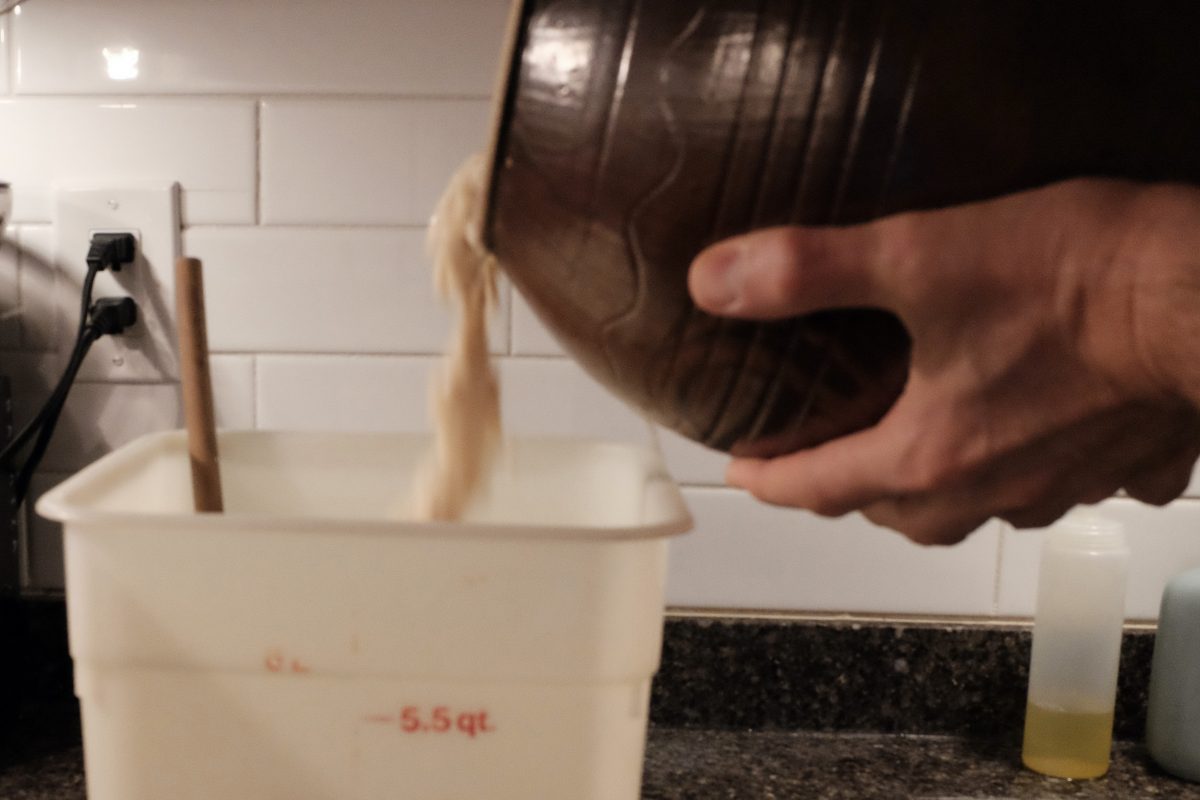
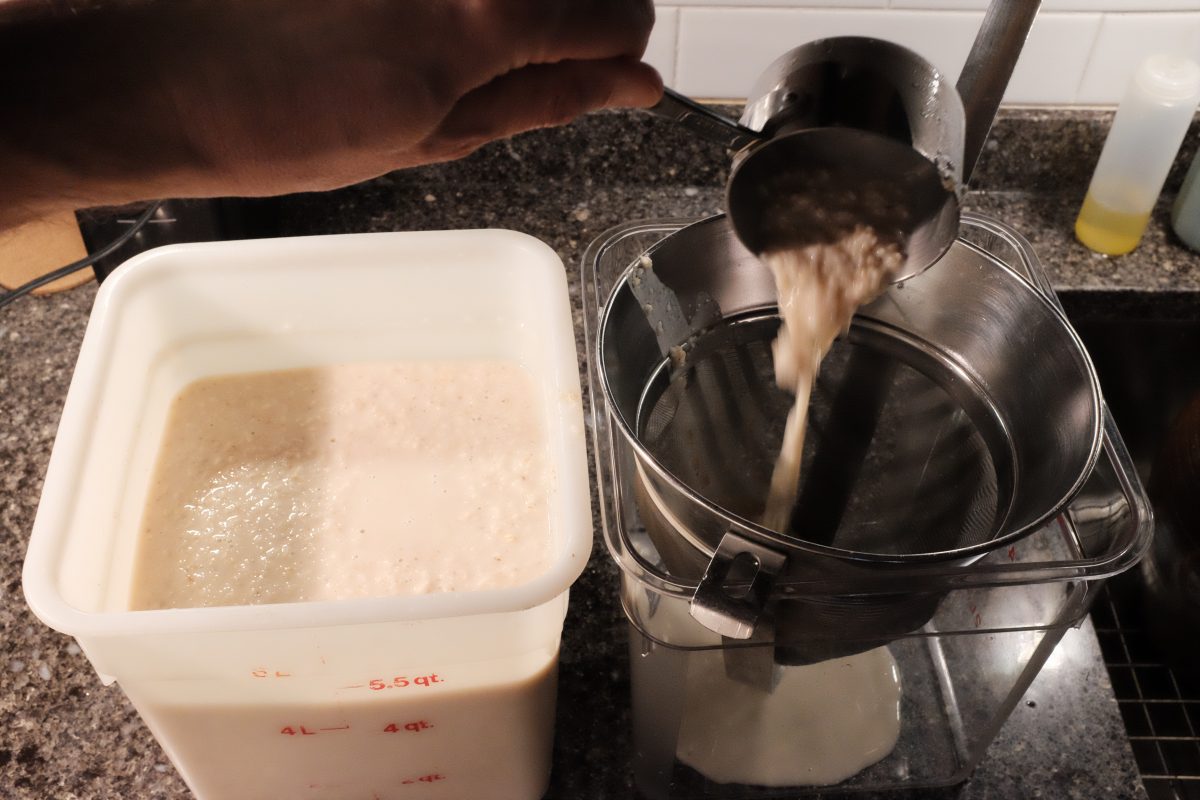
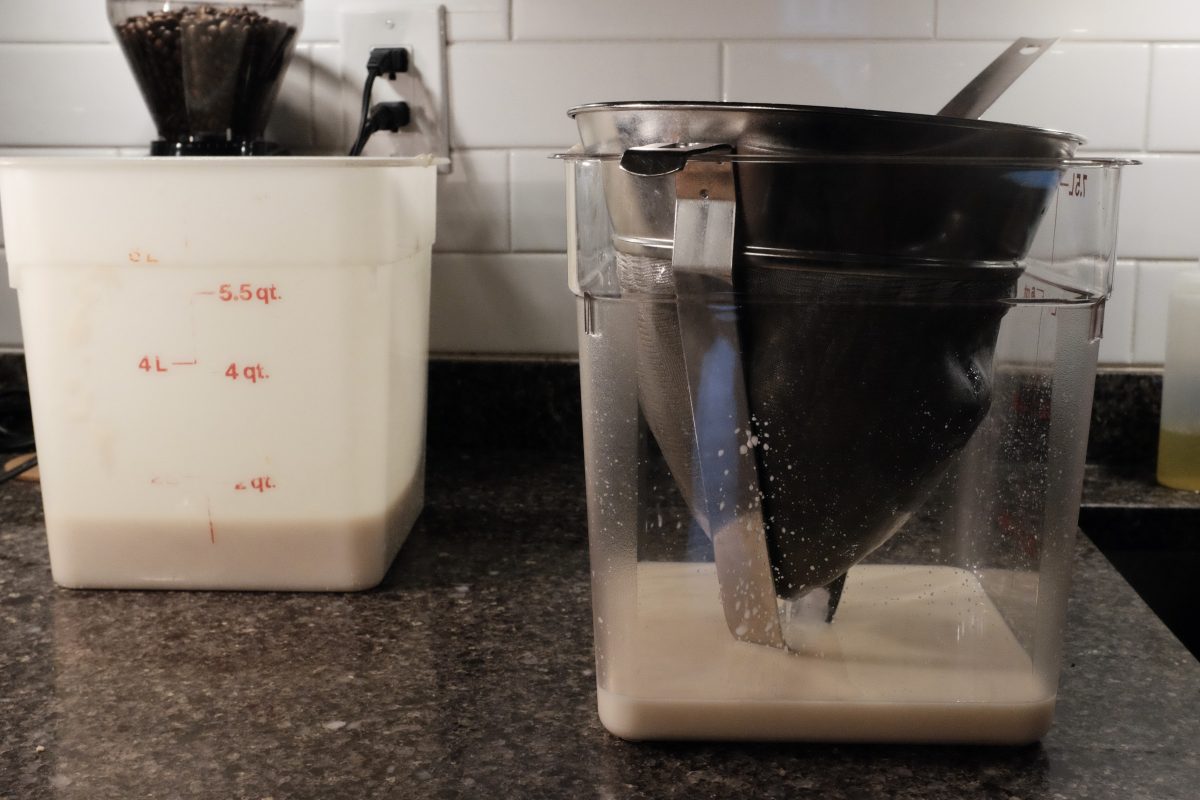
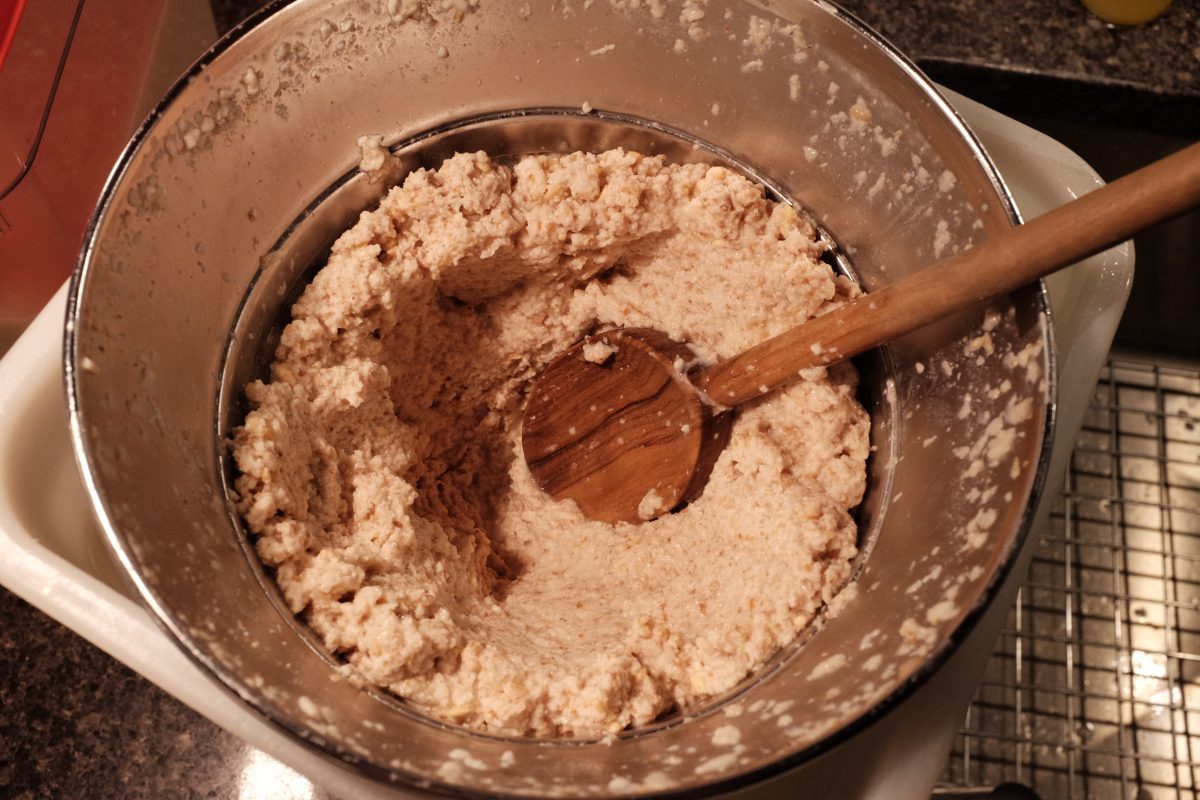
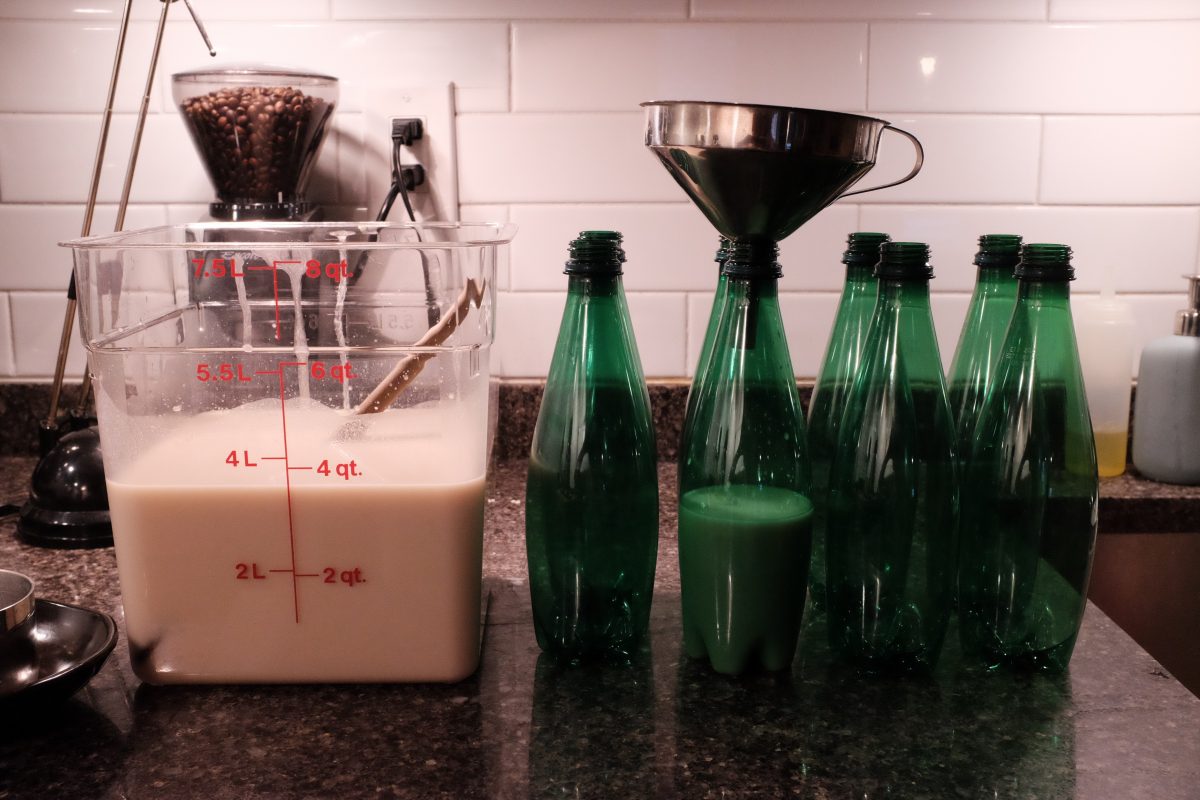
Filtering the brew
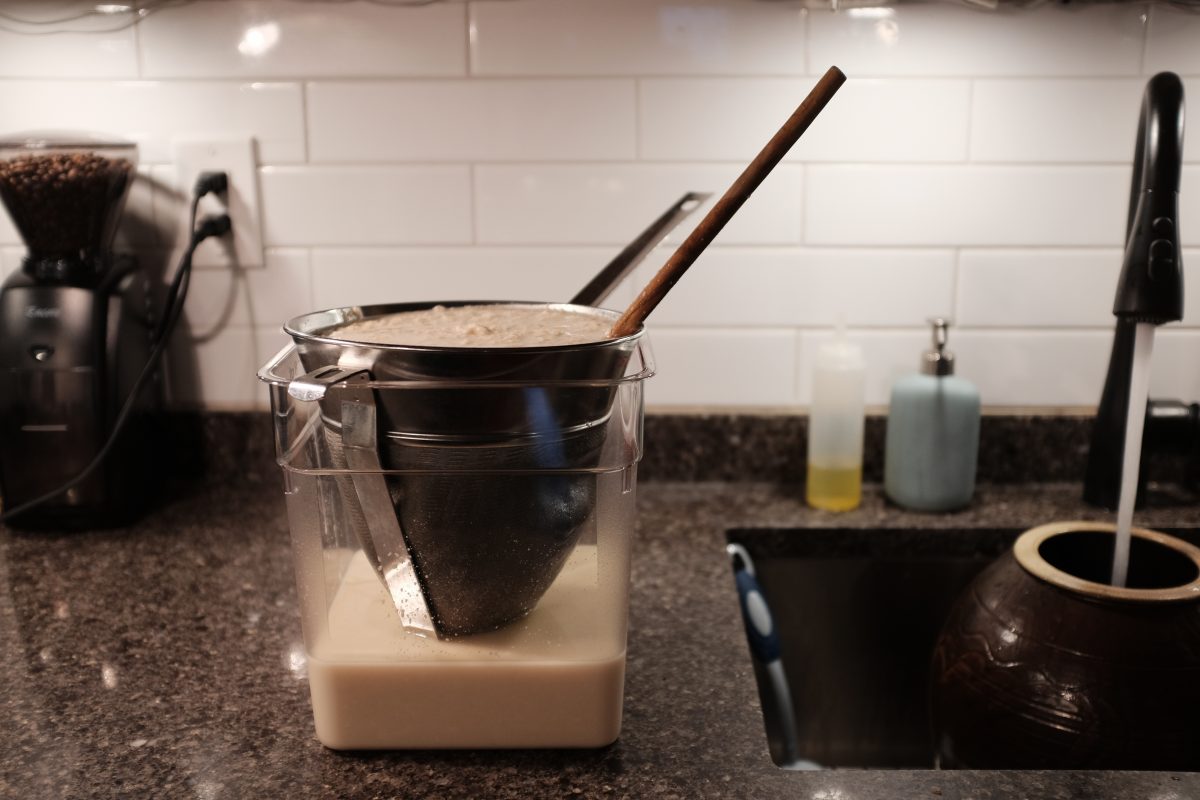
Terminology around nuruk-fermented rice alcohol and how to enjoy your brew:
Depending on a few different factors, there a few different categories of rice alcohol. Without going into a lot of detail, here is a basic list:
- Makgeolli: sedimented brew with less than 10% alcohol
- Takju: sedimented brew with more than 10% alcohol
- Yakju: clarified rice brew (the clear top layer in the above picture)
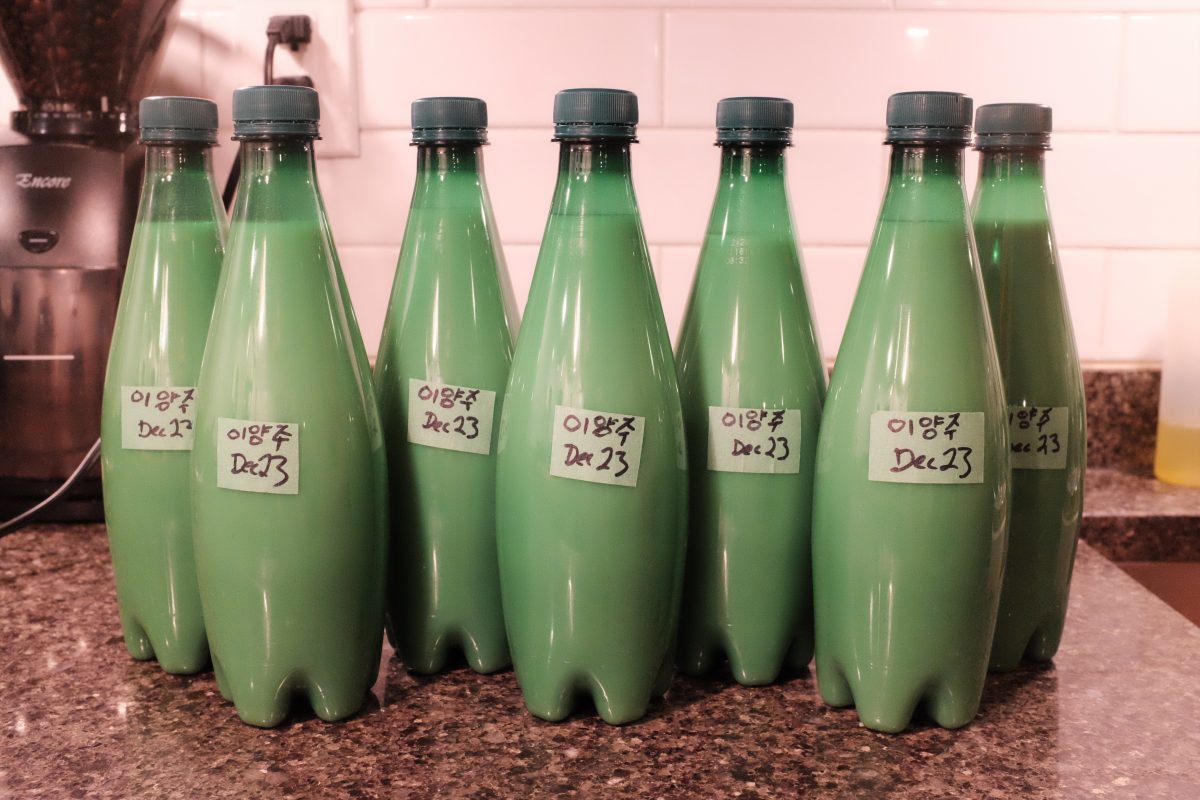
Our two-stage brew, long-fermented in a cool environment will almost certainly have more than 10% alcohol by volume. This means that it is a “Takju” and I think it is best to drink it as is. Gently turn the bottle over a few times to distribute the sediment and enjoy.
If you leave the bottles to rest, after a week or so, all of the sediment will settle to the bottom and there will be a very clear sediment-free layer on top. This is “Yakju”. You can pour it off slowly so as not to disturb the sediment and enjoy just the clear alcohol on it’s own. You can also pour it off, rebottle only the clear layer and age it indefinitely. It will change and develop new flavours over time.
If you pour off the Yakju, and dilute the sediment with fresh water, you will end up with a weaker drink in the under 10% alcohol range: this is Makgeolli. OR..you can also dilute your Takju with water to lighten it up and bring the alcohol concentration down…this would also be Makgeolli.
If I want something really refreshing and thirst quenching to drink with spicy food, I will often dilute my Takju with sparkling water. The brew is lighter and slightly fizzy and the flavours open up in a little different way…similar to the way an ice cube or a little water affects Scotch whiskey.
Commercial Makgeolli:
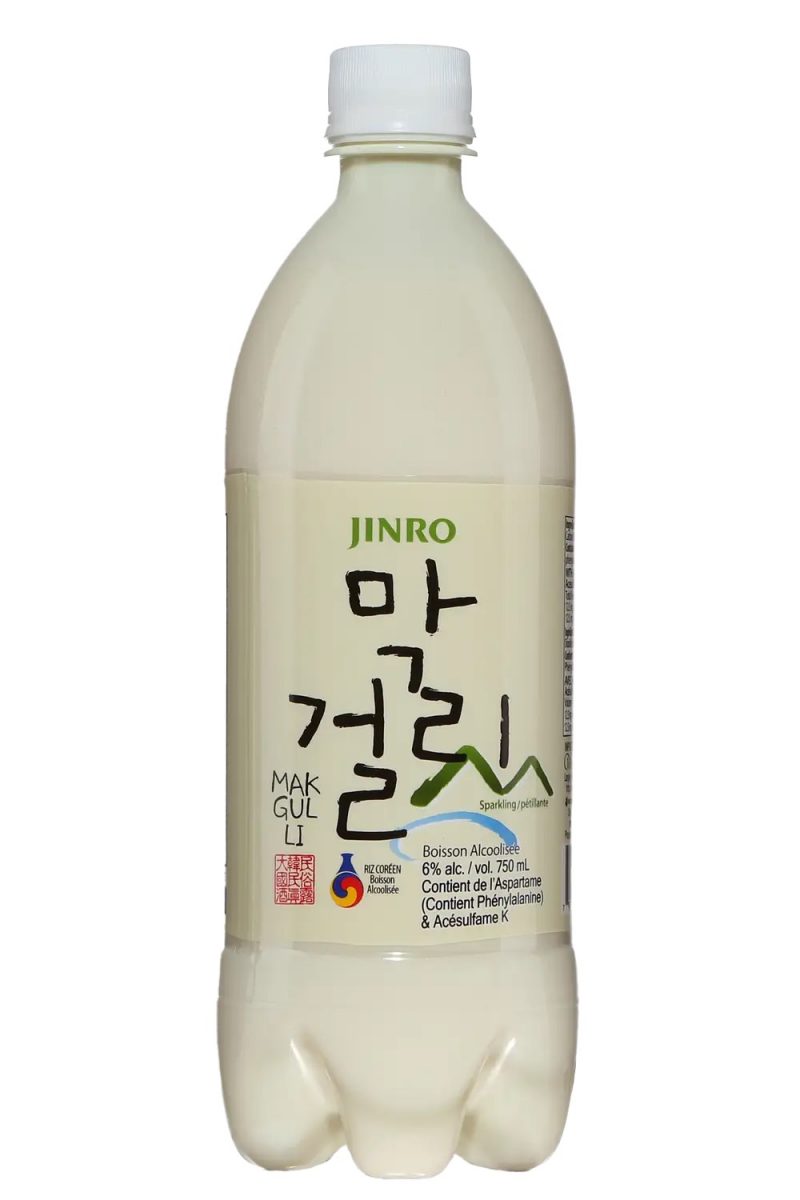
You have probably seen plastic bottles of commercial makgeolli at your local liquor store or in convenience stores in Korea. This cheap and tasty drink has it’s own charm but it does not have that much in common with a traditionally fermented brew like we have made. This commercial Makgeolli is usually fizzy, watery, has very low alcohol content and it surprisingly sweet, almost like a soda. It is sweetened with aspartame to make it more palatable and to prevent further fermentation in the bottle (and pressure related accidents while it is transported).
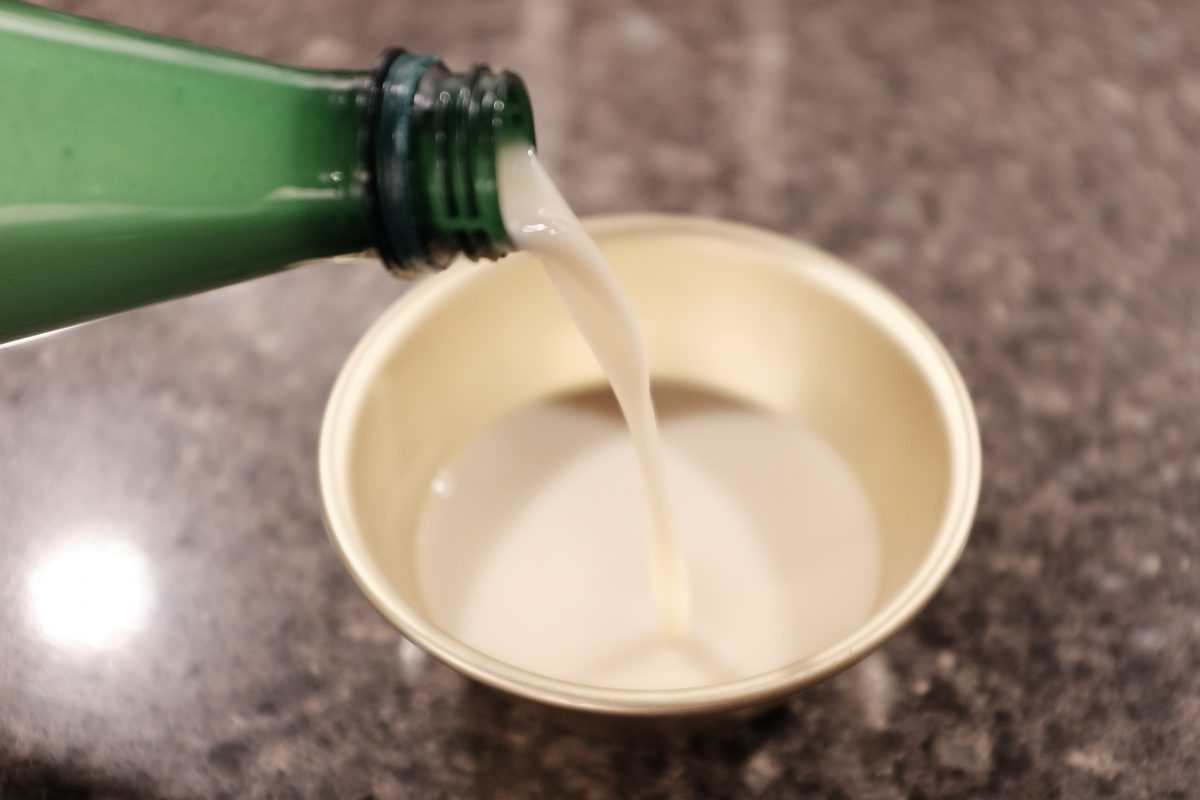
In contrast, our home brew has little to no fizz, a much higher alcohol content and is not especially sweet. In fact, it will lean closer to the dry and tart side with complex rice-y, boozy flavours and a thick creamy mouthfeel. You will taste and feel the alcohol very quickly. It is delicious! And, it is unlike anything else. Korean rice alcohol is entirely it’s own thing and it is next to impossible to compare it to any other brew.
Commercial brewers making traditional Korean sool
Over the last 5 years or so, some commercial brewers of traditional Korean sool have emerged. The first in the US was Hana Makgeolli, founded by Alice Jun. Alice and her team have produced a range of small-batch rice brews ranging from traditional Takju to, most recently, a potent full-strength Soju 60. I have linked a video below of Alice explaining the range of traditional Korean sools as well as Hana Makgeolli’s current offerings.
It was probably close to 10 years ago that I had the pleasure of meeting Alice in New York City when she was still developing recipes in her Brooklyn apartment. I got to sample an early brew “under the table” over Poke-bowls at a Manhattan SunriseMart. To this day, it is still one of my best New York experiences! Alice is one of the loveliest and most generous people I have met and she has a deep understanding of Korean rice alcohol, learning first-hand as a child helping her dad with traditional home brews. I highly recommend having a look at the above video for a comprehensive Sool School and if you are lucky enough to be able to try Alice’s brews in person, don’t hesitate to visit her shop and brewery.
As always, if you have any questions, comments or suggestions, please leave them below. If you try this recipe and like the results, please let me know. I hope you enjoy making your own rice brew as much as I do. Cheers! : )
If you enjoy the content and would like to contribute towards website maintenance and development, you can make a donation here.
Samgyetang
What is samgyetang?
Samgyetang is ginseng chicken soup. “Sam” for insam (인삼), the Korean word for ginseng; “gye” refers to chicken; “tang”(탕) is a soup. It is a hearty and delicious soup that tastes great during chilly months. It is also surprisingly popular during the hottest days of the year in Korea where eating steaming hot food is believed to have a cooling effect on the body.
My first time…
The first time I ate this soup was on a chilly afternoon in Seogwipo City on Jeju Island. Hungry and cold, I was wandering around an area known for restaurants. It was the off-season so many restaurants were closed and most others were serving Jeju black pig samgyeopsal, something that is difficult to eat on your own. Feeling defeated, I decided to go to a nearby convenience store to at least buy some kimbap. On my way I spotted a small house with a sign that simply said “삼계탕” (samgyetang) but this little house didn’t look like a restaurant at all.
When I cracked the door open to peek inside, I was surprised to see an older woman sitting on the floor in front of her sofa, watching TV. I quickly apologized and tried to leave, but she got up and gestured for me to come inside. Hardly knowing any Korean, I simply said “samgyetang”? She nodded and gestured for me to sit on the sofa. She unfolded a small square table in front of me and then disappeared. I sat alone in this room, watching TV and silently wondering if I had made some kind of a mistake. But, a few minutes later, she came back smiling and put 2 or 3 dishes of simple banchan on the table in front of me. And, a little after that, she came back with a steaming black earthenware bowl containing a single small chicken in a bubbling broth.
I ate this delicious steaming meal as fast as I could without burning my mouth. The woman seemed pleased when she saw all the empty plates. I gestured to pay, she accepted my money with a nod and a smile and I was on my way.
That meal seems like a mystery to me to this day. Was it really a restaurant? Was it a dream? It seemed like some kind of a magical chapter in a book. Someday I will return to investigate. These are the best kinds of travel experiences. There is something deeply lonely about traveling by yourself, but I think that it also opens many doors that may not have otherwise materialized at all. Like the door to this little house where I first ate samgyetang on a chilly afternoon on Jeju Island, perched on the edge of a sofa watching TV.
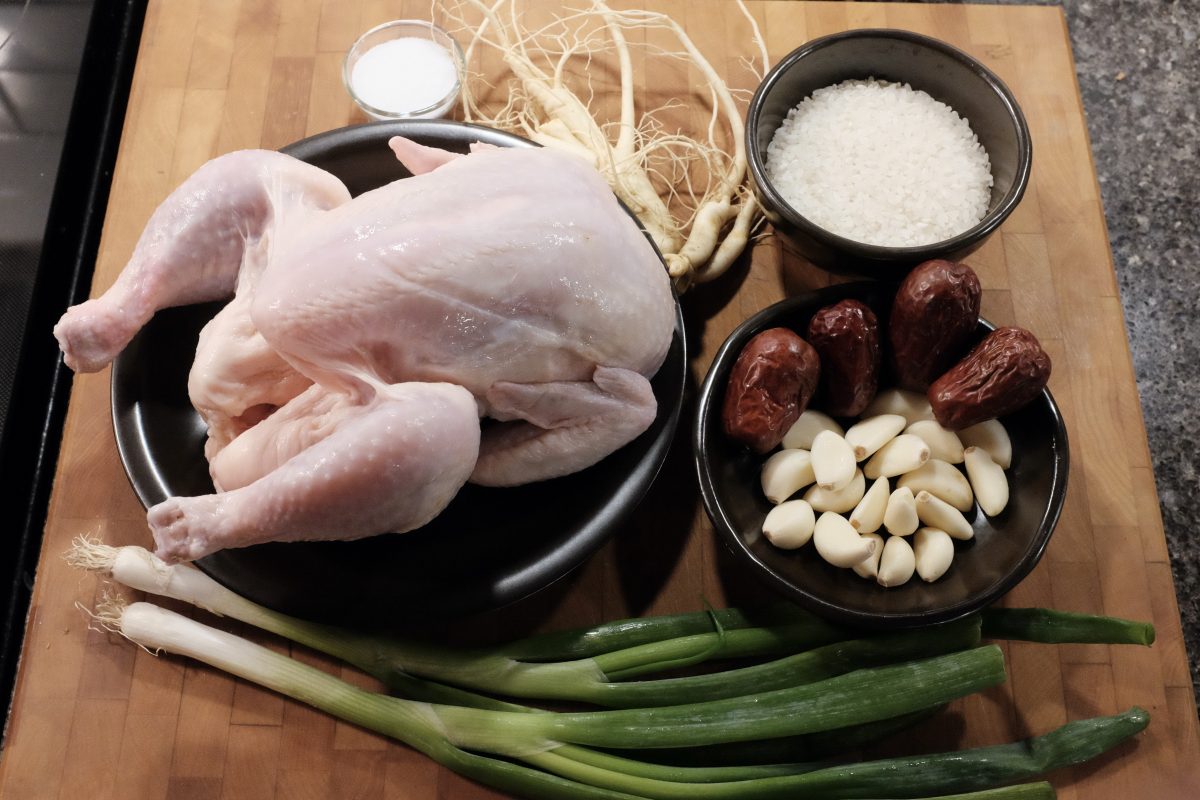
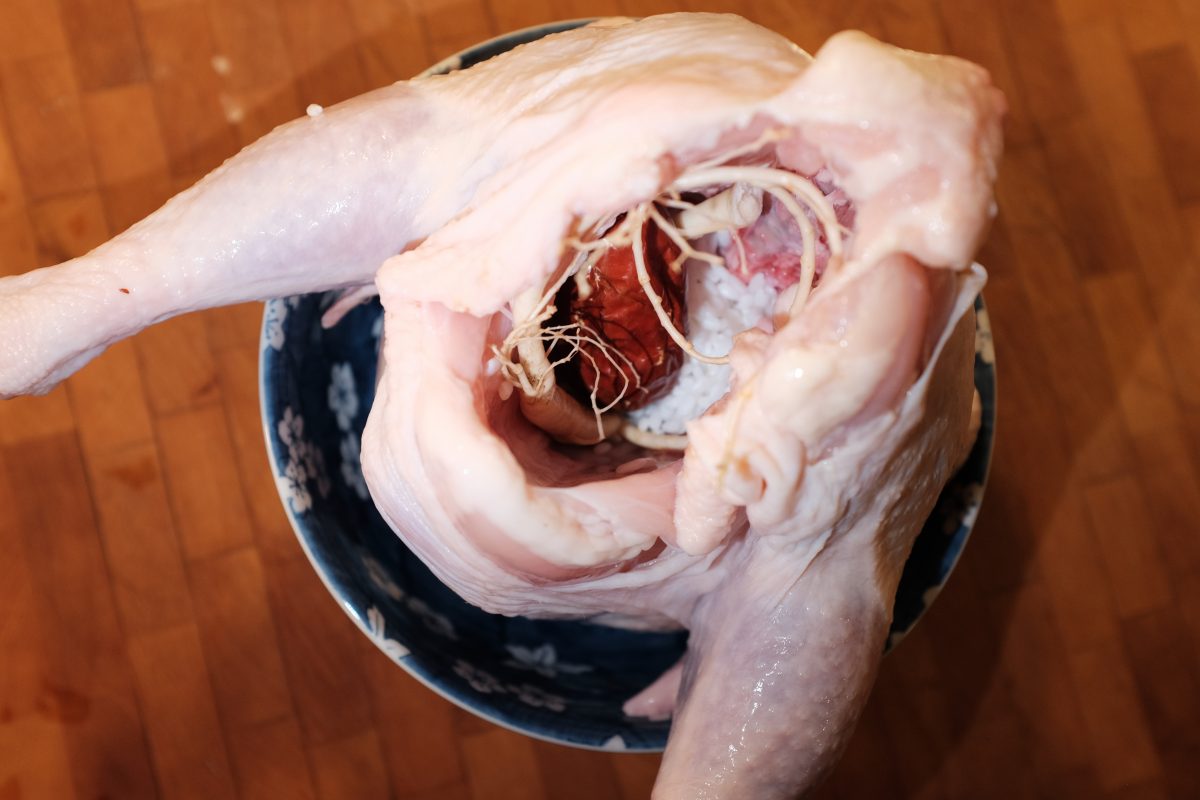
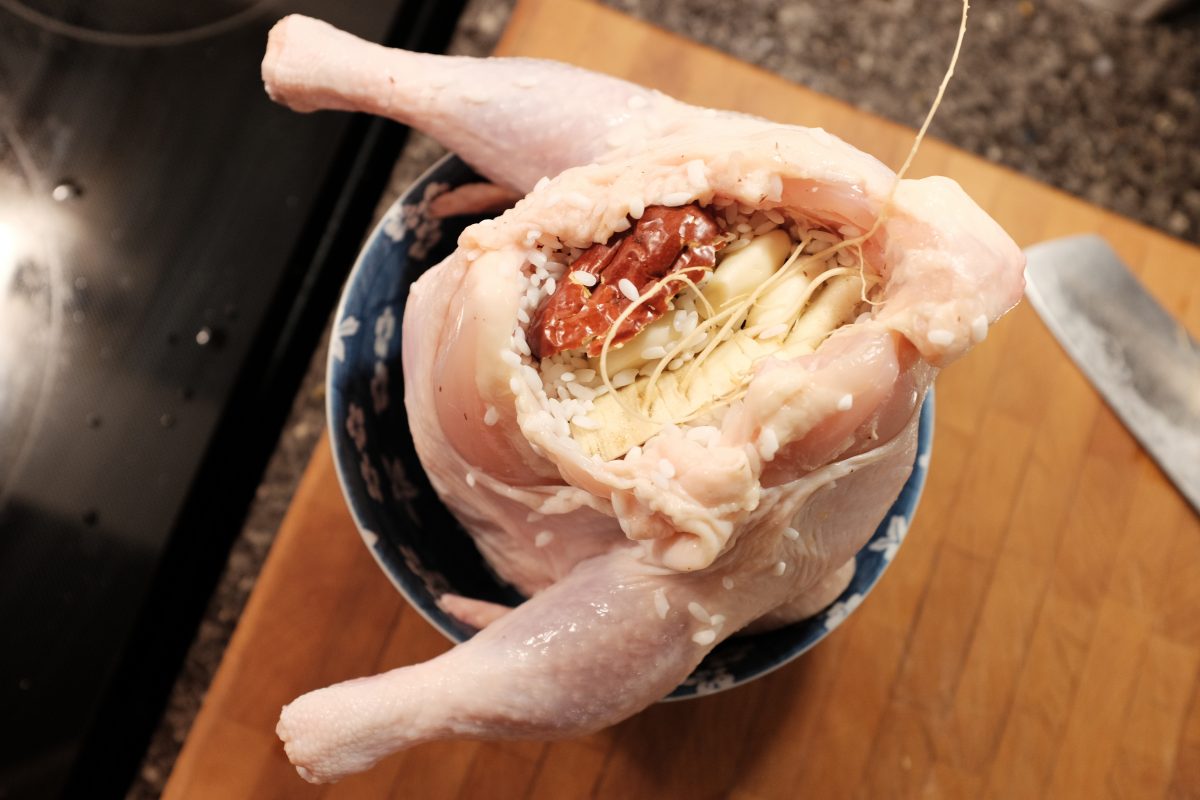
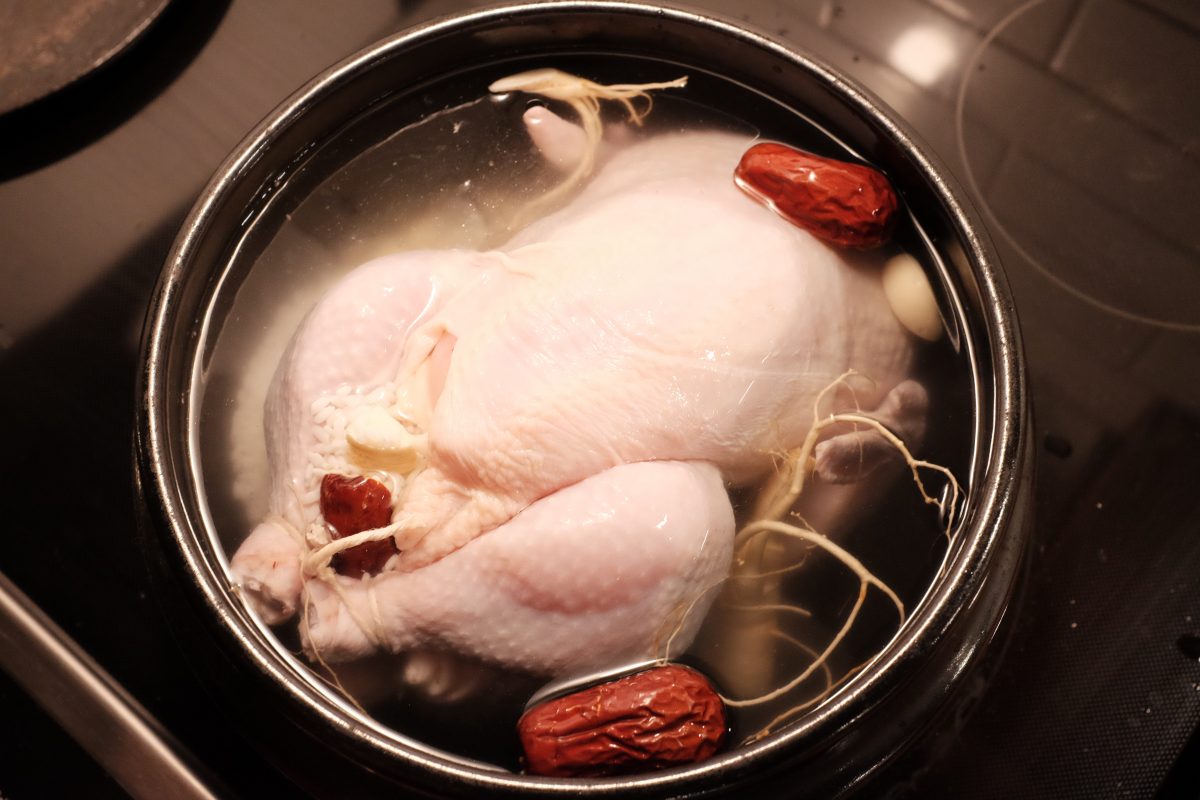
Ingredients
I made this recipe in a single large pot with a small whole chicken to eat family style. If you prefer, you can also make 2 separate portions out of this using the same amount of ingredients and 2 Cornish hens instead. It looks prettier when you serve each person their own whole bird and it is a lot less messy. Chickens are quite a bit less expensive and easier to find than Cornish hens so this is what I usually use.
- 1 small to medium chicken (or 2 cornish hens)
- 15-20 whole cloves of garlic
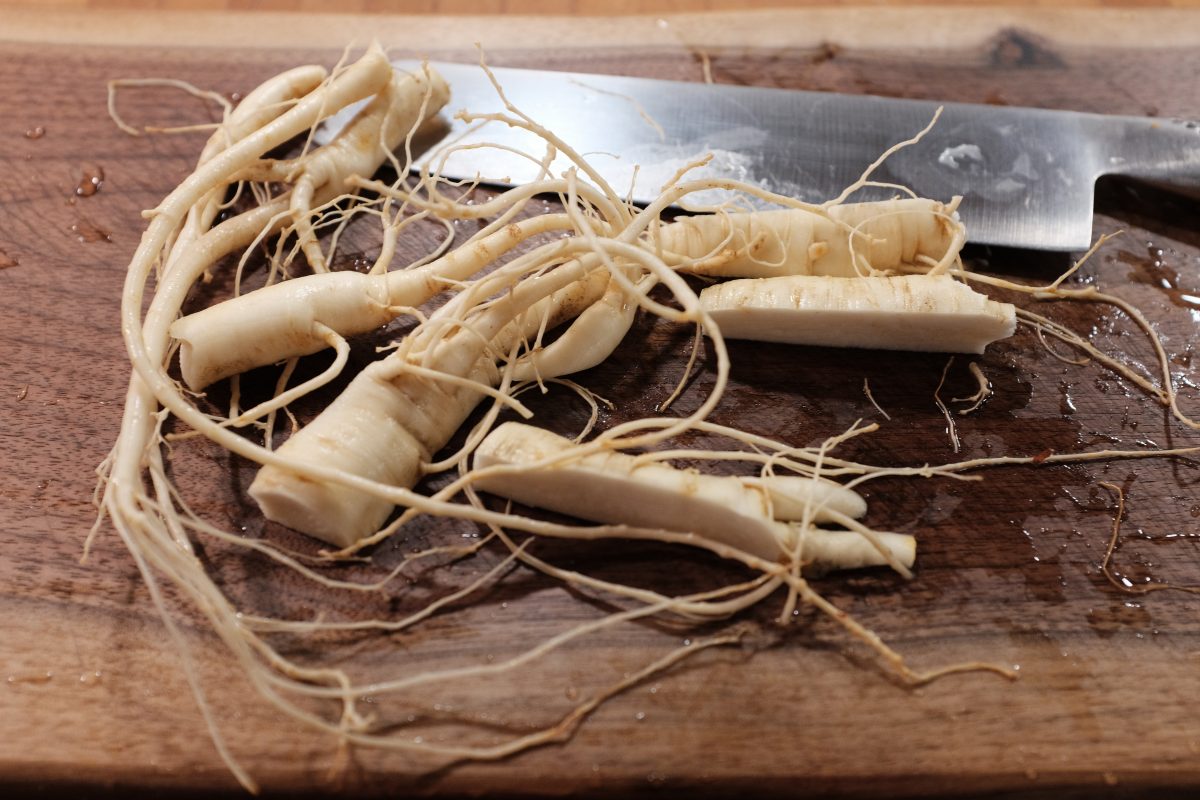
- 2 fresh ginseng roots
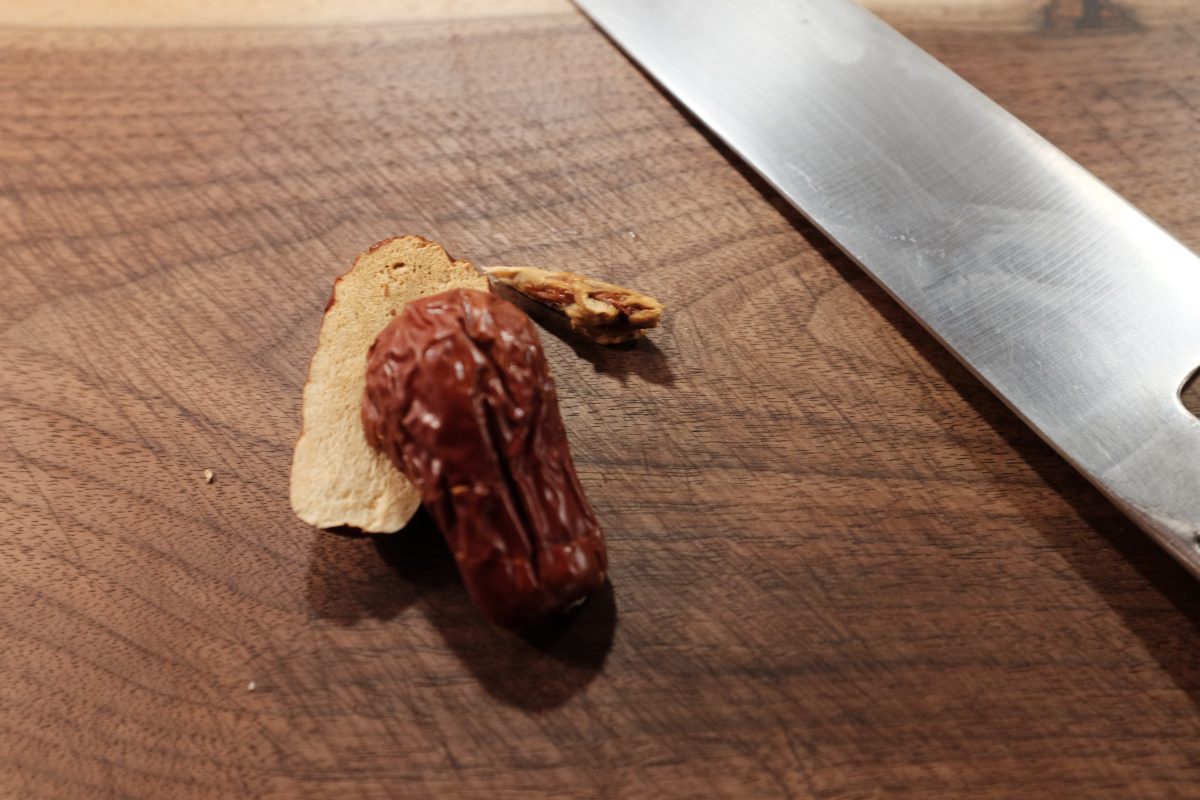
- 4 dried red dates (jujubes/daechu)
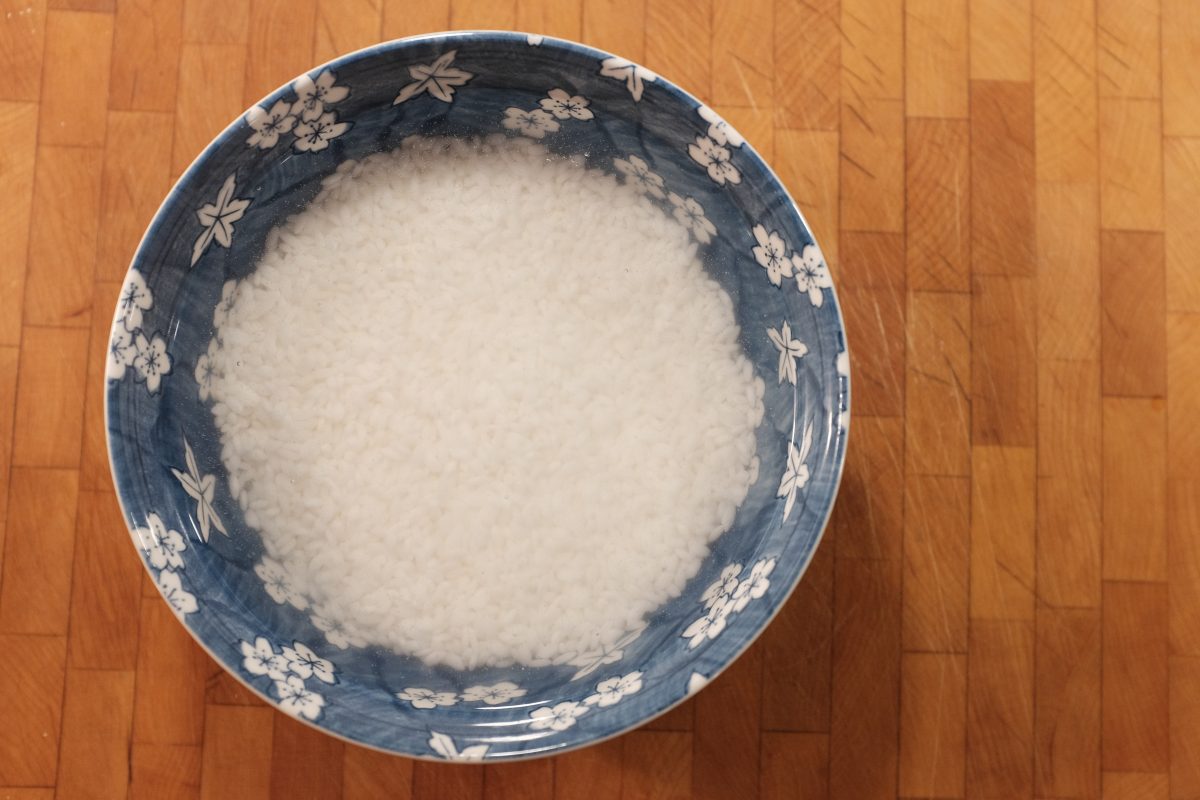
- 1 cup short grain rice (you can substitute with glutinous rice/chapssal)
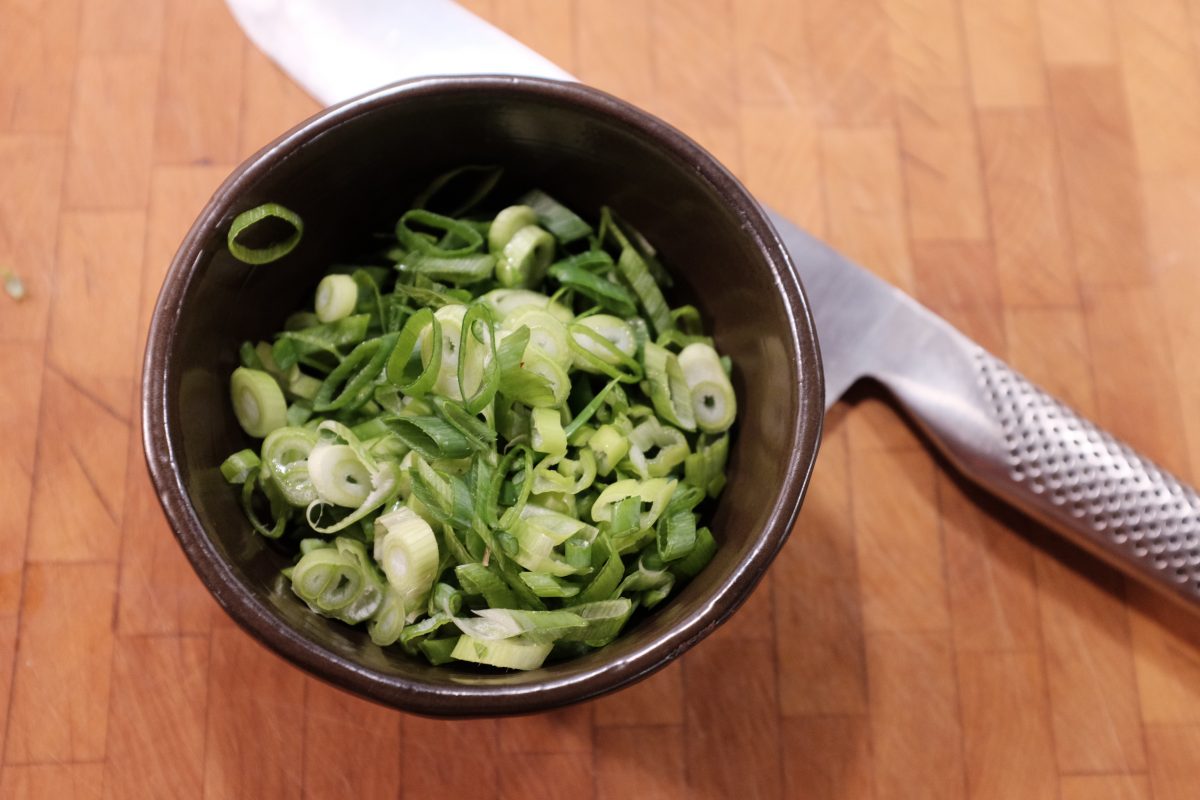
- 2 green onions
- salt and pepper
I am always able to find fresh ginseng at Asian grocers. Same goes for red dates: you may see these called Chinese red dates, jujubes or daechu (대추).
***At the end of the soup recipe there is a recipe for dipping sauce to go with it. Scroll to the bottom for that one. You can make it while your chicken is cooking.
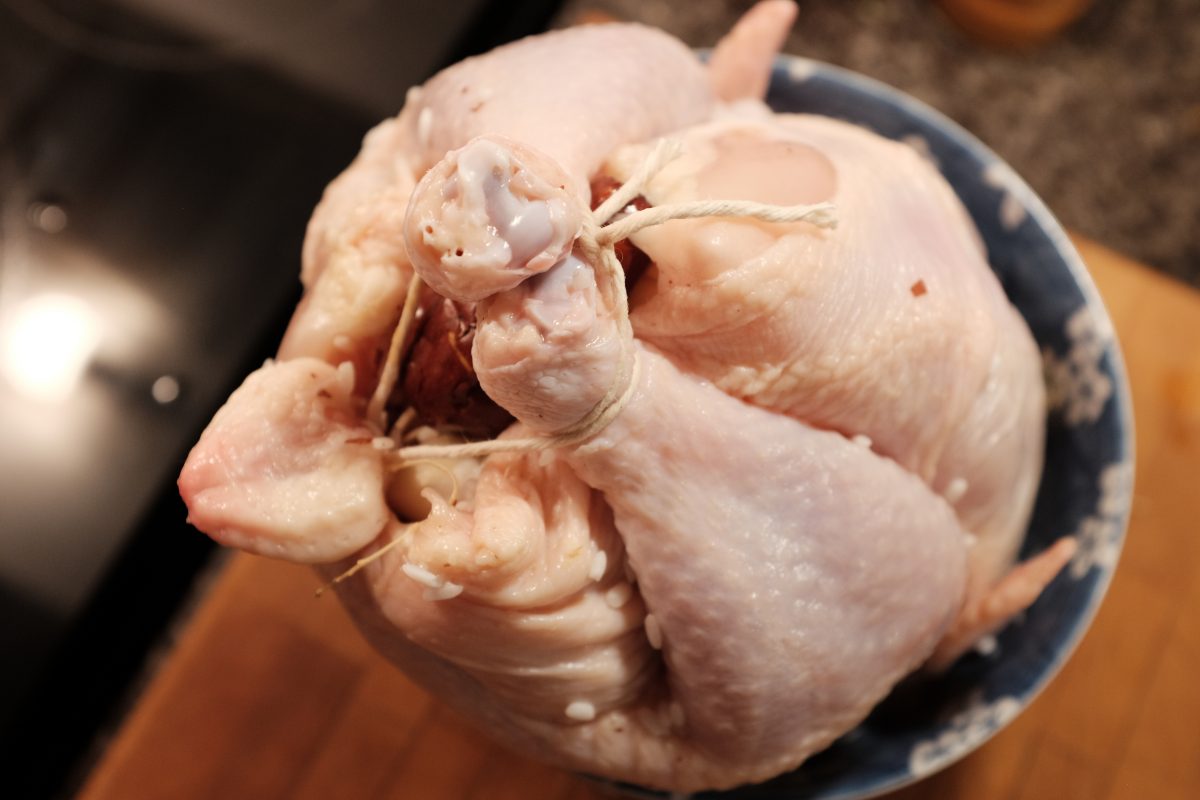
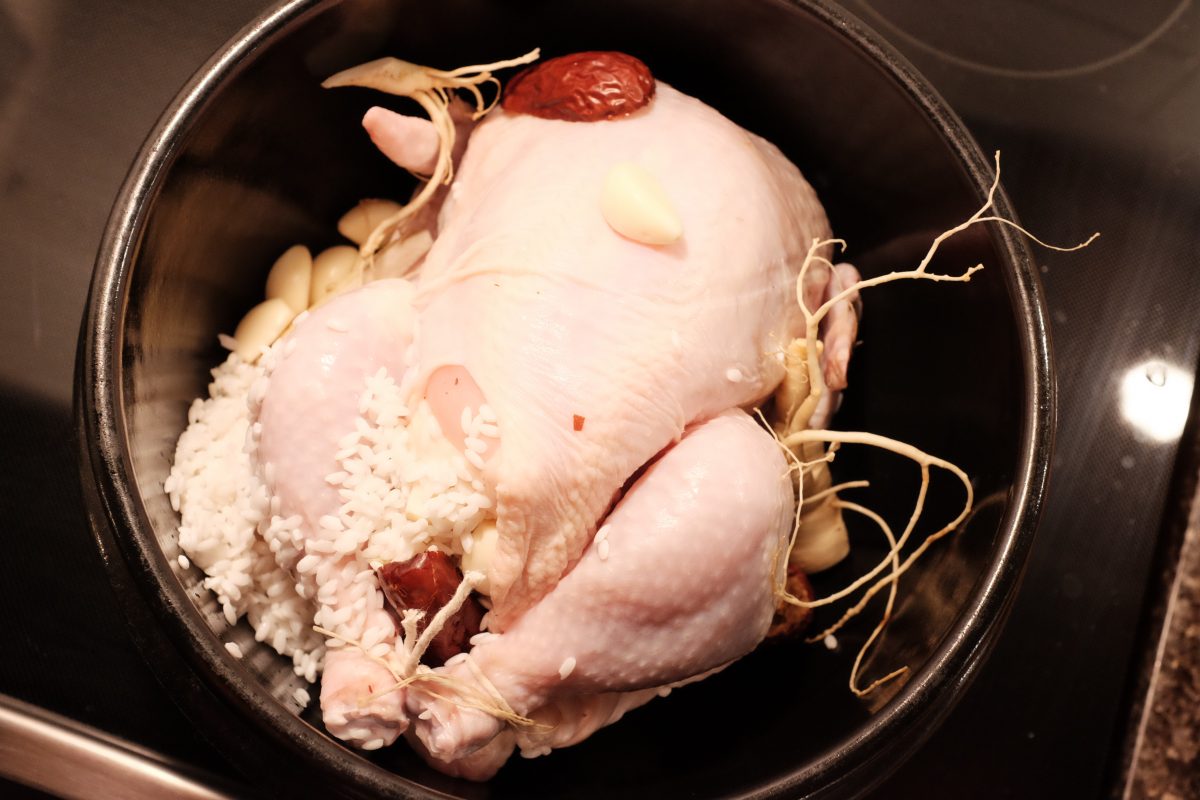
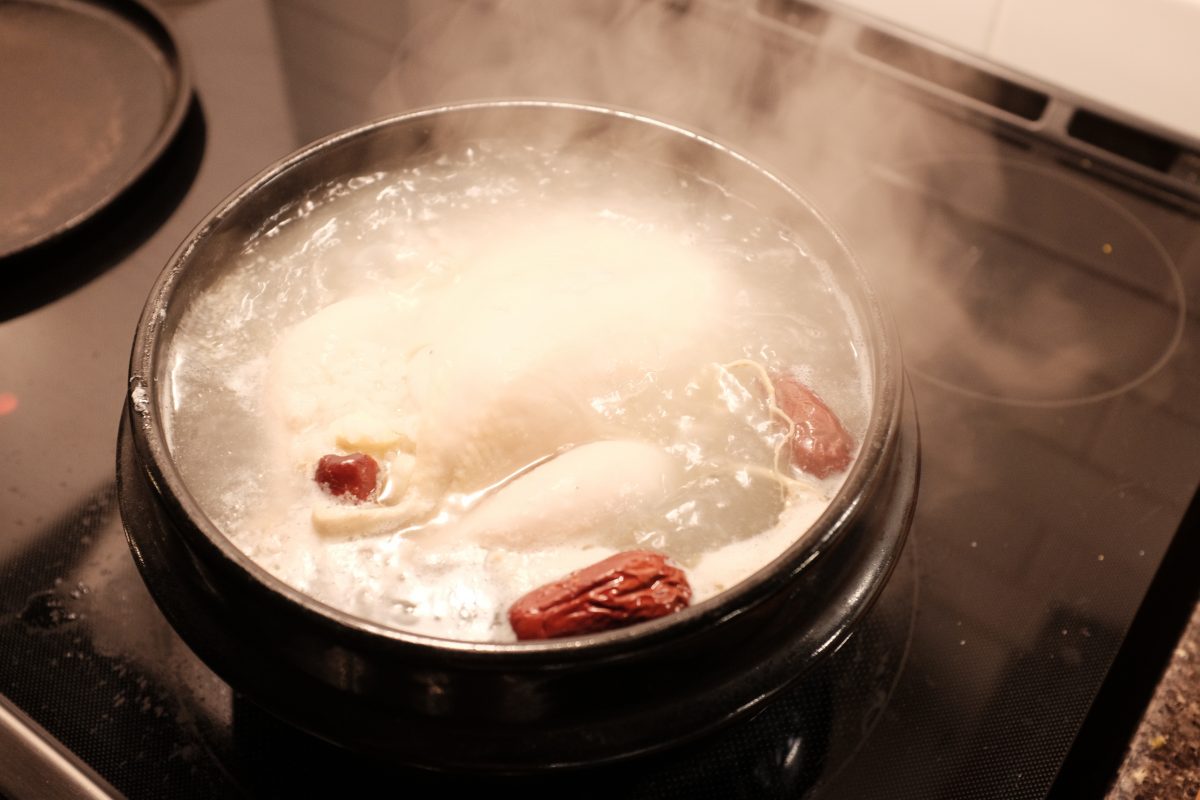
Process


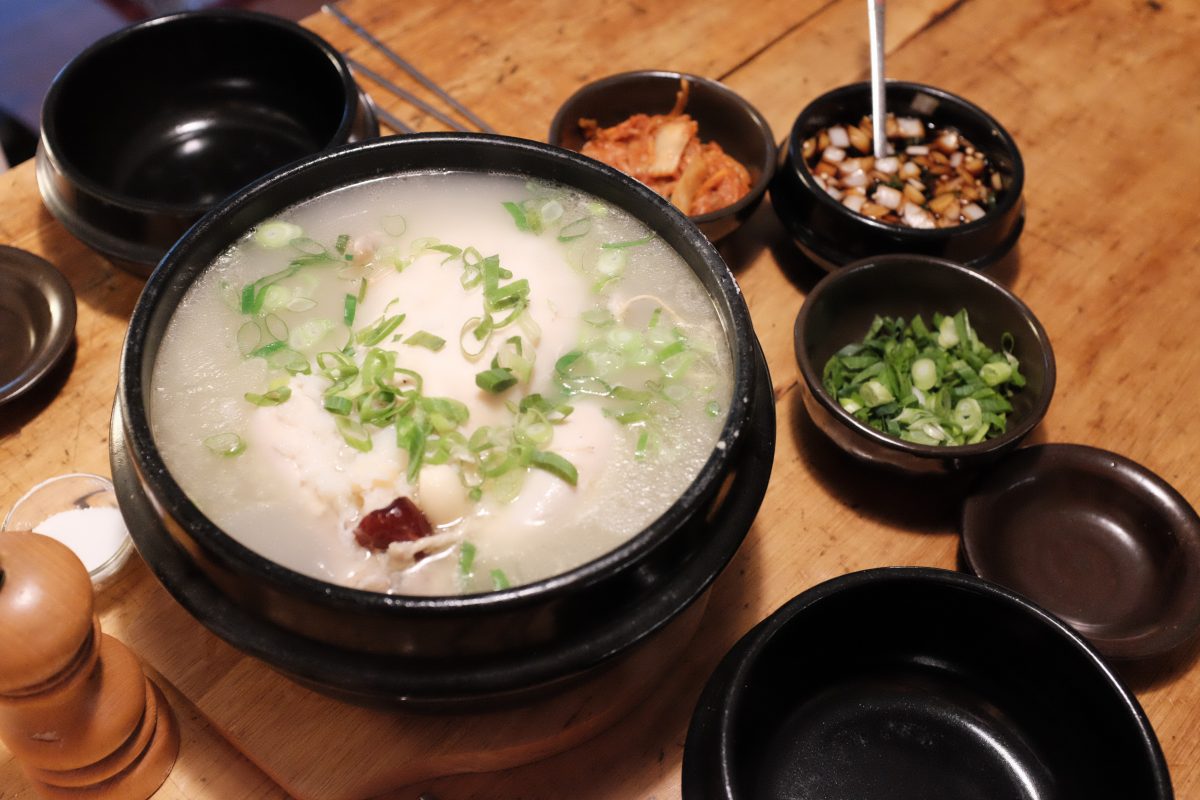
Serving
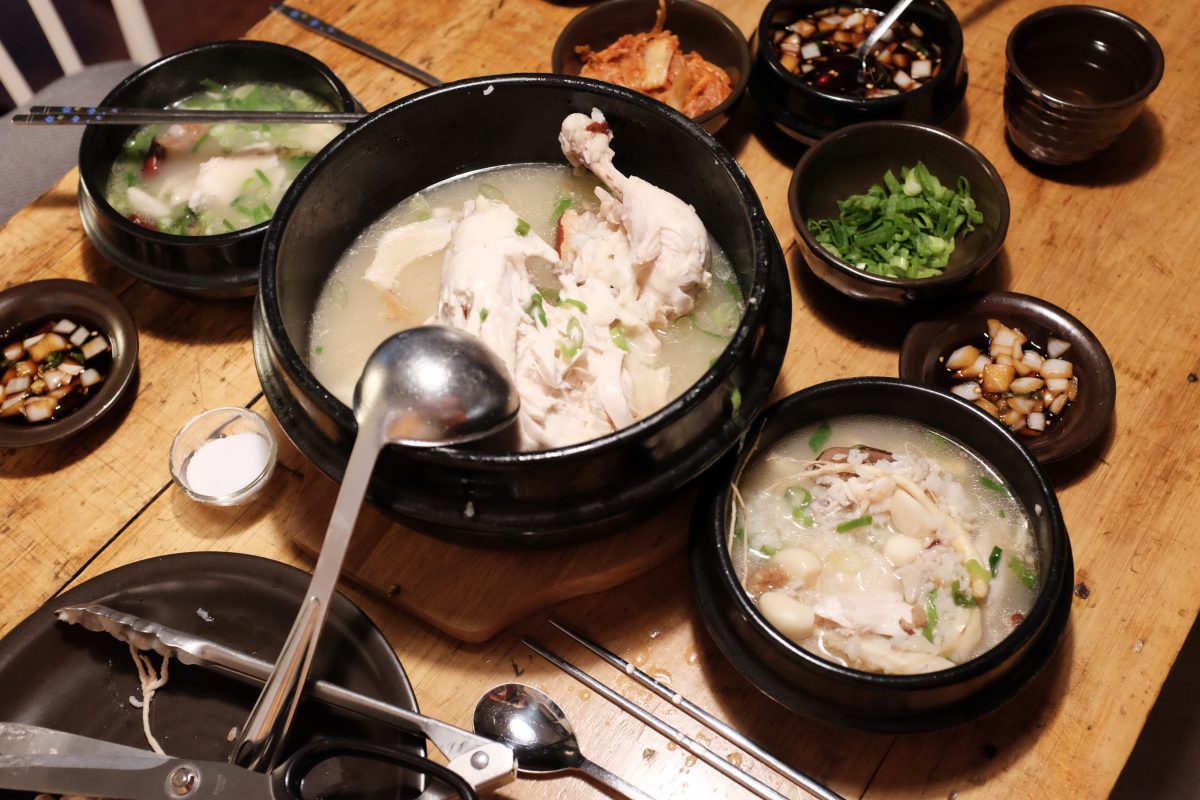
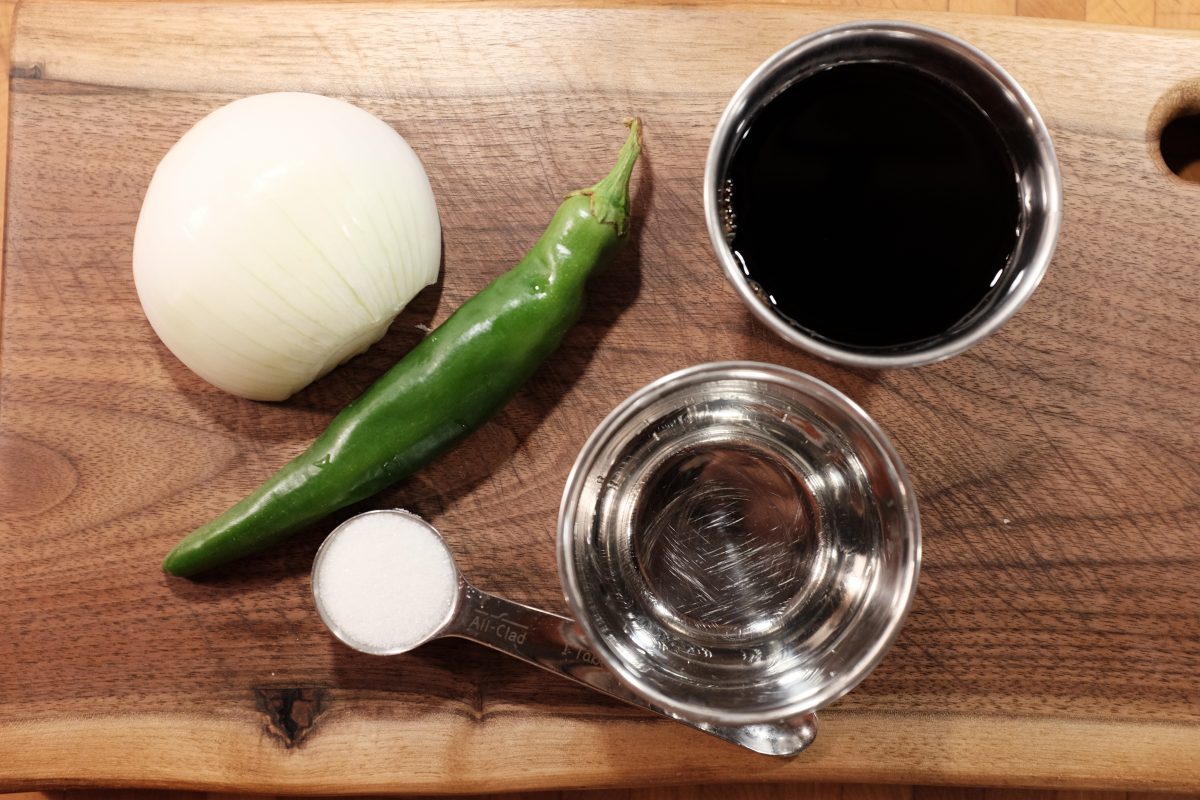
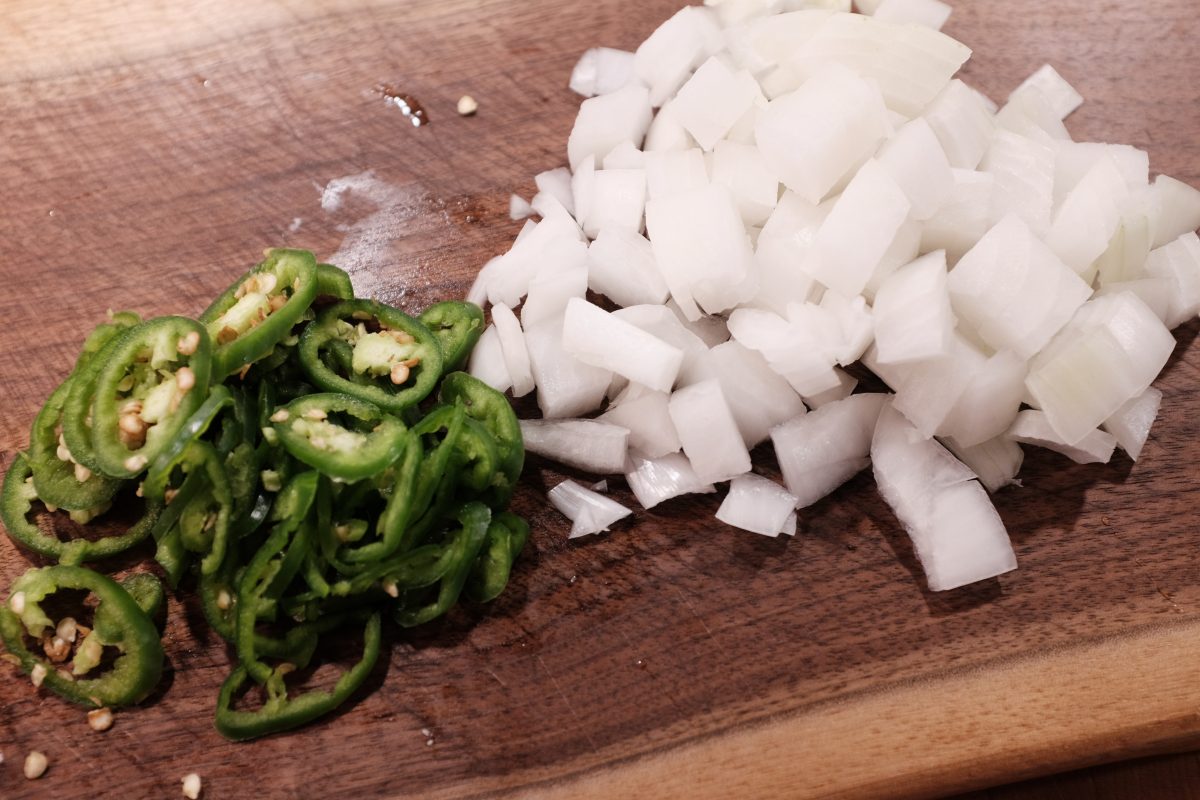
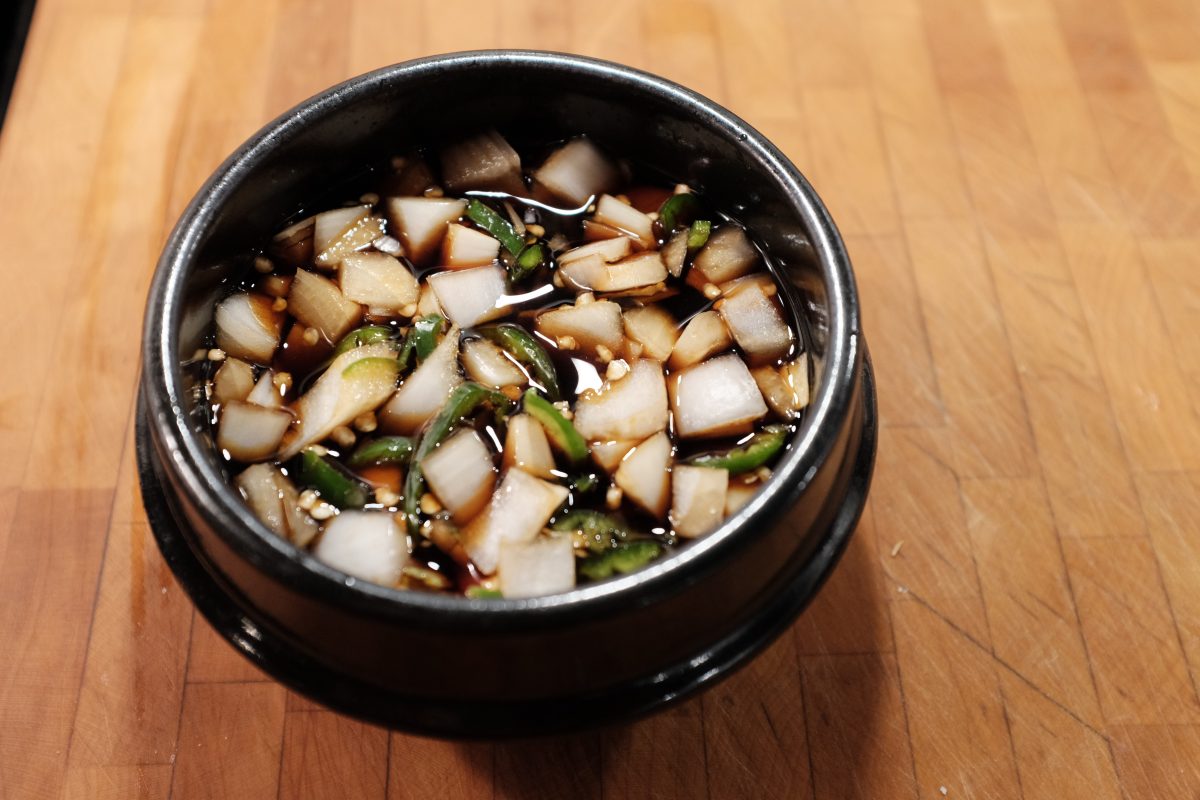
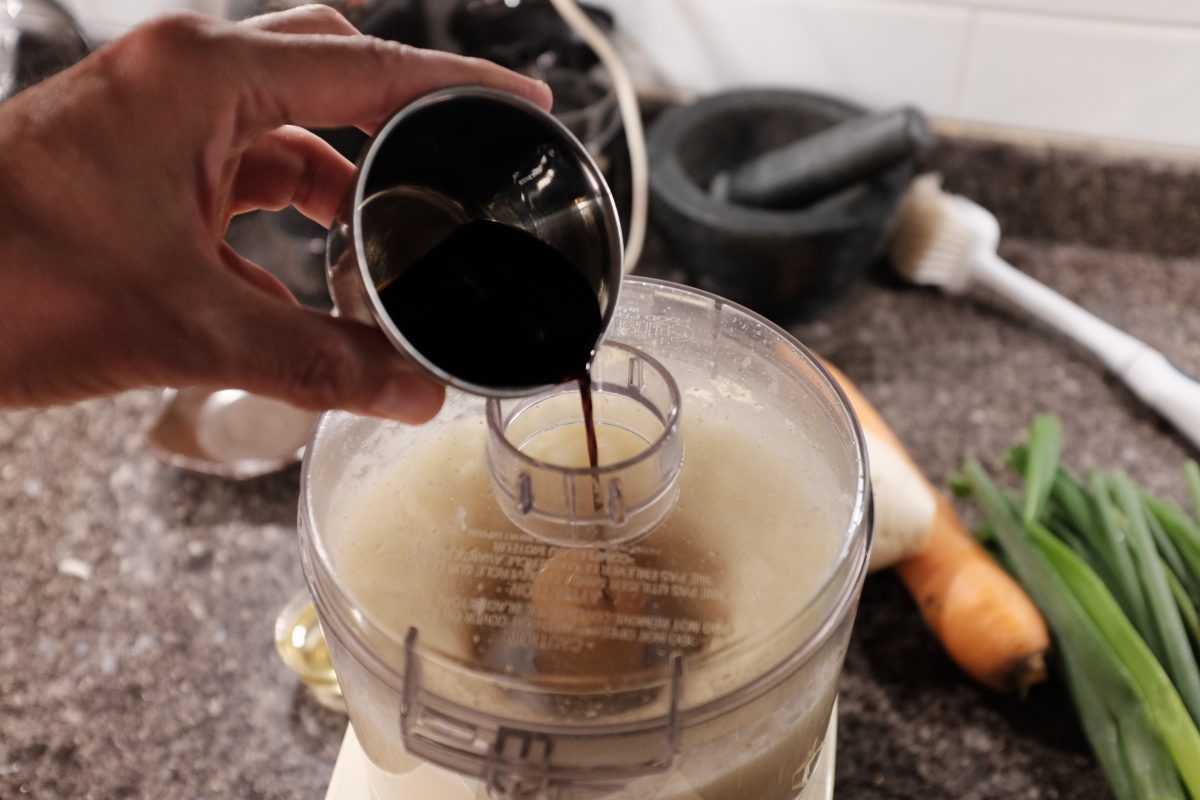
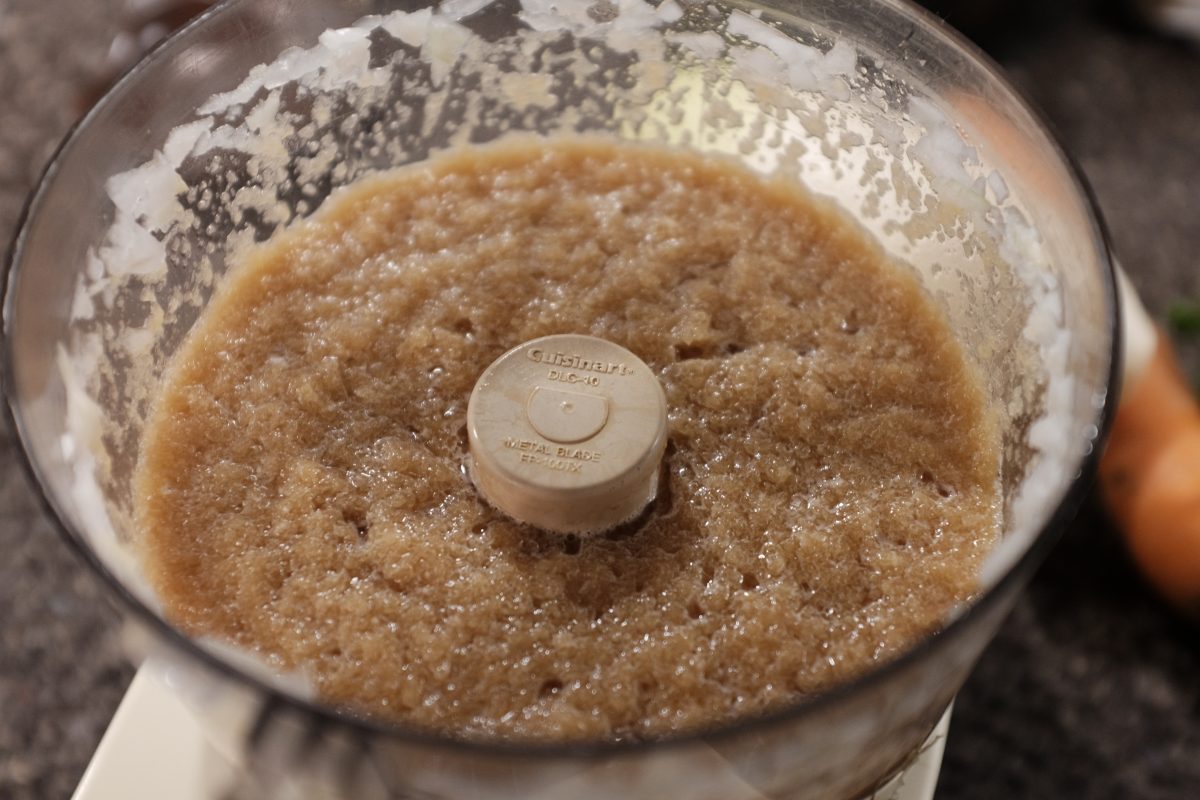
Soy and vinegar dipping sauce
Ingredients
- 100ml (around 6 tablespoons) brewed soy sauce
- 50ml (around 3 tablespoons) white vinegar
- 12-13gr (1 tablespoon) white sugar
- 1/2 medium white onion
- 1 green long chile or jalapeño
I like regular harsh white vinegar for this recipe. You can substitute rice vinegar or apple cider vinegar but I would avoid using wine vinegars. Use regular brewed (Japanese style) soy sauce, not Korean soup soy sauce. Use an equal amount of honey if you prefer it over white sugar. You can leave out the chili altogether but, I would recommend just taking the seeds out if you don’t want any spice. The “greenness” of the chili adds alot of flavour here.
Process
This is one of my favourite soups. Hot and satisfying, it is especially good when you are feeling a little sick or run down. It is one of those meals that seems to instantly fortify the body much like my other favourite seolleongtang.
If you need a homemade kimchi recipe to go with any of your Korean cooking, click here.
If you have any comments or questions, please leave them below. Thanks for reading.
If you enjoy the content and would like to contribute towards website maintenance and development, you can make a donation here.
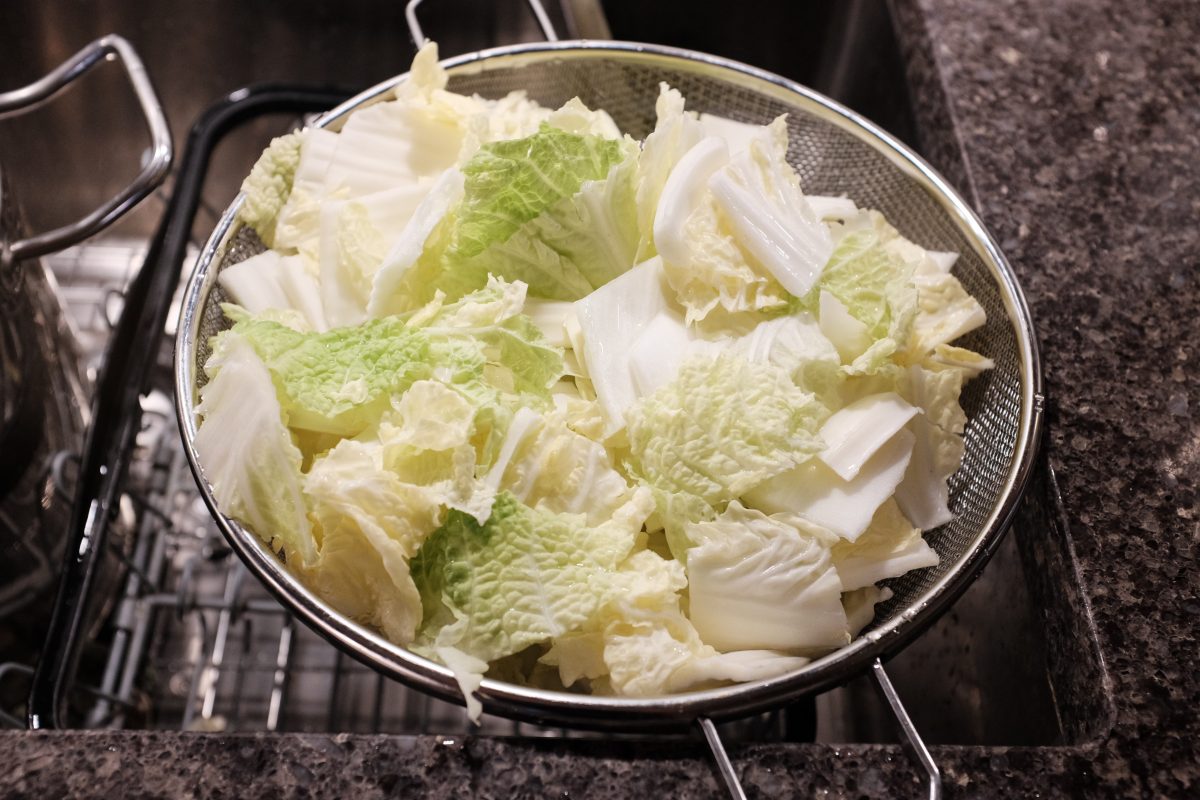
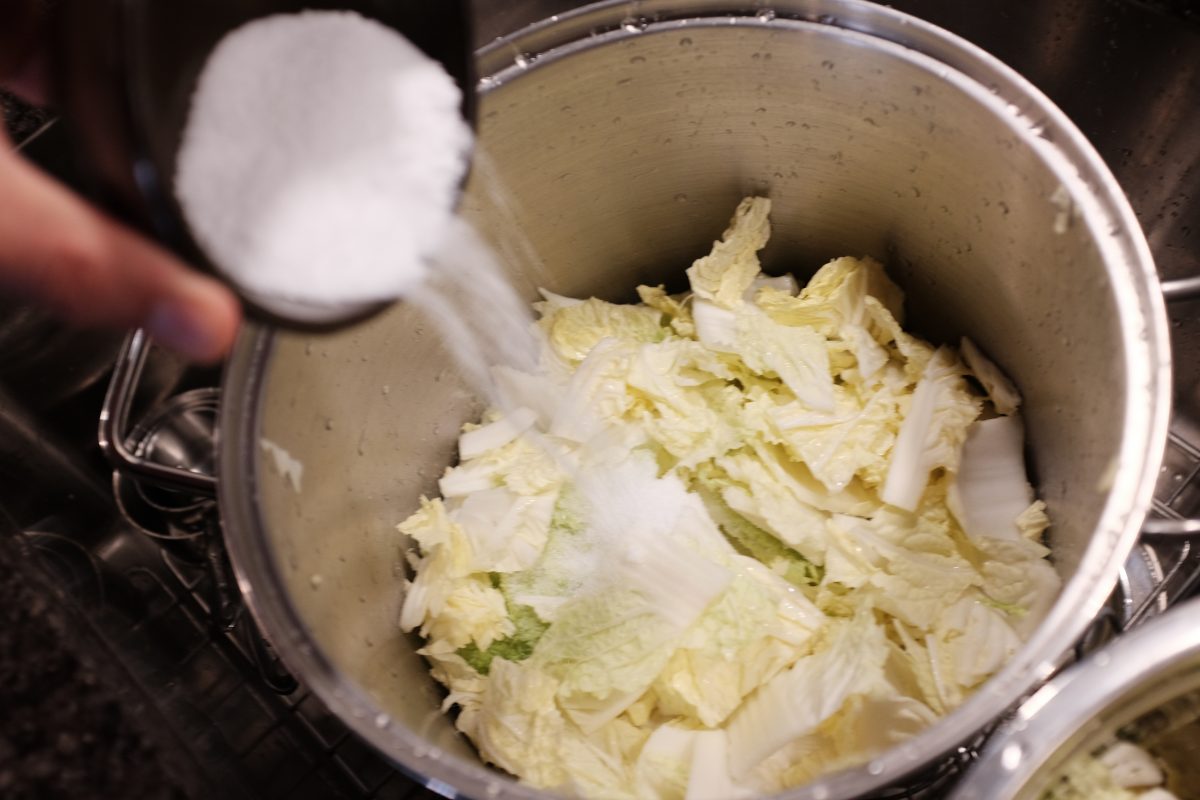
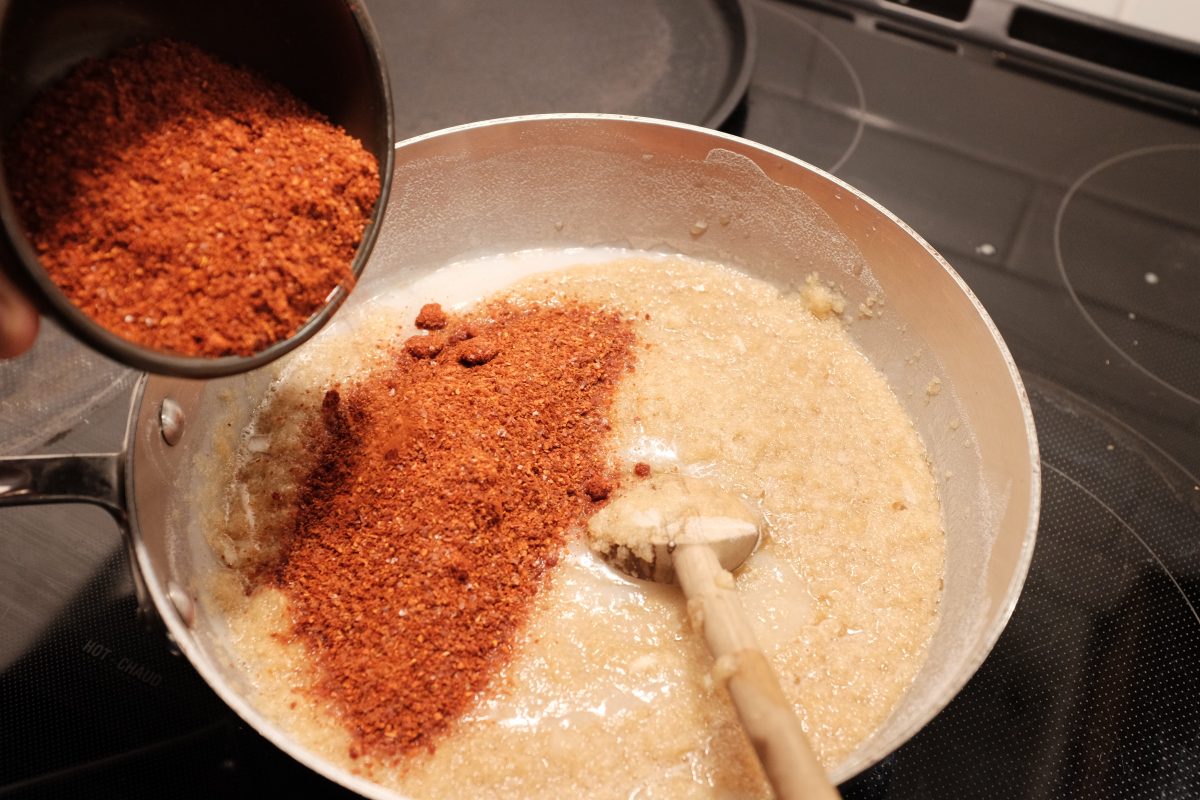
Vegan Napa Cabbage Kimchi
This is a tested recipe for anyone who does not eat meat, anyone with shrimp allergies or anyone who does not like the fishy taste of fish sauce. Once this recipe ferments, you will have a tasty vegan kimchi that you can use just like any other kimchi. It is a variation on a cut kimchi recipe that I posted previously. If you are interested in making a kimchi with all the seafood included or if you are interested in more information about kimchi in general, you can find that by clicking here.
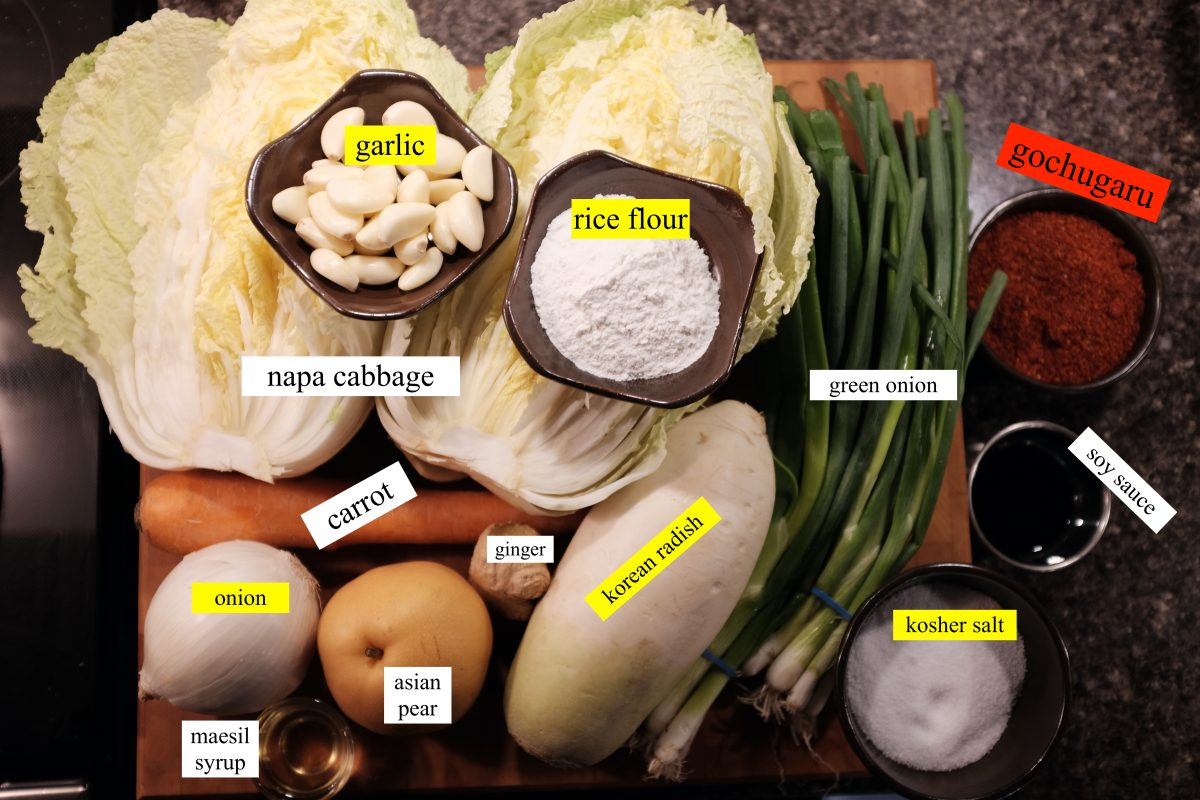
Ingredients
- 1 large (2kg) Napa Cabbage
- 80 grams/3oz (around 1/2 cup) Diamond Kosher Crystal salt for brining
- up to 2 Tablespoons kosher salt for seasoning (not for brining…save this for later)
- 1 tablespoon soy sauce
- 275ml (1 1/2 cups) water
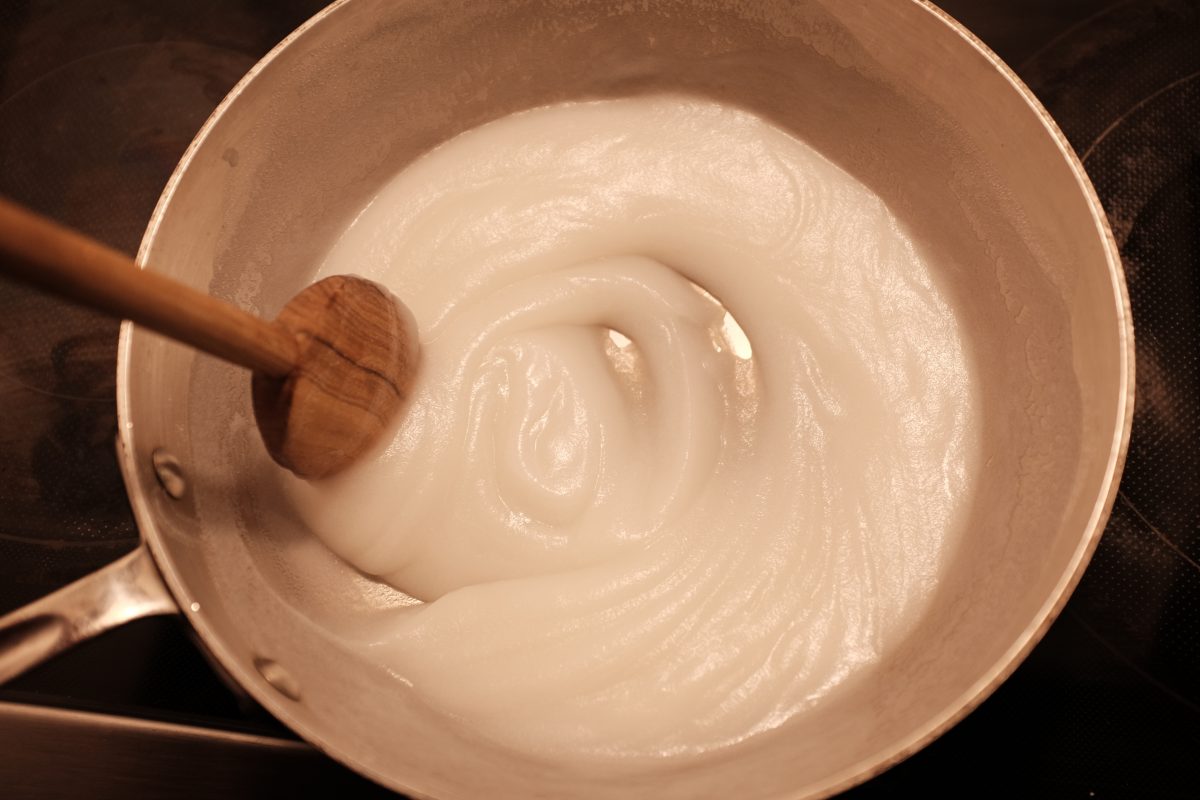
- 1/4 cup rice flour
- 1 tablespoon white sugar or maesil plum syrup
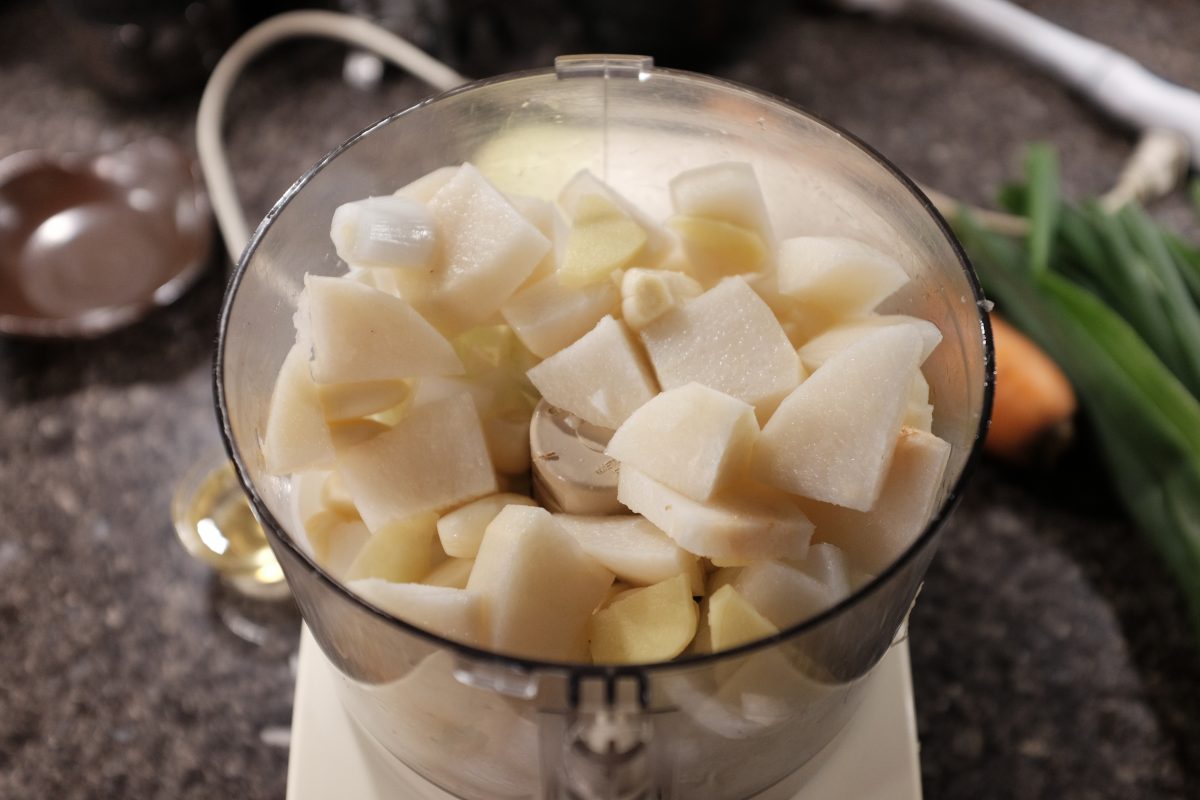
- 1/2 cup peeled garlic cloves (around 20)
- 1 tablespoon ginger peeled and sliced
- 1 white onion peeled and chopped
- 1 asian pear or apple peeled and chopped
- 1/4 up to 1 cup (30-120 grams) korean chili flakes (gochugaru)
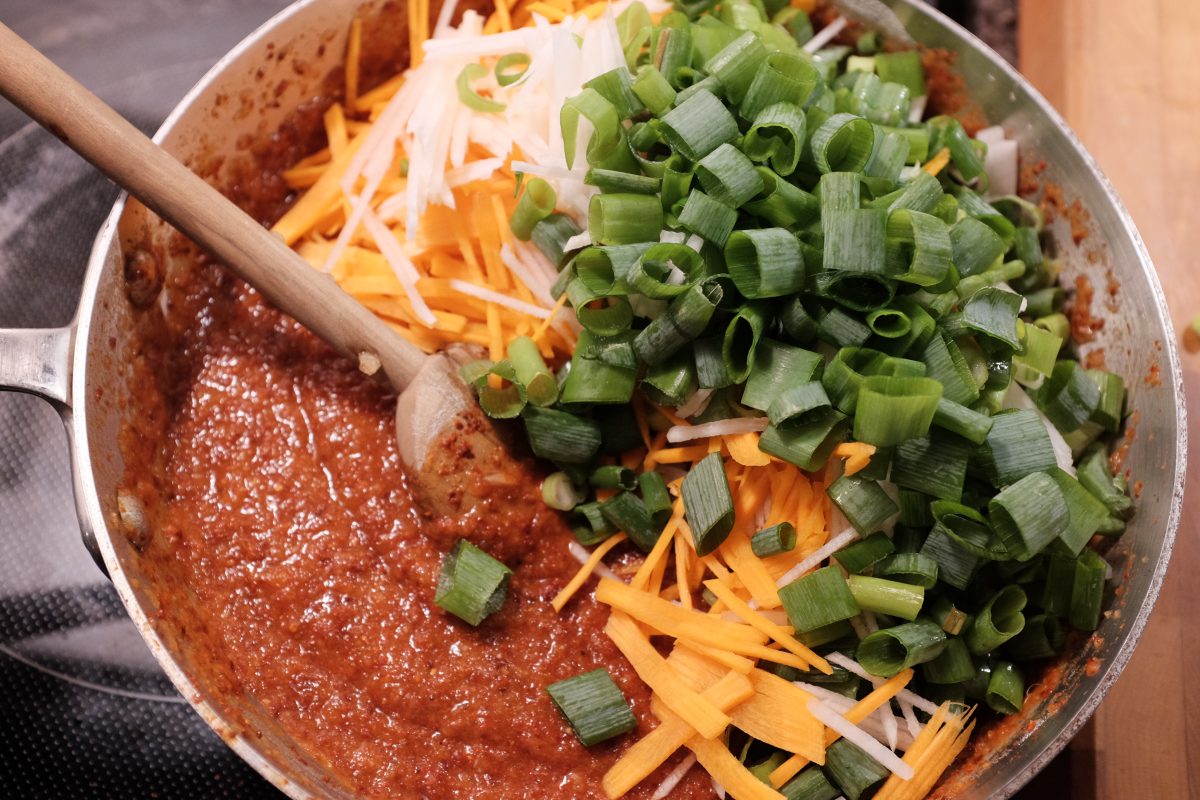
- 2 bunches (12 or so) green onions sliced
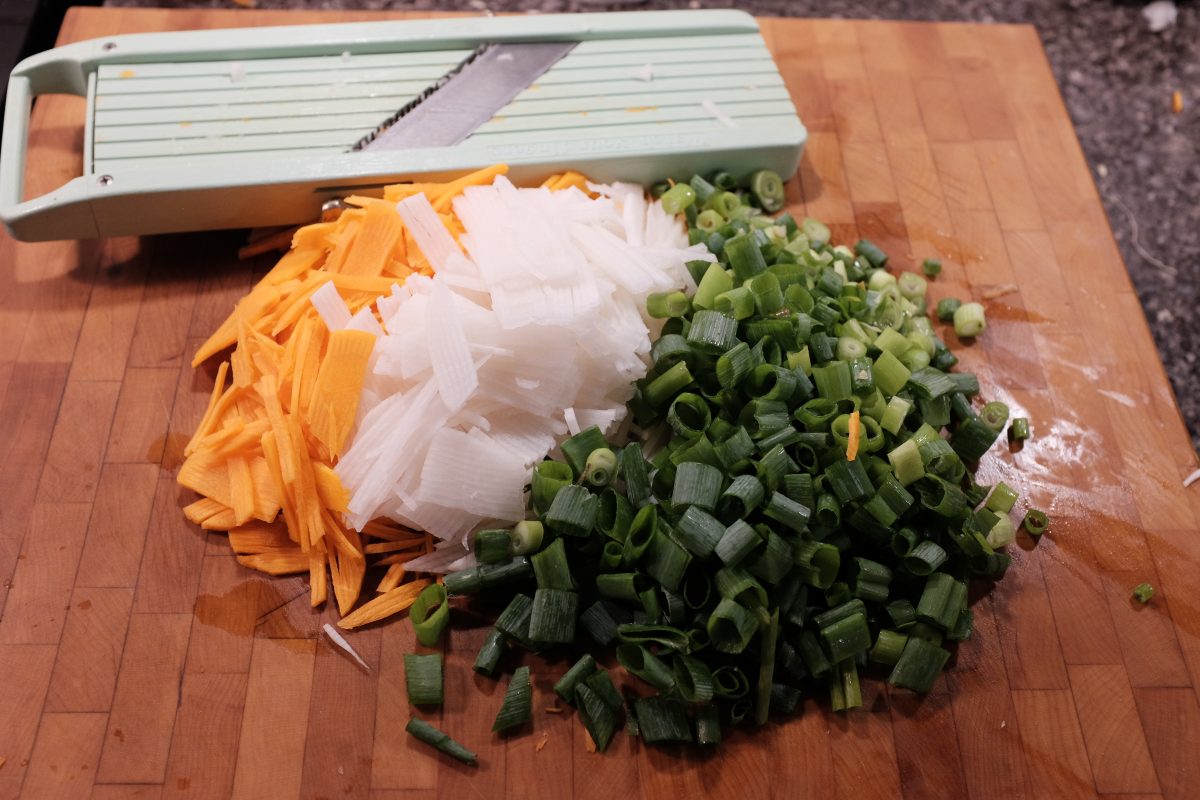
- 1 cup carrot matchsticks
- 1 cup korean radish matchsticks
Try to weigh your salt rather than measuring by cups. Diamond Kosher is a popular salt in my area. If you live in the US, you may be using Morton’s. This salt is much saltier by the cup. Same goes for sea salt if this is what you are using. Whichever salt you use, it is better to weigh it. Avoid using table salt.
Rice flour/rice powder is just finely ground sweet rice. Mochiko is a popular brand but any brand will work.
Korean chili flakes are all very different from batch to batch. Some are mild and fruity and some are sharp and very spicy. It is better to start with less, taste, and then add more if you want it spicier.
Process
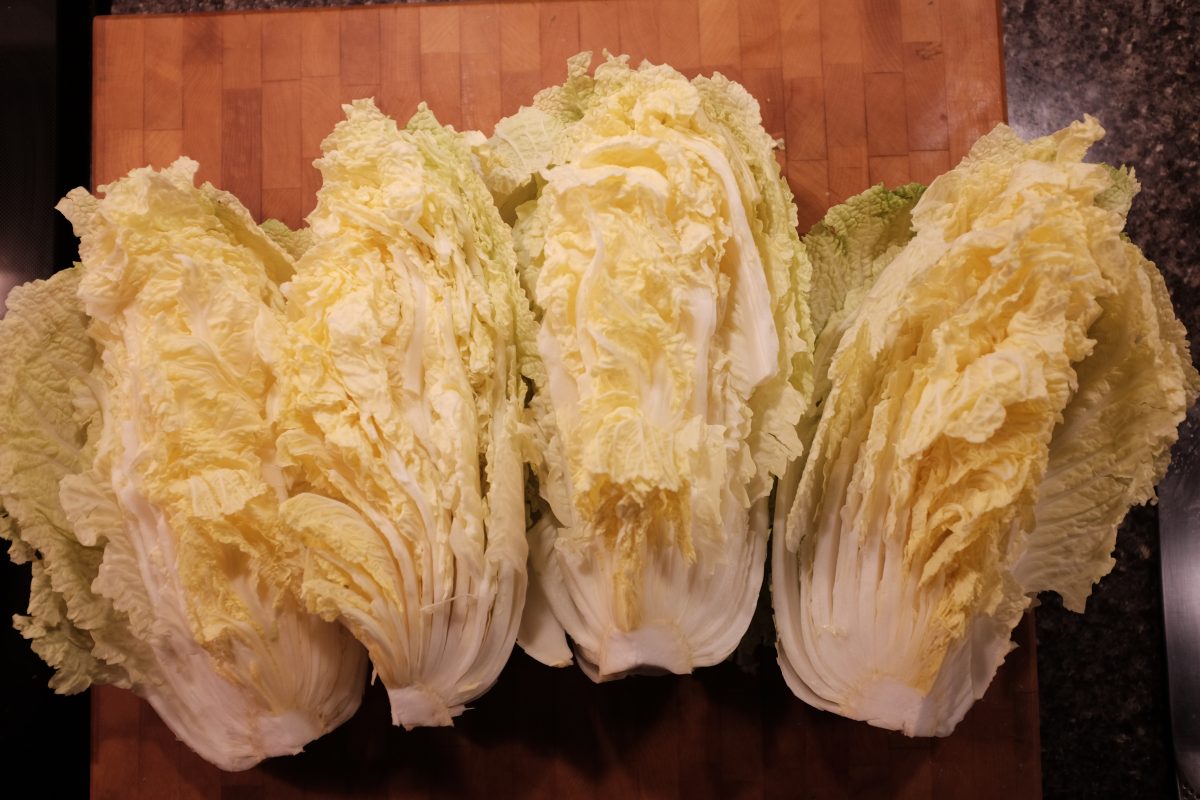
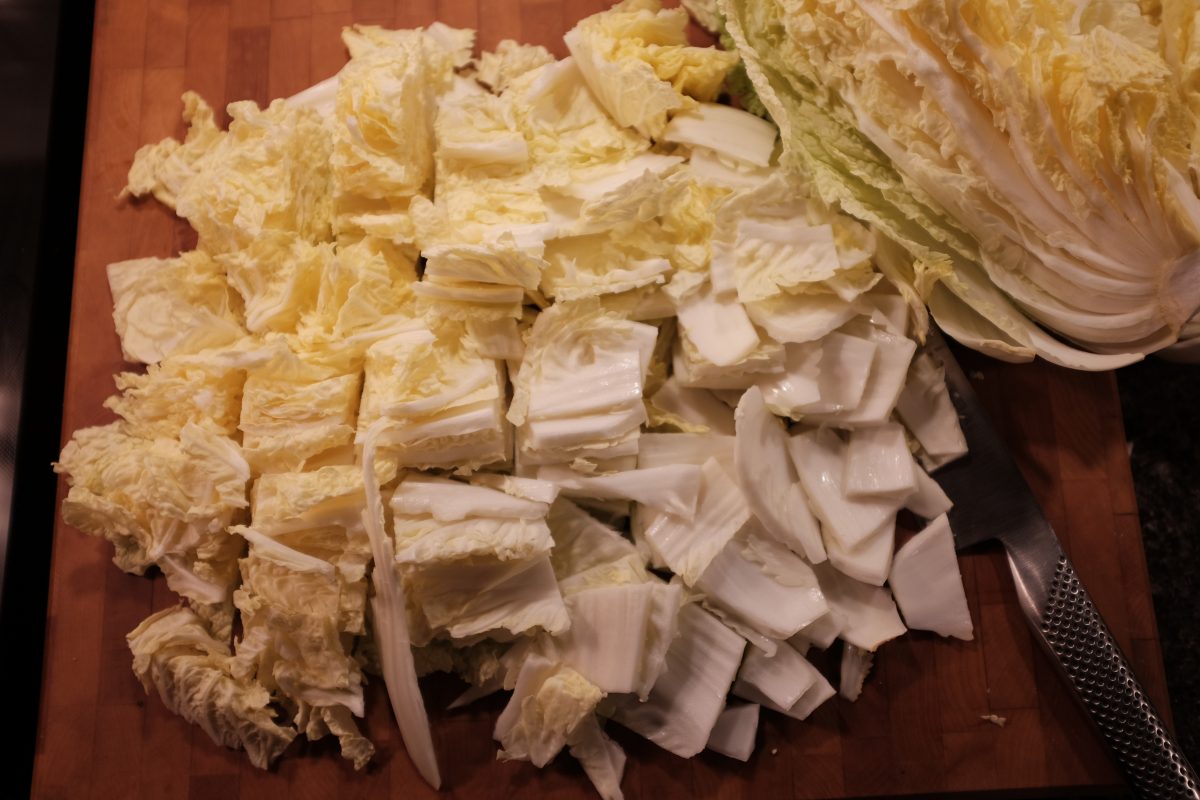
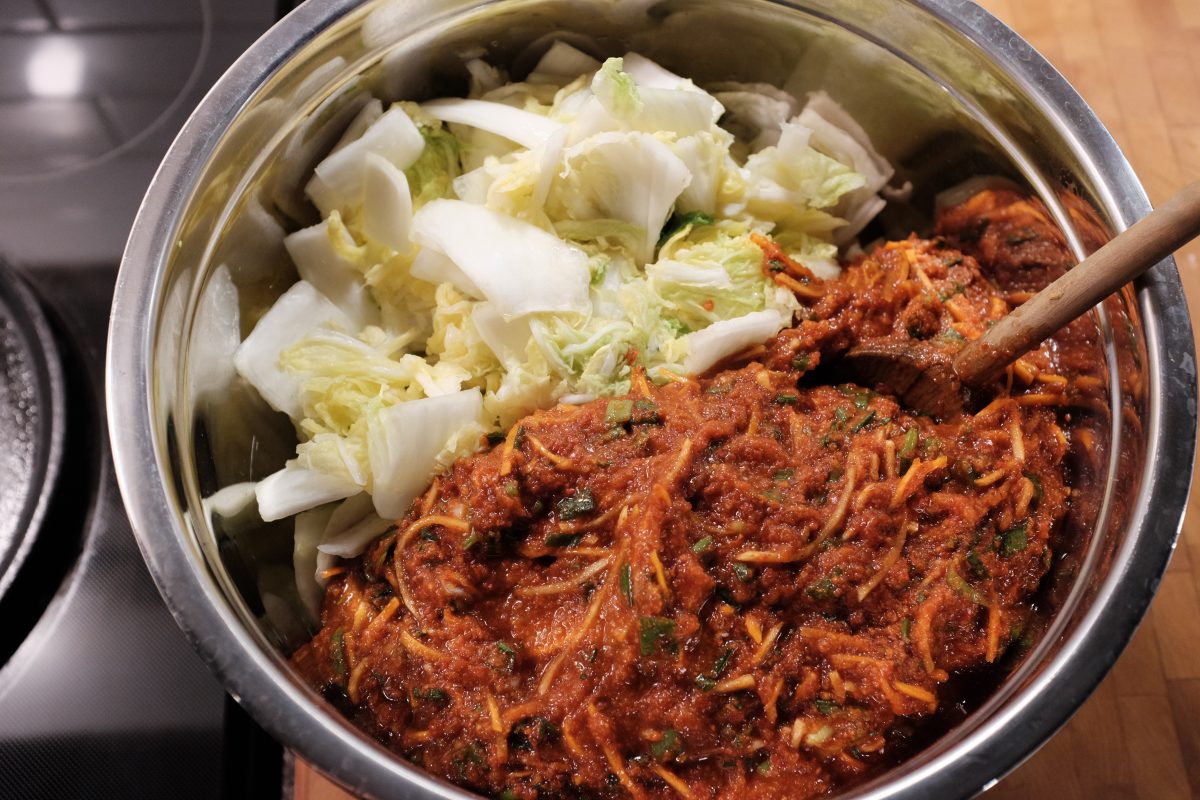
Cabbage preparation
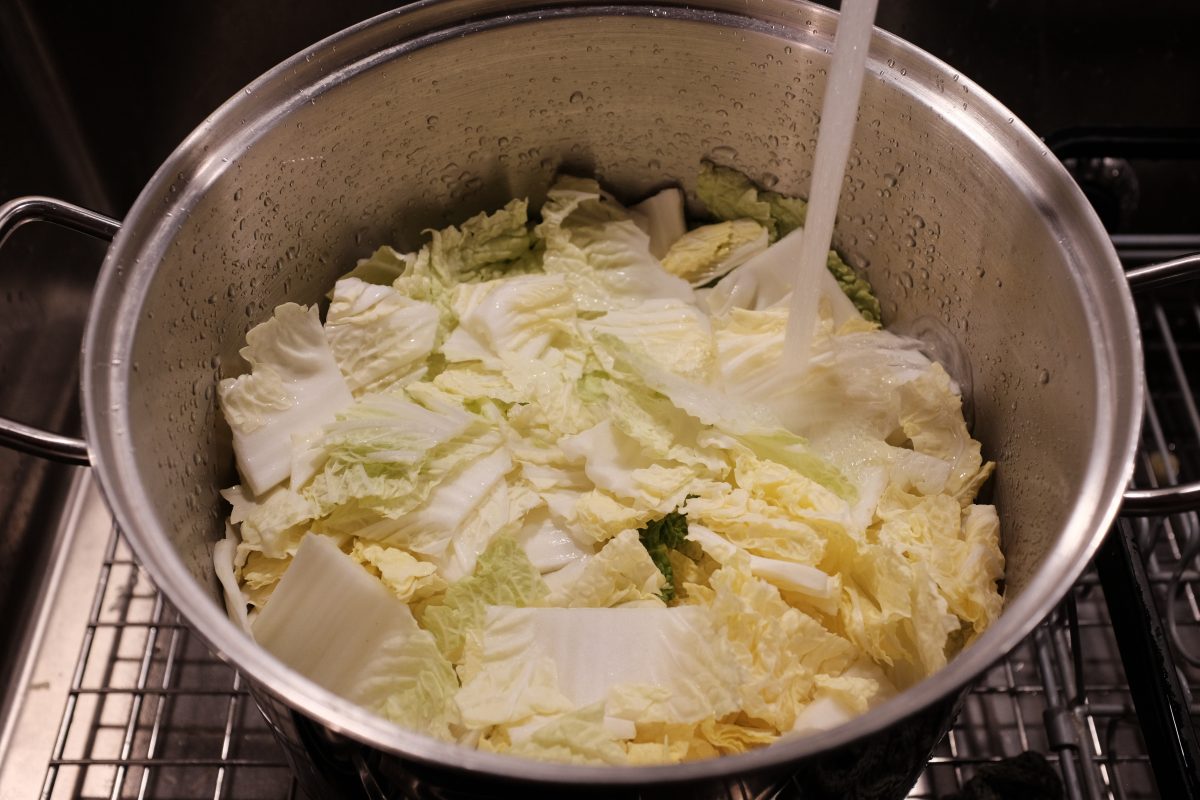
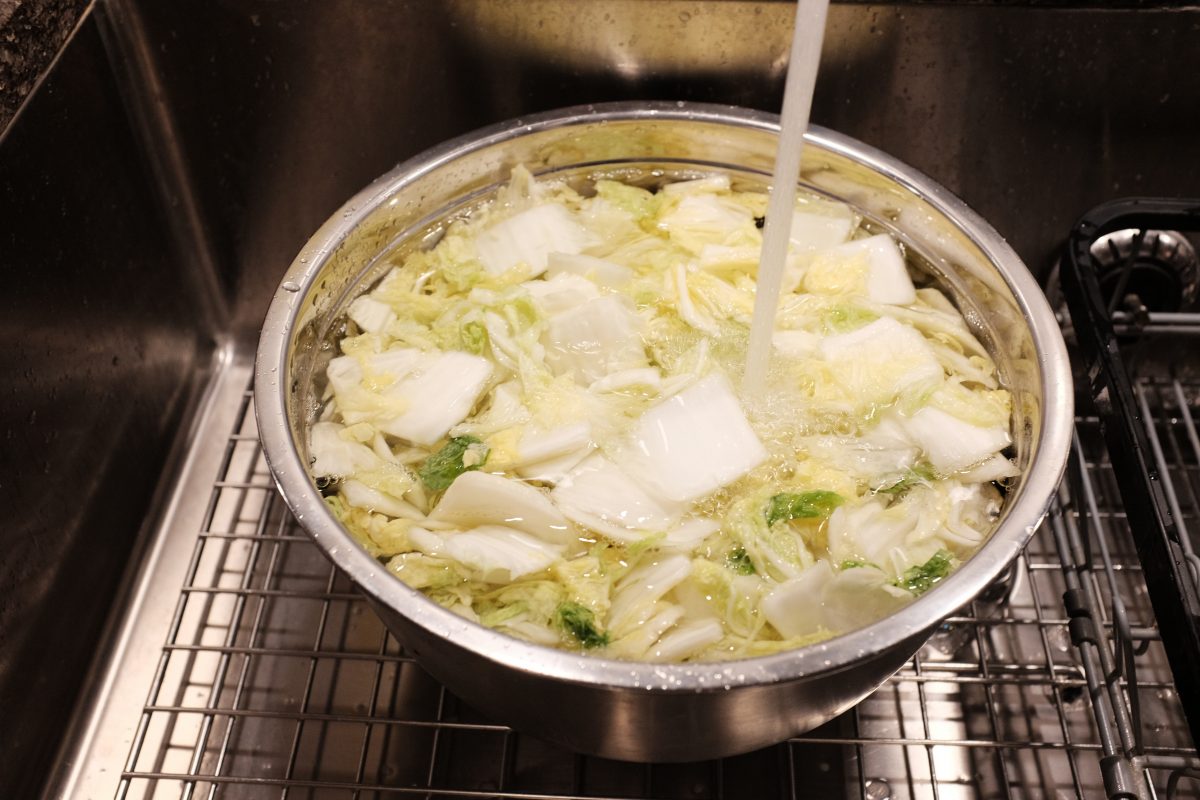
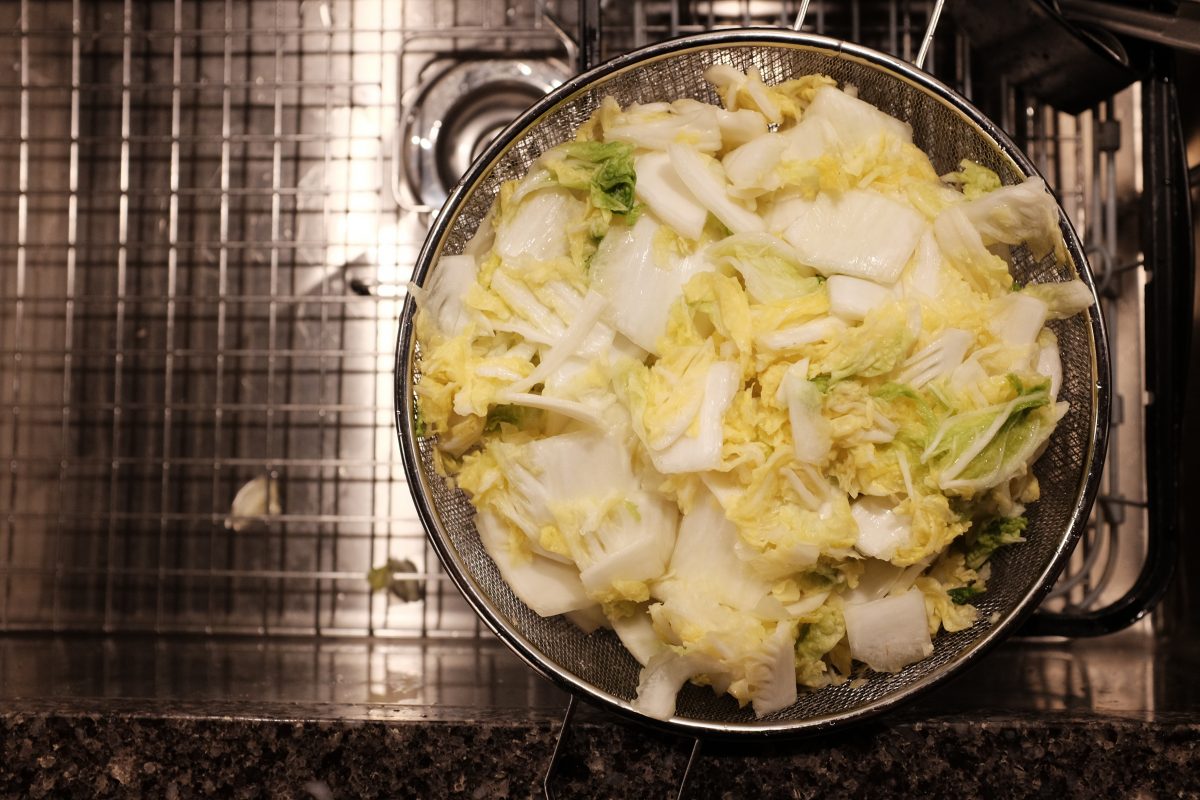
Brining
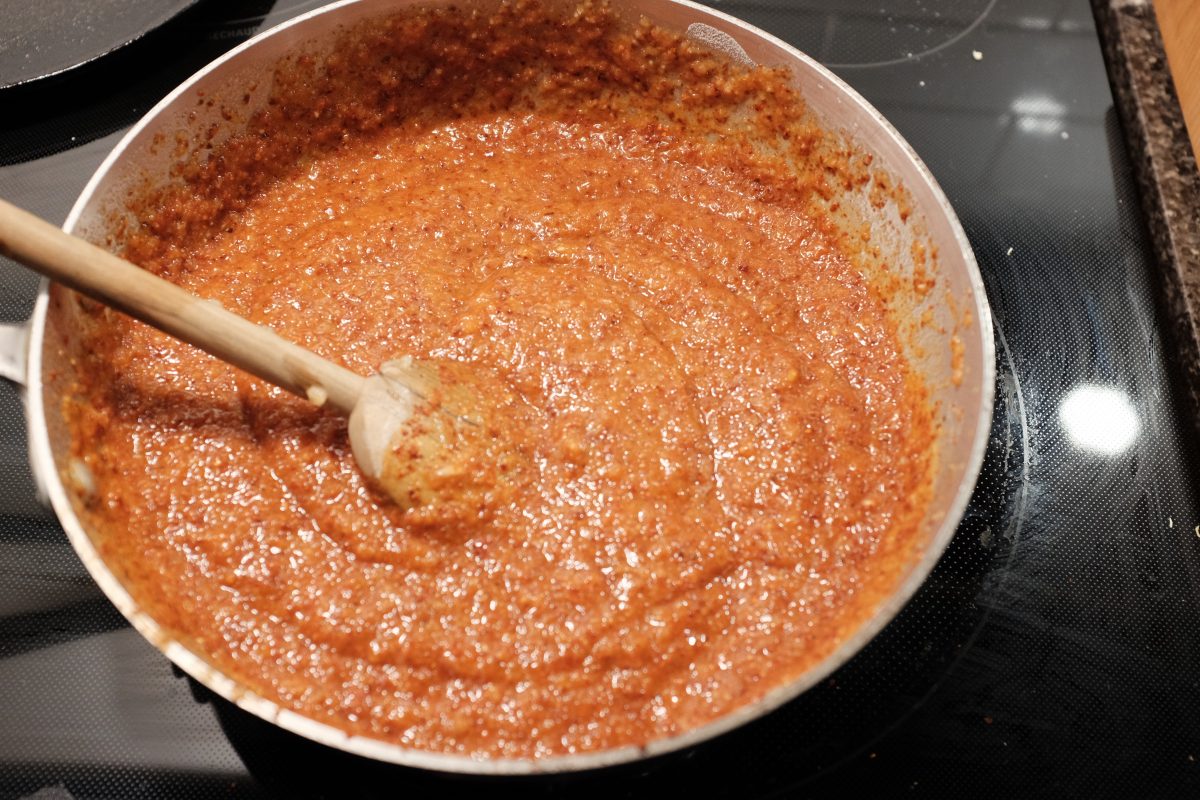
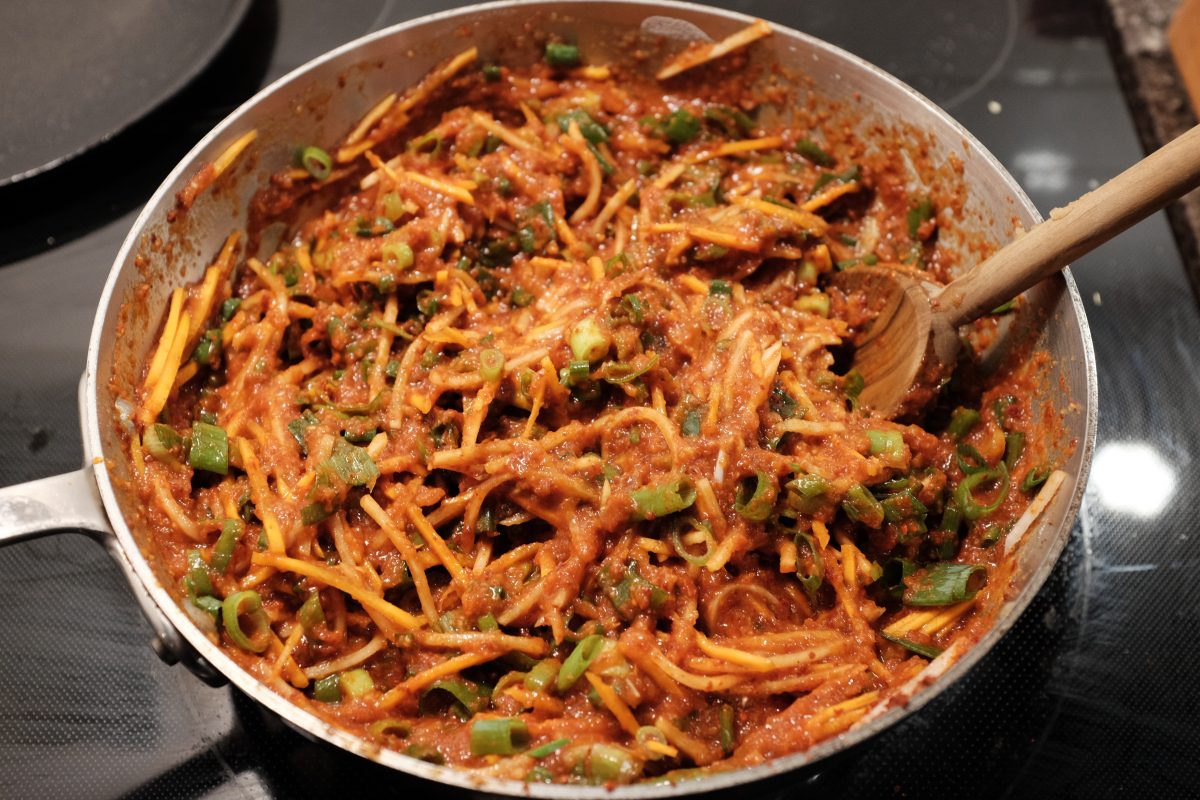
Making the kimchi paste
While the cabbage is brining, make the kimchi paste:
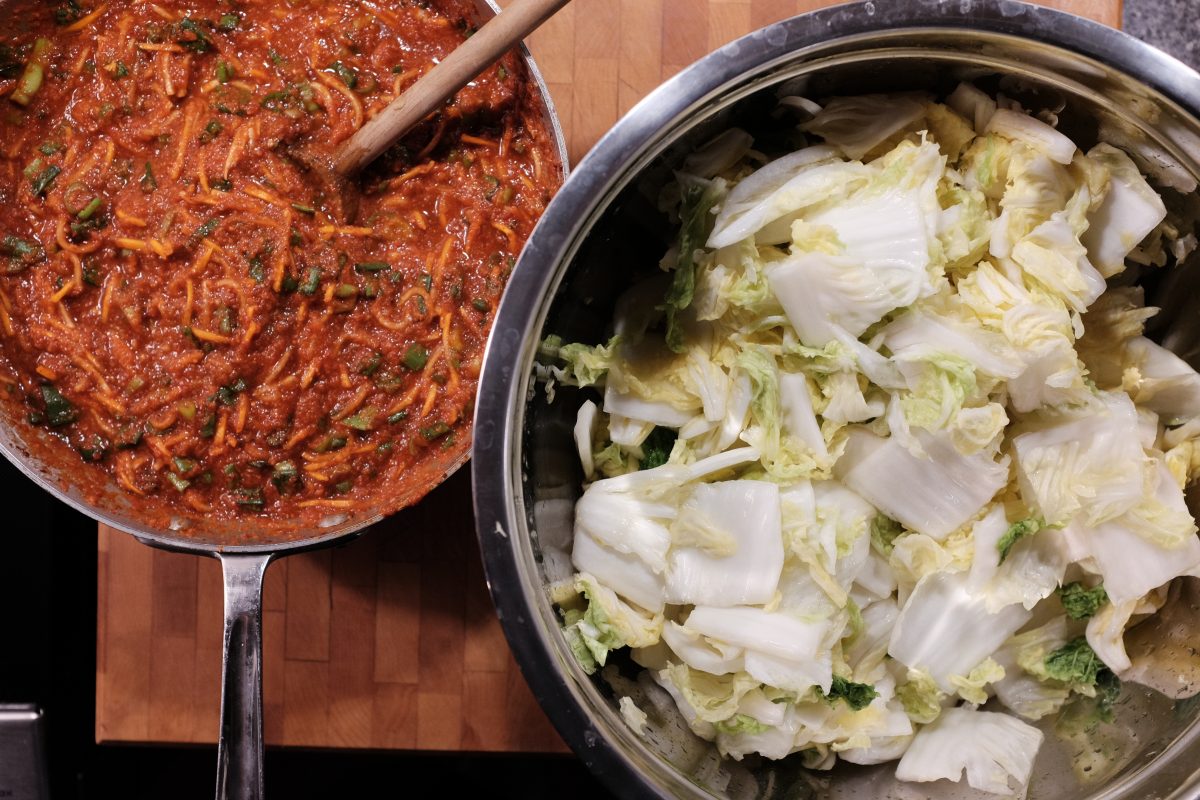
Put it all together
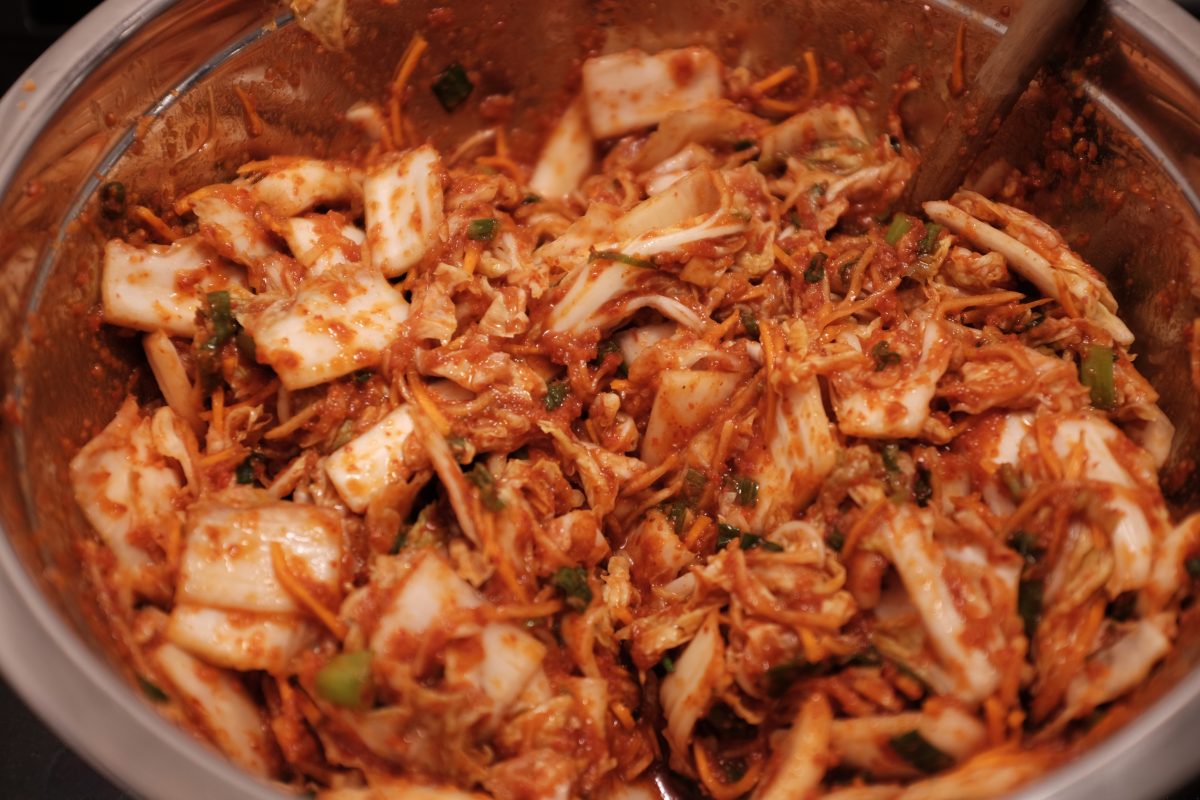
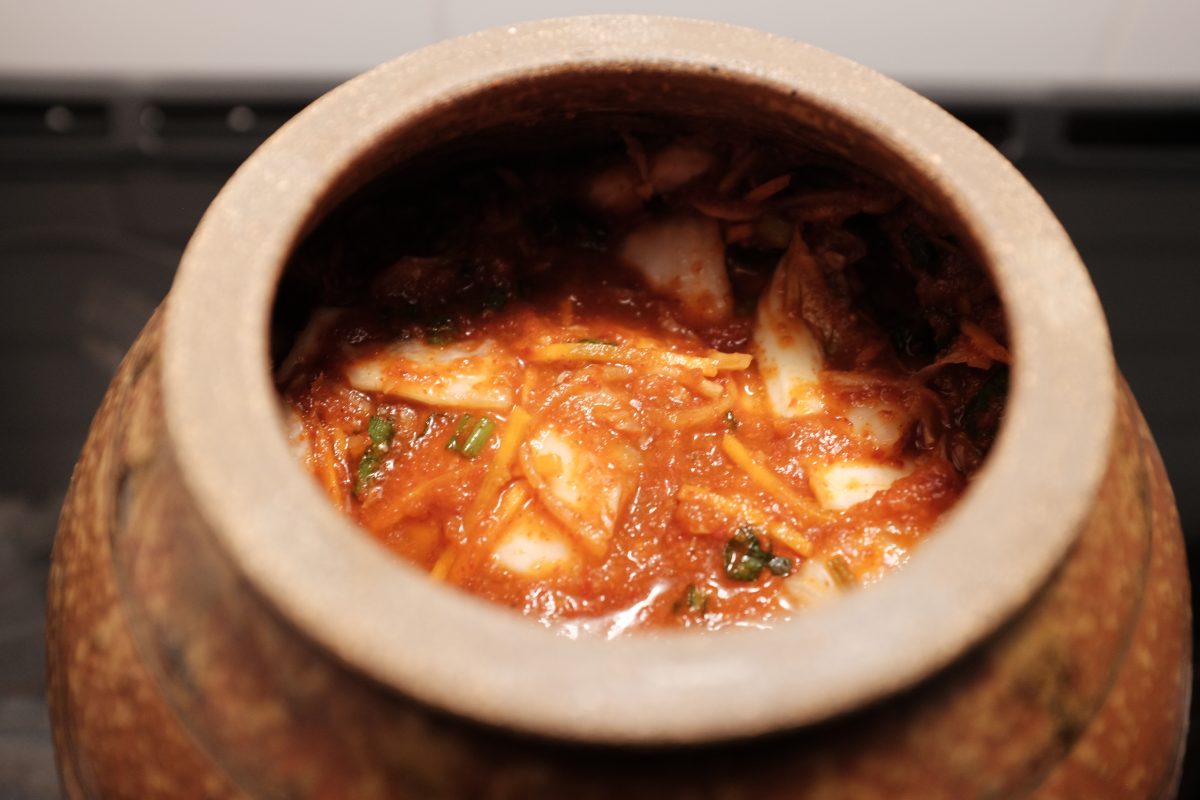
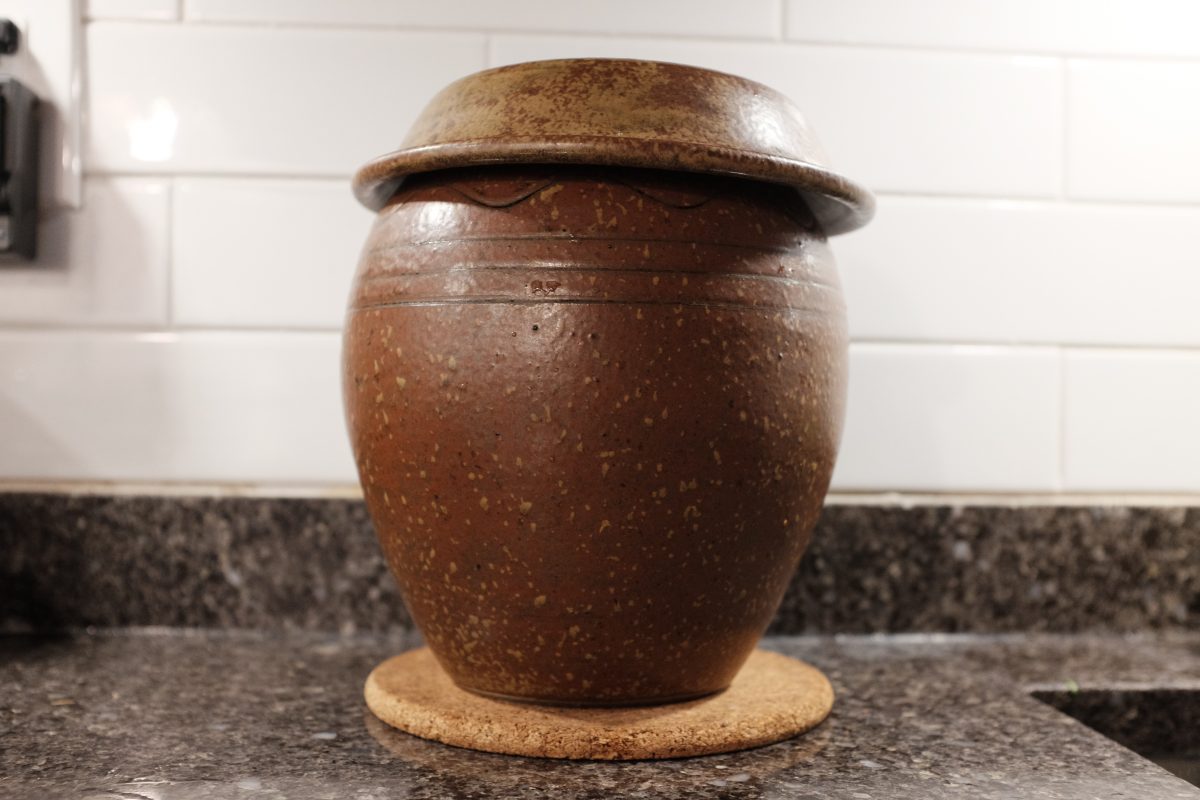
Now what?
For ideas on what to do with your kimchi take a look at this post.
If you have any questions or comments, please leave them below. I am always happy to hear from you.
Thanks for reading!
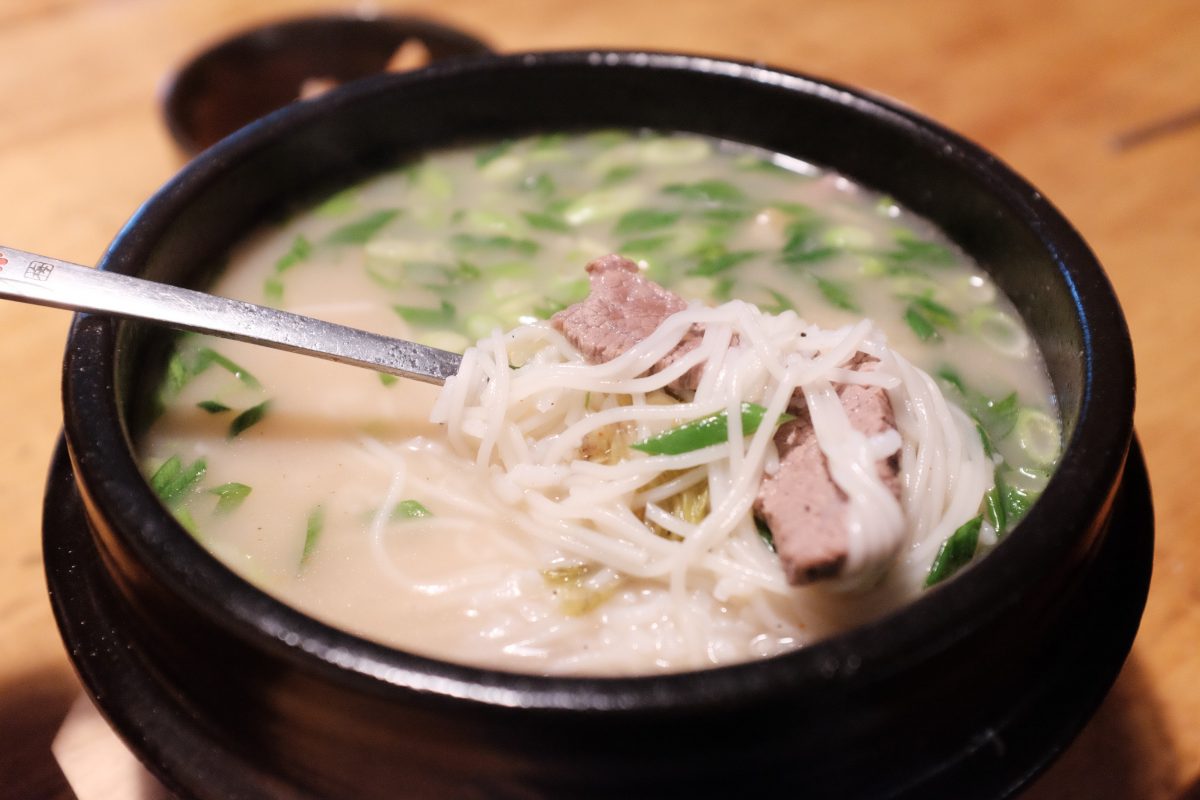
Seolleongtang
Seolleongtang is the first meal I ever ate in Korea. After a 15 hour flight and a long train ride, I finally arrived at my Insa-dong hotel sore, exhausted and hungry. The closest restaurant was directly behind the hotel, attached to the parking lot. This unassuming restaurant turned out to be one of the oldest in Seoul: Imun Seolleongtang. I had a big hot bowl of this plain milky beef soup and within an hour I felt completely refreshed. This simple soup seemed to erase my body’s memory of being crushed in an economy seat for the last 15 hours. It was like magic.
Since then, I have been back to Korea many times and I always start and finish my travels with this simple meal. Imun Seolleongtang has since received Michelin recognition and so it is busier (and more expensive) than ever with lots of tourists coming in to snap photos for instagram and tiktok. The staff seem to take it in stride, brisk and efficient, though maybe somewhat less friendly than I remember nearly 10 years ago. Also gone is the sloppy bucket of juicy and chunky kkadugi in the middle of the table and the big basket of chopped green onion. These now arrive in less bottomless portions after you order. But, even though some things have changed, the food is still as delicious as I remember and I still go to Imun as well as another smaller family run Seollongtang restaurant nearby.
Homemade seolleongtang
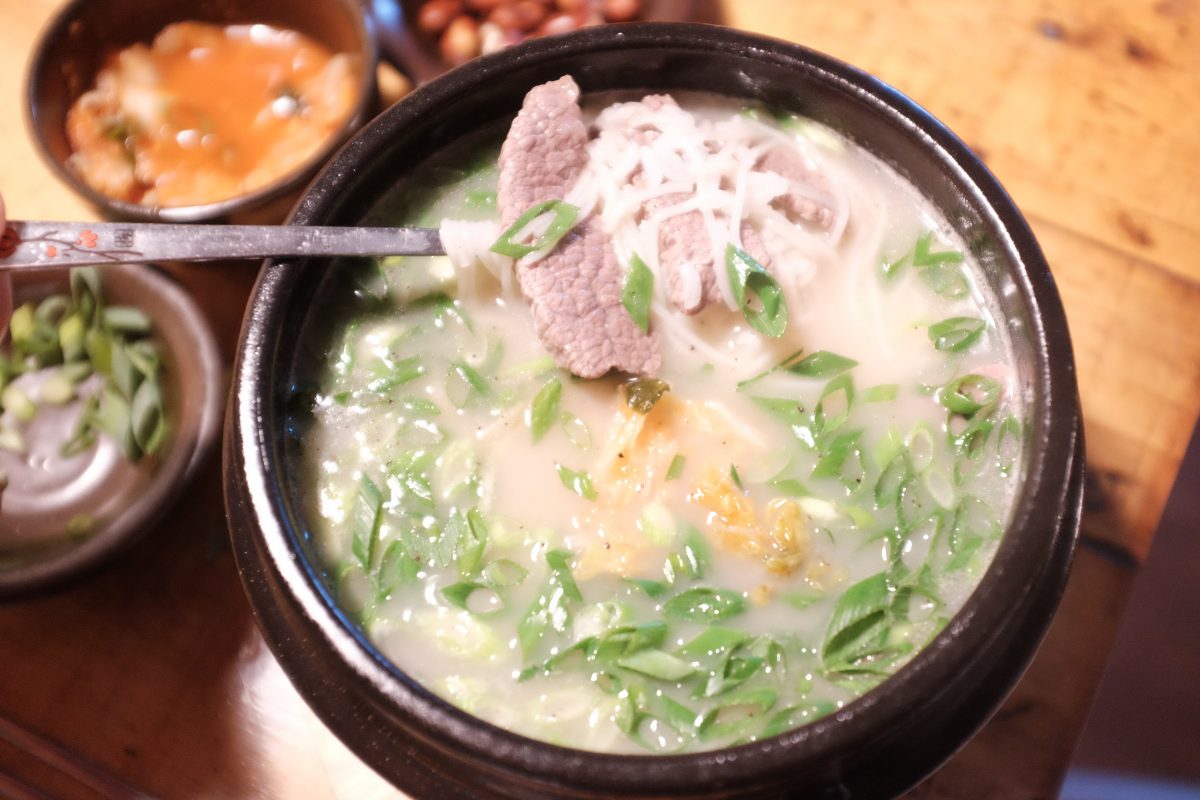
Seolleongtang always seemed kind of mysterious to me. Where did that milky colour come from? How was this simple soup so nutty and delicious? It arrives at the table completely bland and unseasoned but the addition of a little salt and pepper, kimchi juice and green onion turns it into something deep and complex and unforgettable.
Like a good food detective, I decided to launch a full investigation. After much reading and video watching, I discovered that the secret is really in the style of beef stock, in the process rather than the ingredients. The recipe below is a two-part process. First you will need to make the milky bone broth. Once you have this broth on hand, turning it into finished seolleongtang is a very simple and quick process. You can find the complete recipe for the beef bone broth by clicking here.
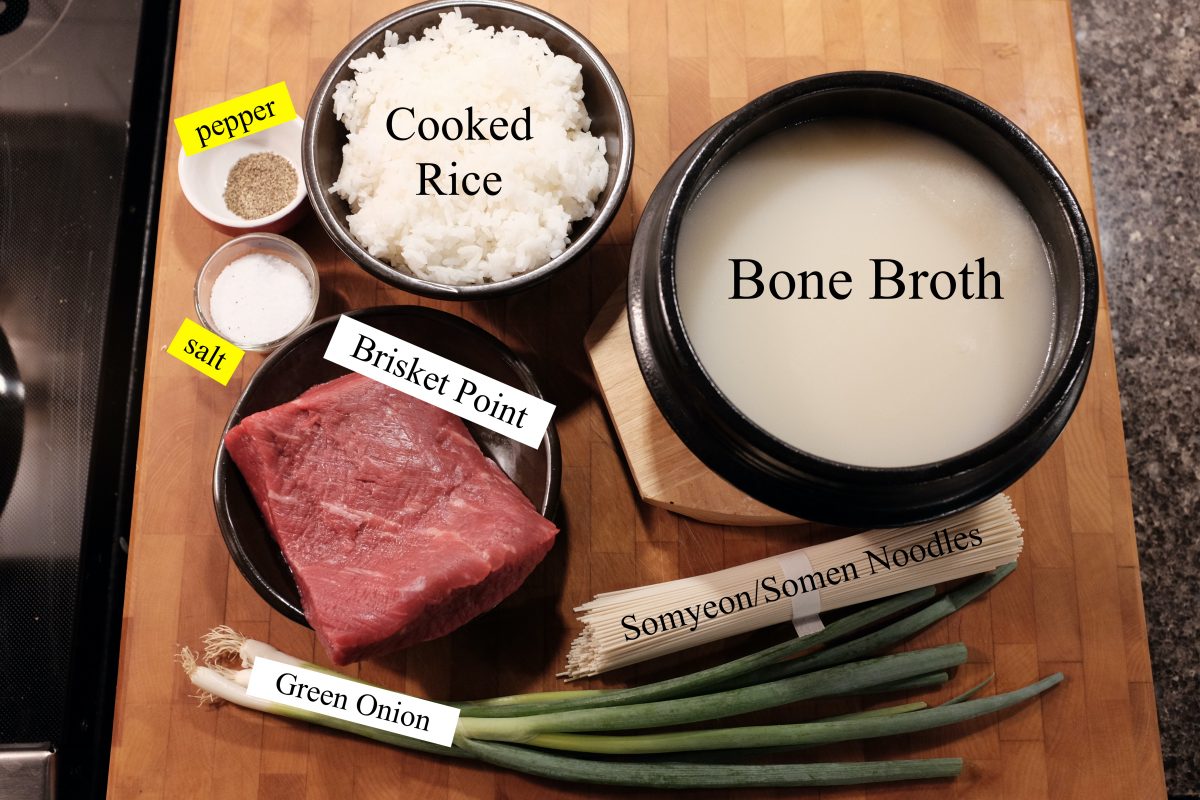
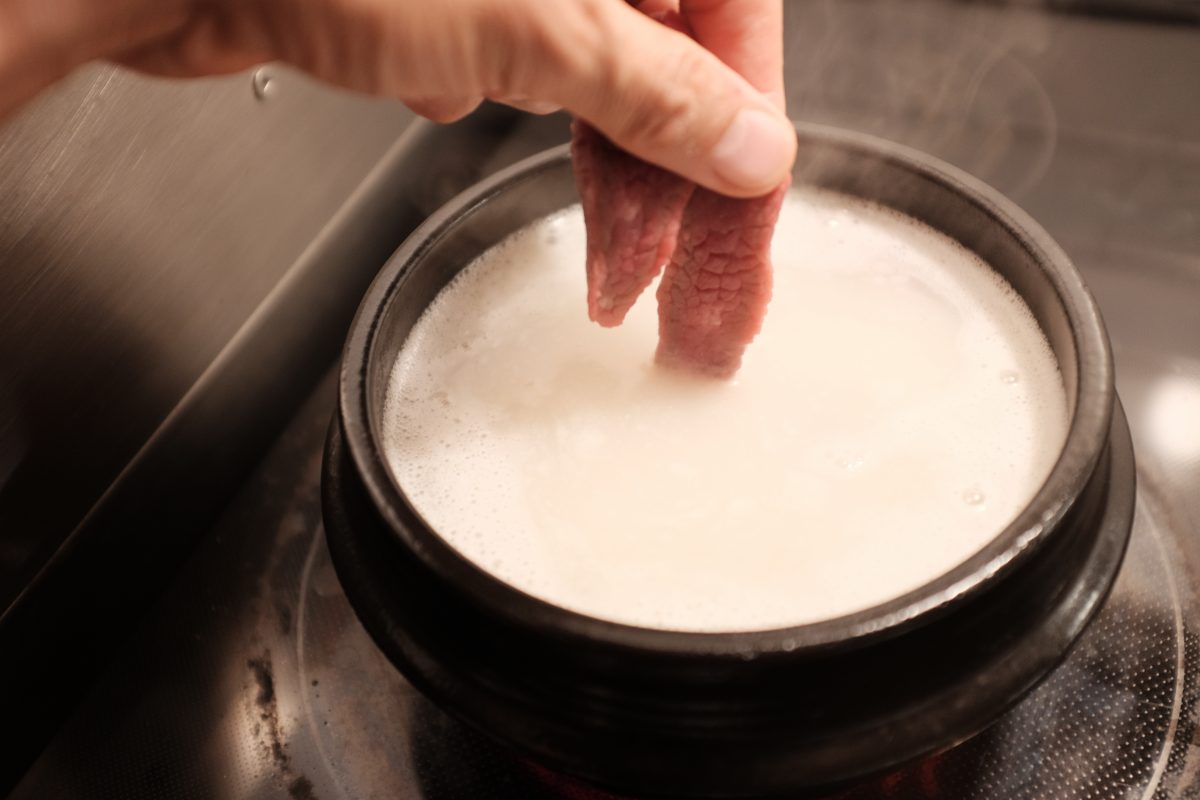
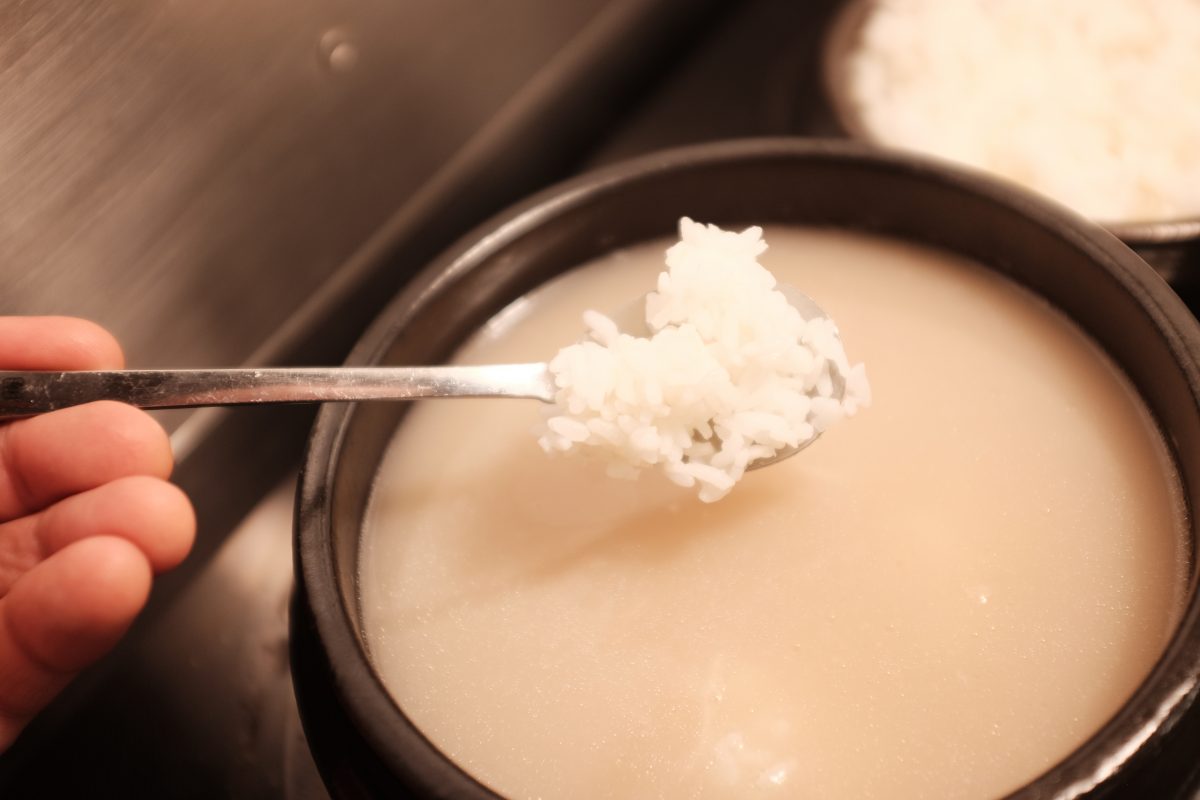
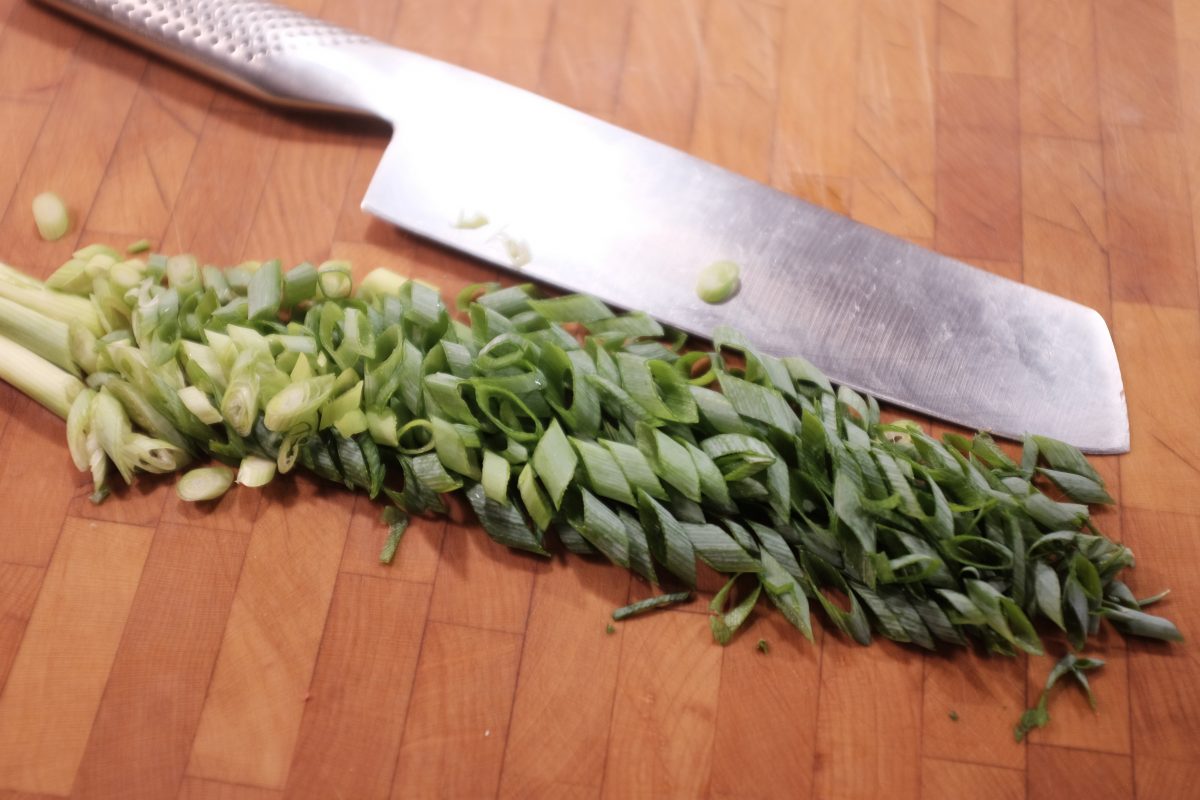
Ingredients
*this is for one big portion or 2 smaller portions
- 1 litre Korean milky beef bone broth
- 250gr beef brisket point
- cooked white rice
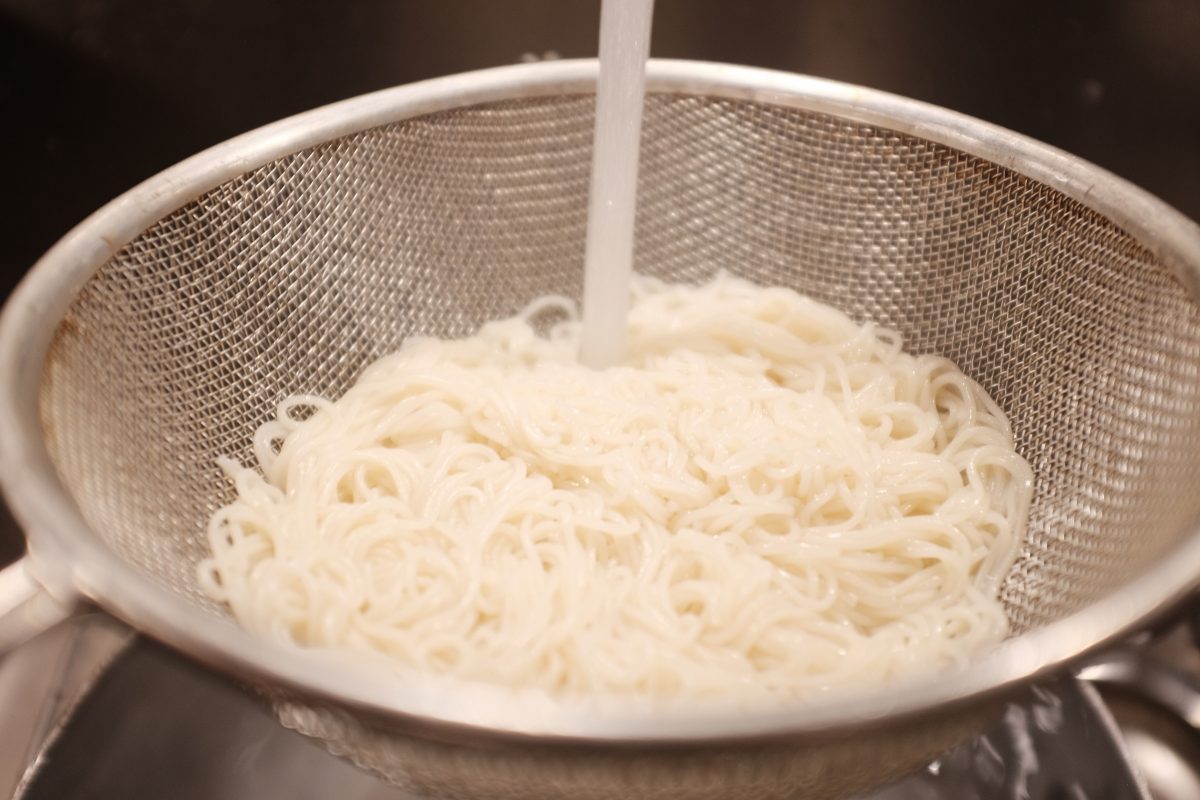
- cooked somyeon/somen noodles
- 2-3 green onions (scallions)
- salt and pepper
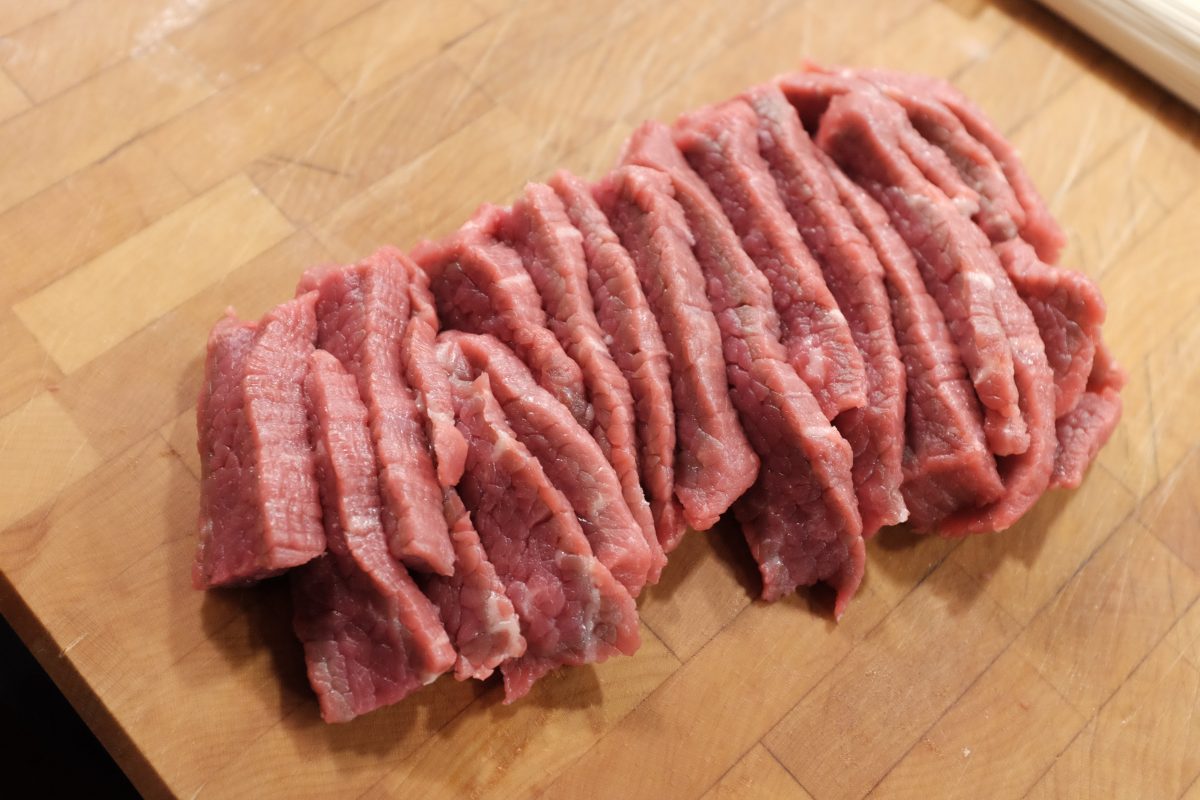
I used brisket point. You can use any beef you like. Tougher cuts will take longer to soften up and more tender cuts will take less time. I like brisket because it is somewhere in between. It has the deep beef flavour of a tougher muscle but is slightly more tender so takes a little less time to cook. If you like, you can soak the meat in water for a few hours to remove some of the blood but, this is optional.
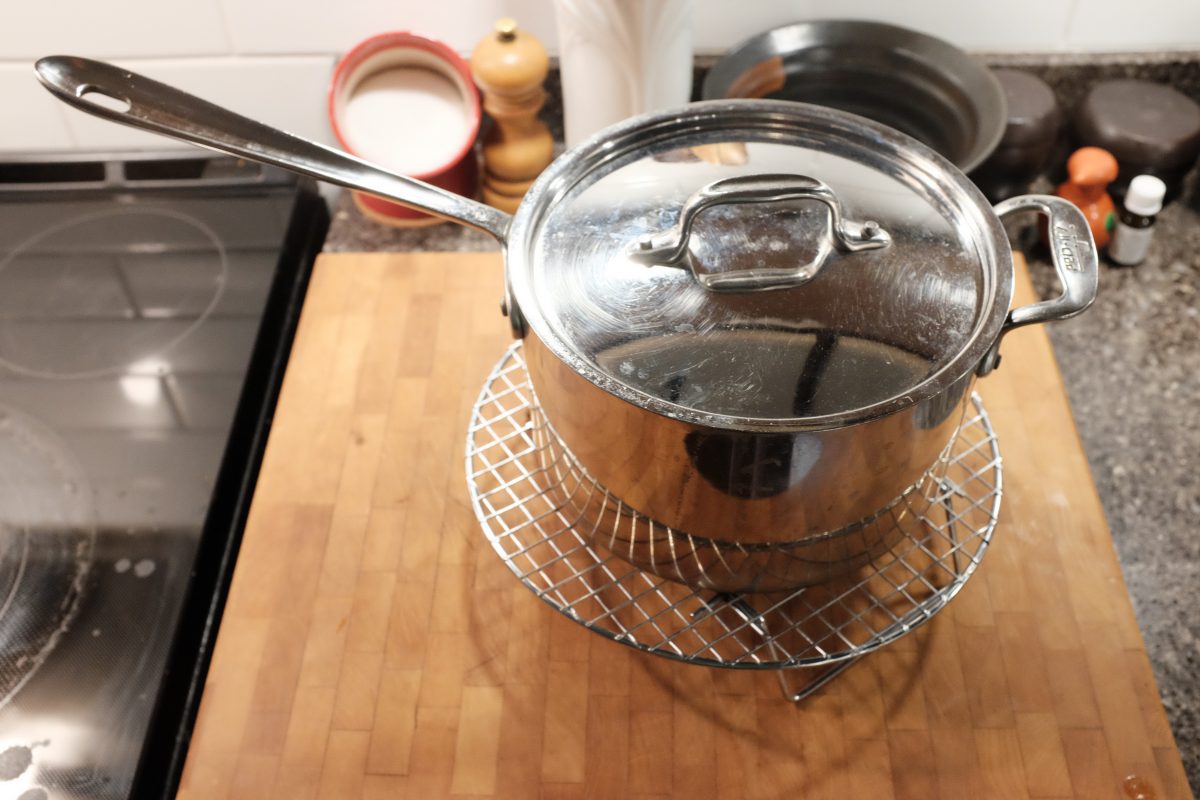
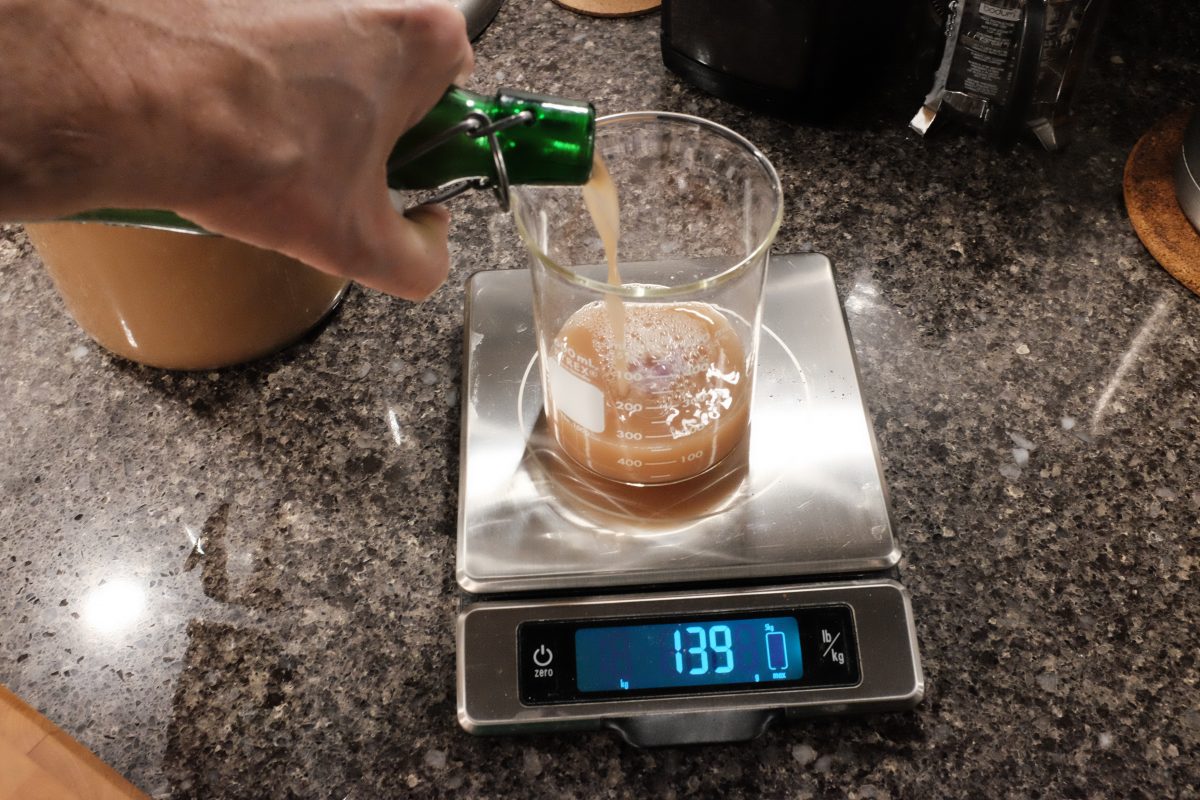
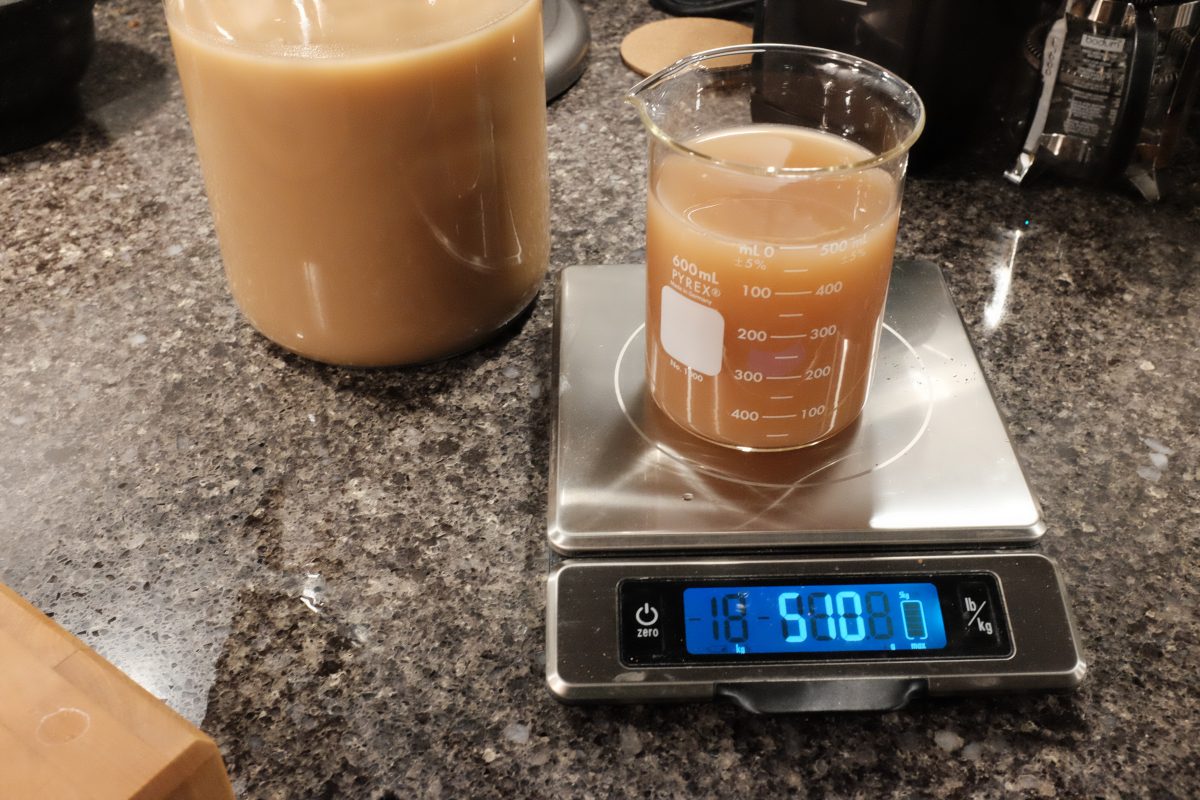
Process

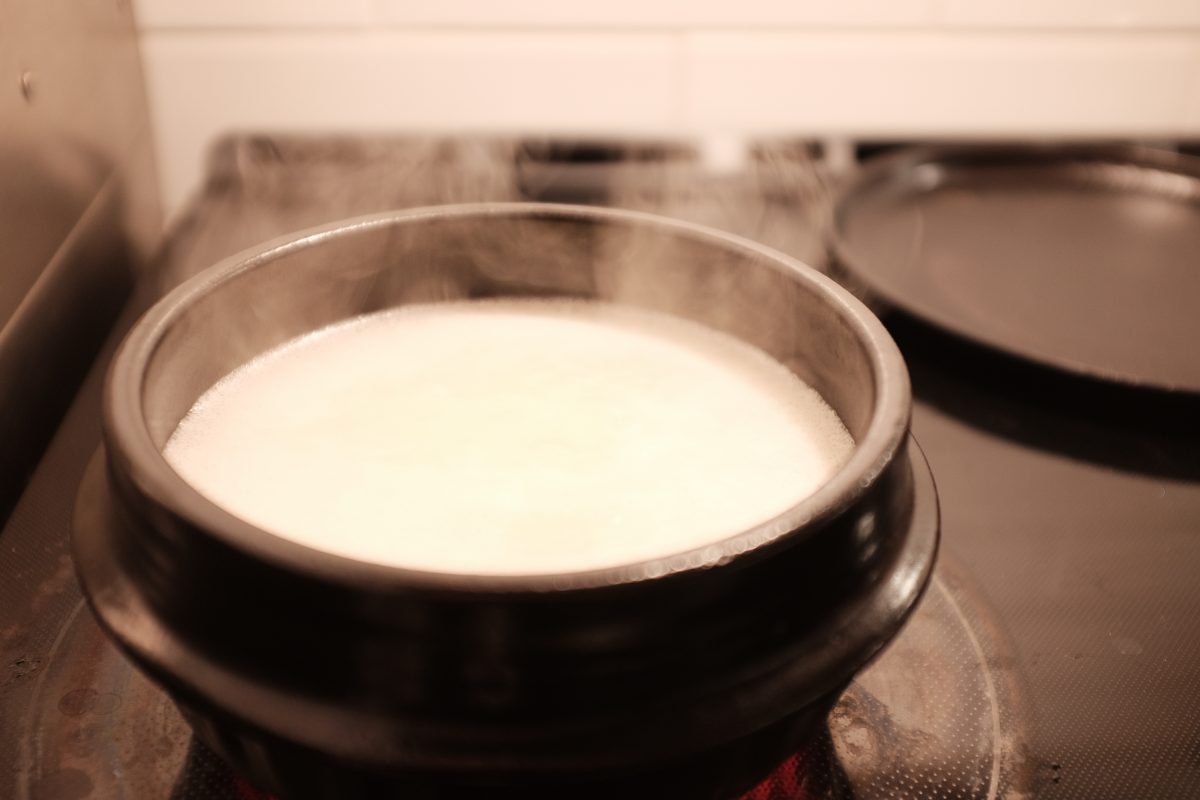


The verdict?
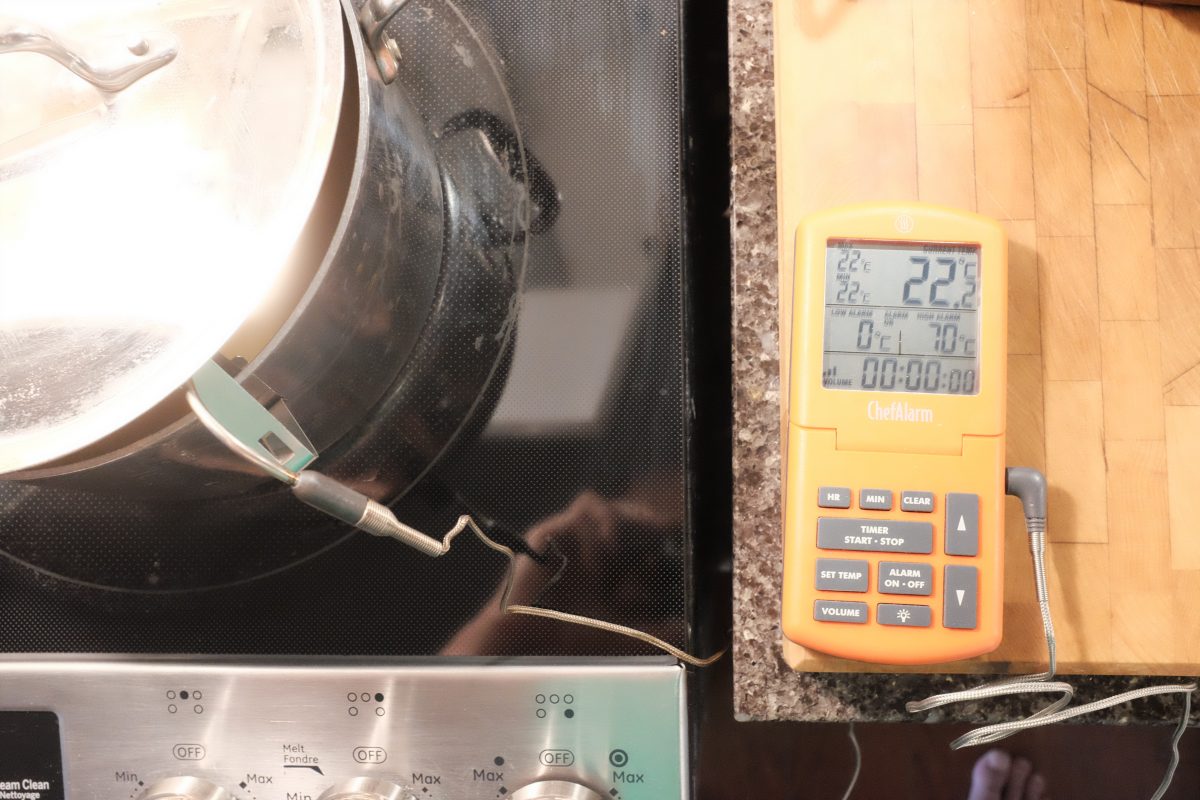
This turned out to be very very good. Maybe 4 out of 5 stars. One star off because, as good as it is, it doesn’t quite measure up to the flavour of Imun Seolleongtang in Seoul. But, honestly, I can say the same thing about all Korean food made outside of Korea. There is always a little something missing when you make these dishes yourself or, eat them in restaurants back home. I think a big part of this is the high quality of ingredients in Korea but, there is also generational knowledge and experience that adds flavour to these dishes and makes the magic hard to replicate. Imun Seolleongtang has been making this same dish for over 100 years and legend has it that the same stock pot has been continuously boiling fresh bones every day for the whole time!
Having said that, I am really happy with the way this turned out and I feel just as refreshed after eating a big hot bowl of this flavourful soup. 시원하다!
If you have any questions or comments please leave them in the space below. Thanks for reading!
If you enjoy the content and would like to contribute towards website maintenance and development, you can make a donation here.
Beef Bone Broth Version 2: Korean Style
Korean Beef Bone Broth vs Western Versions (hard and fast vs low and slow)
Some time ago, I posted a recipe for beef bone broth (stock) that involves a very long cooking time at a very gentle simmer (click here for this low and slow version). The result is a mostly clear, brownish, meaty and gelatinous stock. This is most often what chefs make in a western kitchen…it will typically be used as a soup or sauce base.
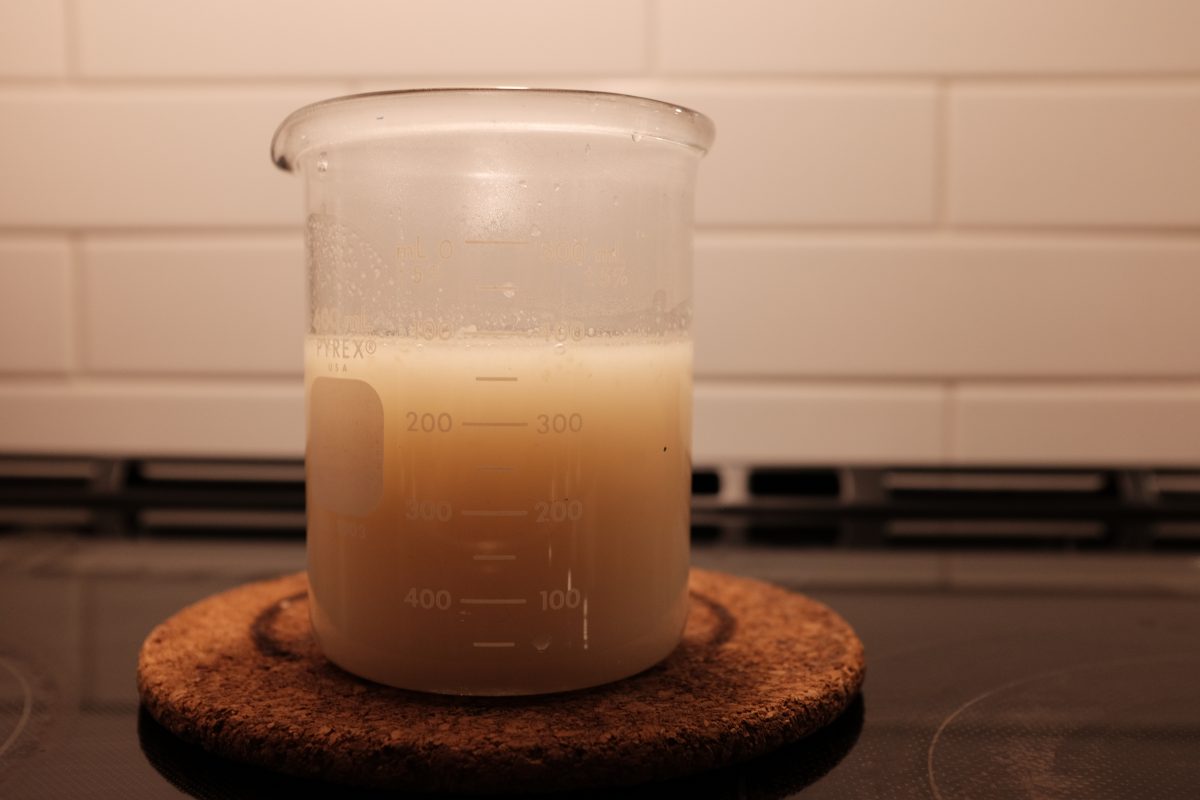
This recipe is almost identical in ingredients and process. The main difference is that this recipe cooks at a harder rolling boil for a shorter time. Even though the steps are almost identical, this small change results in a completely different stock. This one is just as gelatinous but, it is a silky opaque white colour with a nutty and delicate flavour. This stock is a base for dishes like mandu-guk (dumpling soup) or seolleongtang in a Korean kitchen. And, I think this is the version that most people think of when looking for “beef bone broth”.
Ingredients
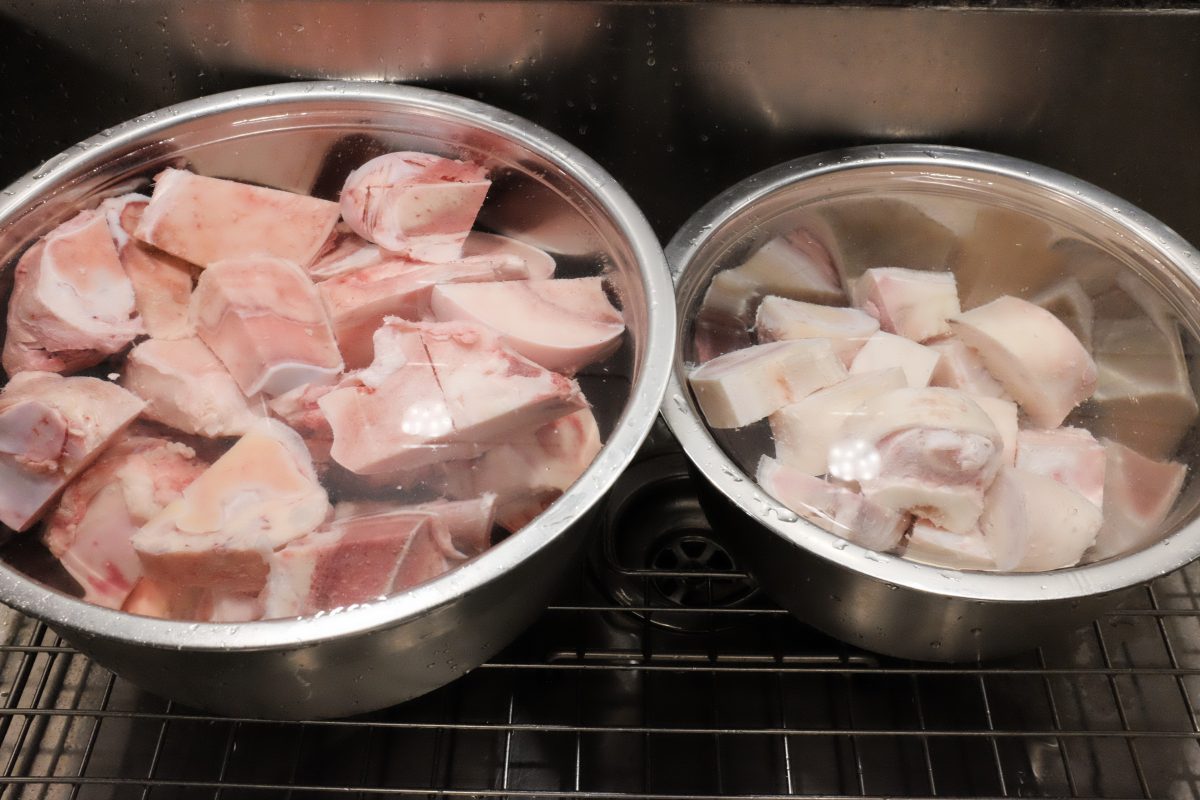
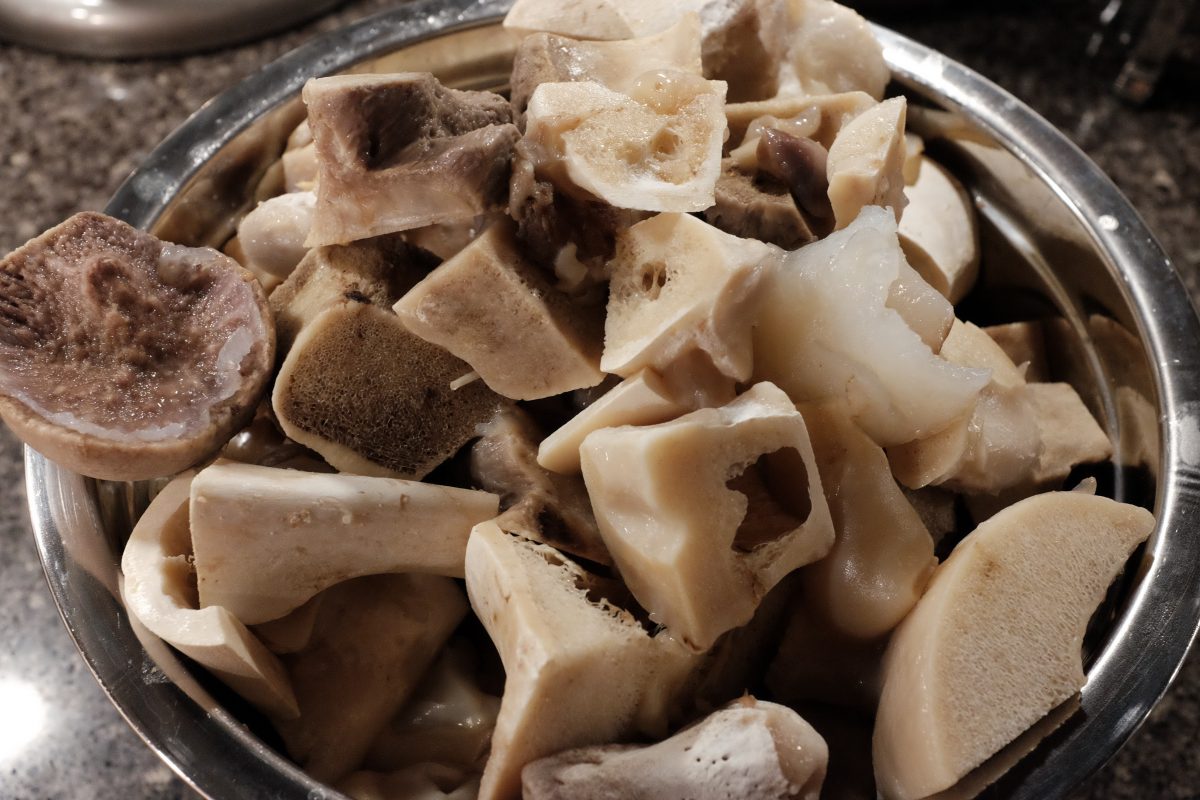
- 4kg (almost 9lb) beef marrow and knuckle bones cut into pieces.
- 1.2kg (around 2.5lb) cow foot cut into pieces
- water
The Korean grocer in my neighbourhood usually has beef bones already cut up and frozen in bags ready to go. If you don’t have access to something like this, any butcher should be able to sell you beef bones for stock. A separate Halal butcher in the neighbourhood stocks frozen cow feet which he chops up for me on his meat saw. Cow foot adds gelatine to your stock which will give it a rich mouthfeel. If you can’t get cow feet, you can leave it out and substitute more bones.
The weights above are a guideline. You can make this as big as the biggest pot you have to hold the bones. I have a 12 litre stockpot and this is a good amount for me. The ratio of bone to cow foot does not have to be exact but I wouldn’t use more than 20-25% foot to bone.
There is no salt in this recipe. Season the stocks as you use it, depending on the dish you are preparing.
Process
This recipe is a slightly abbreviated version of the slow-and-low stock recipe. The process and ingredients are almost exactly the same so I have left out a few of the more obvious photos. If you want more detail on any step, just reference the recipe at this link.
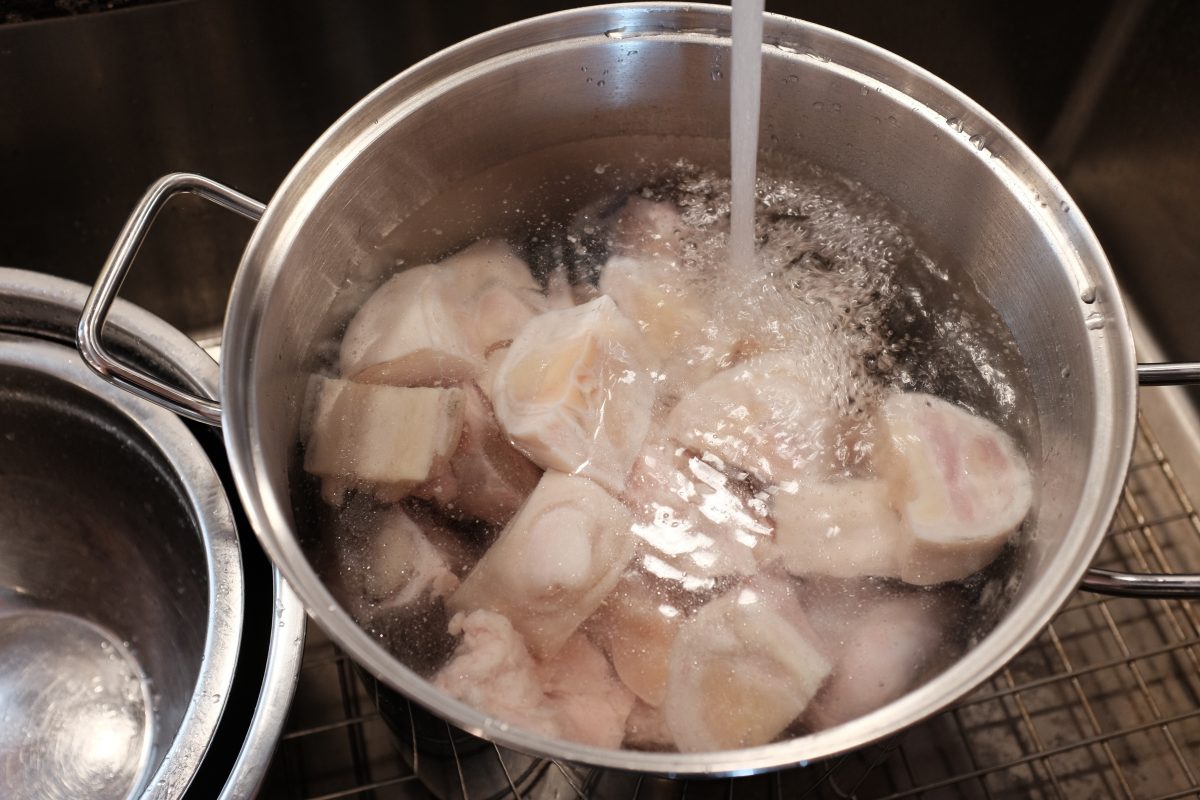
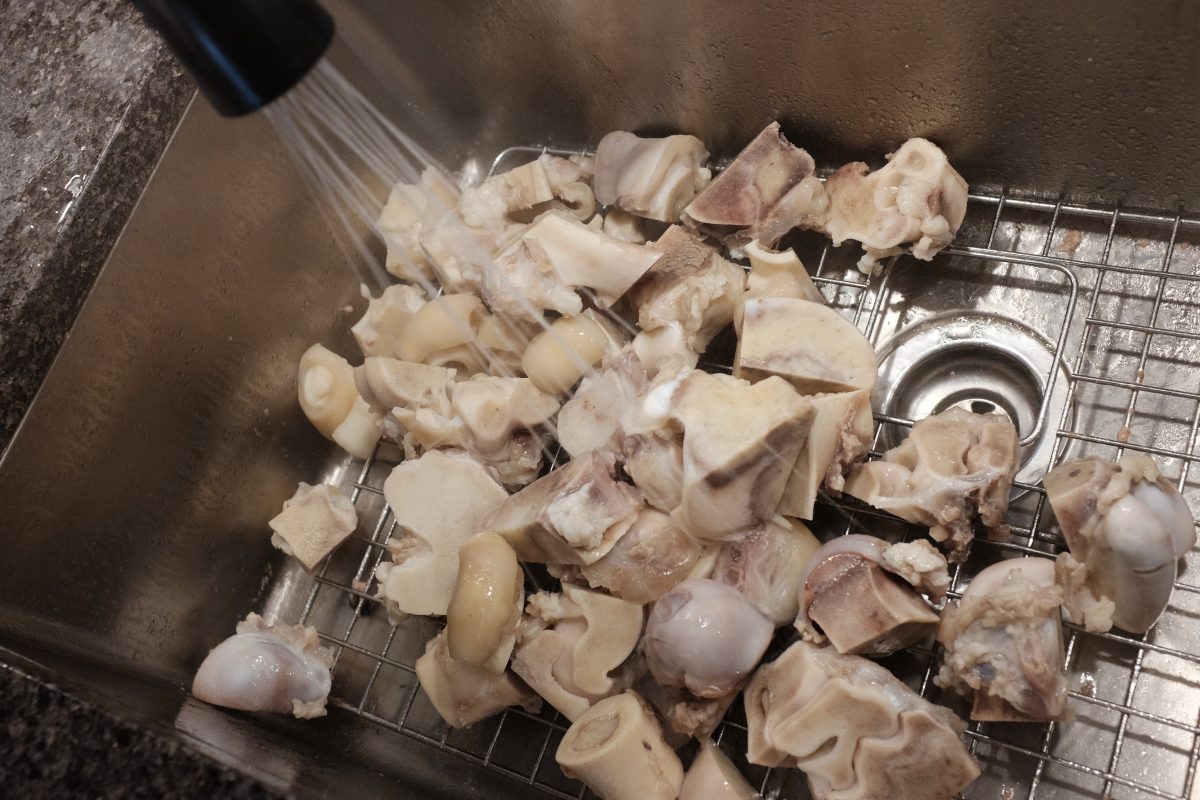
Wash and soak bones
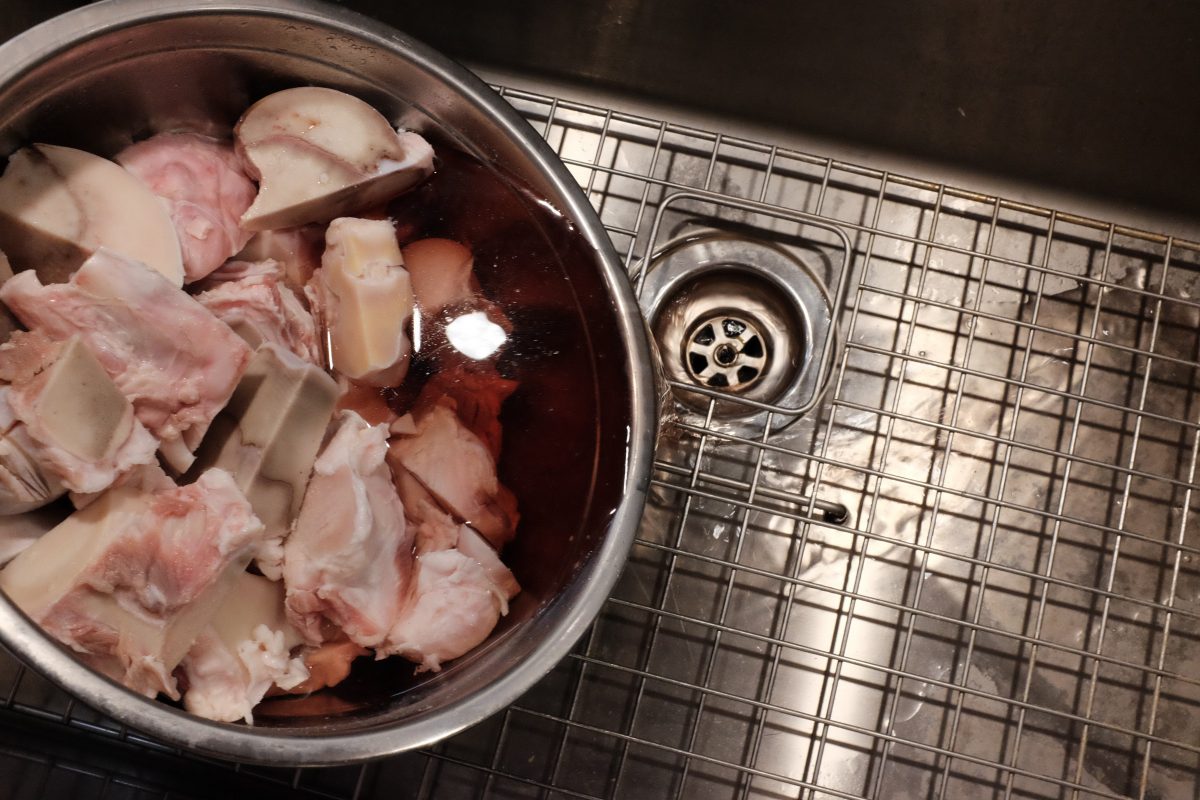
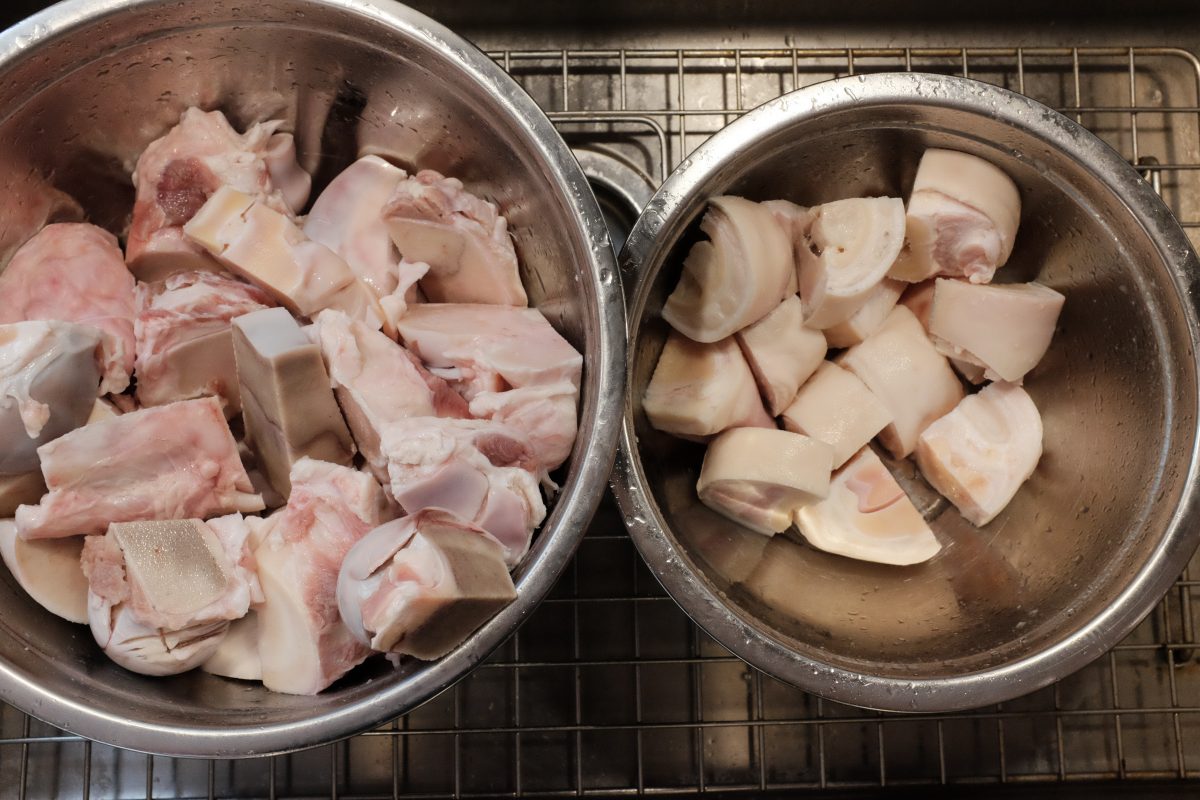
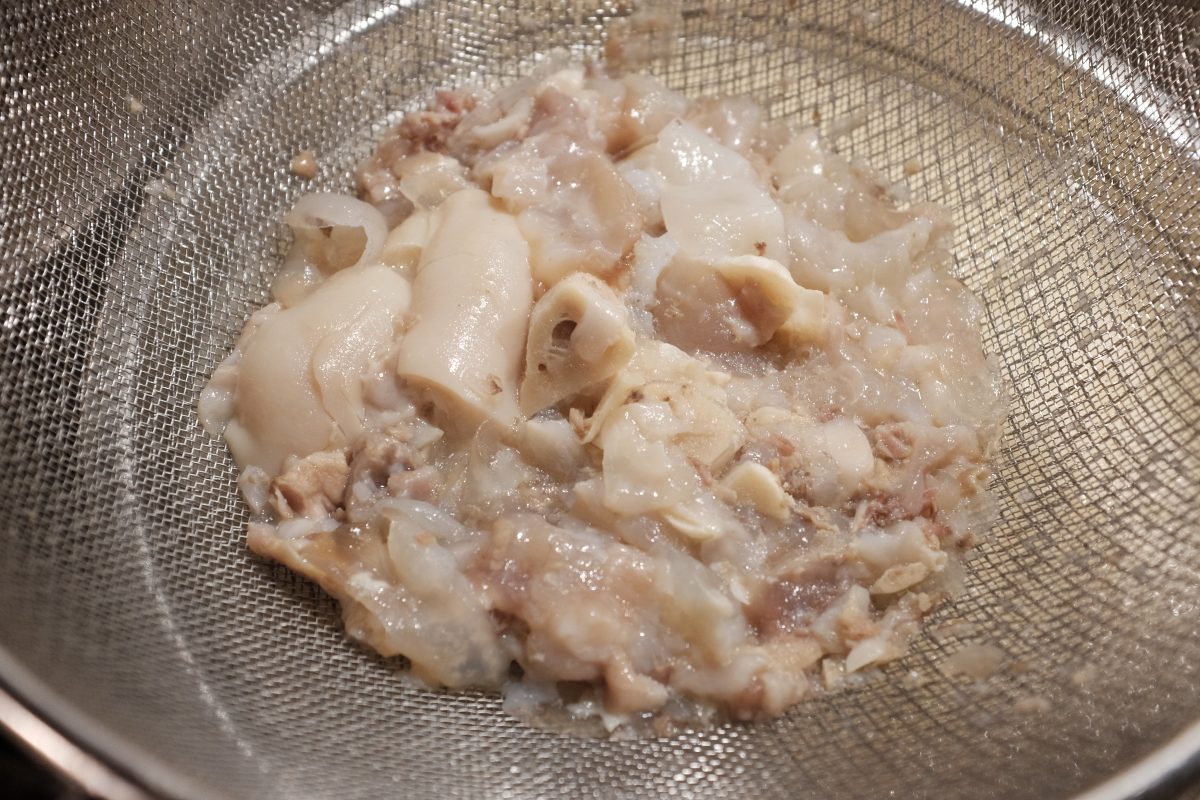
Blanching the bones

Making the stock
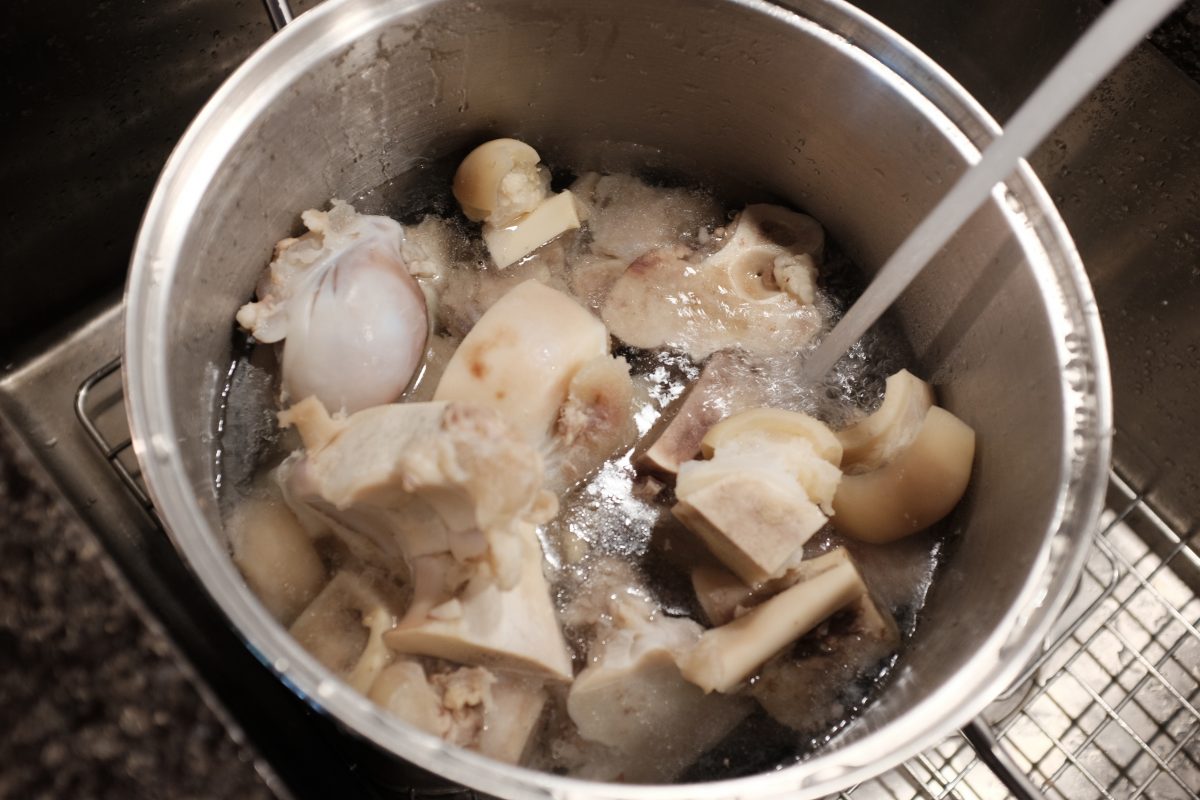

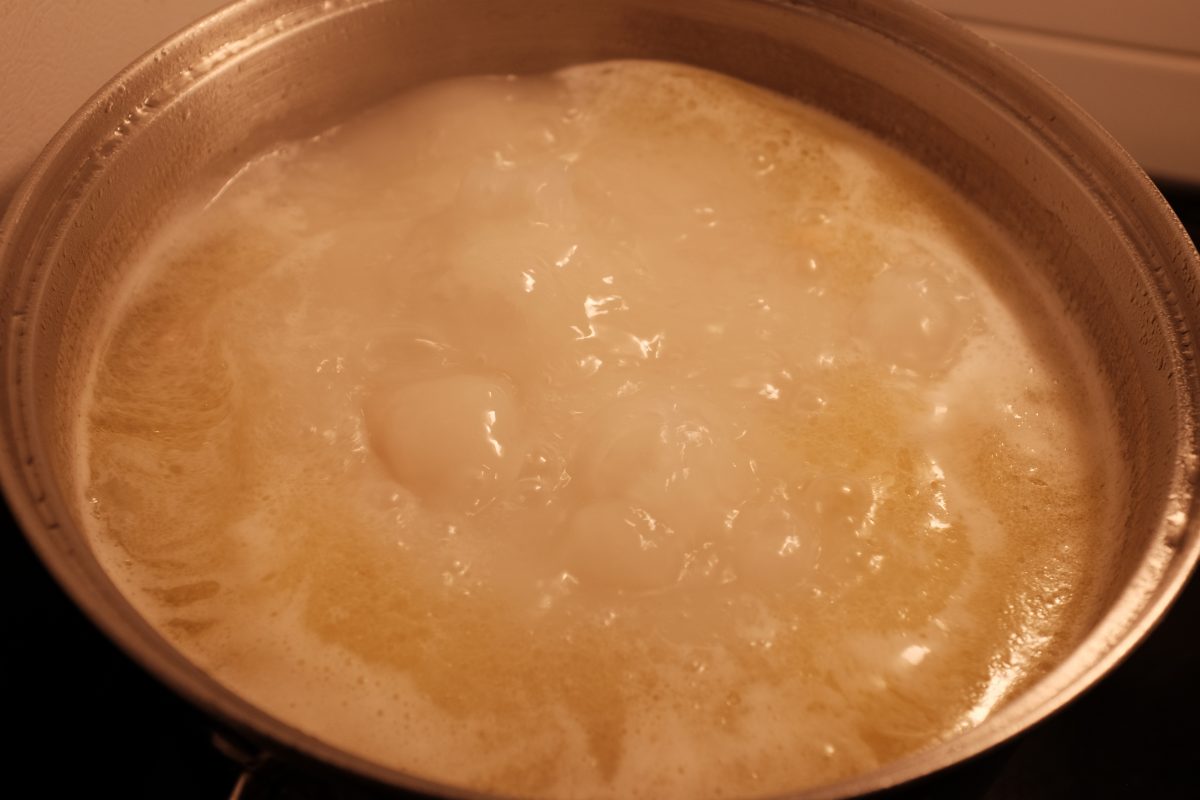
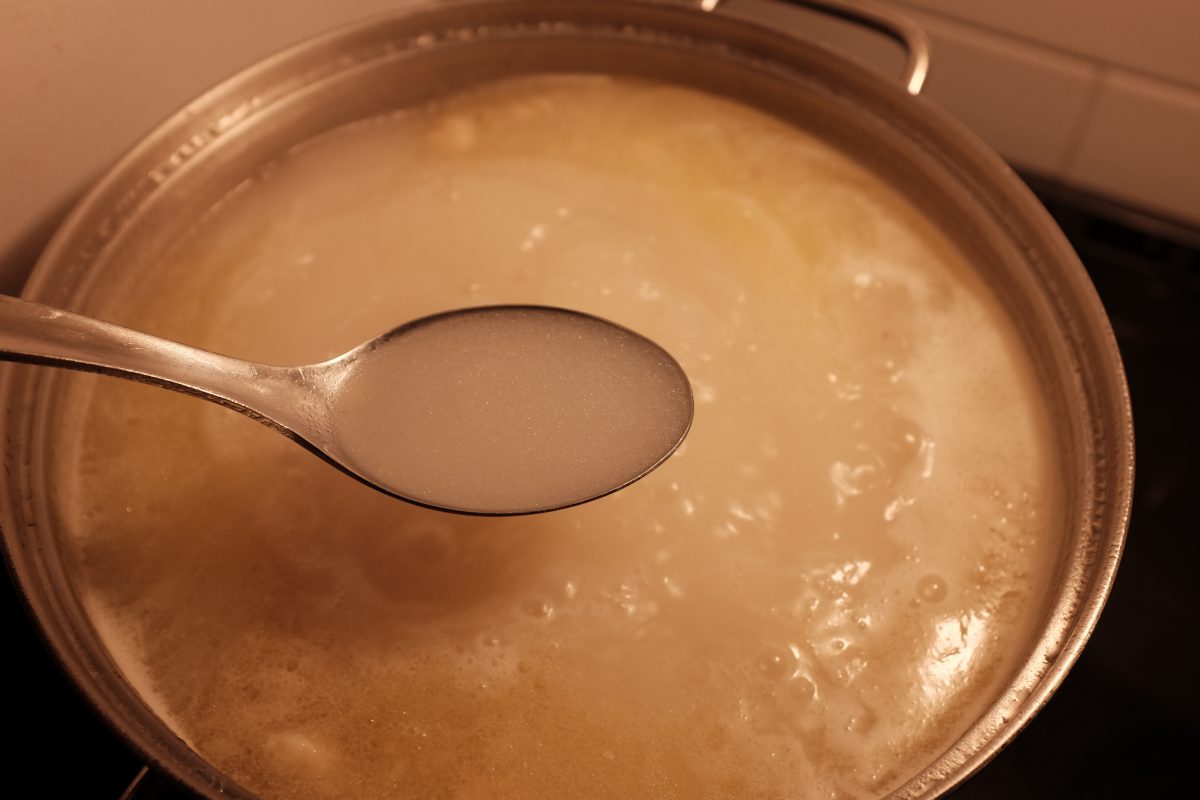
After 8 hours or so…
Remove the bones from the stock and strain the liquid.
What to do with your bone broth (stock)
This is the essential milky base for Korean soups like seolleongtang (click here for recipe), doganitang or mandu guk. However, you can also use it as a base for almost any soup where you want good body and deep beef flavour. You can even drink it as is or add just a bit of cooked rice and chopped green onion for the simplest, easiest to digest, healthy and protein rich meal.
If you have any questions or comments or if I spelled Seolleongtang wrong, please let me know in the space below.
If you enjoy the content and would like to contribute towards website maintenance and development, you can make a donation here.