It takes 2 hours to brine cabbage. There is no way around this. So, if you are wondering what quick kimchi is, I would say “2 hour kimchi”. If you salt the cabbage first thing, it will take around an hour to produce the kimchi paste and then an hour of waiting for your cabbage to finish brining before you mix everything together. Relative to all the other ways of making cabbage kimchi, this would be the fastest.
I first started making Napa cabbage kimchi in my professional restaurant kitchen, 12-16 heads of whole cabbage at a time. Determined to do everything by hand, I bought fresh garlic and peeled and minced every clove with a knife (2-3 hours just for this). Carrots, onions, radish, ginger: all cut by hand. My goal was to produce the most “hand-made” perfect kimchi I possibly could. Efficiency was not so important. Between shopping for all the ingredients, hauling them to the restaurant and finishing the kimchi, it took me the better part of 2 whole days. Of course, I had prep cooks to help with all the peeling and a dishwasher to clean up after me.
Did all this hand-work make any difference? I am not sure. At the time, as a non-Korean chef, I thought I had better try my hardest to make it as traditional as possible. But after reading lots of recipes and speaking with Korean cooks and friends that I knew, it seemed that most of their moms or grandmas were using food processors to make the process more efficient. Efficiency: this is a Korean tradition as well! The kimchi I make at home these days is just as delicious and makes less of a mess. Making cut kimchi instead of whole cabbage kimchi also makes the whole process a lot faster and saves me the trouble of cutting fermented kimchi every time I want to use it.
INGREDIENTS:
1 whole Napa cabbage (around 2kg)
80grams (around 1/2 cup) of Diamond Crystal kosher salt ***if you are using another kosher or sea salt, weigh out 80gr. DO NOT use fine table salt in this recipe.***
1 1/2 cups water
1/4 cup rice flour
1 tablespoon sugar or maesil plum syrup
1/2 cup peeled garlic cloves
1 tablespoon fresh ginger sliced
1 medium onion
1/2 korean pear peeled (you can substitute a regular pear or apple)
1/4 cup fish sauce
1 tablespoon salted shrimp
1 cup mild korean chilli flakes (gochugaru) ***start with much less if your chilli flakes are very spicy. Taste first and add more as you like once the paste is done.
6 green onions
1 cup carrot cut matchsticks
1 cup korean radish matchsticks
1 cup chopped buchu (asian chives) or watercress (minari)
Whole ingredients
PROCESS:
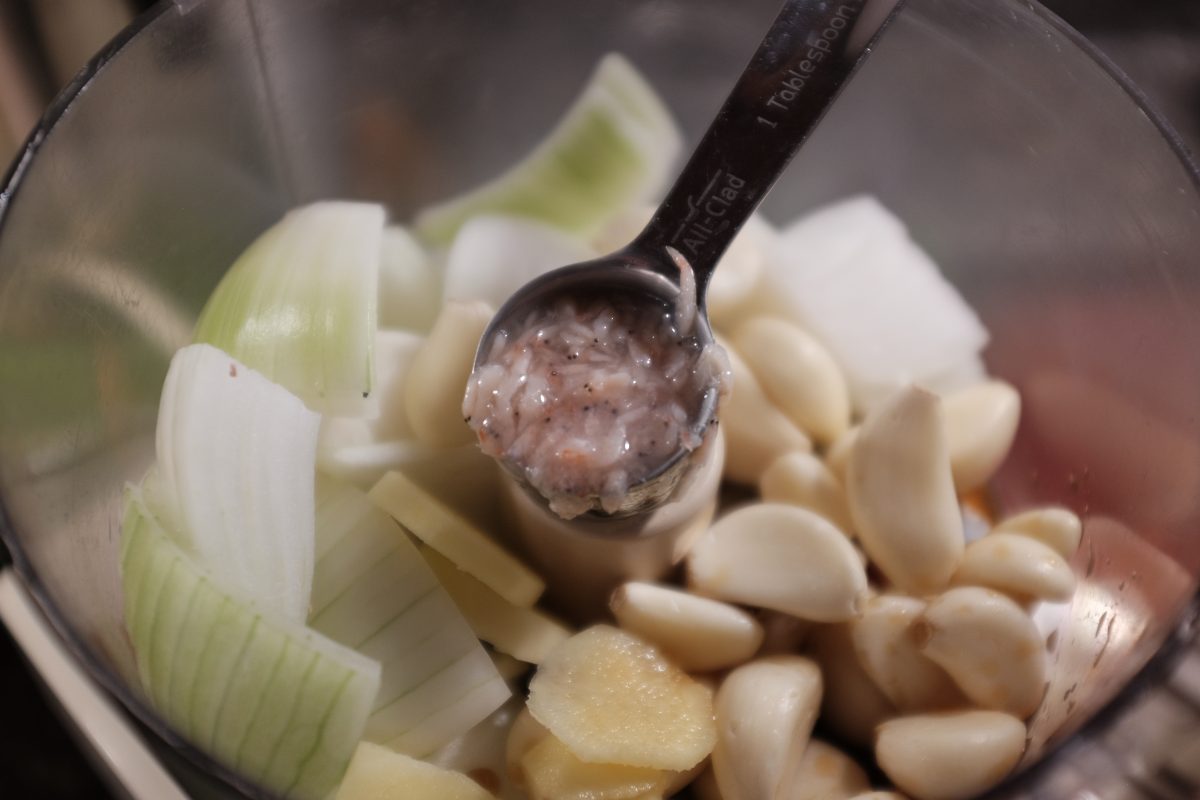
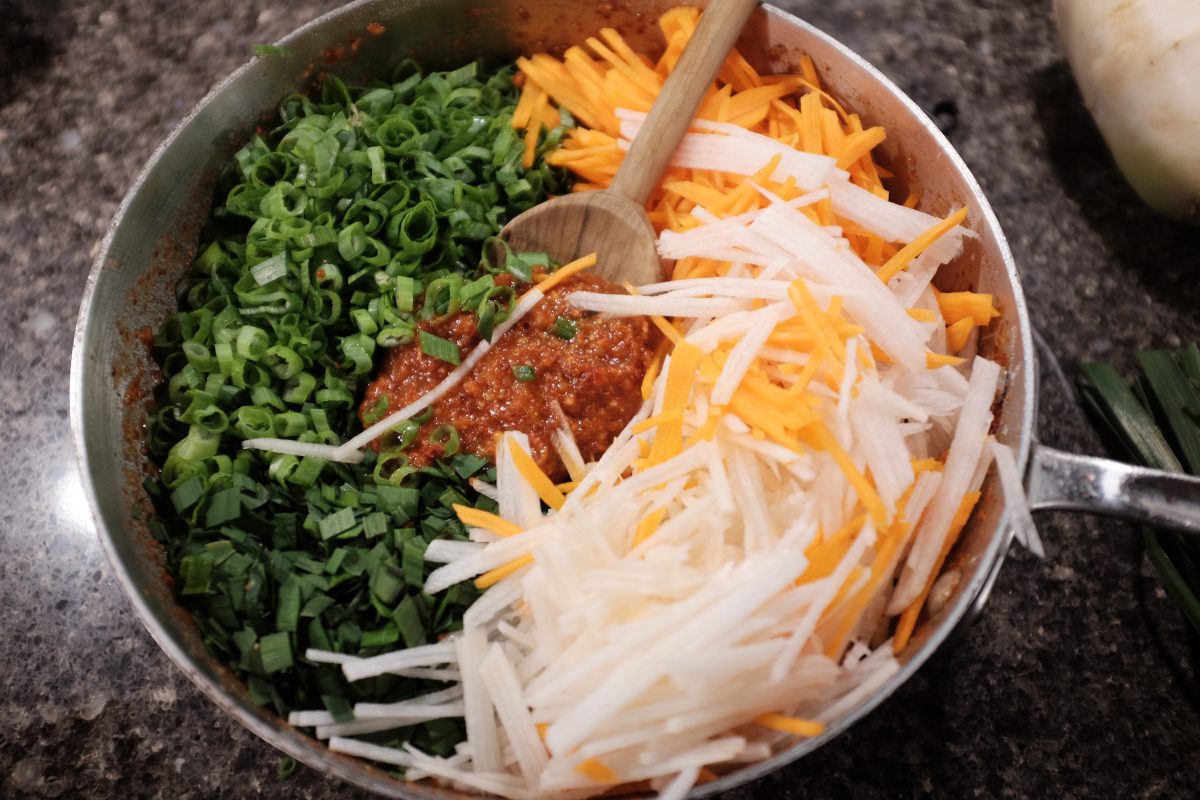
Quarter the cabbage and remove stemsChop into bite-sized piecesRinse cabbage a few times to remove dust and dirtDrain it…In a large container or bowl, toss the cabbage with the saltI don’t have a big enough bowl so I am using a stockpot for now. Once the cabbage wilts, it will shrink dramatically and I will move it into a bowl…stir the cabbage up by hand once every 30 minutes. The cabbage will take 2 hours to brine. Rice flour and water. I am using Mochiko brand but any rice flour will work. These ingredients will combine to make a slurry (juk) that will help feed fermenting bacteria and also hold your ingredients together.Whisk water and rice flour over medium heat until it becomes thick and translucent. Set it aside to cool down. Next step…measure out fish sauce and shrimp…I am using Red Boat fish sauce. I like this one but almost any fish sauce will do…This is tiny salted shrimp from Korea. They add a strong savoury flavour. I keep this jar in the freezer. The shrimp are so salty that they do not freeze but the jar lasts forever.They even have little eyes 👀In a food processor, combine salted shrimp, fish sauce, rough chopped onion, peeled garlic cloves, and asian pear and sliced gingerProcess into a puree and stir it into the cooled rice flour slurry (juk)Use the best chilli flakes you can find. I recommend buying Korean grown and processed gochugaru. It is about 3 times as expensive as the cheap stuff but it tends to be more fruity and less sharp and spicy. How much you put in is up to you. The amount can be adjusted depending on how spicy you want it. Stir in sugar or syrup. I am using plum syrup (maesil cheong). You can buy maesil syrup already made at any Korean grocer if you want to try it. If not, white or brown sugar work just fine.Chop buchu and green onions into 1cm piecesI use this Benriner slicer for the carrot and radishIt makes quick work of a perfect matchstickMix veggies into the pureeThis is the finished sauce. It has an intensely savoury and meaty smell. It always reminds me of a Bolognese sauce for pasta.Once the cabbage is done brining, these two parts will get mixed togetherAfter 2 hours of bring the cabbage will have wilted and released a large amount of water. Wash it a few times and drain it completely.Combine with the finished sauce and mix by hand…Done! You can give it a taste at this point to adjust for sweetness or spiciness.I start off the fermentation process in this onggi jar made especially for kimchi fermentation. It is not strictly necessary but I have them around so I use them. You can also age your kimchi in any glass or food safe plastic container. Remember to leave some space in the container for the kimchi to expand as it ferments. Don’t fill it to the top. If you start it on the counter, leave the lid loose and put a tray or towel underneath just in case it overflows a little. The fermentation will slow down in the refrigerator, but it’s still a good idea to keep your container on a dish or tray for a day or two until you are sure the fermentation has settled down.I usually leave it out at room temperature overnight to get the fermentation started and then move it into the fridge in this container. That way I can enjoy it fresh for some time and let it ferment slowly in the fridge. When it is sour enough, I will move it to airtight glass containers. This amount usually lasts me a month or so by which time the kimchi is quite sour. If you like your kimchi more fermented, just leave it out on the counter until it is as sour as you like before moving it to the fridge.
…just leave out the chilli flakes. Your kimchi will still ferment and be delicious.
Enjoy!
That’s it! A very simple kimchi recipe. It is still pretty messy and time consuming but, it will always taste better than anything you will buy in a jar at the grocery store and you will have the satisfaction of handpicking all of the ingredients yourself and making it as spicy as you like. If you have any questions, please leave them in the comments.


Look so good 😍
Thanks! : )
Nice instructions.
Thank you! I wanted to make it easy to follow for someone trying to make kimchi for the first time.