Posts Tagged: cooking
Kimchi Fried Rice
I have made this kimchi fried rice recipe 1000 times in my restaurant kitchen. It is scaled down here to serve two people as a side or one person as a big meal. I am calling it a “recipe” but really, the amounts can change as you like. If you follow it, it will be delicious. But, if you like more of one ingredient and less of another, adjust as you like. Kimchi and rice are the only must haves. The important thing is that it is hot and it tastes good and that there is enough for everyone.
This will turn out best with day old, cold rice. If you plan to cook rice the same day, spread it on a plate, cool it and refrigerate it uncovered until it is completely cold and a bit dry. This doesn’t take more than an hour or two. Doing this will allow the starch in the rice to firm up. The drier the rice is, the more kimchi juice it will be able to absorb without getting mushy. If you use hot rice right out of the rice cooker, the texture of the finished rice will be mushy and sticky.
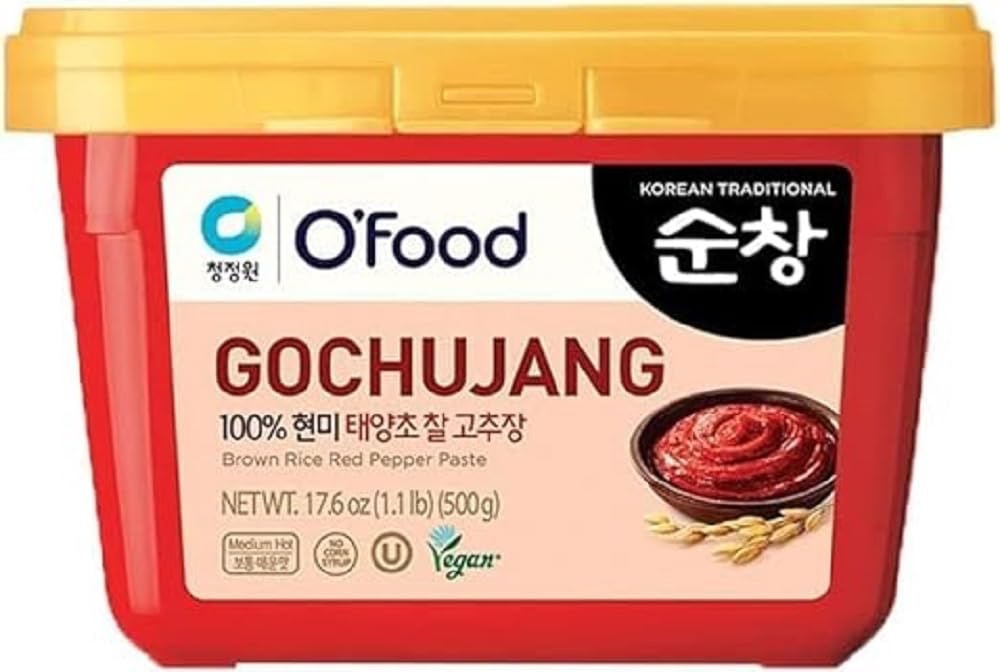
Gochujang is fermented Korean chili paste which you can buy at any Korean grocer. Lately, I have seen it at most regular supermarkets as well. It will add some spice and funk to this dish but it is optional. It always comes in a little red rectangular plastic tub. Just like this:
Roasted Korean Seaweed (aka Gim or Laver) can be found at any Asian grocer and maybe at your local supermarket too. It comes in bigger sheets or little packets which I prefer because they work as one serving. Looks something like this:

The big packs are ok too but make sure to wrap the leftover sheets tightly. Humidity will destroy them in a day.
The older and more sour your kimchi, the better the end flavour of this rice dish.
Vegans, this will work just fine with no meat. Mushrooms are very good in this recipe as well.
Ingredients:
- 2 cups cooked white short grain rice chilled in the refrigerator
- 1 cup sour kimchi with juice
- 1 teaspoon gochujang (optional)
- 1 tablespoon sesame oil
- 1 tablespoon sesame seeds
- 1/2 cup chopped roasted Korean seaweed (laver)
- 1 egg per person
- 1 cup chopped protein of your choice (I have used summer sausage and chicken here because I have it on hand. My first choice would be a nice smokey bacon)
- Olive Oil
- Salt
- Pepper

Process:
Cook sausage (or bacon or mushrooms) in olive oil until it starts to brown..

Add sliced chicken… (all of these proteins are optional)

Season with salt and pepper and cook all the way through…

Stir in kimchi with juice and gochujang if you are using it…

Meanwhile, fry up an egg in a separate pan…

When kimchi is heated through, add cold rice, chop and stir it until kimchi and liquid is incorporated. It should be HOT…

This looks good, even colour, no chunks of white rice, steaming…

Add sesame oil and mix through. Check for seasoning now and adjust salt and pepper…

Plate the rice and top with crushed seaweed and toasted sesame seeds…

Add fried egg and garnish with green onion…

That’s it! A portion this size with enough meat/mushrooms in it should feed one person as is. Or, you can use this as a side for any other dish like fish, steak, pork chop, kebabs, chicken, grilled veggies..almost anything.
A good recipe for homemade cut cabbage kimchi can be found in this post.
For other ideas on what to do with kimchi at home check this post.
If you have any questions or or comments please leave them below.
If you enjoy the content and would like to contribute towards website maintenance and development, you can make a donation here.
What to do with Kimchi

I took this picture a few years back in my restaurant kitchen. Two quarters of fermented whole Napa cabbage kimchi landed on my cutting board in a heart shape. I molded them a little and mopped up the juice and we used the photo later for a Valentine’s Day promotion.
I almost always made whole cabbage kimchi in my professional kitchen, a very time consuming and messy business. Koreans who still make it this way typically do so outside in late autumn. Or, if it has to be made indoors, the floor is covered in plastic sheeting as if the kitchen is about to get painted.
Making whole cabbage kimchi is a fun and relaxing process: to salt and stuff whole cabbages leaf by leaf is even meditative. You can do it at home. I have done it. But afterwards, my kitchen ends up looking like a murder scene. So instead of painting the kitchen red with chili paste, these days I make this cut kimchi recipe. It is relatively easy, and definitely manageable with minimal time, space and tools. And it is delicious! I eat it every day.
Once you find a recipe that you like and you make a batch of kimchi at home, you might be wondering what you can do with it.
Kimchi is alive
Just like all living things, kimchi ages. One month from now the texture and flavour will be quite different. Freshly made kimchi is crisp and bright like a spicy salad. You can taste all of the individual ingredients. Over time, this fresh kimchi will soften as it ferments. The initial sharp and distinct flavours will meld into something more deep, dark and complex. And, as fermenting bacteria produce lactic acid, it will become more and more sour. After enough time has passed, it will sour to the point that the acid levels feel “fizzy” on your tongue.
The good news is that kimchi never really goes “bad”. At every stage of fermentation, there are many ways to eat it. Nothing is wasted.
The list below is divided into things you can do with fresh kimchi vs things you can do with aged kimchi. I think, in general, fresh kimchi is best eaten cold and aged sour kimchi is best eaten hot but it is not a hard rule. You can try either in any preparation.
Freshly made kimchi
Kimchi, even freshly made, is a powerful ingredient. Start with a little bit, taste and add more little by little until you are happy with the flavour.
1-Eat it as is: fresh cold kimchi is a refreshing side dish to eat with almost anything. It is especially good to balance the flavours of fattier foods and meats and makes these things easier to digest. I can’t eat eggs without a side of kimchi anymore.
2-As a salad topping: you can use small leaves of fresh kimchi as an ingredient in any fresh salad. Creamy salads like Caesars also taste wonderful with some julienned fresh kimchi on top.
3-Burger or hotdog topping: like a pickle or relish, chopped fresh kimchi will balance the intense smokiness of sausage or the charred meaty flavours of a burger.
4-Raw oyster topping: A tiny amount of fresh chopped kimchi on top of a raw oyster is a perfect accompaniment. This is especially true for sweeter fattier Pacific oyster varieties but also works well for briny east coast oysters.
5-Avocado Toasts: these days, a lot of us are enjoying the rich flavours and health benefits of ripe avocado smeared on toast. I love it too and often include a bit of fresh chopped kimchi and green onion in the avocado mash. It is especially delicious with a fried egg on top. Addictive!
6-Shrimp Cocktail: whoever first combined ketchup and horseradish as a shrimp dip was a culinary genius. Add a little chopped kimchi into your cocktail sauce. It will tone down the sweetness of the ketchup and add a little garlic and spice for a slight variation on a classic combination.
7-Fresh rolls: if you like rice paper rolls stuffed with crisp veggies and/or shrimp and pork, a little chopped fresh kimchi can add a subtle spicy and garlicky flavour.
8-Kimbap: a little kimchi rolled up with the rice and other ingredients in your kimbap is delicious, especially if you are also making them with tuna!
9-Tuna Sandwich: if you enjoy classic canned tuna and mayo sandwiches as much as I do, try chopping some fresh kimchi into the mix. It brightens up the flavour and is a perfect match for the oily mayo and meaty tuna. If I don’t have kimchi on hand, I don’t even consider making this sandwich. It is that good.
10-Bloody Mary/Bloody Caesar Cocktail: try substituting the tobasco in your cocktail recipe with some fresh juice from your kimchi stash. You can even garnish with some small fresh kimchi leaves. Sour kimchi works great here too.
11-Kimchi Devilled Eggs: mix some finely chopped kimchi into the mayo and egg yolk mixture to brighten the colour and flavour of this classic dish. Top with chopped chives or green onion for a perfect finish. Also good with sour kimchi.
Aged Kimchi
Sour kimchi is an ingredient in many classic Korean dishes. For excellent traditional recipes to try at home, please have a look at Maangchi’s website , Korean Bapsang or My Korean Kitchen. There are countless sources for Korean cooking on the internet but these three are the ones I look to first for great food and writing.
Classic Korean dishes using sour kimchi:
1-Kimchi fried rice: an excellent way to use up leftover white rice. Top with chopped roasted seaweed, toasted sesame, sesame oil, green onion and fried egg. Here is a link to my kimchi fried rice recipe.
2-Kimchi jeon (pancake): Aged kimchi and it’s juices are made into a batter using flour and/or rice starch. Fried in oil until crispy outside and served with soy and vinegar sauce. Addictive. Good recipe here.
3-Kimchi jjigae (stew): there are a variety of thick and hearty stews made with aged kimchi. Ingredients can be fresh veggies, tofu, meats, tuna and other fish. Even spam and ramen noodles or hotdogs in the case of Buddae Jjigae (Army base stew). Click HERE for my kimchi jjigae with tuna recipe.
4-Kimchi Guk (soup): similar to kimchi jjigae but a little lighter and thinner. Look here for a good recipe to try.
5-Kimchi Mandu (dumplings): Korean dumplings, steamed, fried or in soup are delicious. If you want to try making your own have a look at this recipe from Korean Bapsang. You can also buy pretty good frozen ones at Korean grocers though they will probably never be as good as the fresh made.
6-Kimchi Jjim (braised kimchi): An incredibly deep and flavourful braise of aged kimchi and pork. You can also substitute in other meats, fish and/or mushrooms. I have also made this with really tough cuts of beef and the results are always very good. It is one of my favourite ways to eat really ripe kimchi. Here is a good recipe.
Other uses for aged kimchi
In my last 10 years as a chef I made tons of kimchi and tons of staff meals. The restaurant staff were always the test subjects for kimchi experiments but I honestly never received a lot of complaints. Most of the things listed below I have made myself at one time or another.
1. Pasta Sauces: aged kimchi, in small amounts will wake up any tomato sauce. You won’t exactly taste kimchi but you will taste something…GOOD. Kimchi will add a little punch to any tomato sauce with it’s heat, acidity and fermented funk. It is surprisingly delicious. This also works in cream sauces where you end up with a kind of spicy, garlicky rose…excellent with seafood.
2. Baked Pasta: Expanding on the above point, layers of kimchi alongside layers of tomato and meat sauce in a lasagna or any baked pasta is an outstanding flavour boost.
3. One more noodle: kimchi macaroni and cheese is next level delicious. Make it from scratch or even stir chopped kimchi into your boxed mac n cheese.
4. Burgers and Pizza: Warm aged kimchi is a fantastic topping on burgers (put it under the cheese) and pizza. You can also puree aged kimchi into any pizza sauce to brighten it up.
5. Kimchi Grilled Cheese sandwich: I see this one talked about a lot because it is a fantastic idea. Try it with a smoked cheese or layer of smokey bacon for maximum pleasure
6. Instant Ramen (or any cup noodles): another classic application because it is so good. Use only half the powder of your instant ramen packet and substitute in some well fermented kimchi and juice. Add an egg too. A little more healthy and definitely more delicious.
7. Hot sauce: many hot sauces are made from fermented chilis (heat) and vinegar (acid). Aged kimchi has both of these qualities. Put kimchi juice and leaves in a blender and puree. Add some extra chilli flakes to ramp up the heat if you like. Instant kimchi flavour that you can easily add to anything.
8. Hollandaise Sauce: add some well aged chopped or pureed kimchi into your egg yolks at the start of your hollandaise sauce. If it is sour enough, it can replace vinegar, shallots and cayenne like magic.
9. Kimchi Potato Hash: Boil and chop potatoes. Fry bacon in a pan until fat is rendered, add aged chopped kimchi, add potatoes and cook until they start to brown and crisp. Amazing starch for any meat dish or even with eggs at brunch.
10. Chili con carne: If you are a chili lover, try adding a little aged kimchi into the mix. It will do the same thing it does for pasta sauce. You won’t exactly taste kimchi but you will taste something delicious.
11. Steamed mussels: kimchi and cream together (bacon too) make an excellent broth for steaming live mussels and dipping bread later.
12. Baked oysters: Oysters on the half shell with crispy bacon bits, aged kimchi and smoked (or even blue) cheese broiled in the oven.
13. Kimchi butter: aged kimchi cooked in butter and poured over fish or meat with fresh green onion or chives makes an flavourful and easy sauce.
14. Kimchi sour cream: chop some aged kimchi into sour cream and serve it with bacon bits on potato and cheese pierogis. Thanks for this suggestion Milosz!
Maybe not?
Many years ago, I may have made kimchi gelato. I think some people liked it but…it wasn’t unanimous. I think it was pretty good. Am I dreaming?
There must be more…
Today I sat down and tried to think of every way I have cooked with kimchi in the past. This is what I came up with for now but I am sure there are a lot more good ideas. If you have anything to add, please leave a suggestion in the comments and I will add it to the post. We can work on this list together : )
If you enjoy the content and would like to contribute towards website maintenance and development, you can make a donation here.
Quick and Easy Napa Cabbage Kimchi Recipe
It takes 2 hours to brine cabbage. There is no way around this. So, if you are wondering what quick kimchi is, I would say “2 hour kimchi”. If you salt the cabbage first thing, it will take around an hour to produce the kimchi paste and then an hour of waiting for your cabbage to finish brining before you mix everything together. Relative to all the other ways of making cabbage kimchi, this would be the fastest.
I first started making Napa cabbage kimchi in my professional restaurant kitchen, 12-16 heads of whole cabbage at a time. Determined to do everything by hand, I bought fresh garlic and peeled and minced every clove with a knife (2-3 hours just for this). Carrots, onions, radish, ginger: all cut by hand. My goal was to produce the most “hand-made” perfect kimchi I possibly could. Efficiency was not so important. Between shopping for all the ingredients, hauling them to the restaurant and finishing the kimchi, it took me the better part of 2 whole days. Of course, I had prep cooks to help with all the peeling and a dishwasher to clean up after me.
Did all this hand-work make any difference? I am not sure. At the time, as a non-Korean chef, I thought I had better try my hardest to make it as traditional as possible. But after reading lots of recipes and speaking with Korean cooks and friends that I knew, it seemed that most of their moms or grandmas were using food processors to make the process more efficient. Efficiency: this is a Korean tradition as well! The kimchi I make at home these days is just as delicious and makes less of a mess. Making cut kimchi instead of whole cabbage kimchi also makes the whole process a lot faster and saves me the trouble of cutting fermented kimchi every time I want to use it.
INGREDIENTS:
- 1 whole Napa cabbage (around 2kg)
- 80grams (around 1/2 cup) of Diamond Crystal kosher salt ***if you are using another kosher or sea salt, weigh out 80gr. DO NOT use fine table salt in this recipe.***
- 1 1/2 cups water
- 1/4 cup rice flour
- 1 tablespoon sugar or maesil plum syrup
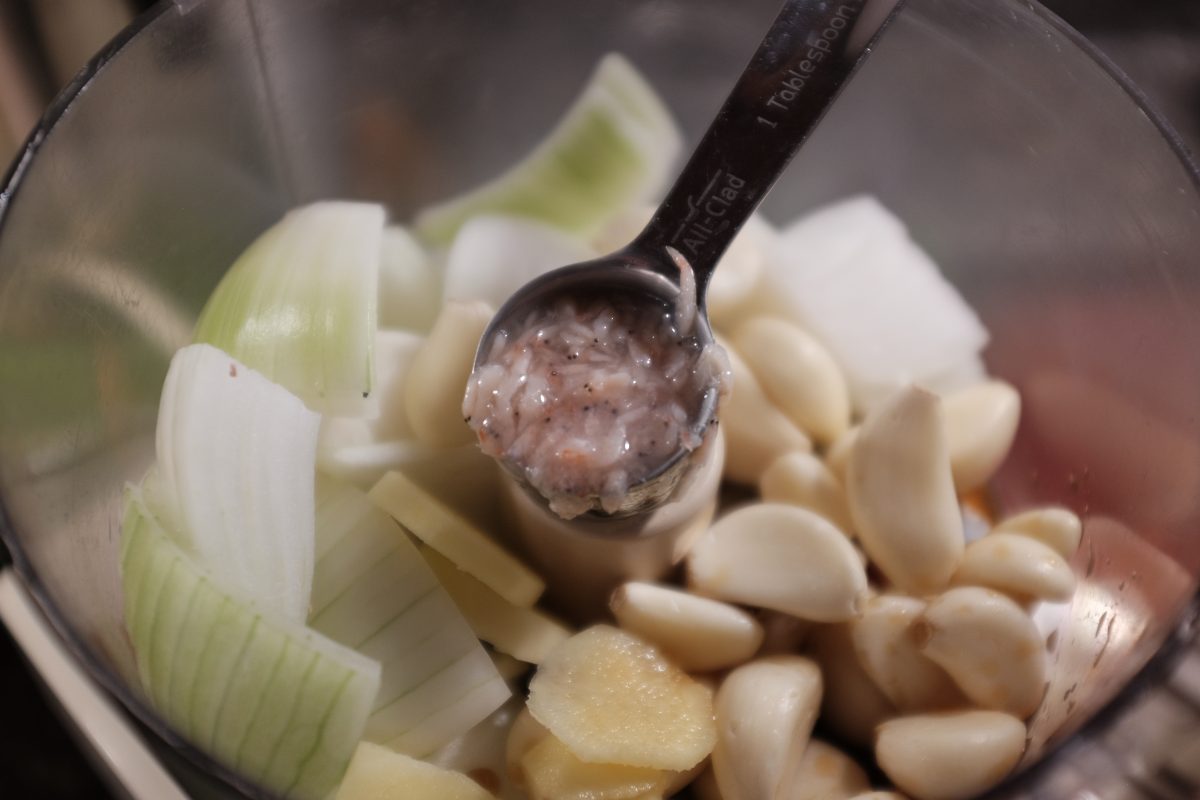
- 1/2 cup peeled garlic cloves
- 1 tablespoon fresh ginger sliced
- 1 medium onion
- 1/2 korean pear peeled (you can substitute a regular pear or apple)
- 1/4 cup fish sauce
- 1 tablespoon salted shrimp
- 1 cup mild korean chilli flakes (gochugaru) ***start with much less if your chilli flakes are very spicy. Taste first and add more as you like once the paste is done.
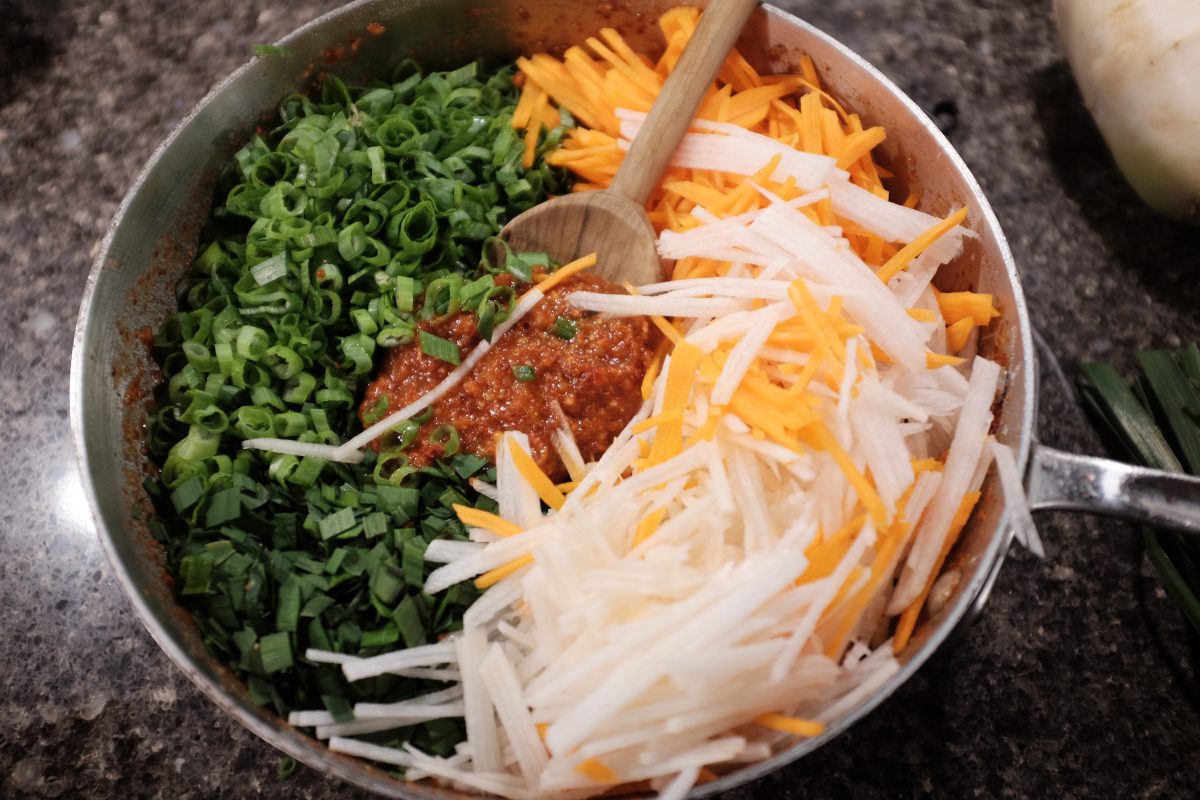
- 6 green onions
- 1 cup carrot cut matchsticks
- 1 cup korean radish matchsticks
- 1 cup chopped buchu (asian chives) or watercress (minari)

PROCESS:


VEGETARIANS/VEGANS
You can find my straightforward recipe for vegan napa cabbage kimchi here.
IF YOU DON”T LIKE SPICY FOOD…
…just leave out the chilli flakes. Your kimchi will still ferment and be delicious.
Enjoy!
That’s it! A very simple kimchi recipe. It is still pretty messy and time consuming but, it will always taste better than anything you will buy in a jar at the grocery store and you will have the satisfaction of handpicking all of the ingredients yourself and making it as spicy as you like. If you have any questions, please leave them in the comments.
Here is a link to my favourite kimchi fried rice and kimchi jjigae with tuna recipe. And for more ideas about what to do with your new batch of kimchi, have a look at this post.
If you enjoy the content and would like to contribute towards website maintenance and development, you can make a donation here.